Language selection
Give your users the freedom to choose their preferred language for using the app. This feature allows for a more personalized and accessible experience, especially in multilingual markets.
Step 1: Enable Language Options
Before users can choose a language, you first need to define which languages will be available in the app.
-
Go to:
Settings → Channels → Mobile App → Settings -
In the General section, enable the toggle Available languages.
-
Select all the languages you want your users to be able to choose from.
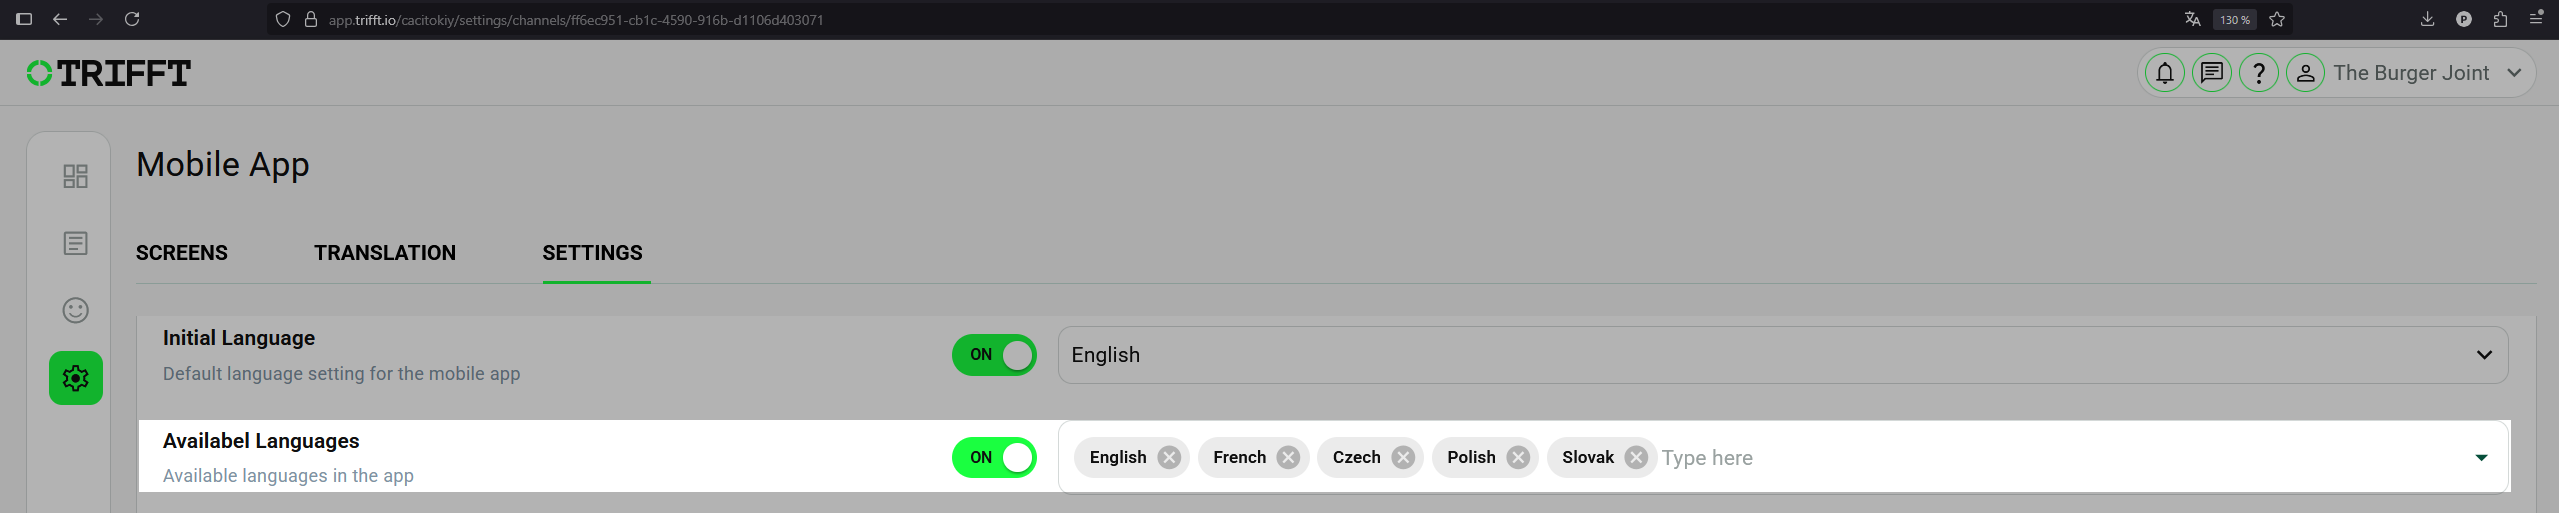
Enable Language Options
Step 2: Set Up Language Selection During Onboarding
To ensure users select their language from the very beginning, it's recommended to add a language selection screen into the app's welcome flow.
-
Go to:
Settings → Channels → Mobile App → APP_WELCOME -
Click Add new to create a new screen.
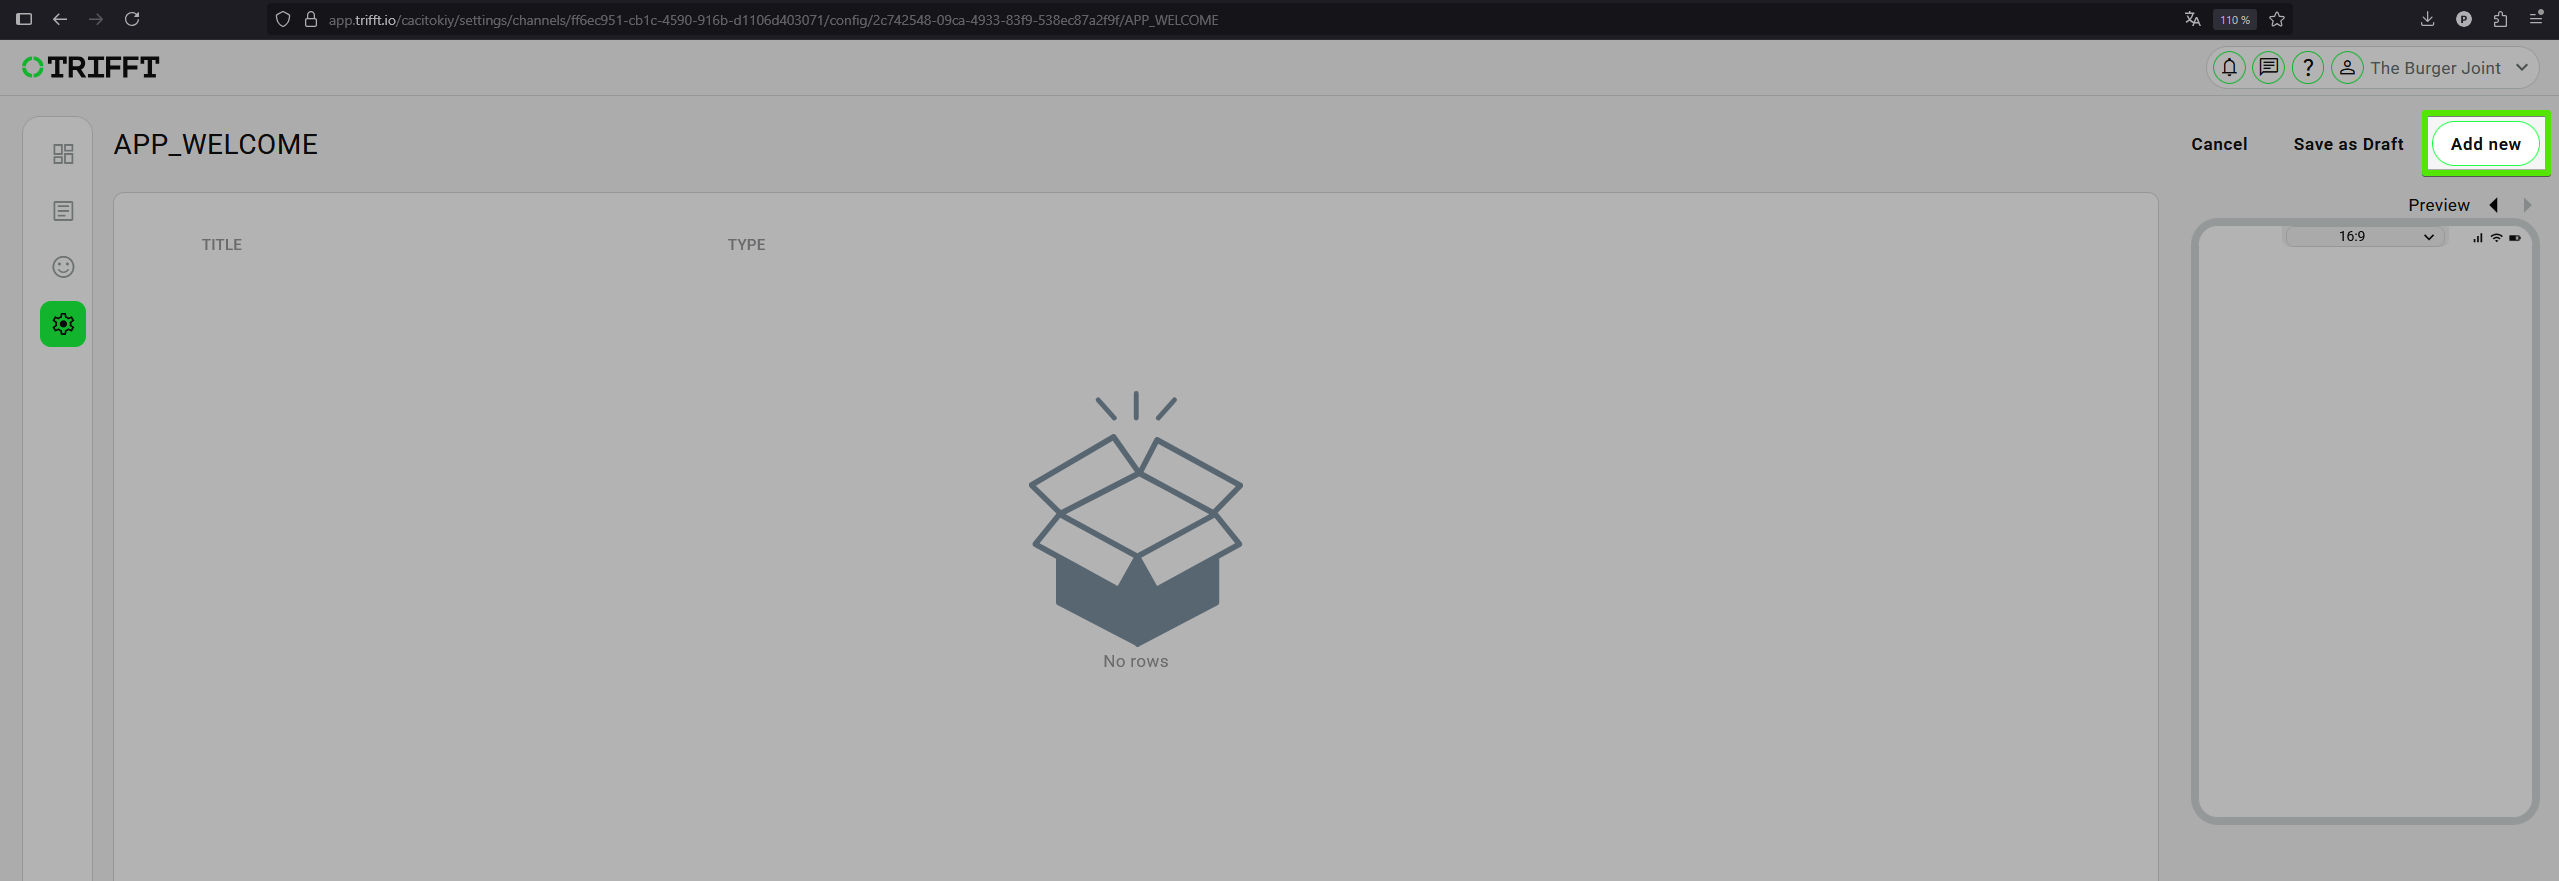
Add new screen
-
Set the following options:
- Screen Type:
Language screen - Action:
Next
- Screen Type:
-
Optionally configure title, subtitle, and other content.
-
Click Save as a Draft, and then Publish the changes.

Set up language selection during the Onboarding process
Step 3: Make Sure All Translations Are Set
The app UI will automatically reflect the language selected by the user. To avoid missing content, make sure all translations are prepared for the enabled languages.
General Settings
-
Go to:
Settings → General Settings → Translations -
In the Language is dropdown, select each language you’ve enabled.
-
Review or edit the translations as needed.
-
Click Save in the top-right corner after making changes.
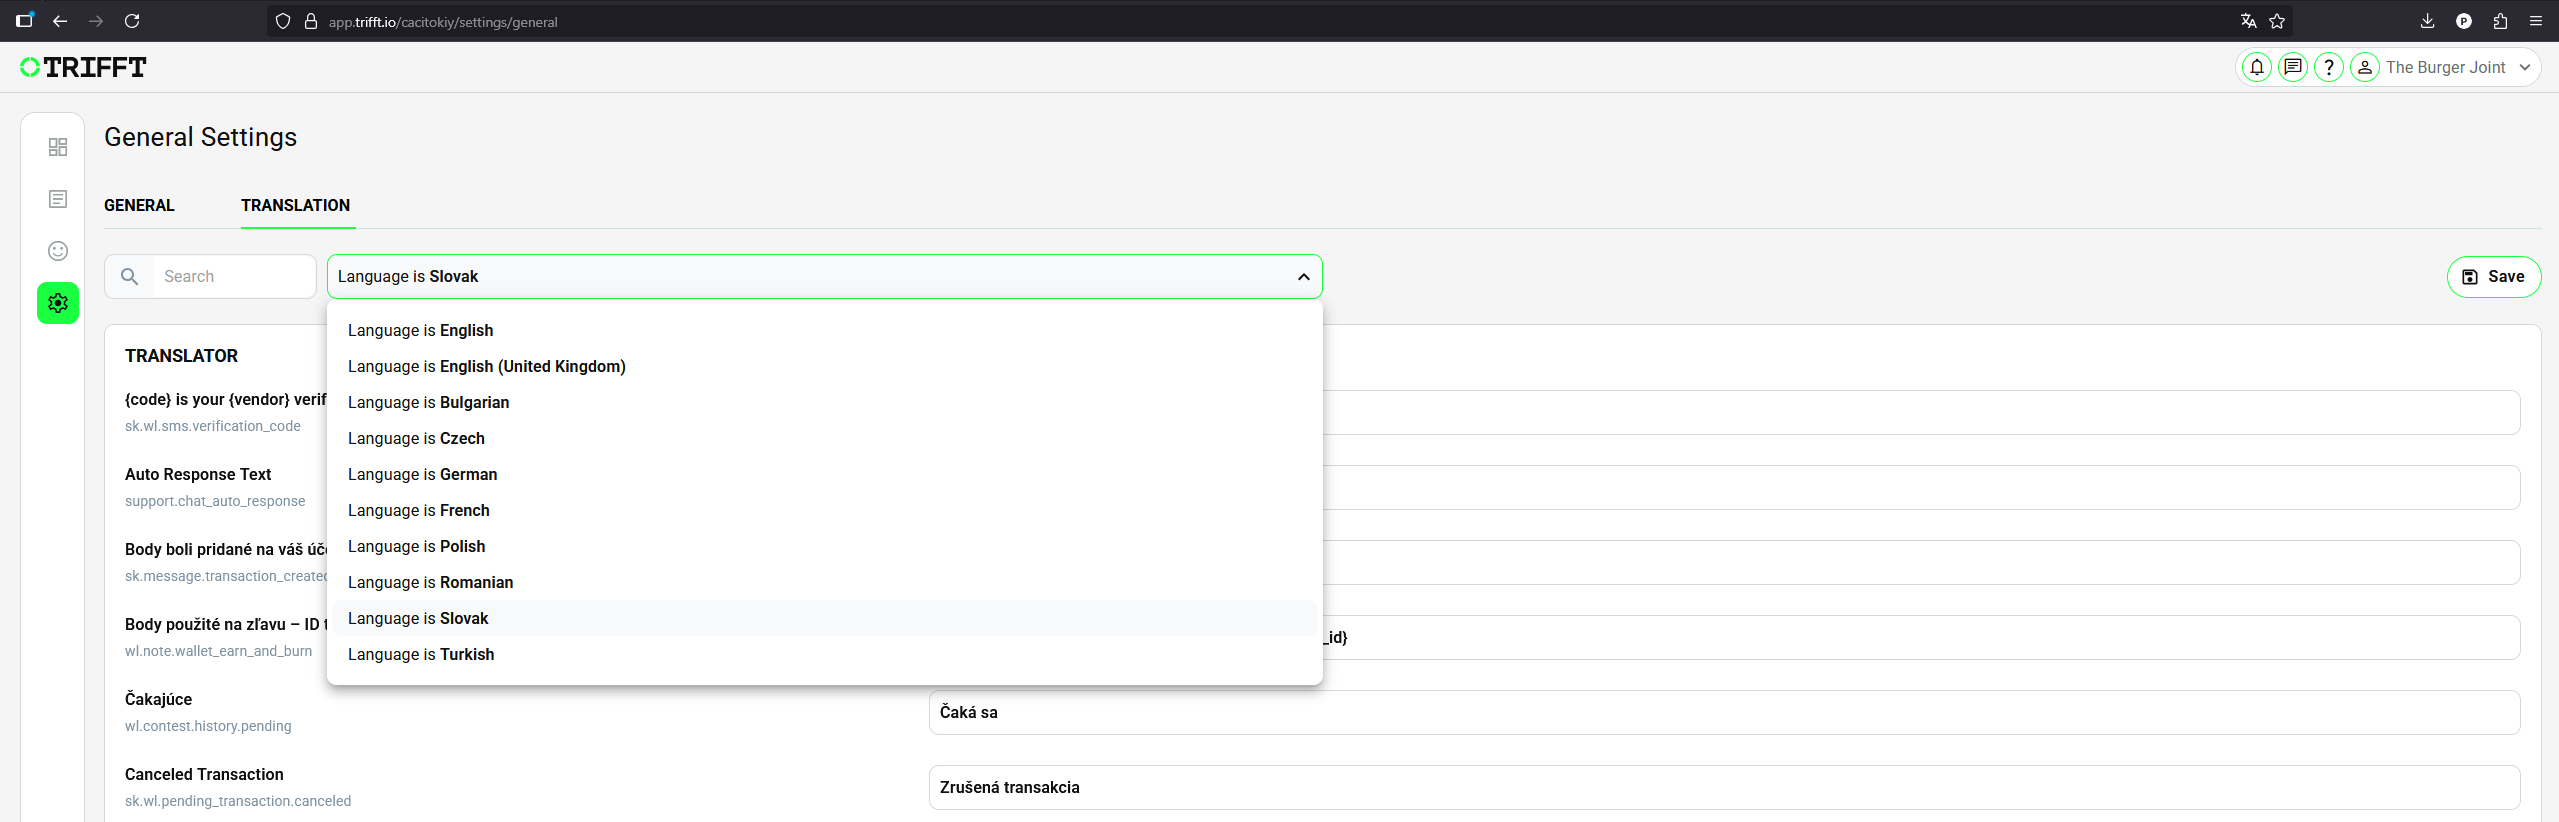
Set up all translations in General settings
App Channel Settings
-
Go to:
Settings → Channels → Mobile App → Translations -
In the Language is dropdown, select each language you’ve enabled.
-
Review or edit the translations as needed.
-
Click Save in the top-right corner after making changes.
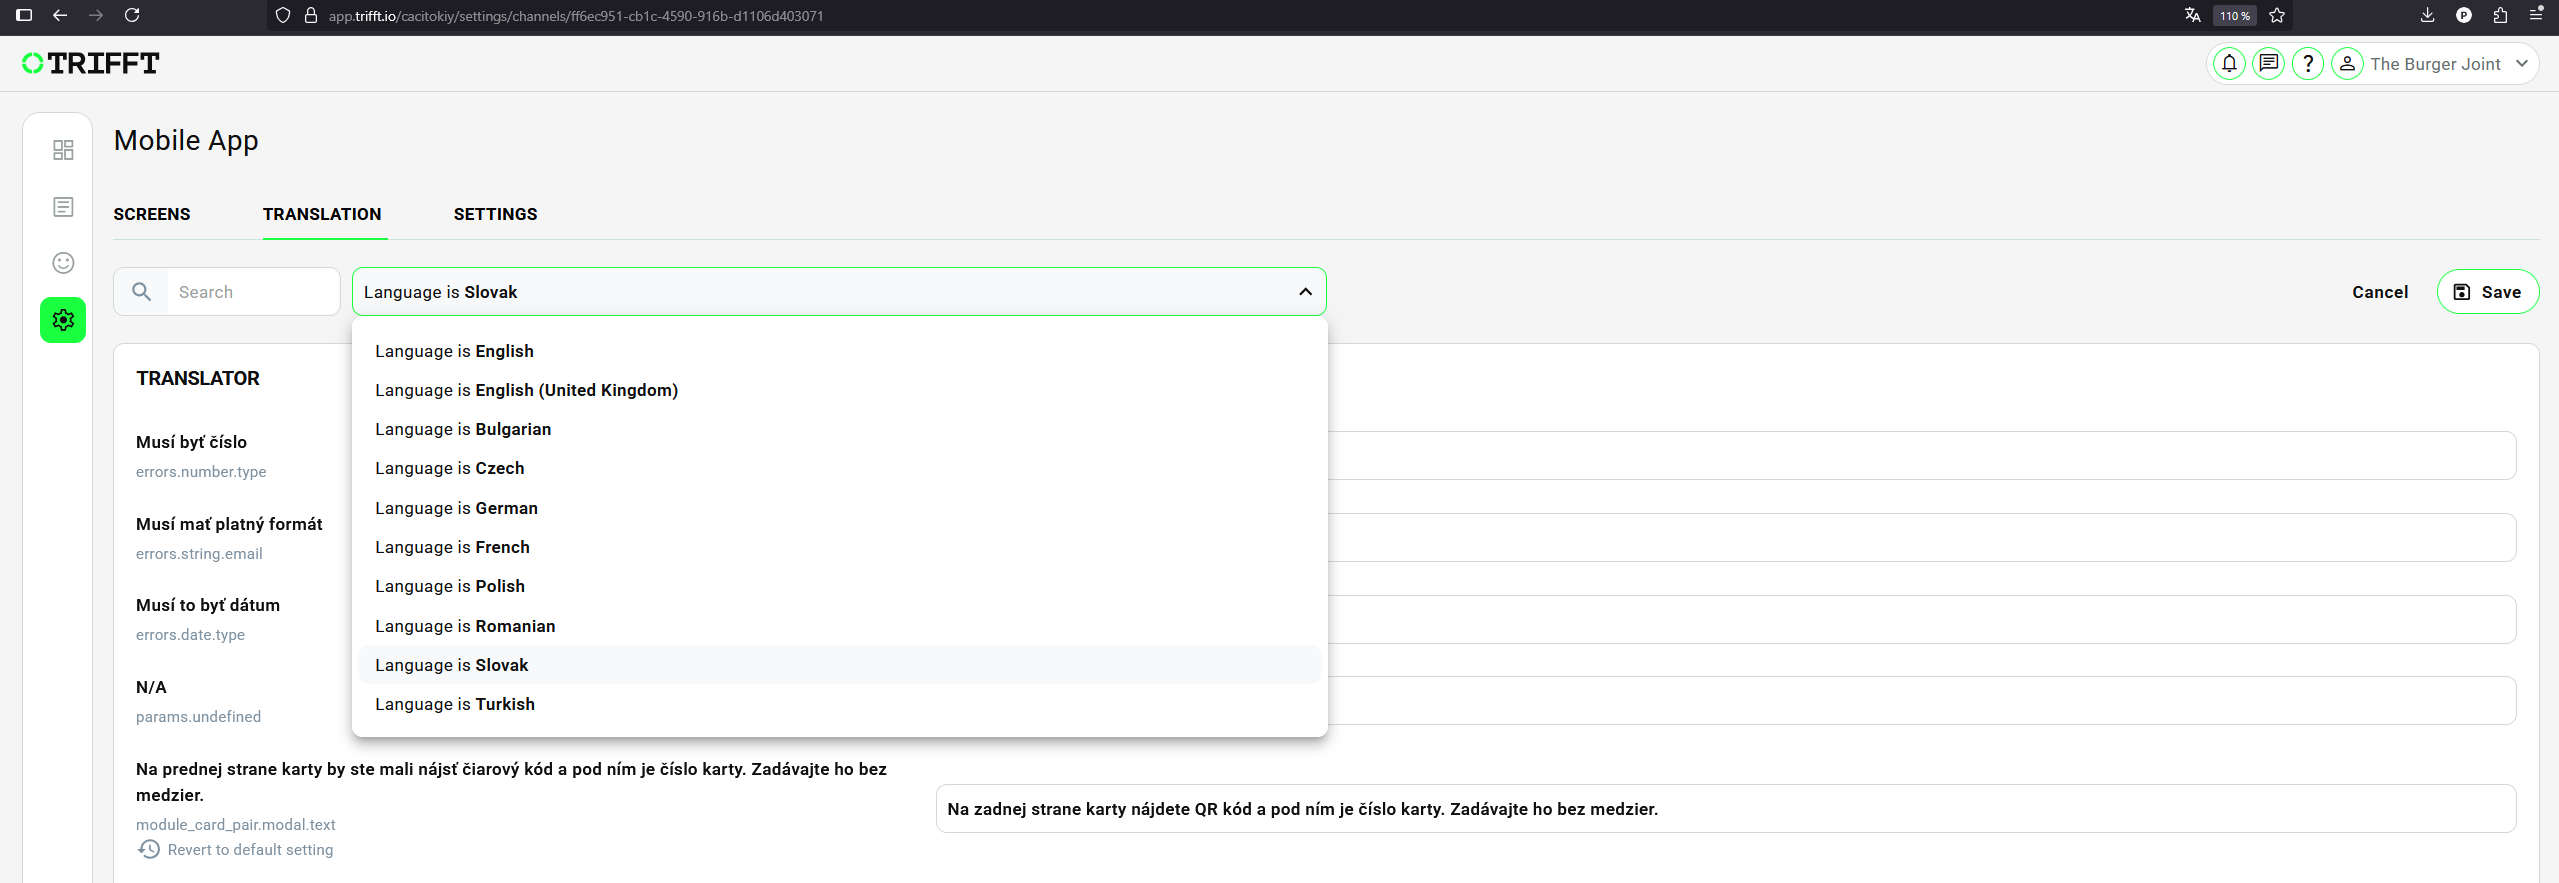
Set up all translations in App Channel settings
Step 4: Allow Users to Change Language Later
You can also allow users to change their language anytime—typically from their Profile screen.
-
Go to:
Settings → Channels → Mobile App → Profile -
Click Add new (top-right) to add a new widget.
-
Select:
- Widget Type:
Settings - Setting Type:
Language
- Widget Type:
-
You can optionally set a Title and Subtitle to display in the app.
-
Don’t forget to Save as a Draft, then Publish.
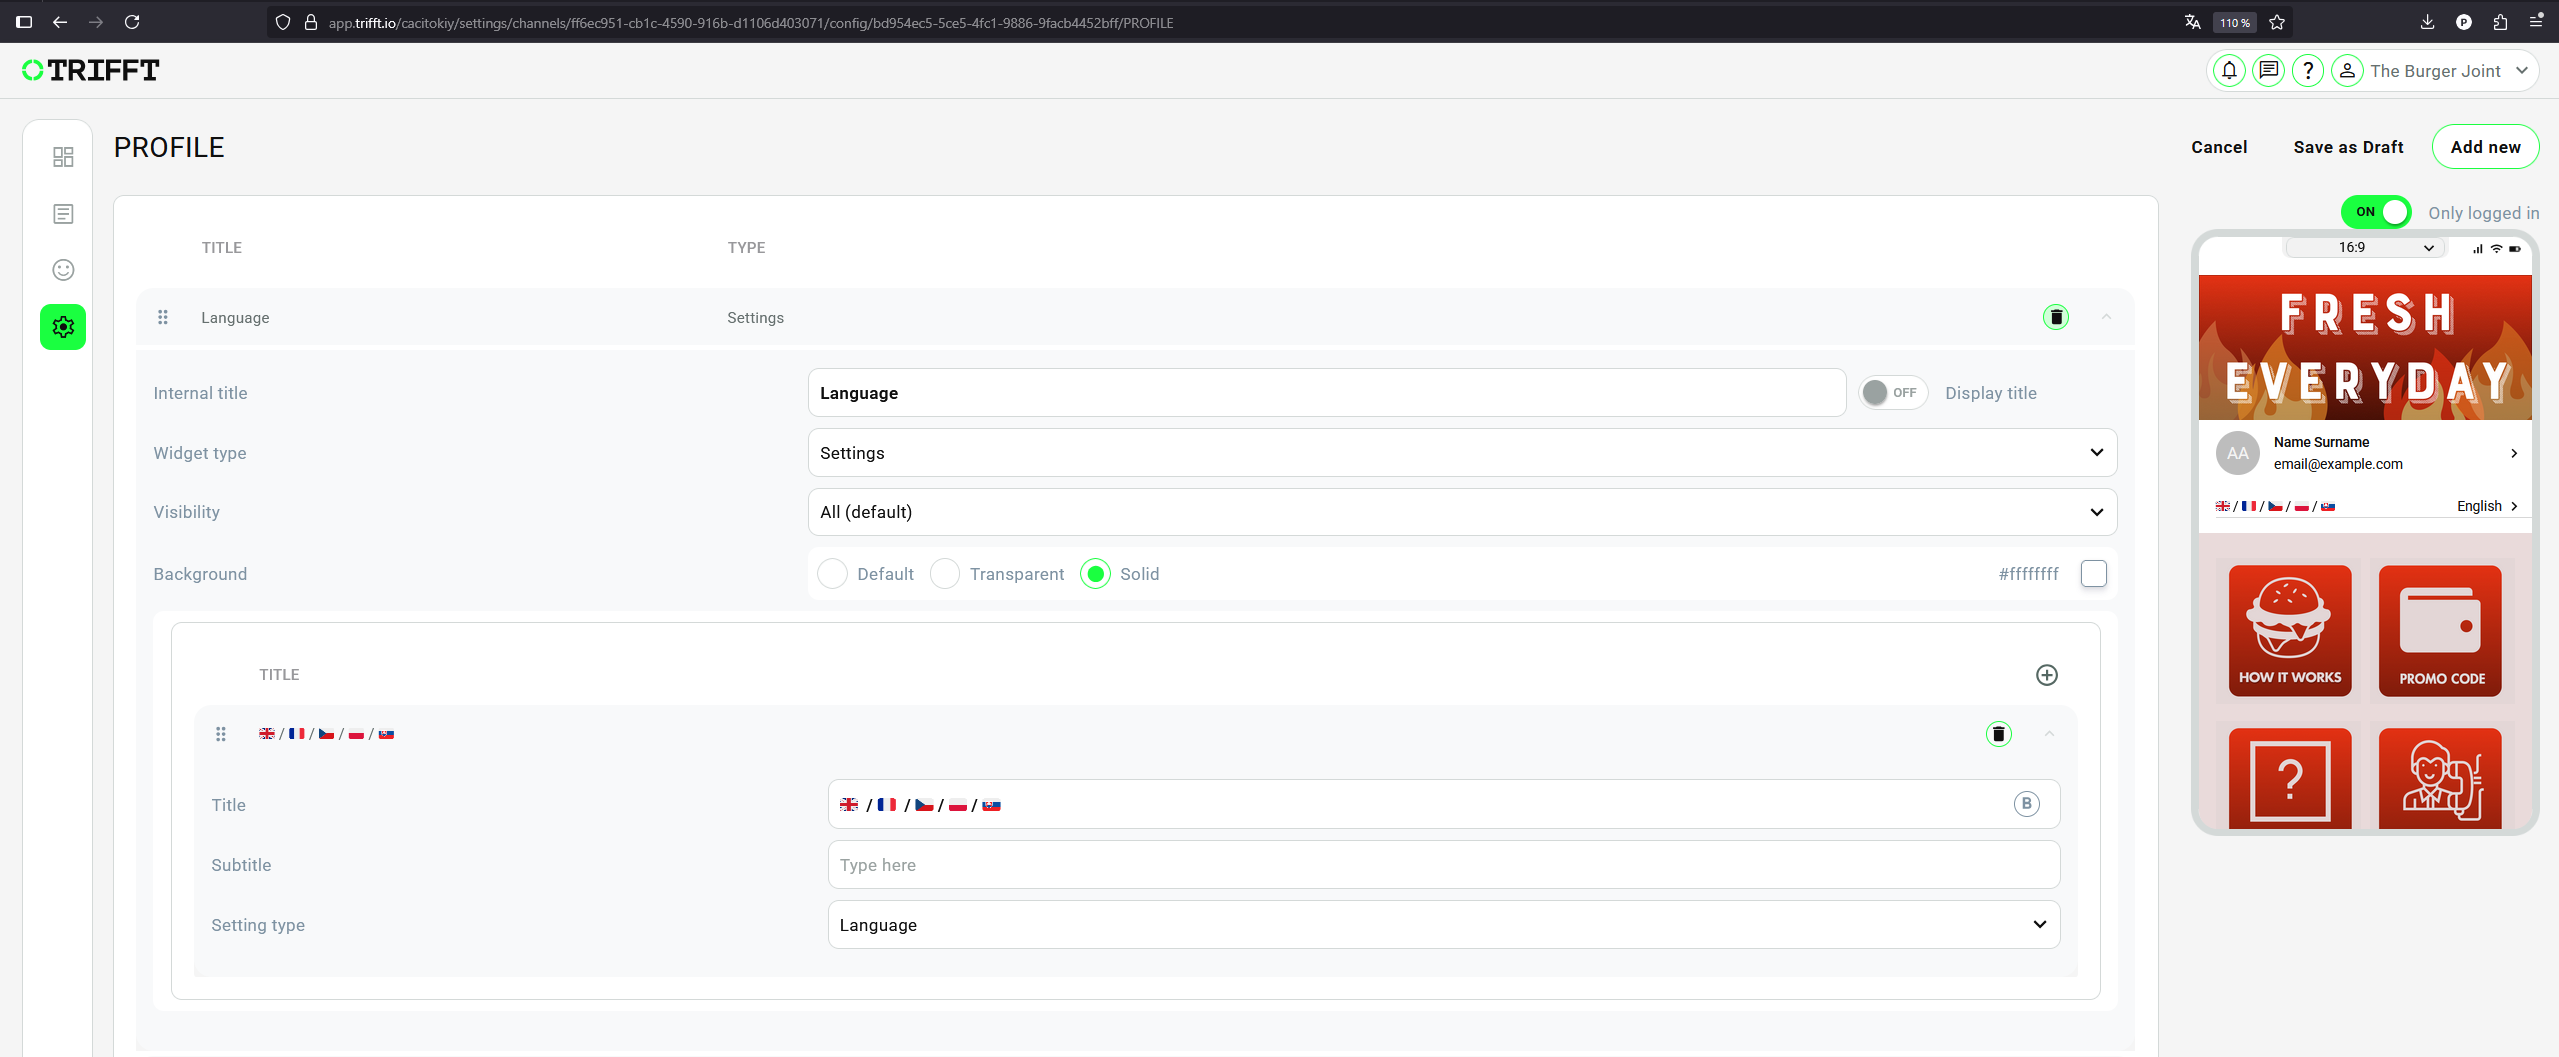
Setting of the widget to allow users to change language later
Example: How It Looks in the App
Below are two examples of how language selection can appear in the app:
-
Language selection on the welcome screen during onboarding (left)
-
Language selection accessible later via the Profile screen (right)
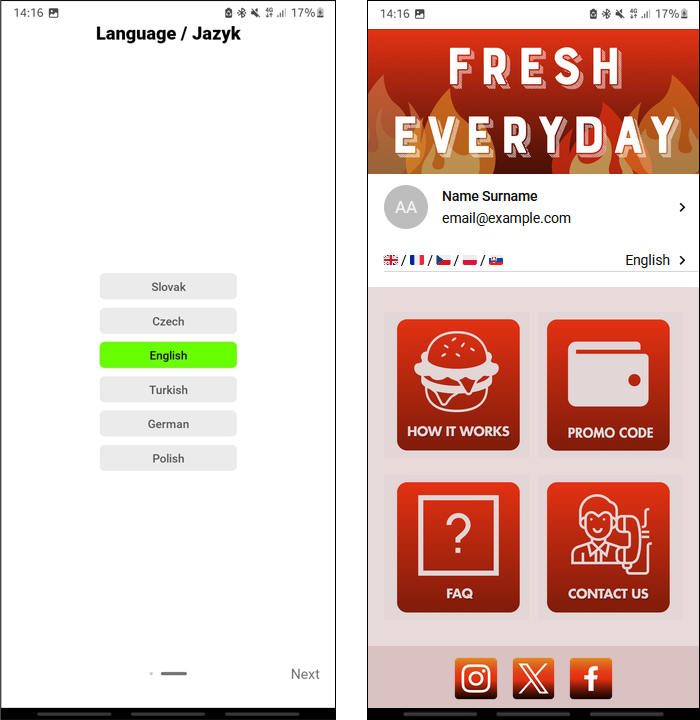
Welcome screen during the onboarding / Language selection accessible from Profile screen