Setting Up a Promo Code
This guide explains how to create and configure a Promo Event in the system.
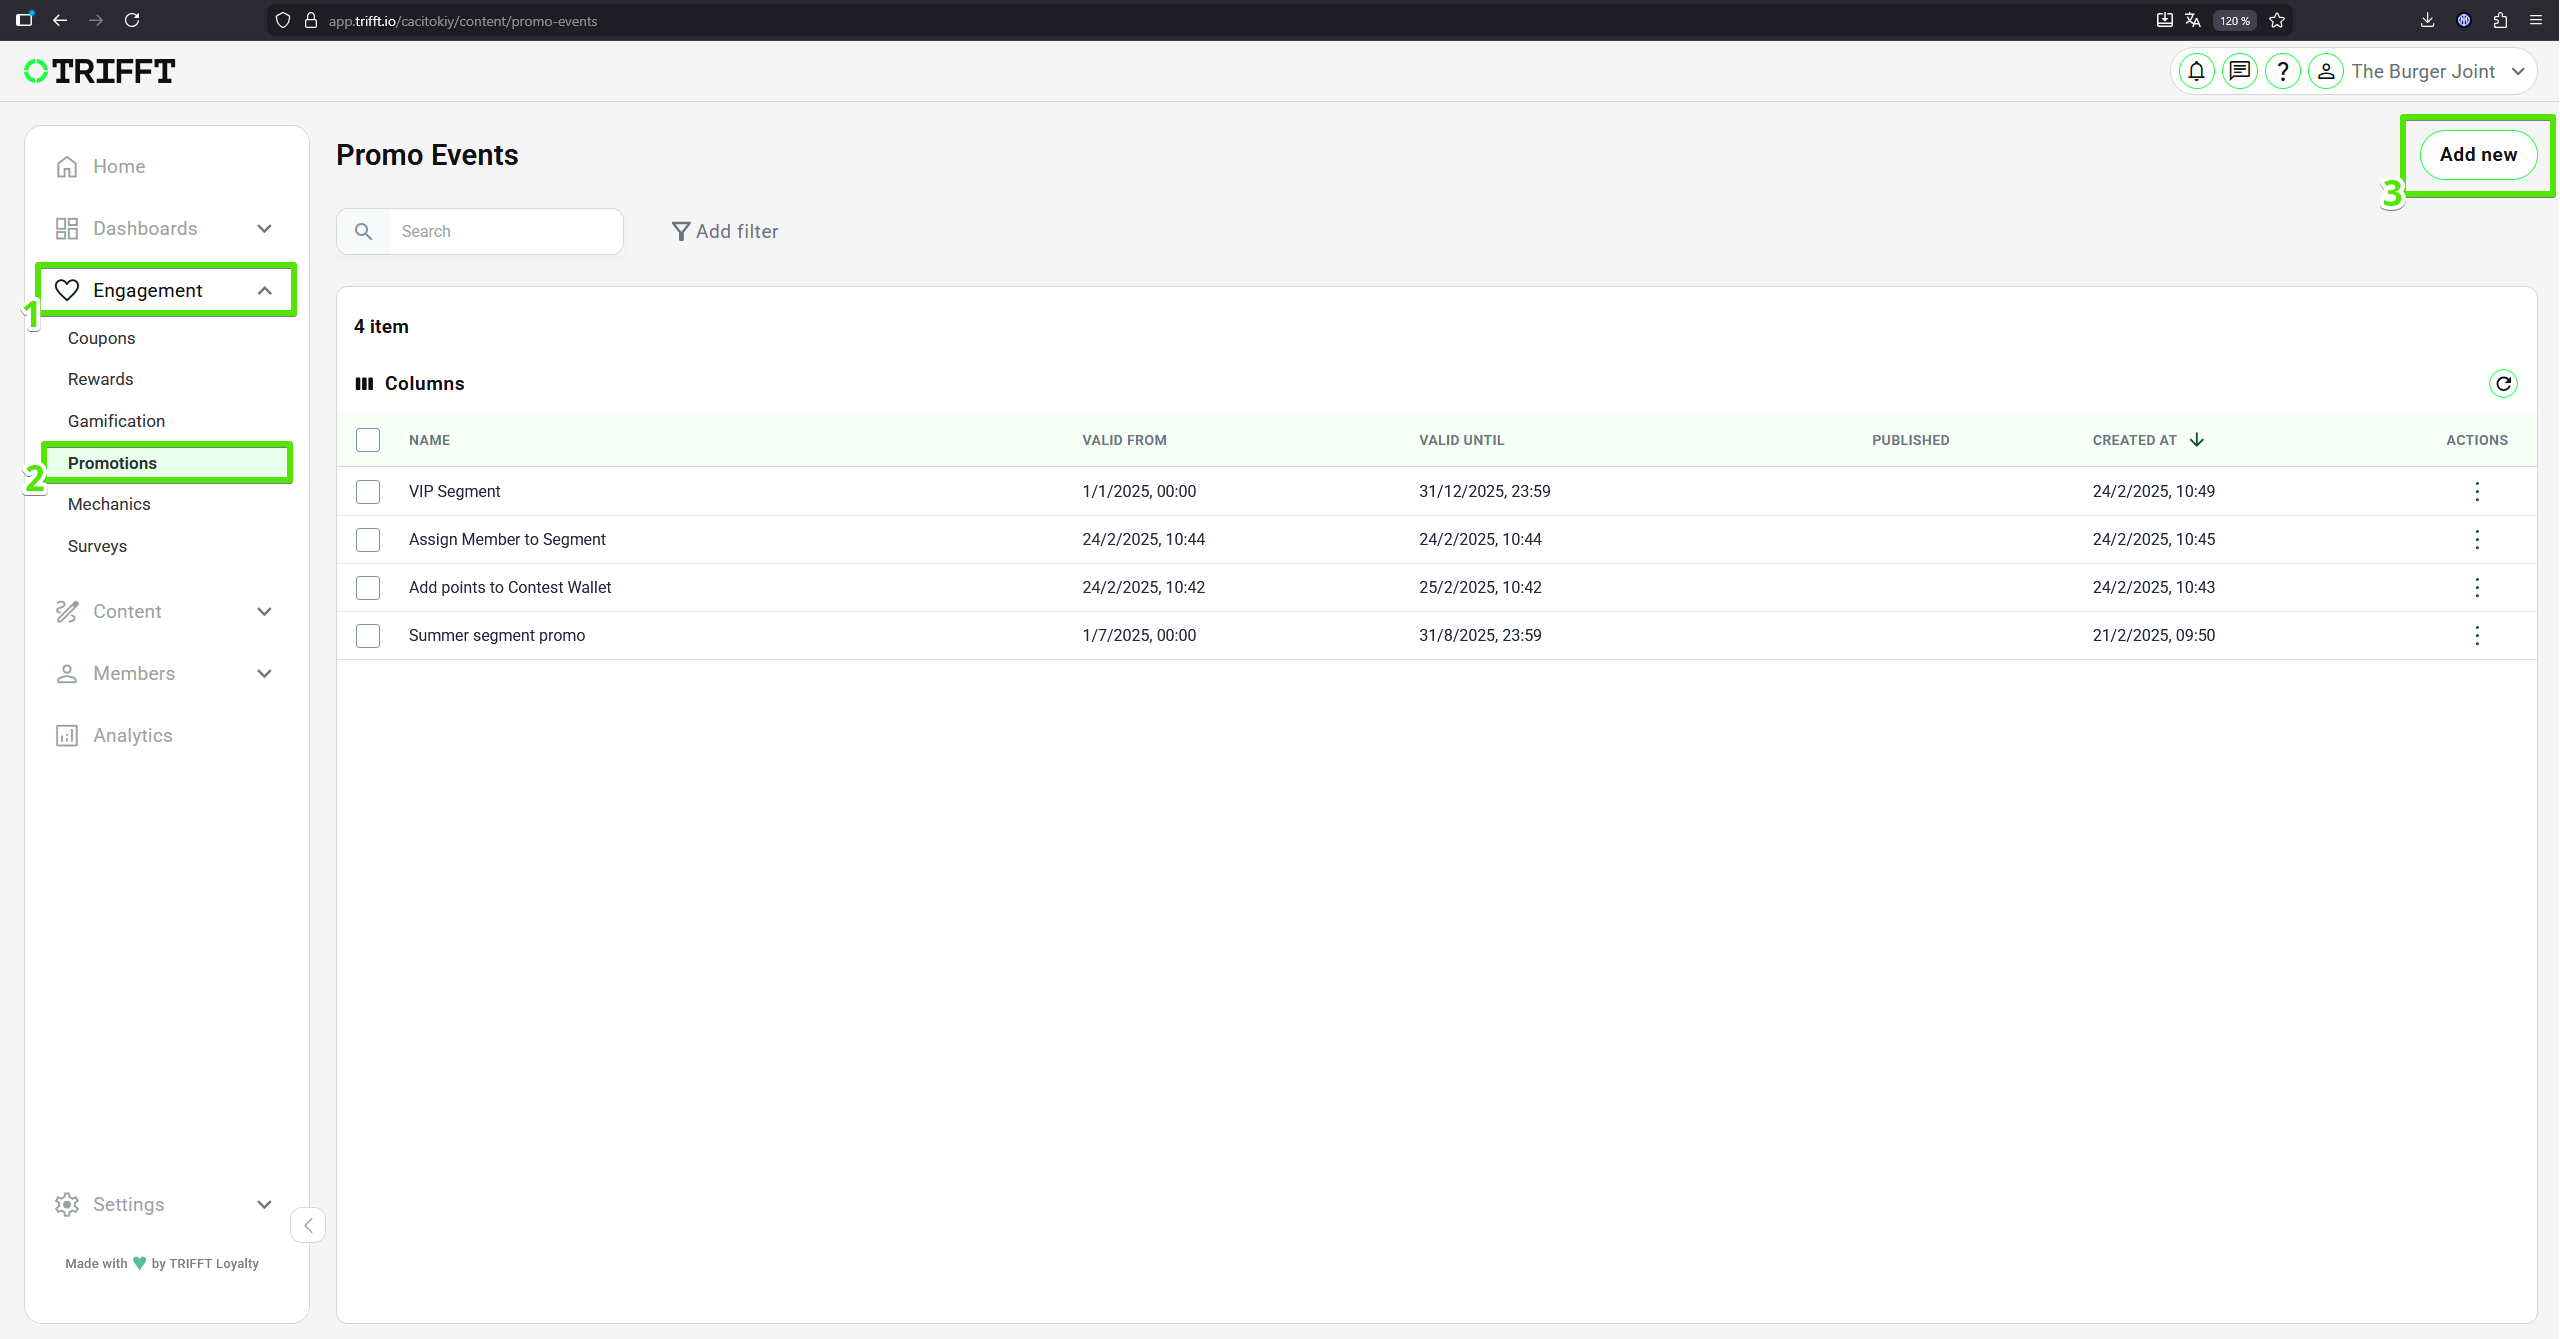
Create a new Promo Event
- Navigate to
Engagement (1)section in the admin panel and click onPromotions (2)to access the list of existing promotions.. - Click
Add New (3)in the top-right corner.
Create a new Promo Event
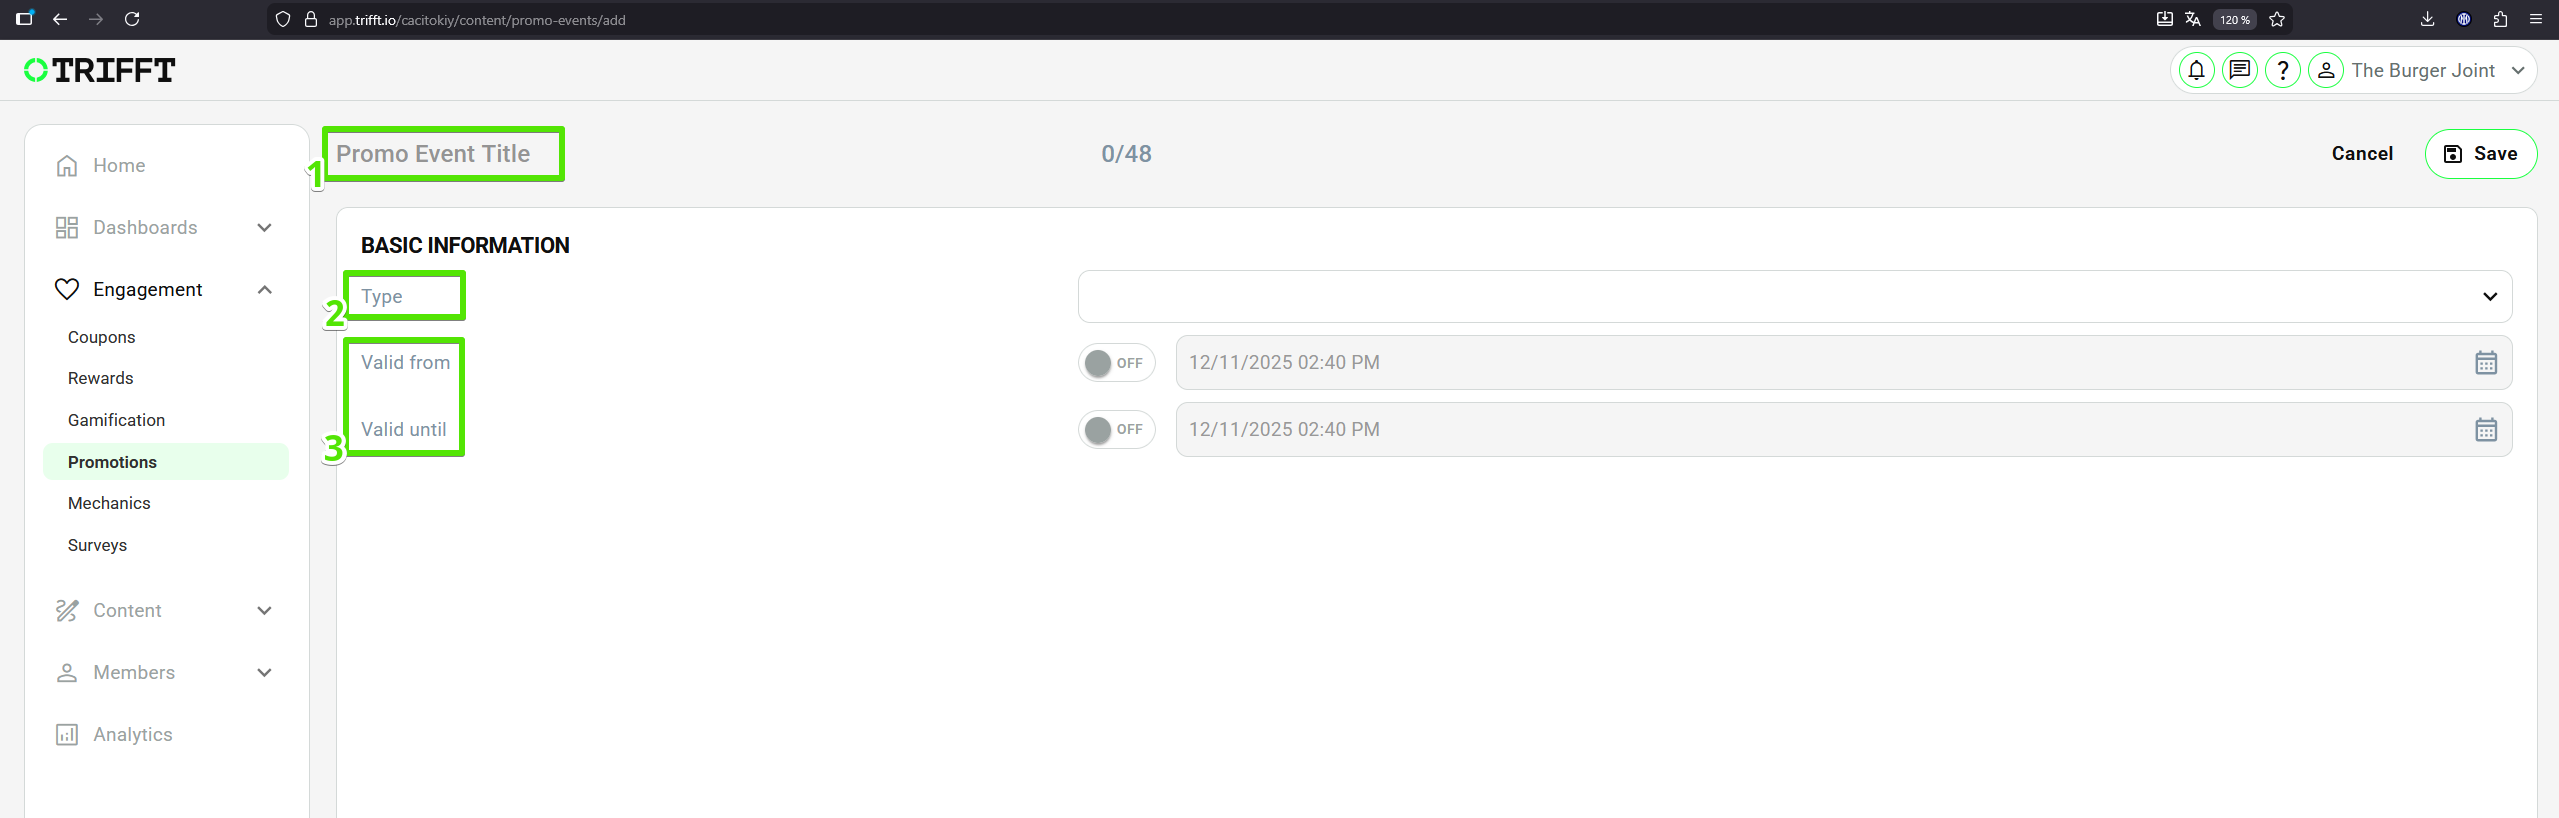
Fill in Promo Event details
- Enter a descriptive
Promo Event Title (1)for internal reference. - Selecting the
Type (2)means setting up the promo code trigger. Validity Period (3)– Set the start and end date for when the promo code can be used.
Fill in Promo Event details
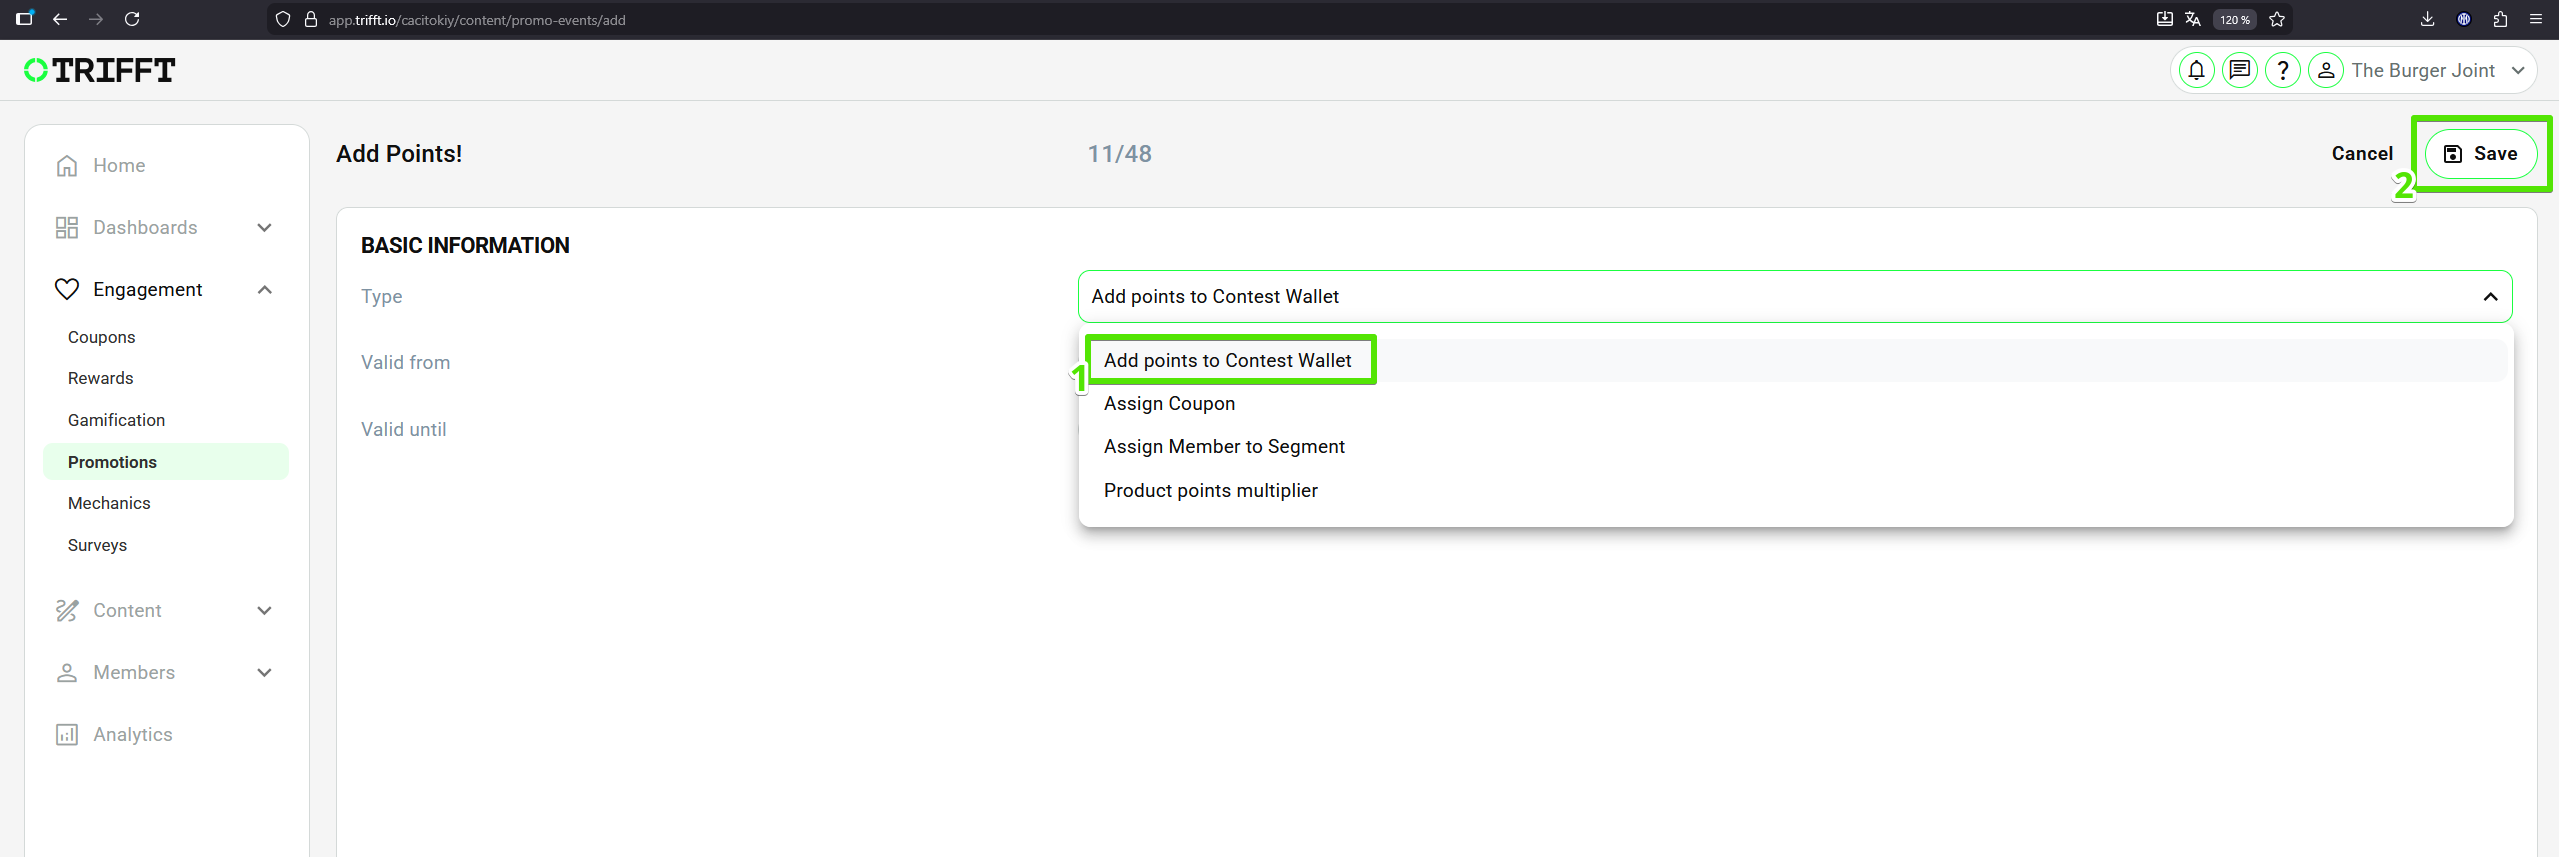
Add points to Contest Wallet
- Select the promo event
Type (1)Add points to Contest Wallet. - Click the
Save (2)button in the top-right corner.
Add points to Contest Wallet
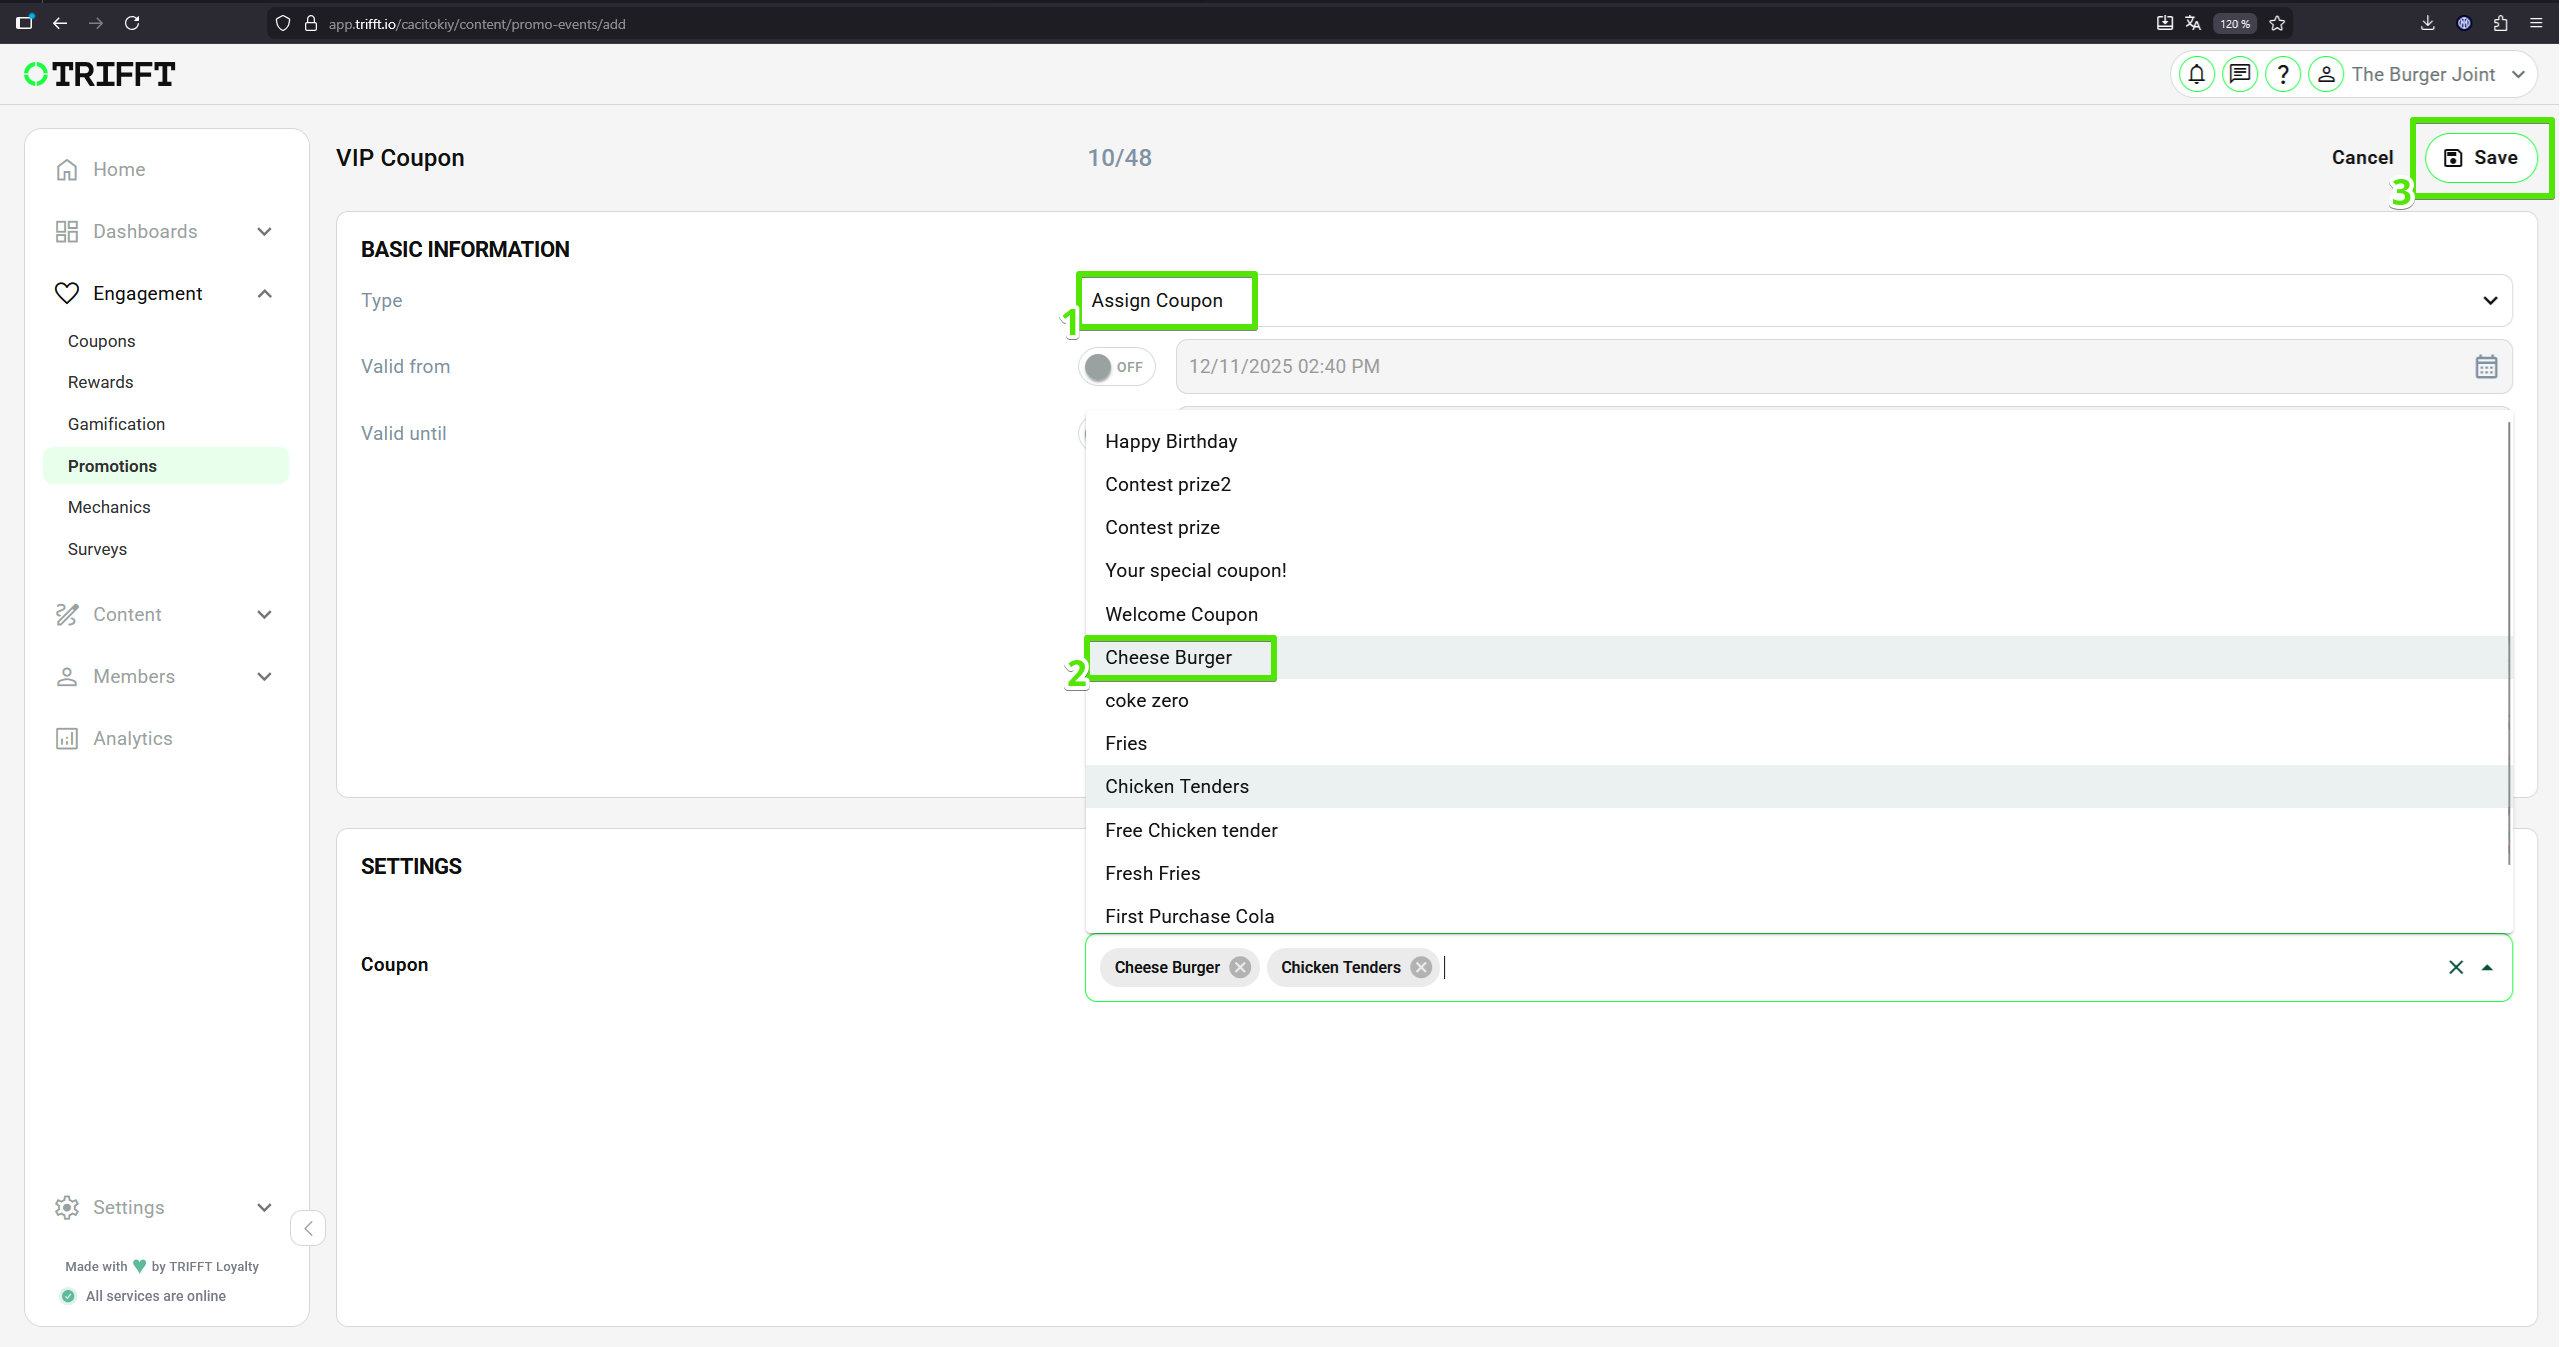
Assign Coupon
- Select the promo event
Type (1)Assign Coupon. - A list of all coupons stored in your project will appear.
- Choose the
coupon (2)that should be assigned to the customer (you can choose multiple coupons) and click theSave (3)button in the top-right corner.
Assign Coupon
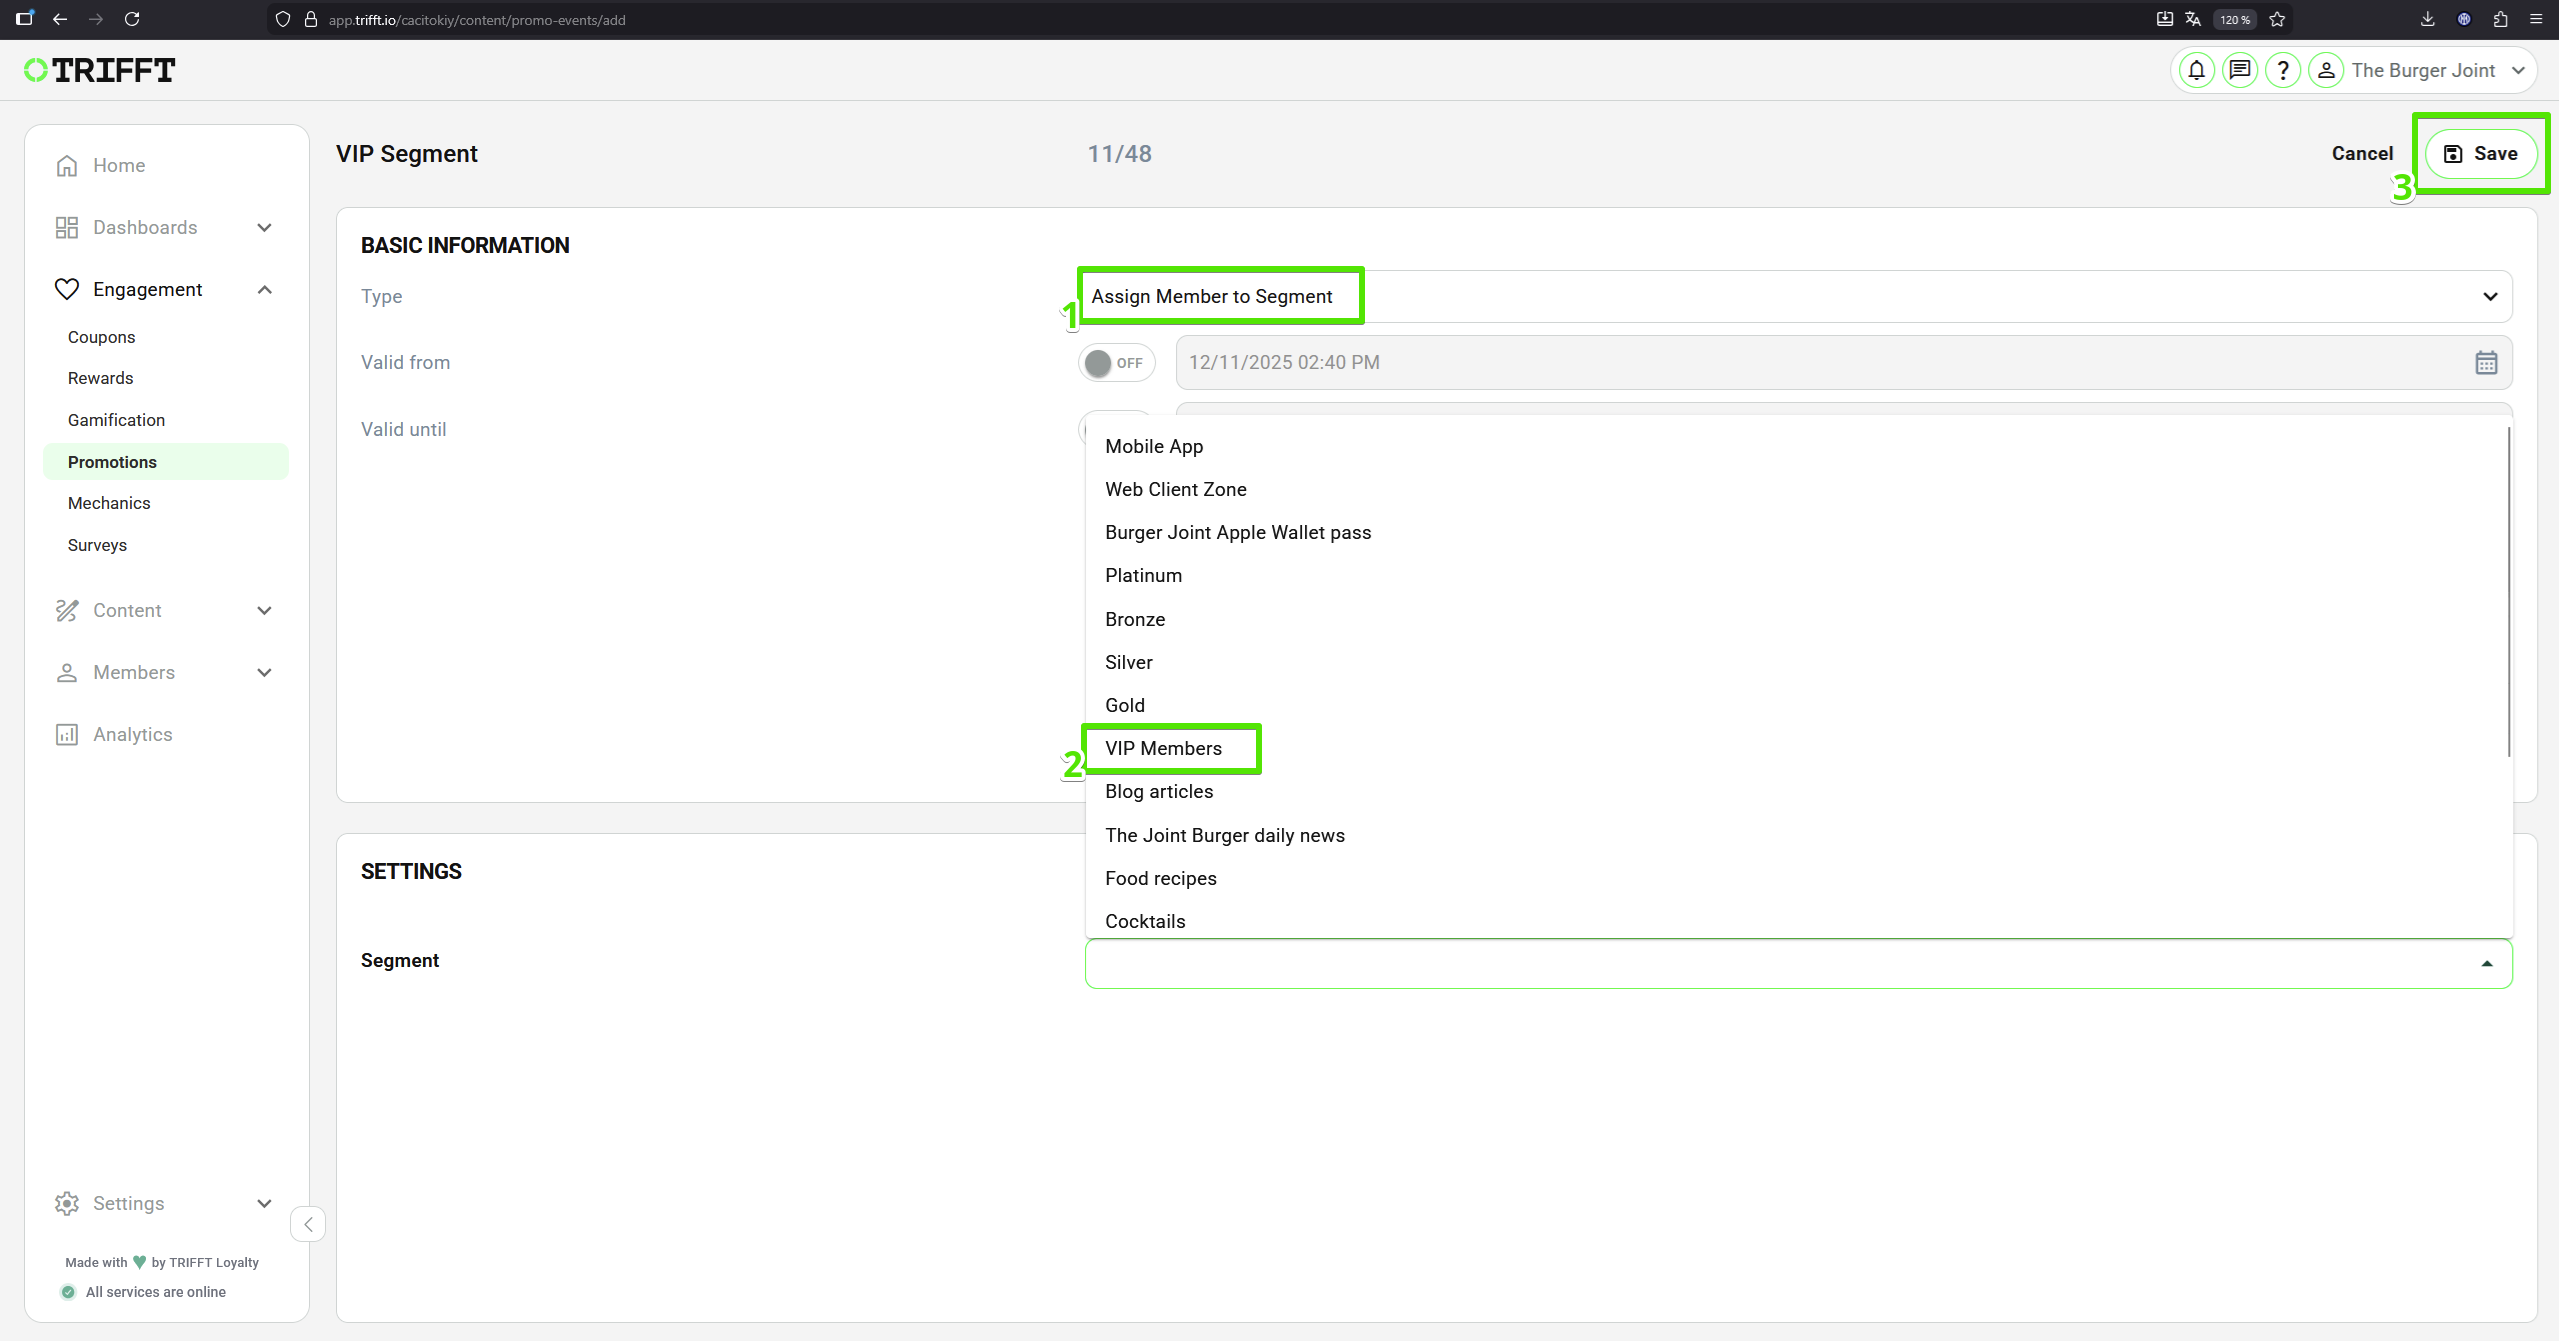
Assign Member to Segment
- Select the promo event
Type (1)Assign Member to Segment. - A list of all segments stored in your project will appear.
- Select the
Segment (2)to which the promo code should assign the customer and click theSave (3)button in the top-right corner.
Add Member to Segment
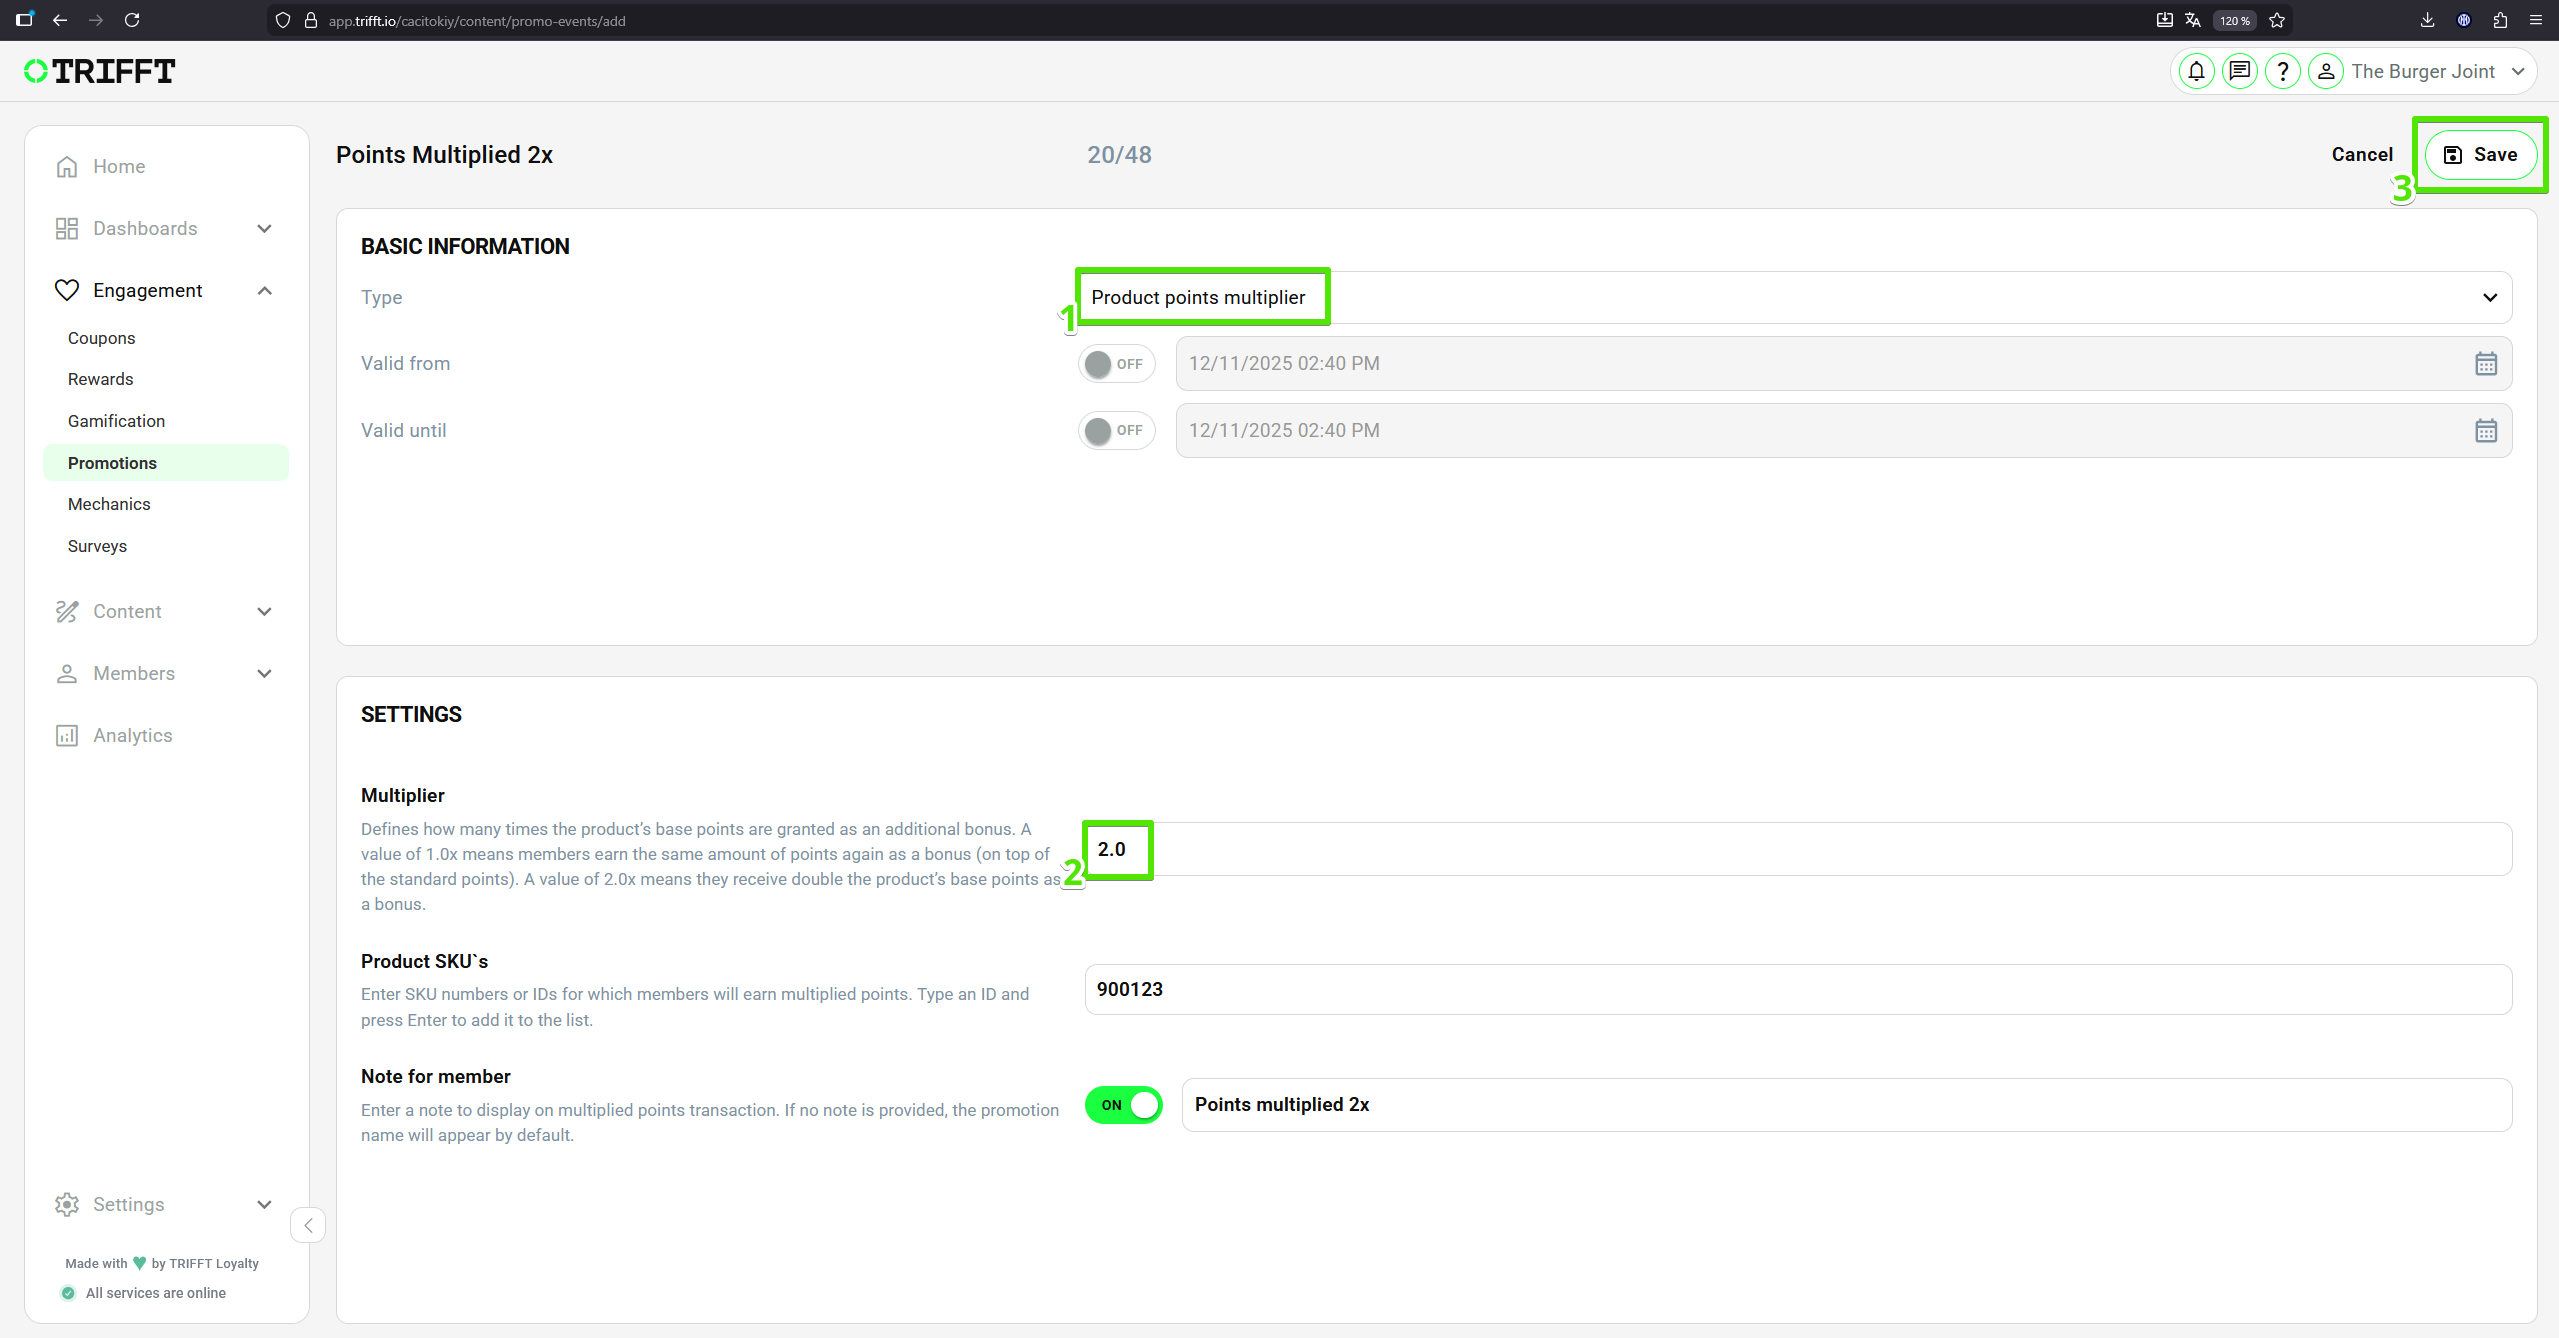
Product Points Multiplier
- Select the promo event
Type (1)Product points multiplier - Define the
Multiplier (2)- how many times the product’s base points are granted as an additional bonus. - Optional: You can also set the SKU numbers or IDs for which members will earn multiplied points and a note for member which will display on multiplied points transaction.
- Click the
Save (3)button in the top-right corner.
Product Points Multiplier
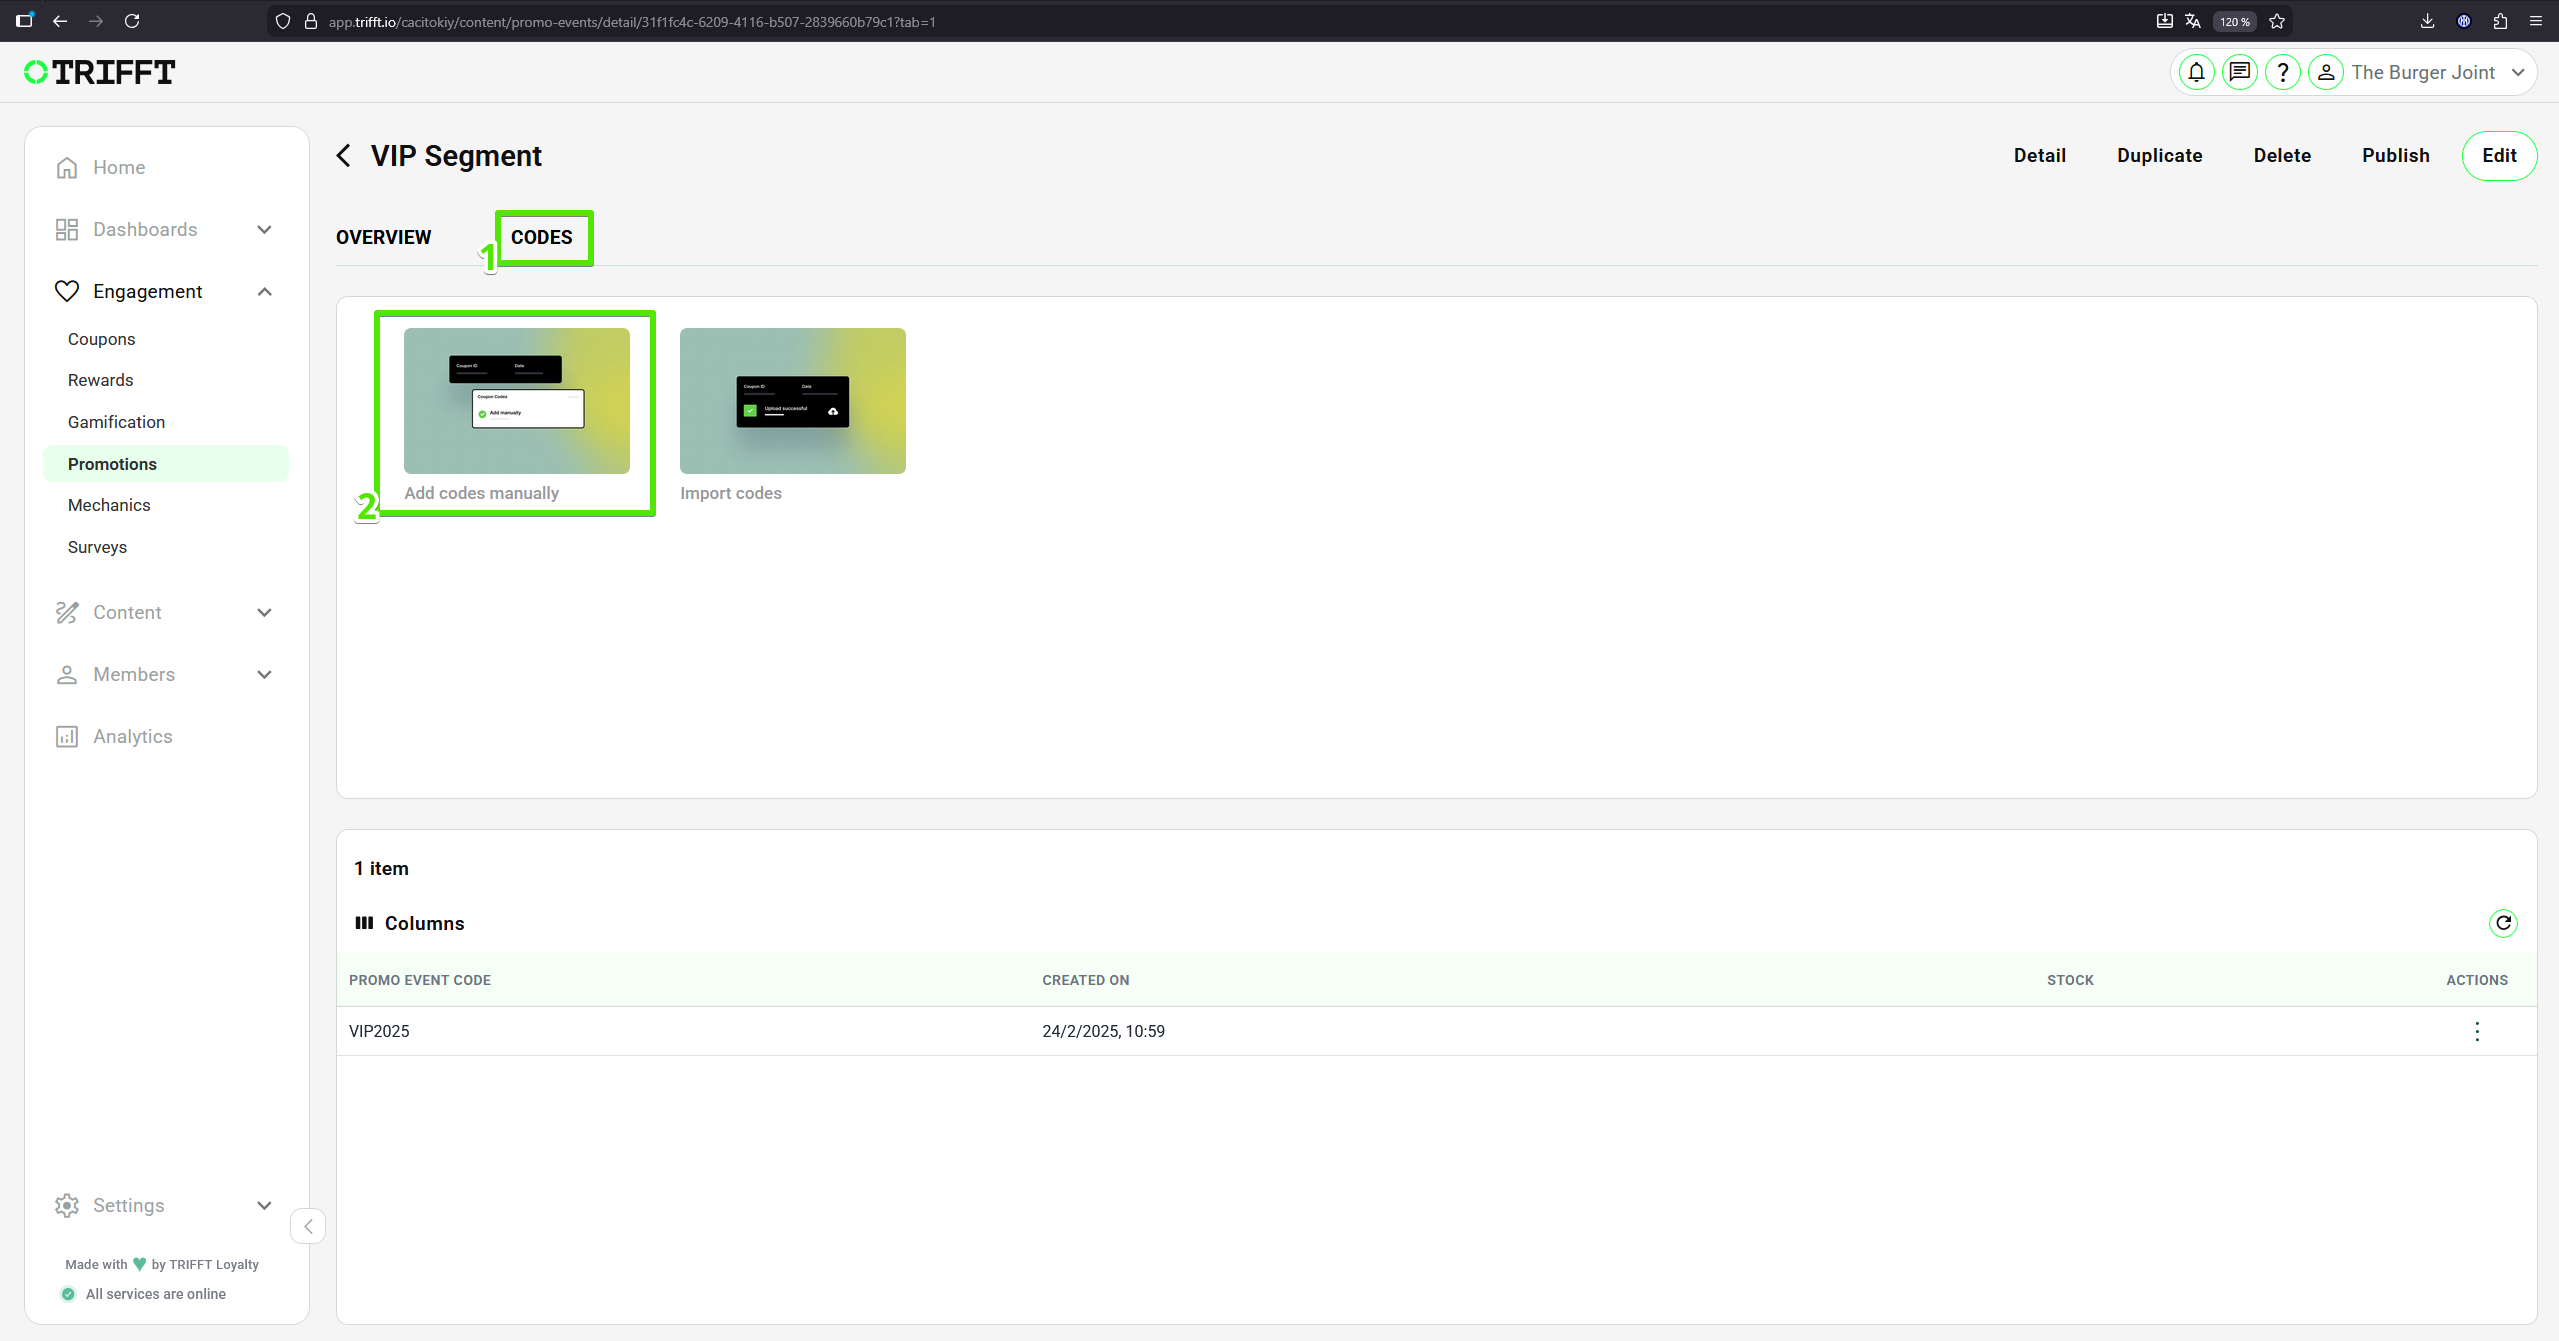
Setup the code
- After creating and saving the promo event, its detail page opens. Navigate to the
Codes (1)tab, where you can assign a promo code to this event. You can create codes manually or import them from a CSV or XLS file. - For creating a code manually click
Add codes manually (2), otherwise you can Import the list of your codes.
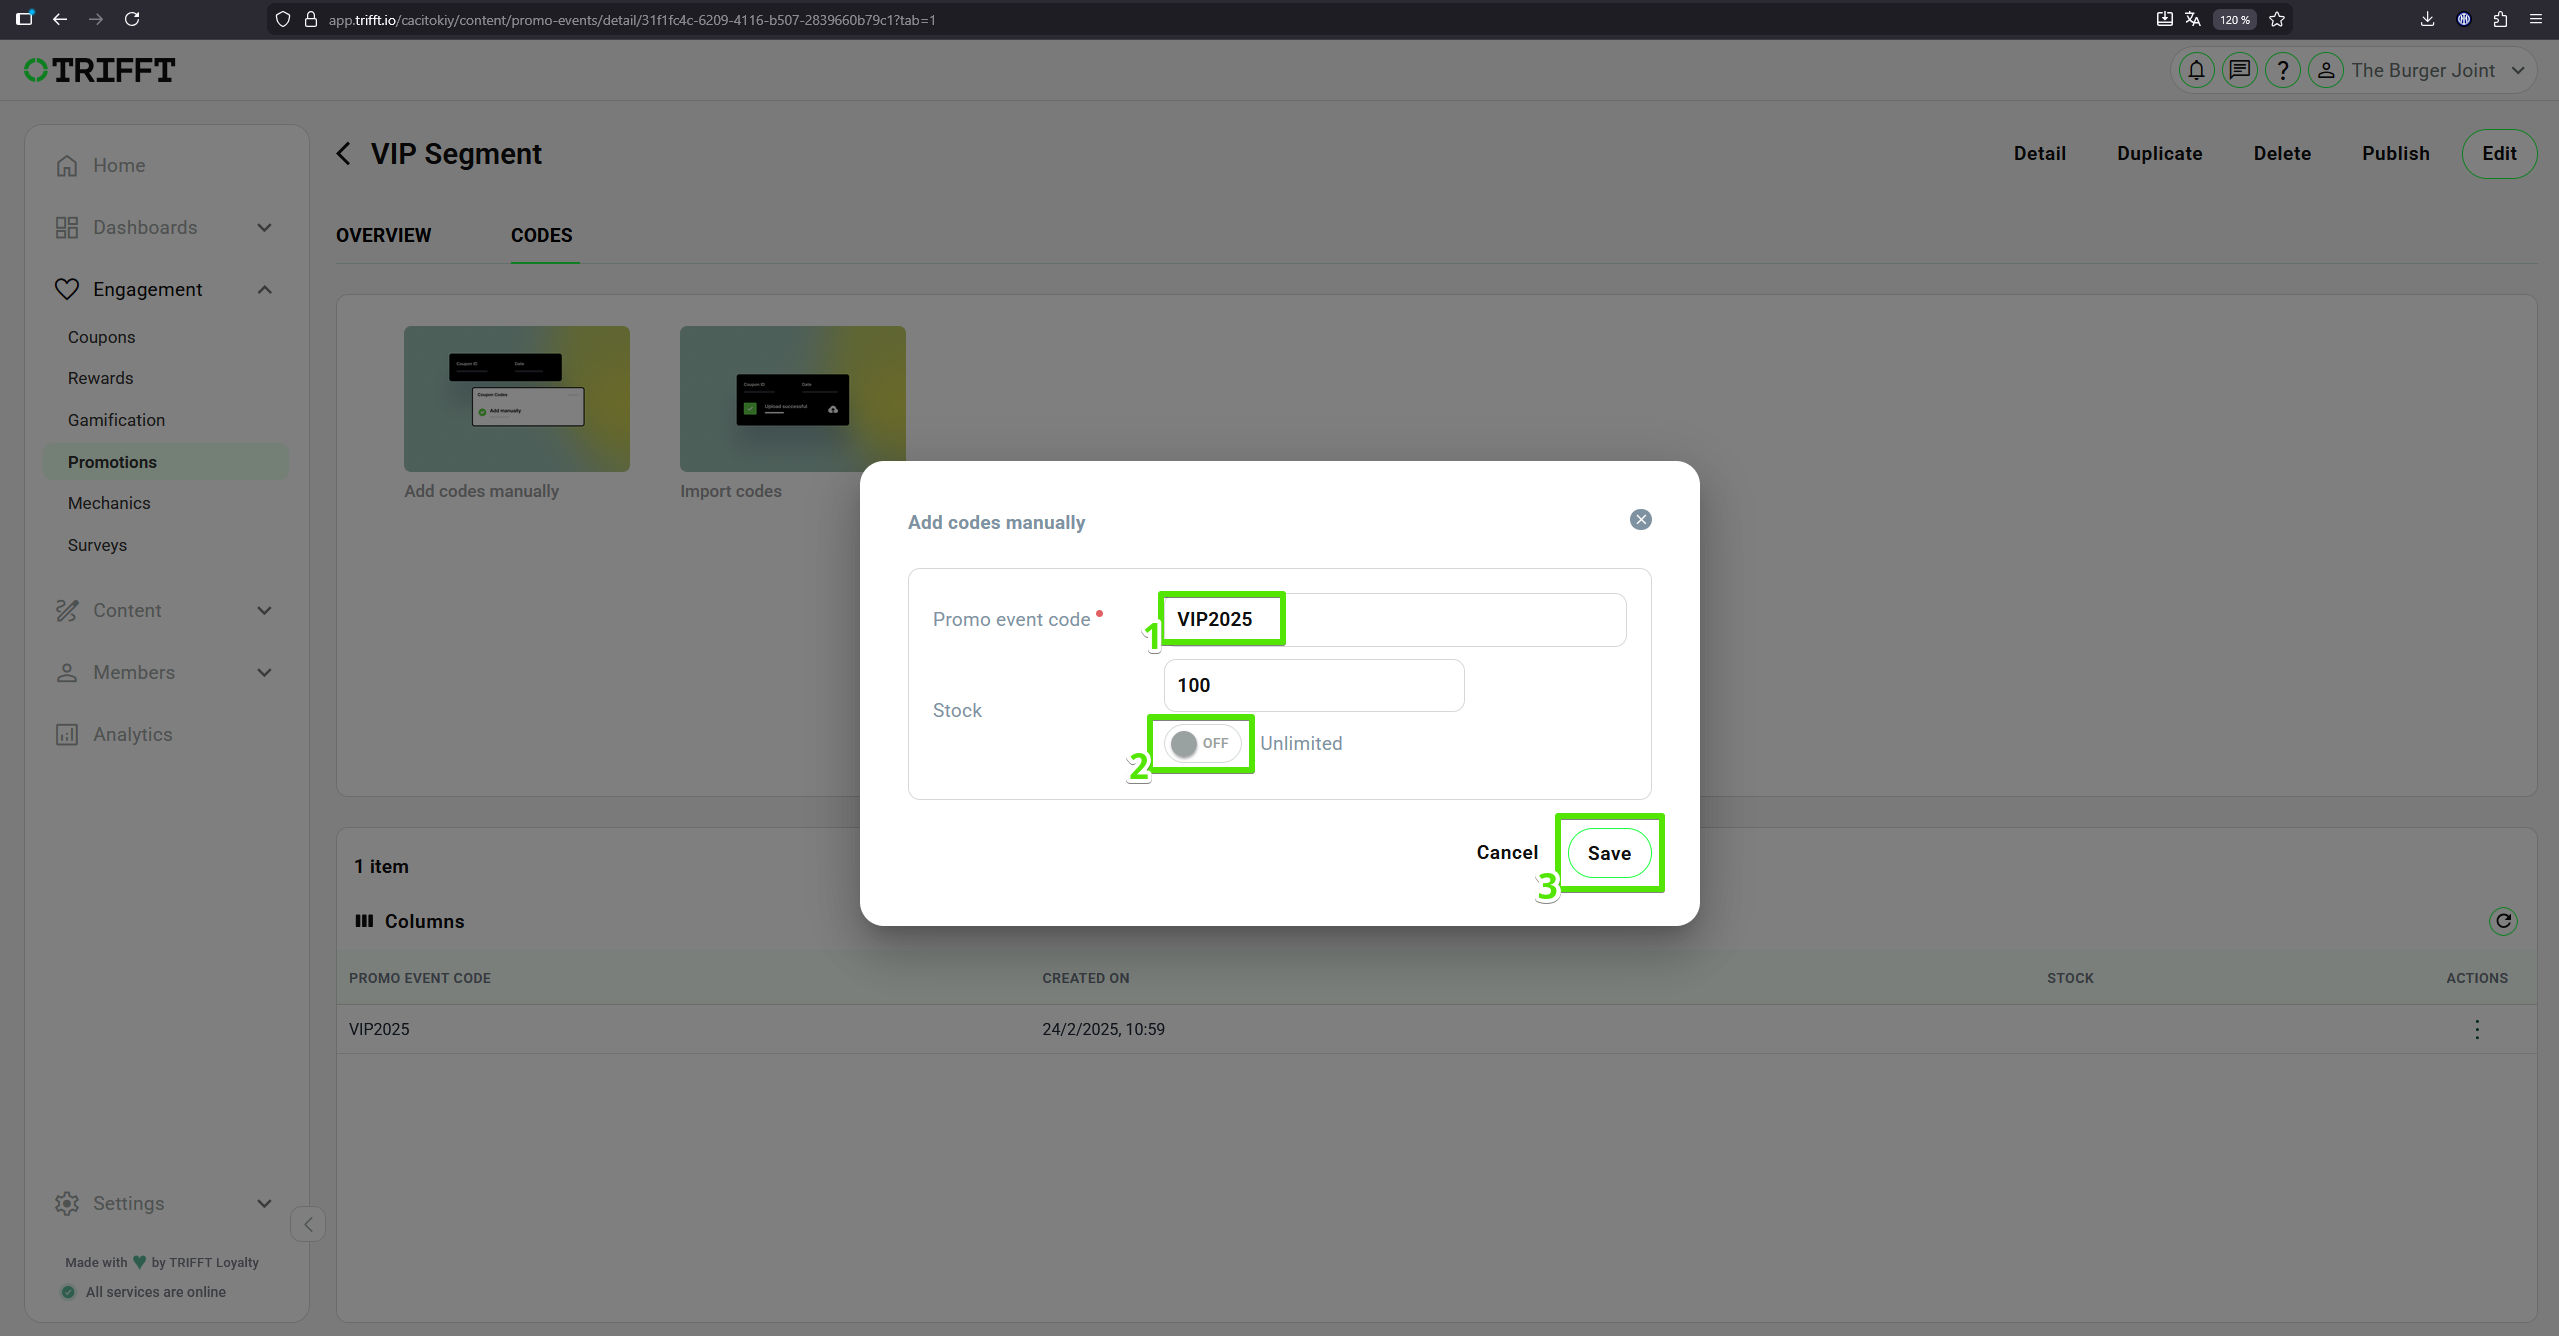
Setup the code manually - step 1/2
- In the new window, enter the
desired code (1). - Optional: If you want to limit the number of times the code can be used, check the
Stock (2)option and set the allowed usage limit. - Click
Save (3)to confirm. - Once saved, the promo code is set, and the promo event is successfully configured.
Setup the code manually - step 2/2