Push notifications
This article explains how to create, schedule, and configure push notifications to engage your users with timely and targeted messages.
Feature Overview
Push notifications are a powerful way to communicate with your customers directly on their devices—even when they’re not actively using the app. They can be used to notify members about special offers, new content, leaflets, or important news. Each message can optionally link to specific content, such as a coupon or leaflet, and can be scheduled in advance to be sent at a later time.
As of Feb 17th 2026, the bulk push notification limits in TRIFFT are set to:
- Notification preparation: 50.000 members every 10 minutes
- Notification sending: 10.000 members every 3 minutes
So, if your push notification is targeted toward 300 thousand members, allow at least 1 hour (300/50 * 10 = 60 minutes) for segment preparation and expect 1.5 hours (300/10 * 3 = 90 minutes) from the beginning of sending until the last push is sent.
Why Use Push Notifications?
- Drive engagement by reaching users at the right time with the right message
- Promote campaigns and offers directly through their phones
- Guide users into specific app content with a single tap
- Automate communication by scheduling messages in advance
How to Create a Push Notification
Create a new Push Notification:
-
Navigate to:
Content (1)and selectPush Notifications (2). -
This opens the list of all existing push messages—both past and scheduled ones.
-
Click
Add new (3)(top-right corner) to start creating a new push.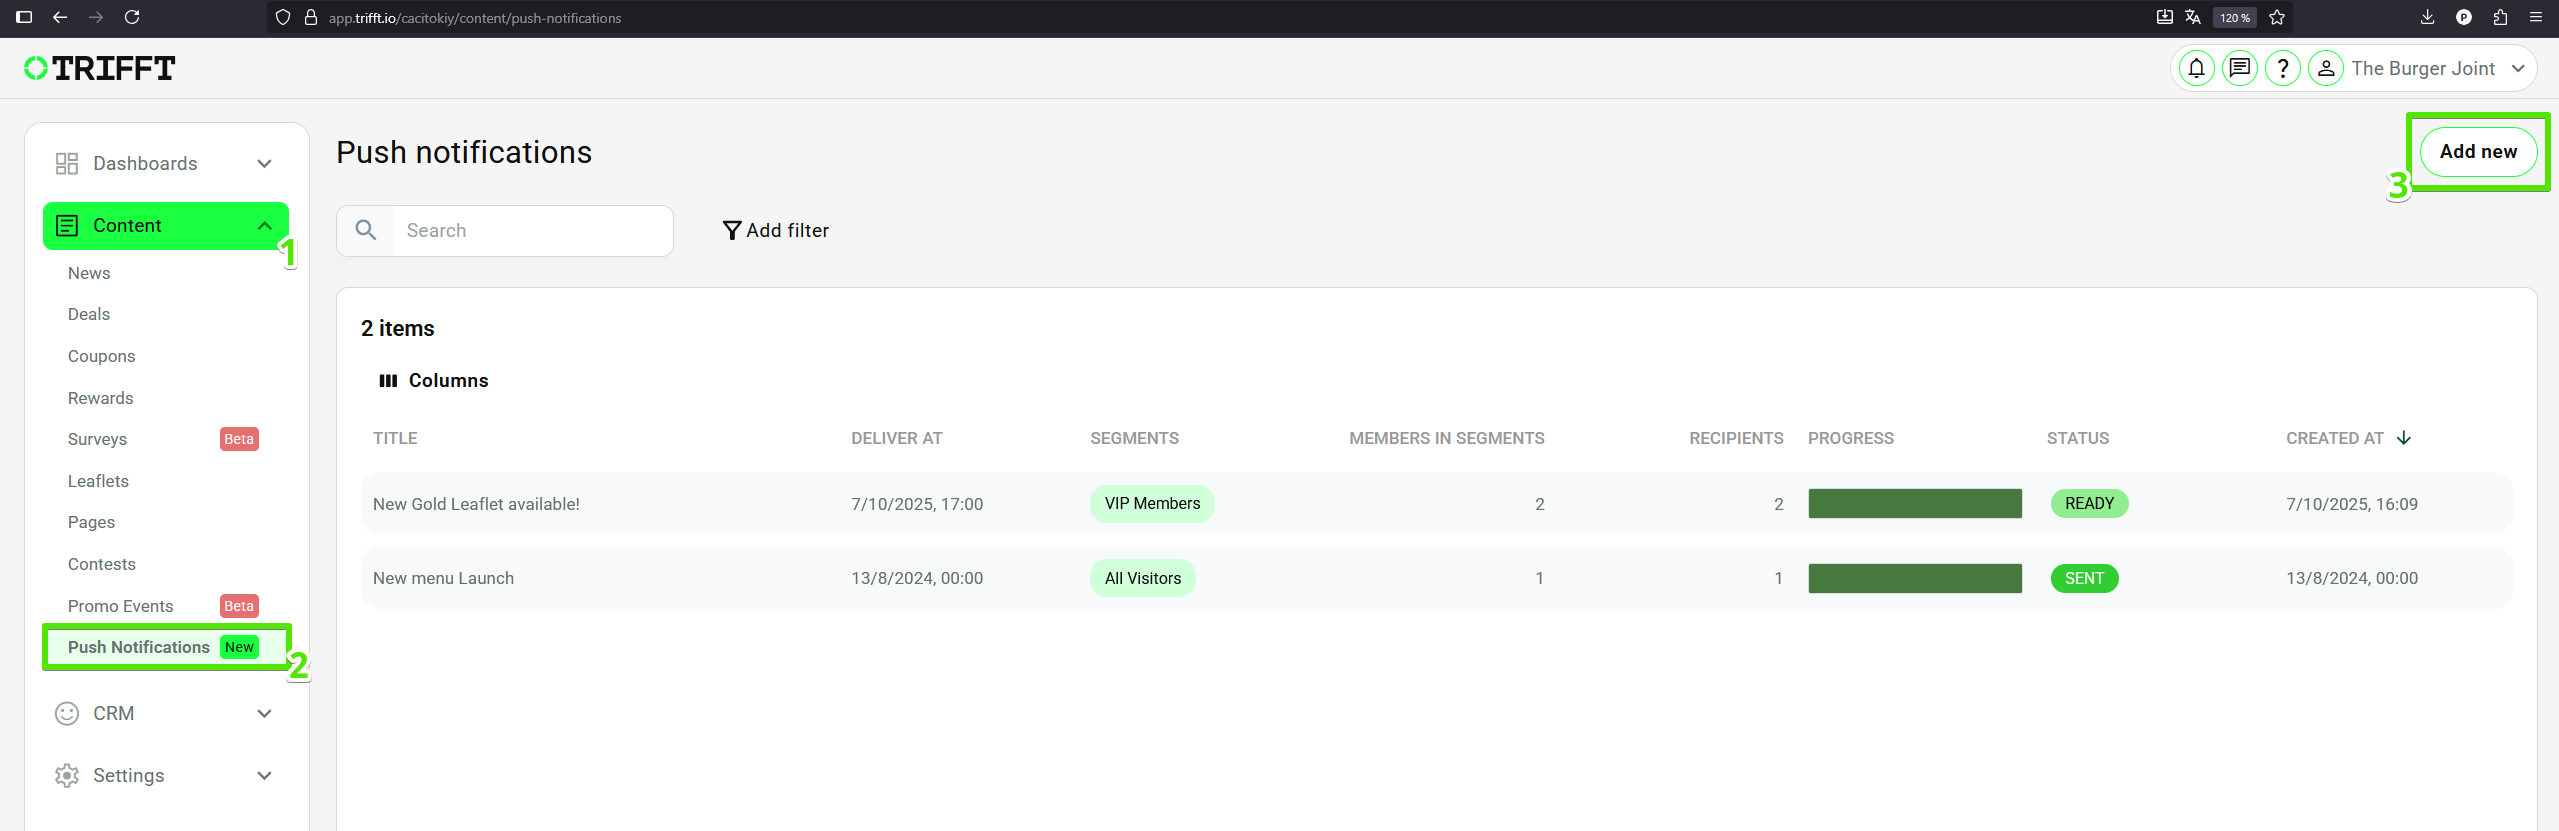
List of all Push Notifications
Push Notification Settings
After the previous step you’ll see a form with the following fields:
Required Fields
| Field | Description |
|---|---|
| Title | The headline of your push (max 65 characters) |
| Text | The body text of the push message (max 178 characters) |
| Schedule | Choose when the push should be sent |
| Segments | Select which customer segment(s) will receive the notification |
Optional Fields
| Field | Description |
|---|---|
| Image | Visual banner for the push. Allowed formats: JPG, JPEG, PNG. Max size: 5MB. Recommended: 1024x512 px |
| Link override | Define a custom action when the user taps the notification |
| Link type | There are three types of links: • App link – Opens a specific section or content in app • Web link – Opens a URL (can open in-app, in an in-app tab, or in external browser) • System link – Executes system action (e.g. Share) |
Example of the Push Notification Settings with the linking on the Coupon:
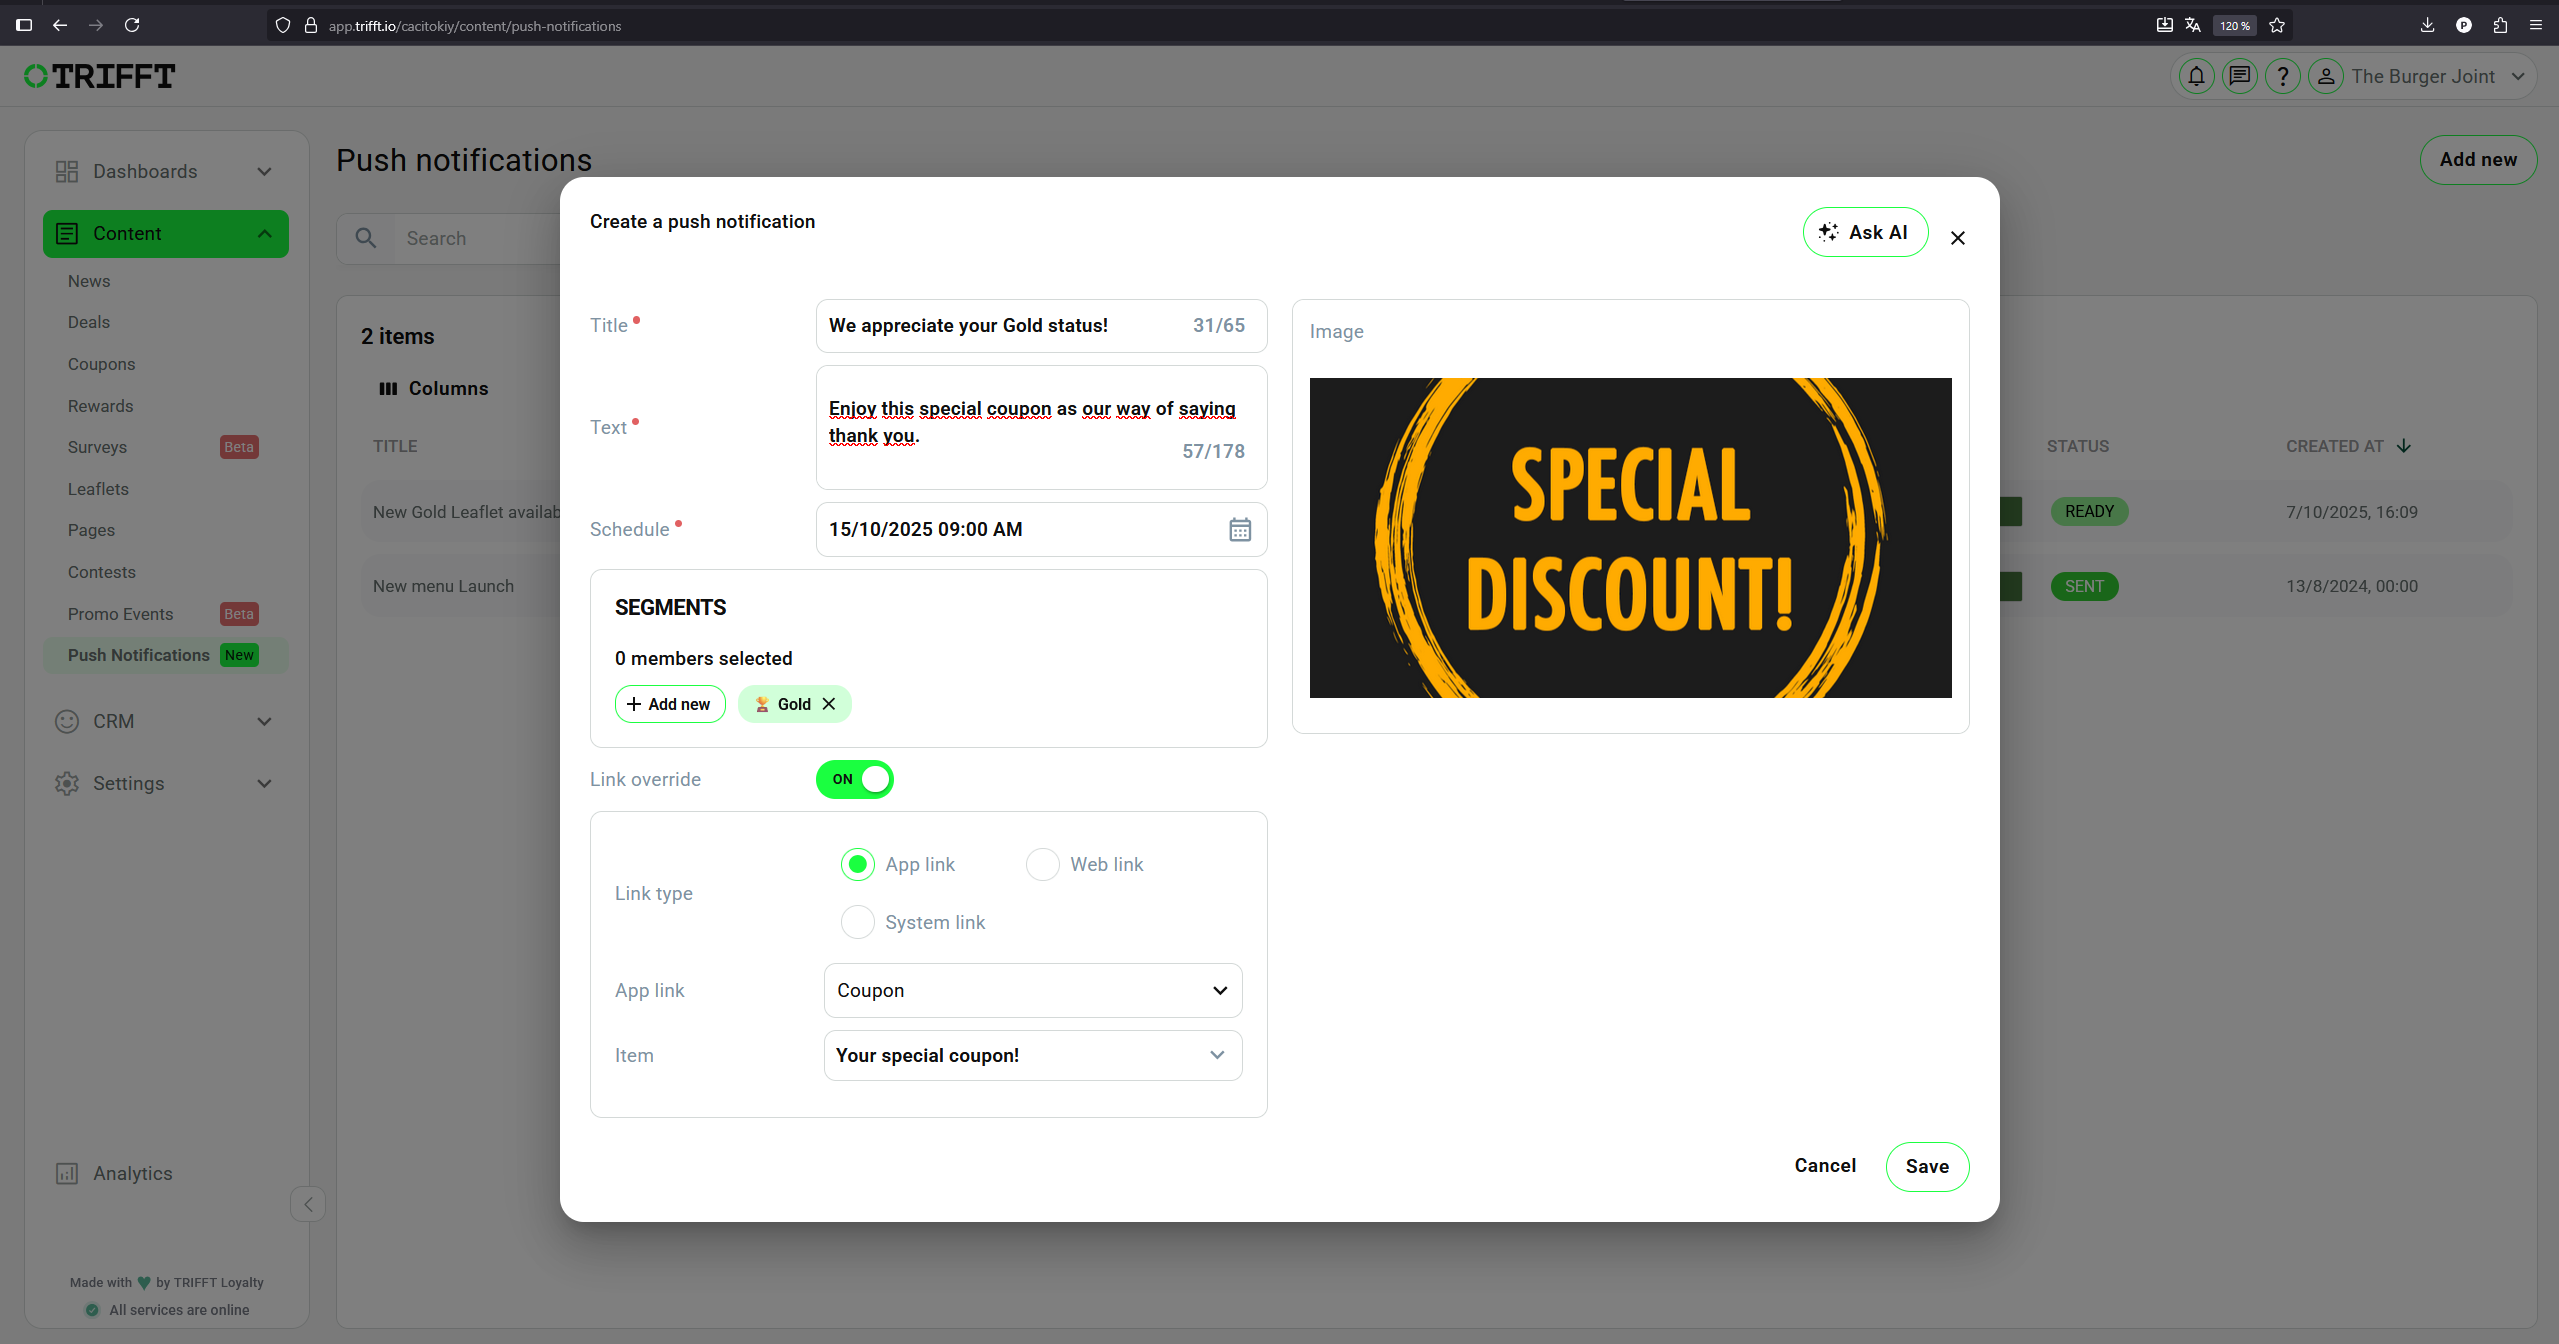
Example of Push Notification Settings
Final Step: Save
Once all required fields are filled in, click the “Save” button in the bottom-right corner.
Important: After saving, the push notification will begin processing and can no longer be edited or deleted. Make sure all the information is correct before clicking save.
Push notifications are one of the easiest and most effective ways to keep your customers engaged—don’t let them go unused!