
Language Set Up
Prerequisites
Admin role required — You must have Admin access to enable new languages.
Before you begin, gather the following:
| Requirement | Details |
|---|---|
| ISO language codes | The codes for each locale you plan to support (e.g., EN, DE, FR). |
| Localized copy | Translated strings for UI labels, notifications, and legal text. |
| Translation API (optional) | Credentials for an external translation service, if you plan to automate translations. |
Step-by-step setup
1. Open the Languages panel
- Go to Settings > Touchpoints > App > Settings > General.
2. Enable a new language
- Click Available Languages and select the desired locale from the dropdown.
3. Set the default language
- Choose the Default Language that applies to the entire tenant. This is the language users see when no preference is set.
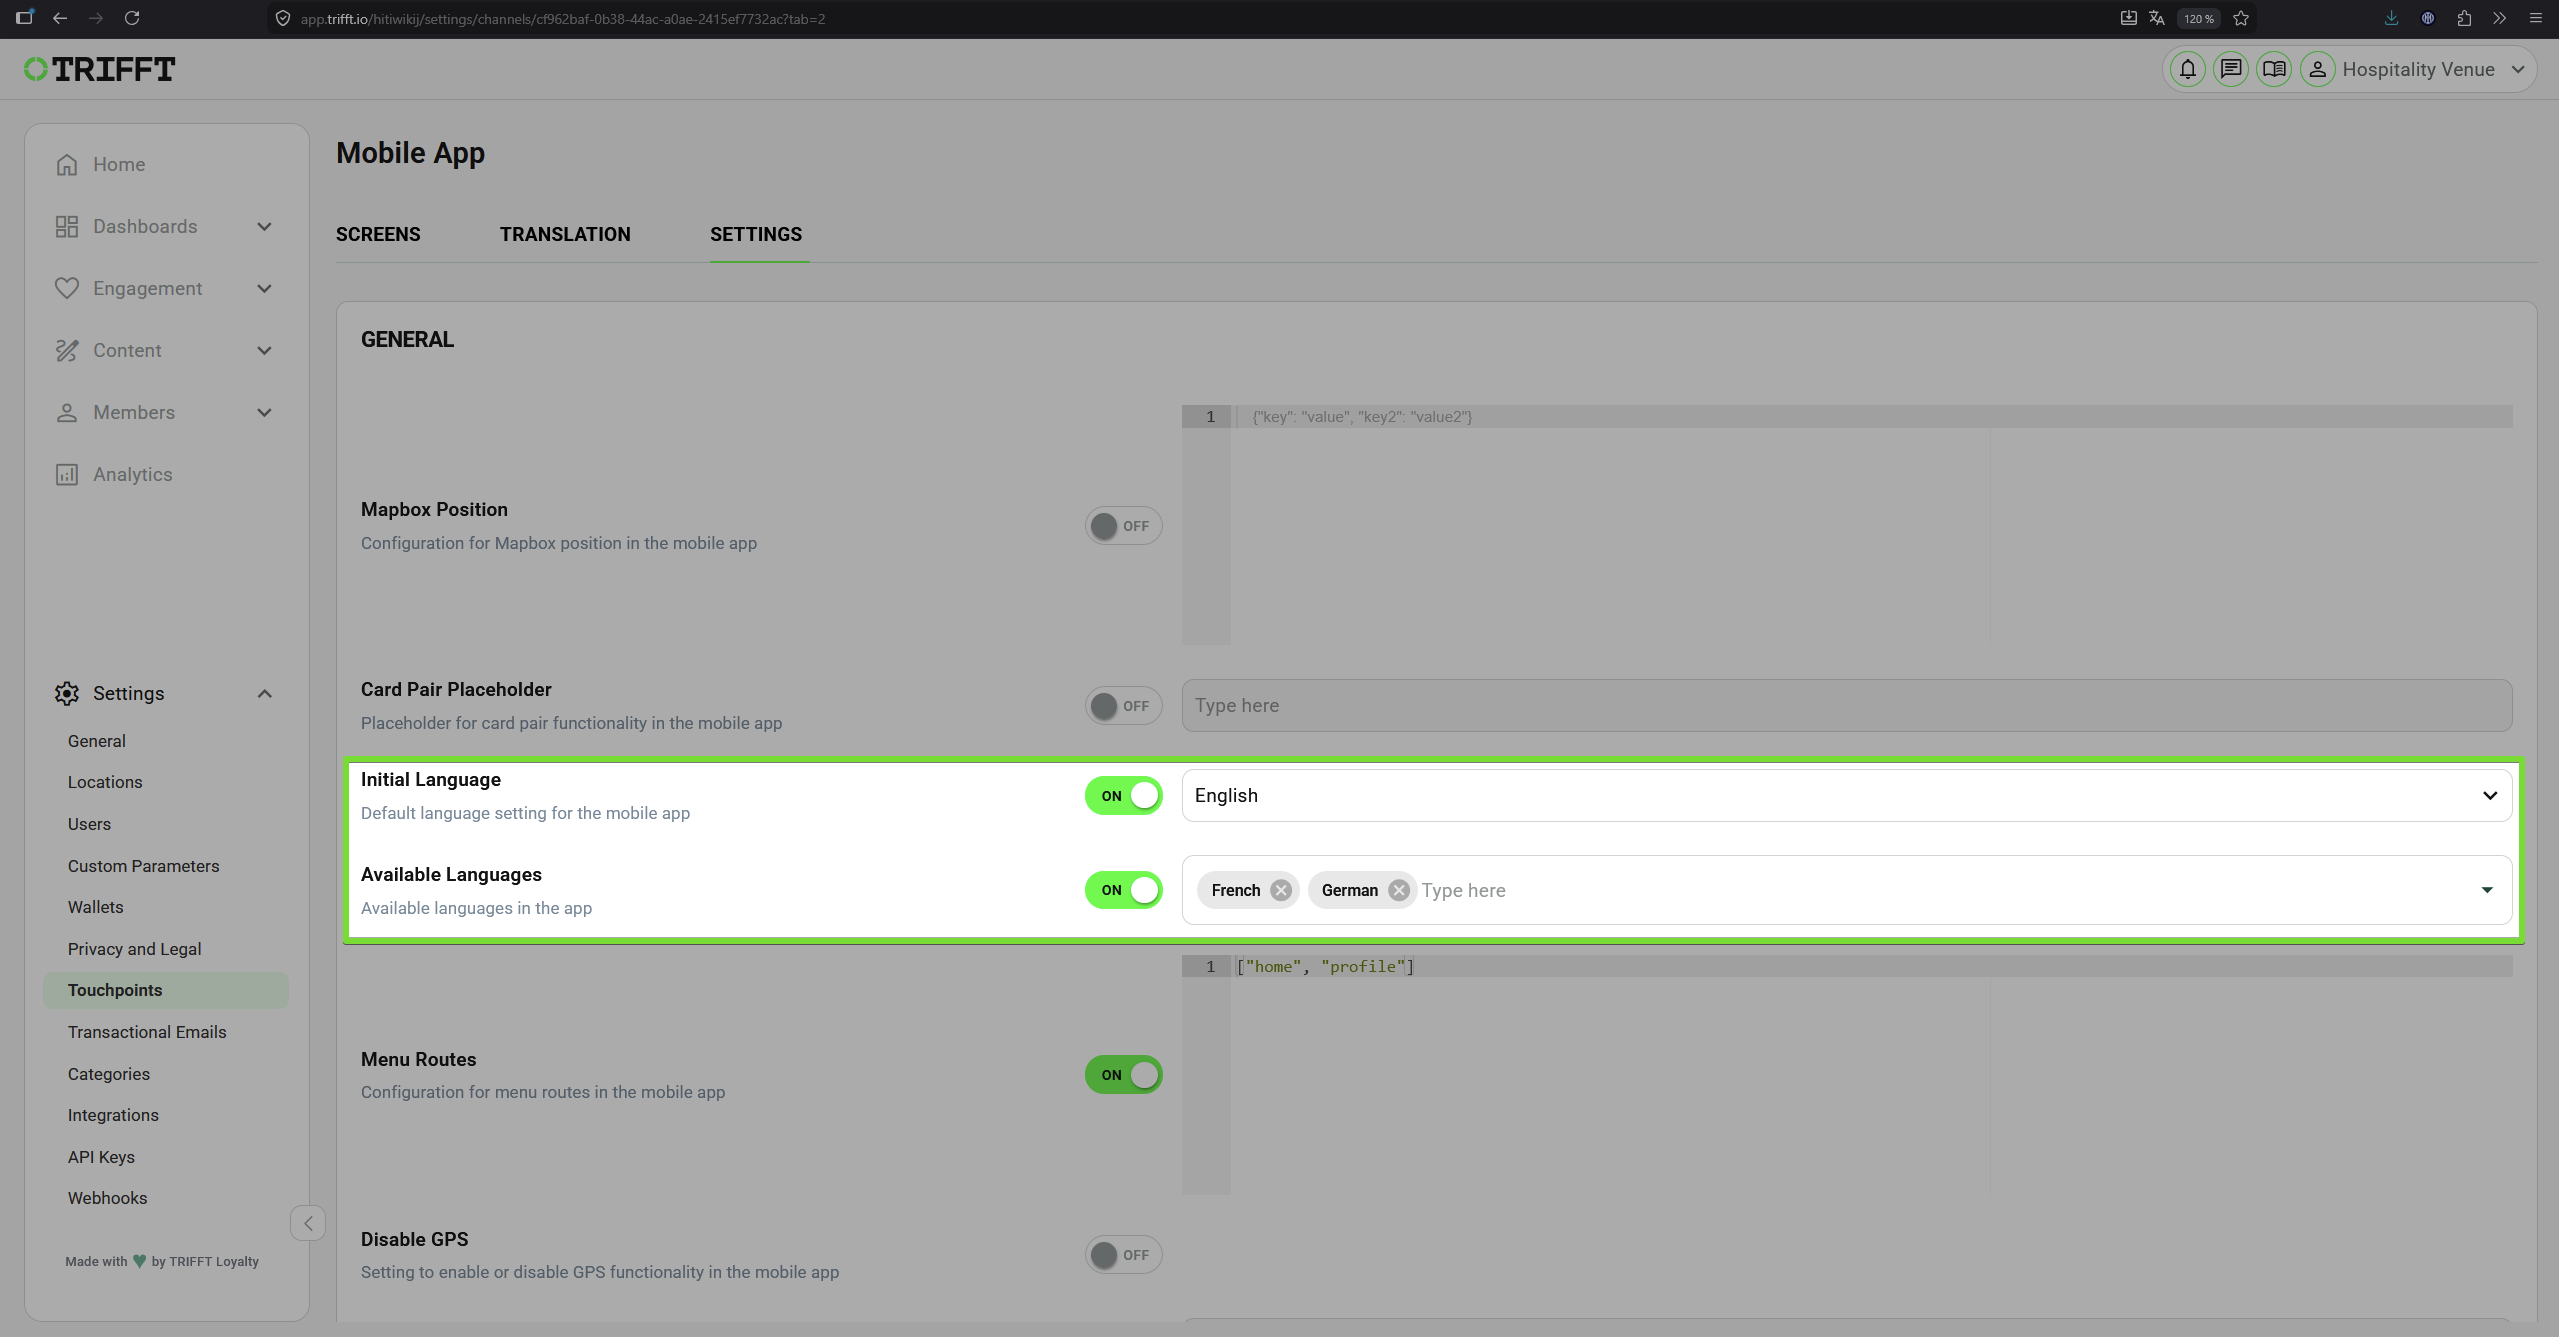
Language settings
4. Review the Translation Table
- Navigate to the Translation Table to view all system-default strings.
5. Add your translations
- Manually edit individual strings for your desired translations.
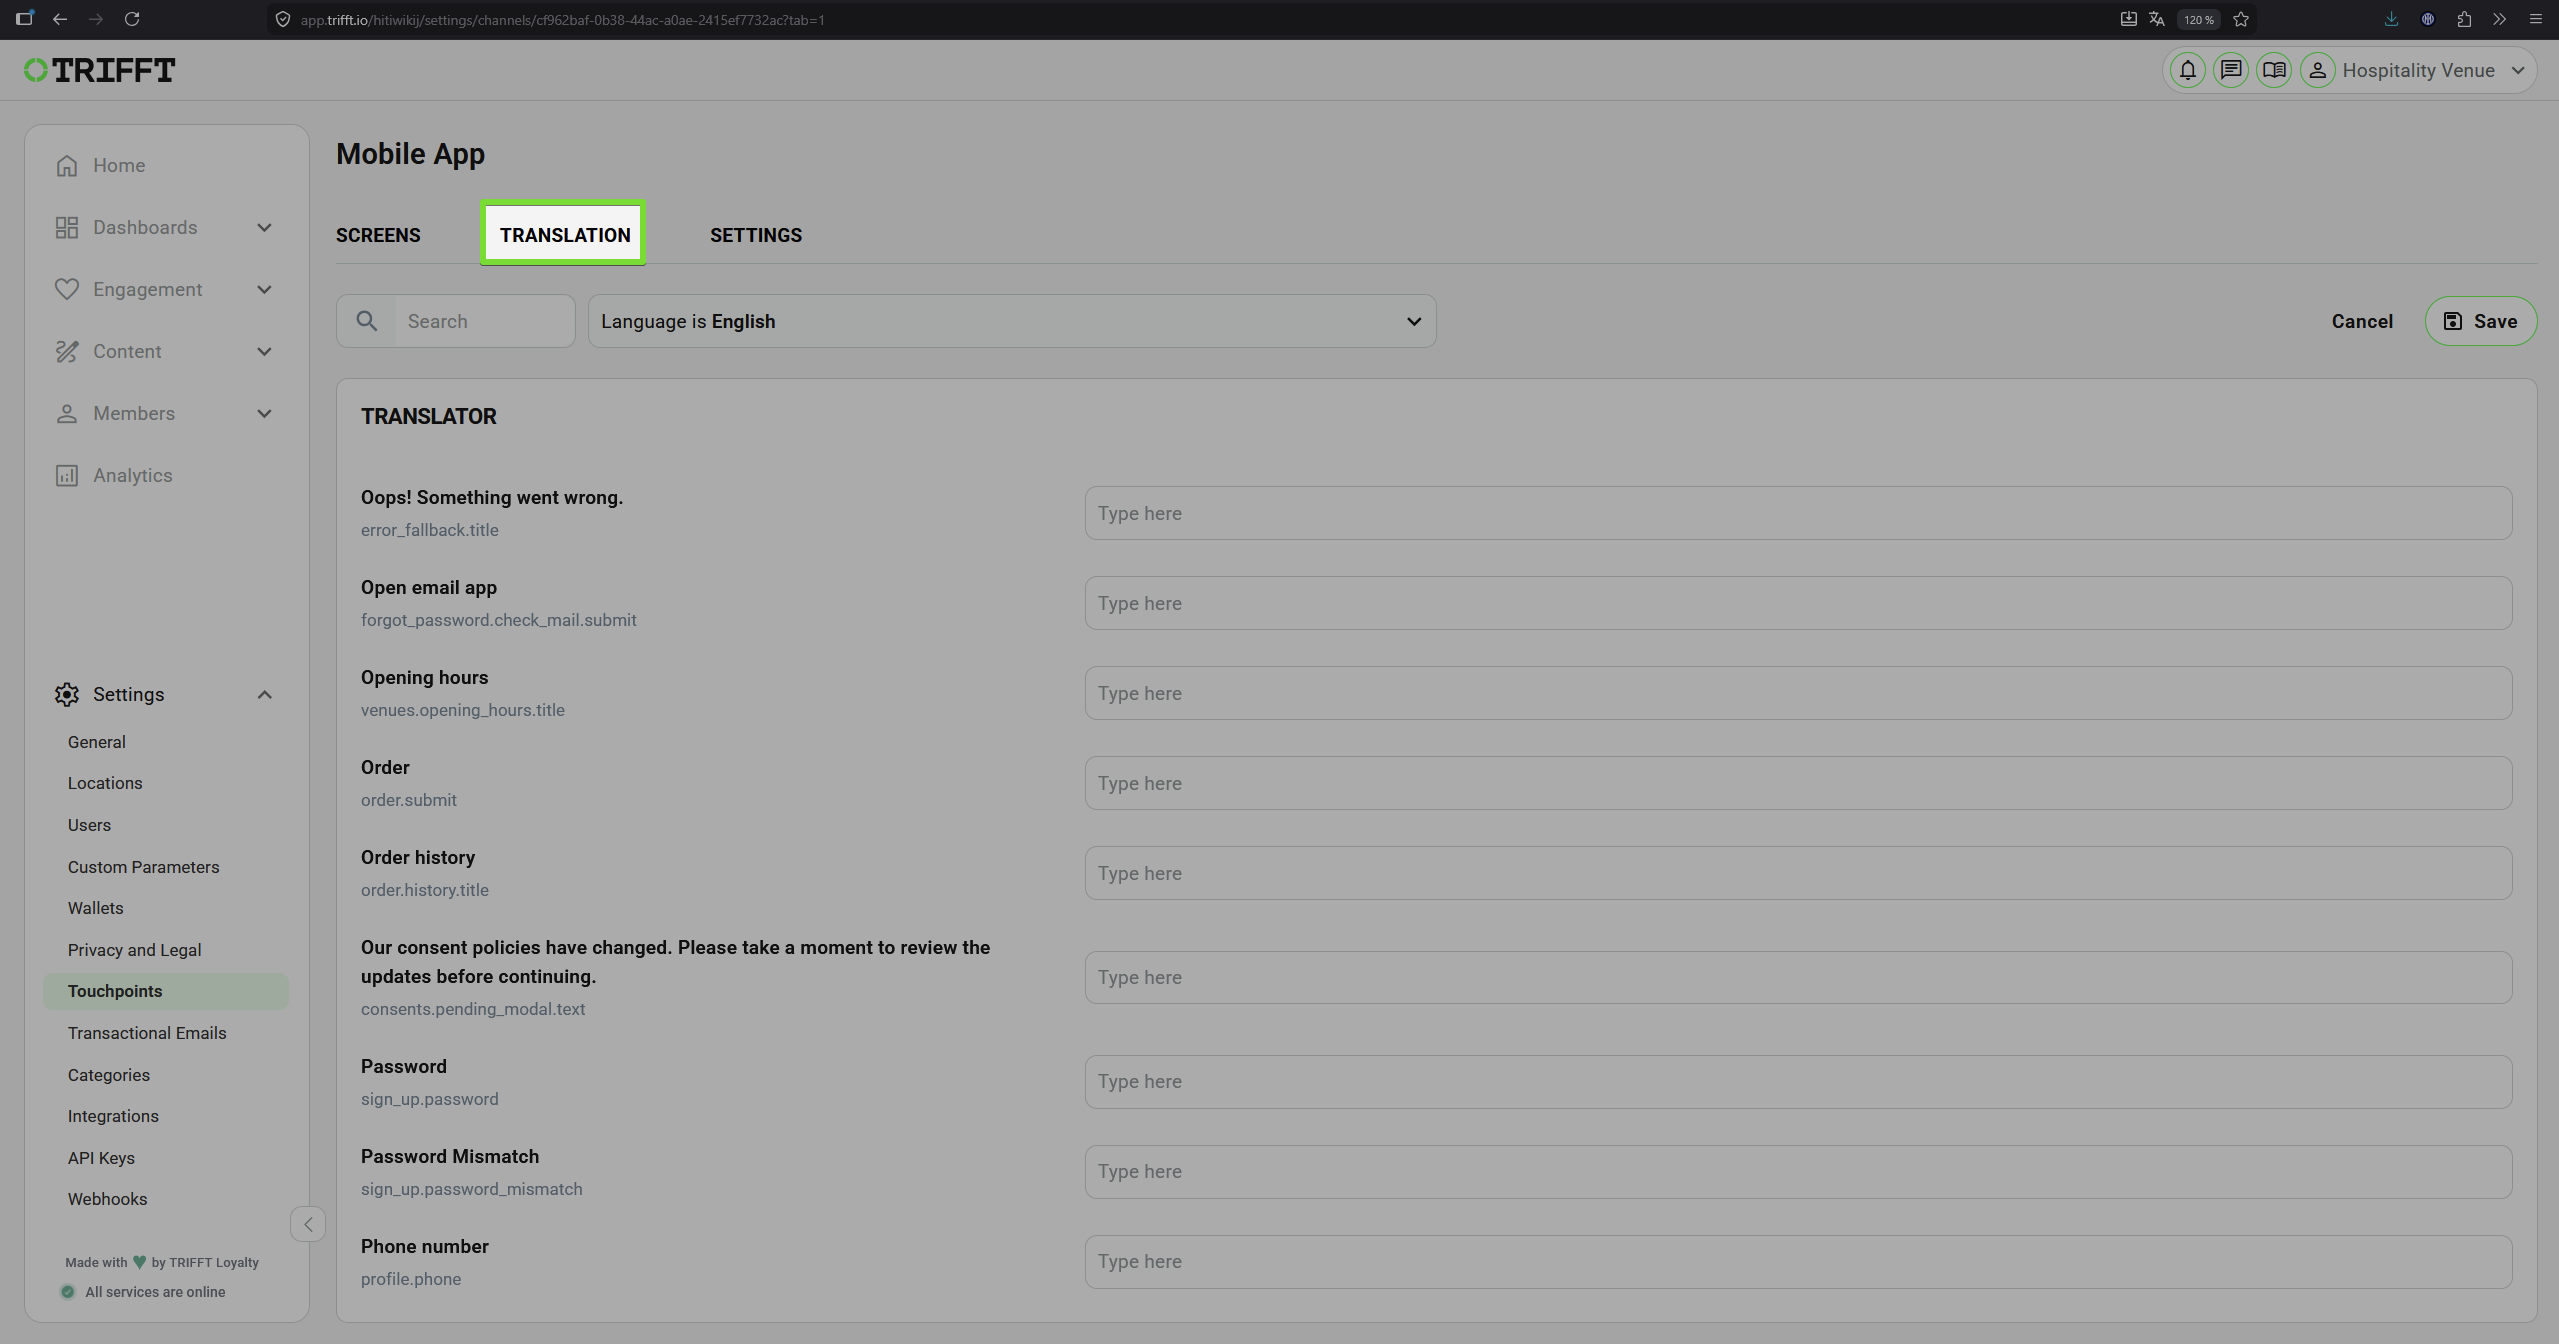
Review the Translation Table
7. Test the experience
- Switch your test user's Preferred Language property and verify that all UI elements render in the selected locale.
Configuration checklist
Run through this checklist before going live:
Encoding & Formatting
- UTF-8 encoding is used for special characters (accents, non-Latin scripts)
- Currency symbols and date formats align with the selected language
Content & Translations
- Mandatory fields are fully translated
- Emails have localized subject lines and pre-headers
Updated 3 months ago
Did this page help you?