
Consent Set Up
This Technical Setup Guide provides the configuration steps required to define and manage the Consents function within the TRIFFT Cockpit to ensure regulatory compliance and member privacy.
| Topic / function | Consents |
|---|---|
| Audience | CRM / Marketing Ops / Implementation |
| Goal | Provide step-by-step setup for privacy permissions and preference centers |
| Prereq systems | TRIFFT Cockpit, Integrated Marketing Tool (e.g., Klaviyo, Bloomreach) |
Create a new Consent
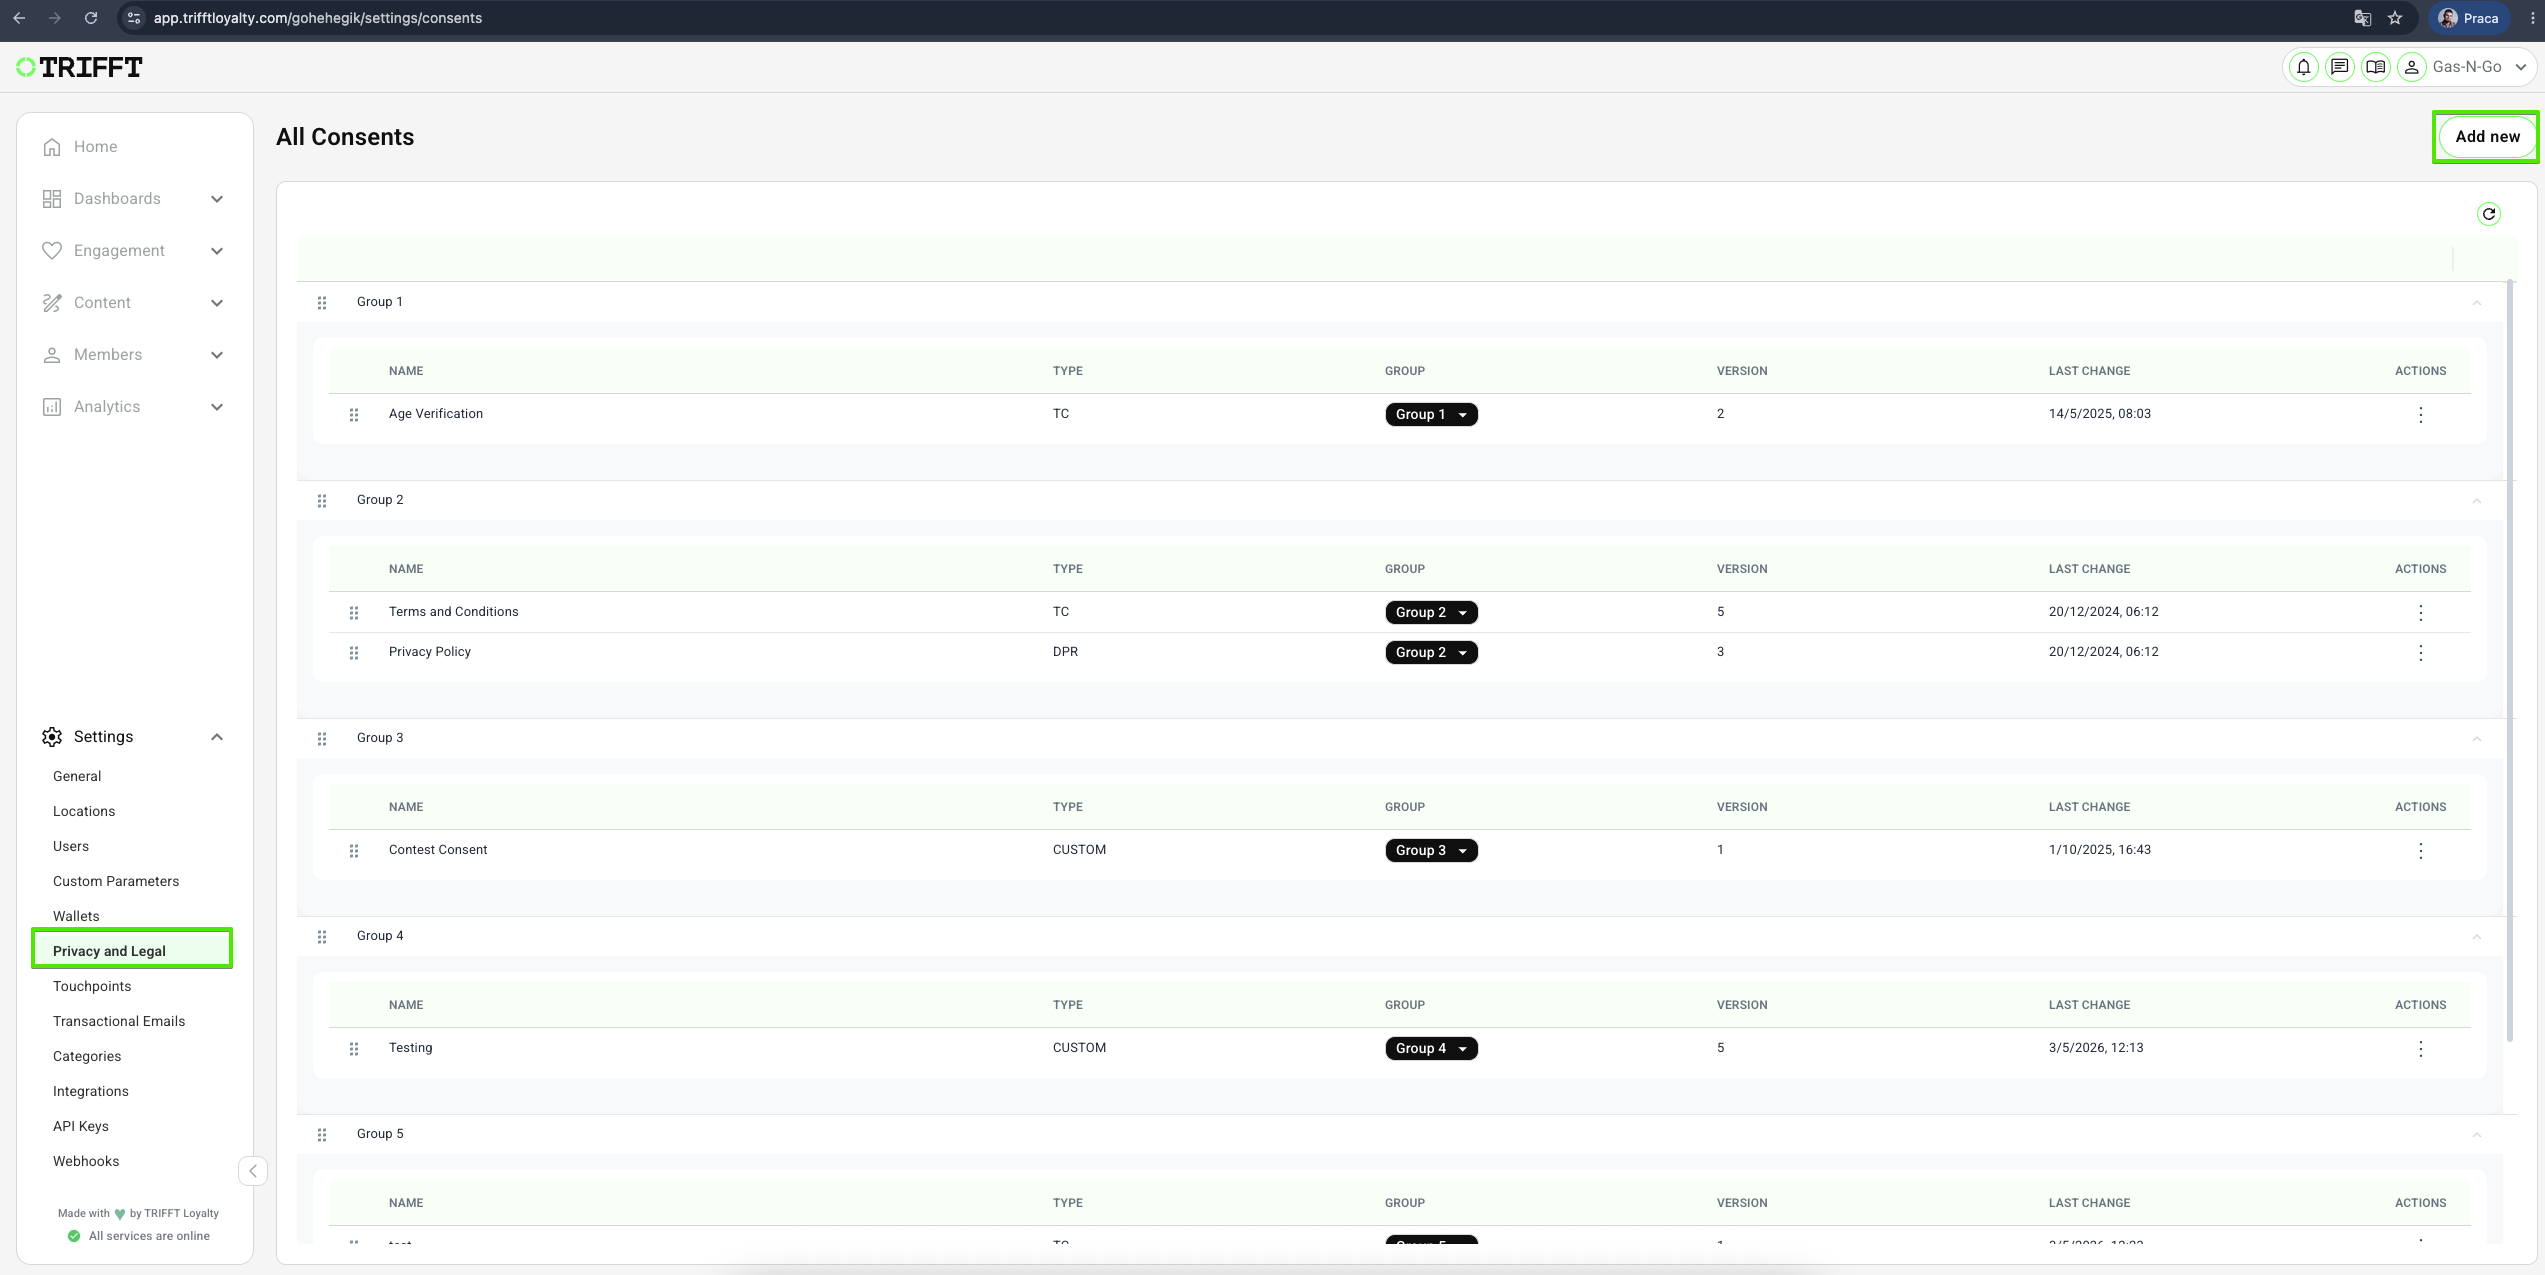
- Navigate to Settings > Privacy and Legal
- You will see a list of All Consents saved in your project.
- To create a new Consent, click the Add New button located in the top-right corner of the page.
Set up the basics
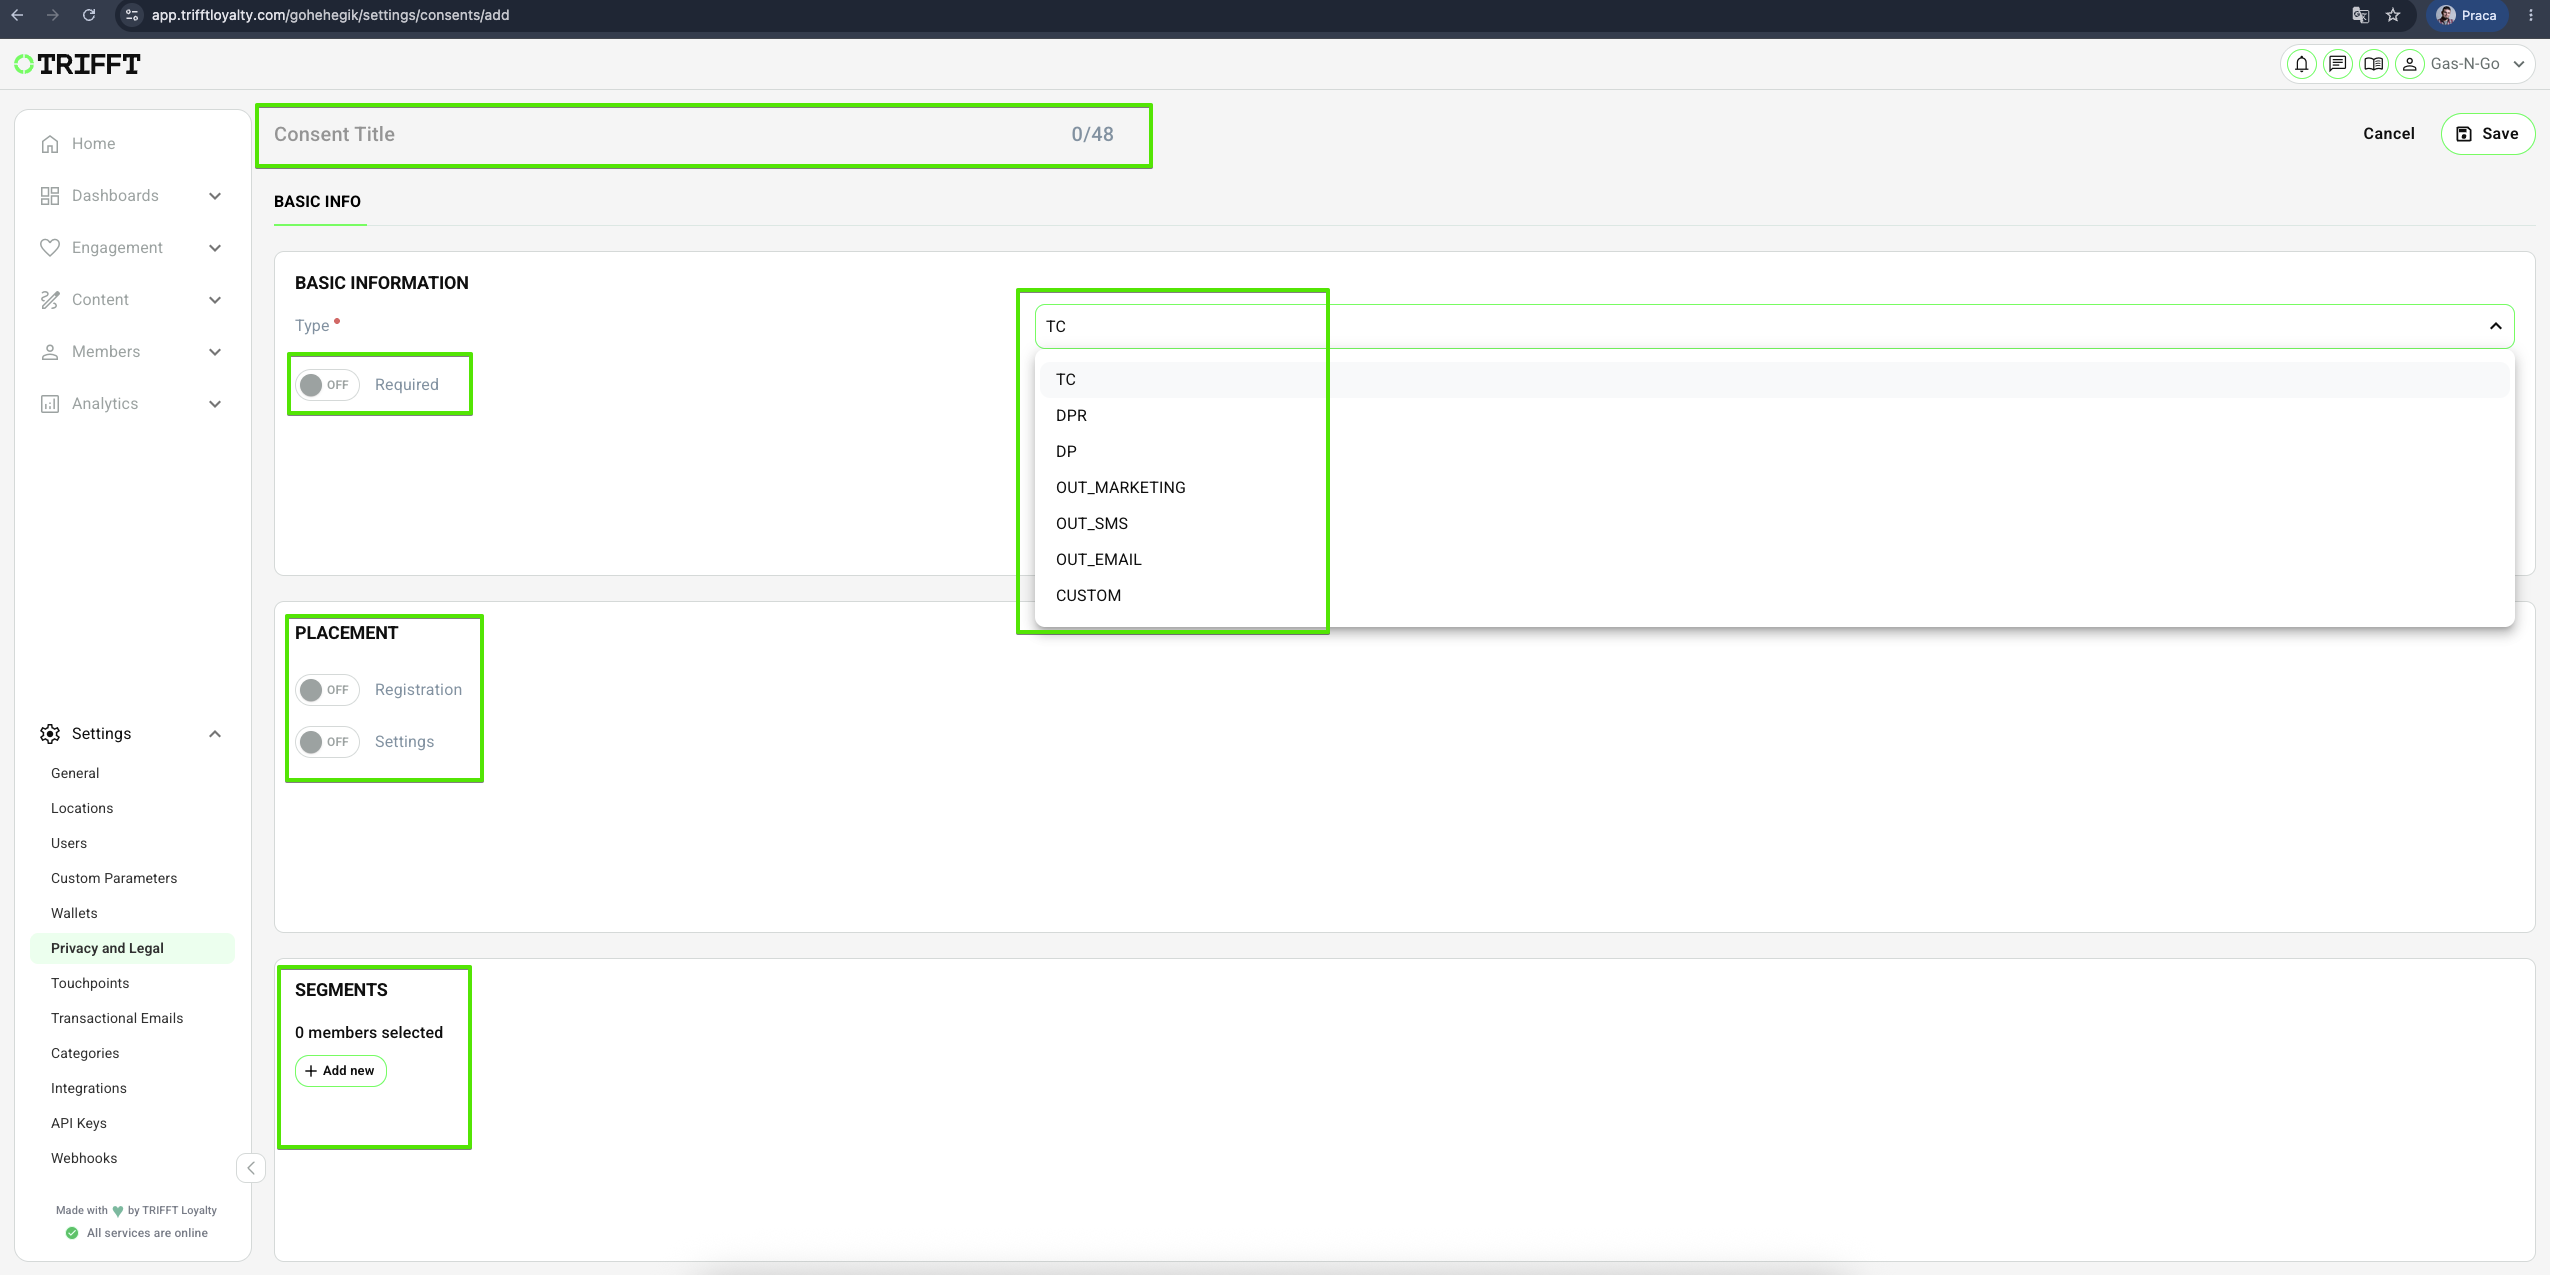
- Provide a Title
- Choose one of the types
Explanation of TypesTC = Terms & Conditions
DPR = Data Protection Regulations
DP = Data Protection
OUT_Marketing = General outbound marketing
OUT_SMS = Notification via SMS
OUT_EMAIL = Notification via E-mail
CUSTOM = Custom
- Set up other optional functions:
| Function | Description |
|---|---|
| Required | If consent is mandatory, the user can't register without ticking the checkbox If consent is not mandatory, the user can proceed with the registration without sliding the bar
|
| Registration placement | This consent will be asked upon registration. |
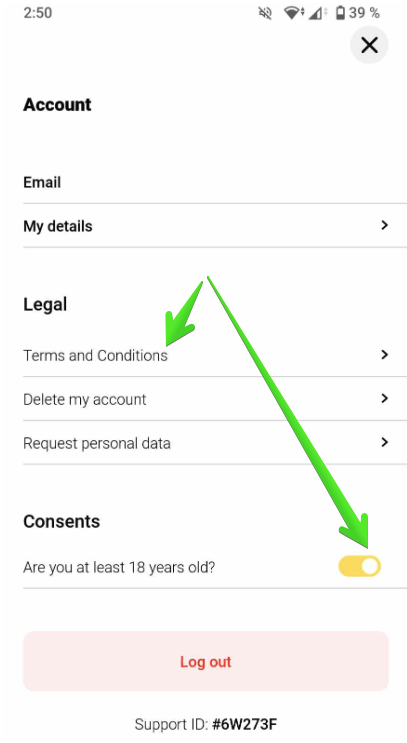
| Settings placement | This consent can be seen in settings as well, and the customer can change the approval later. |
| Segments | You can select a segment |
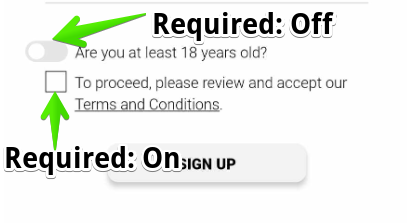
Required consents that could not be toggled off will appear in Legal Information. Not required consent will show in the Consents category
- Click Save in the top right corner
Set up the version
- Once the basics are set up, click on the Versions tab and choose what version of consent you are about to create.
- Click on the plus symbol, choose simple or complex, and confirm your choice.
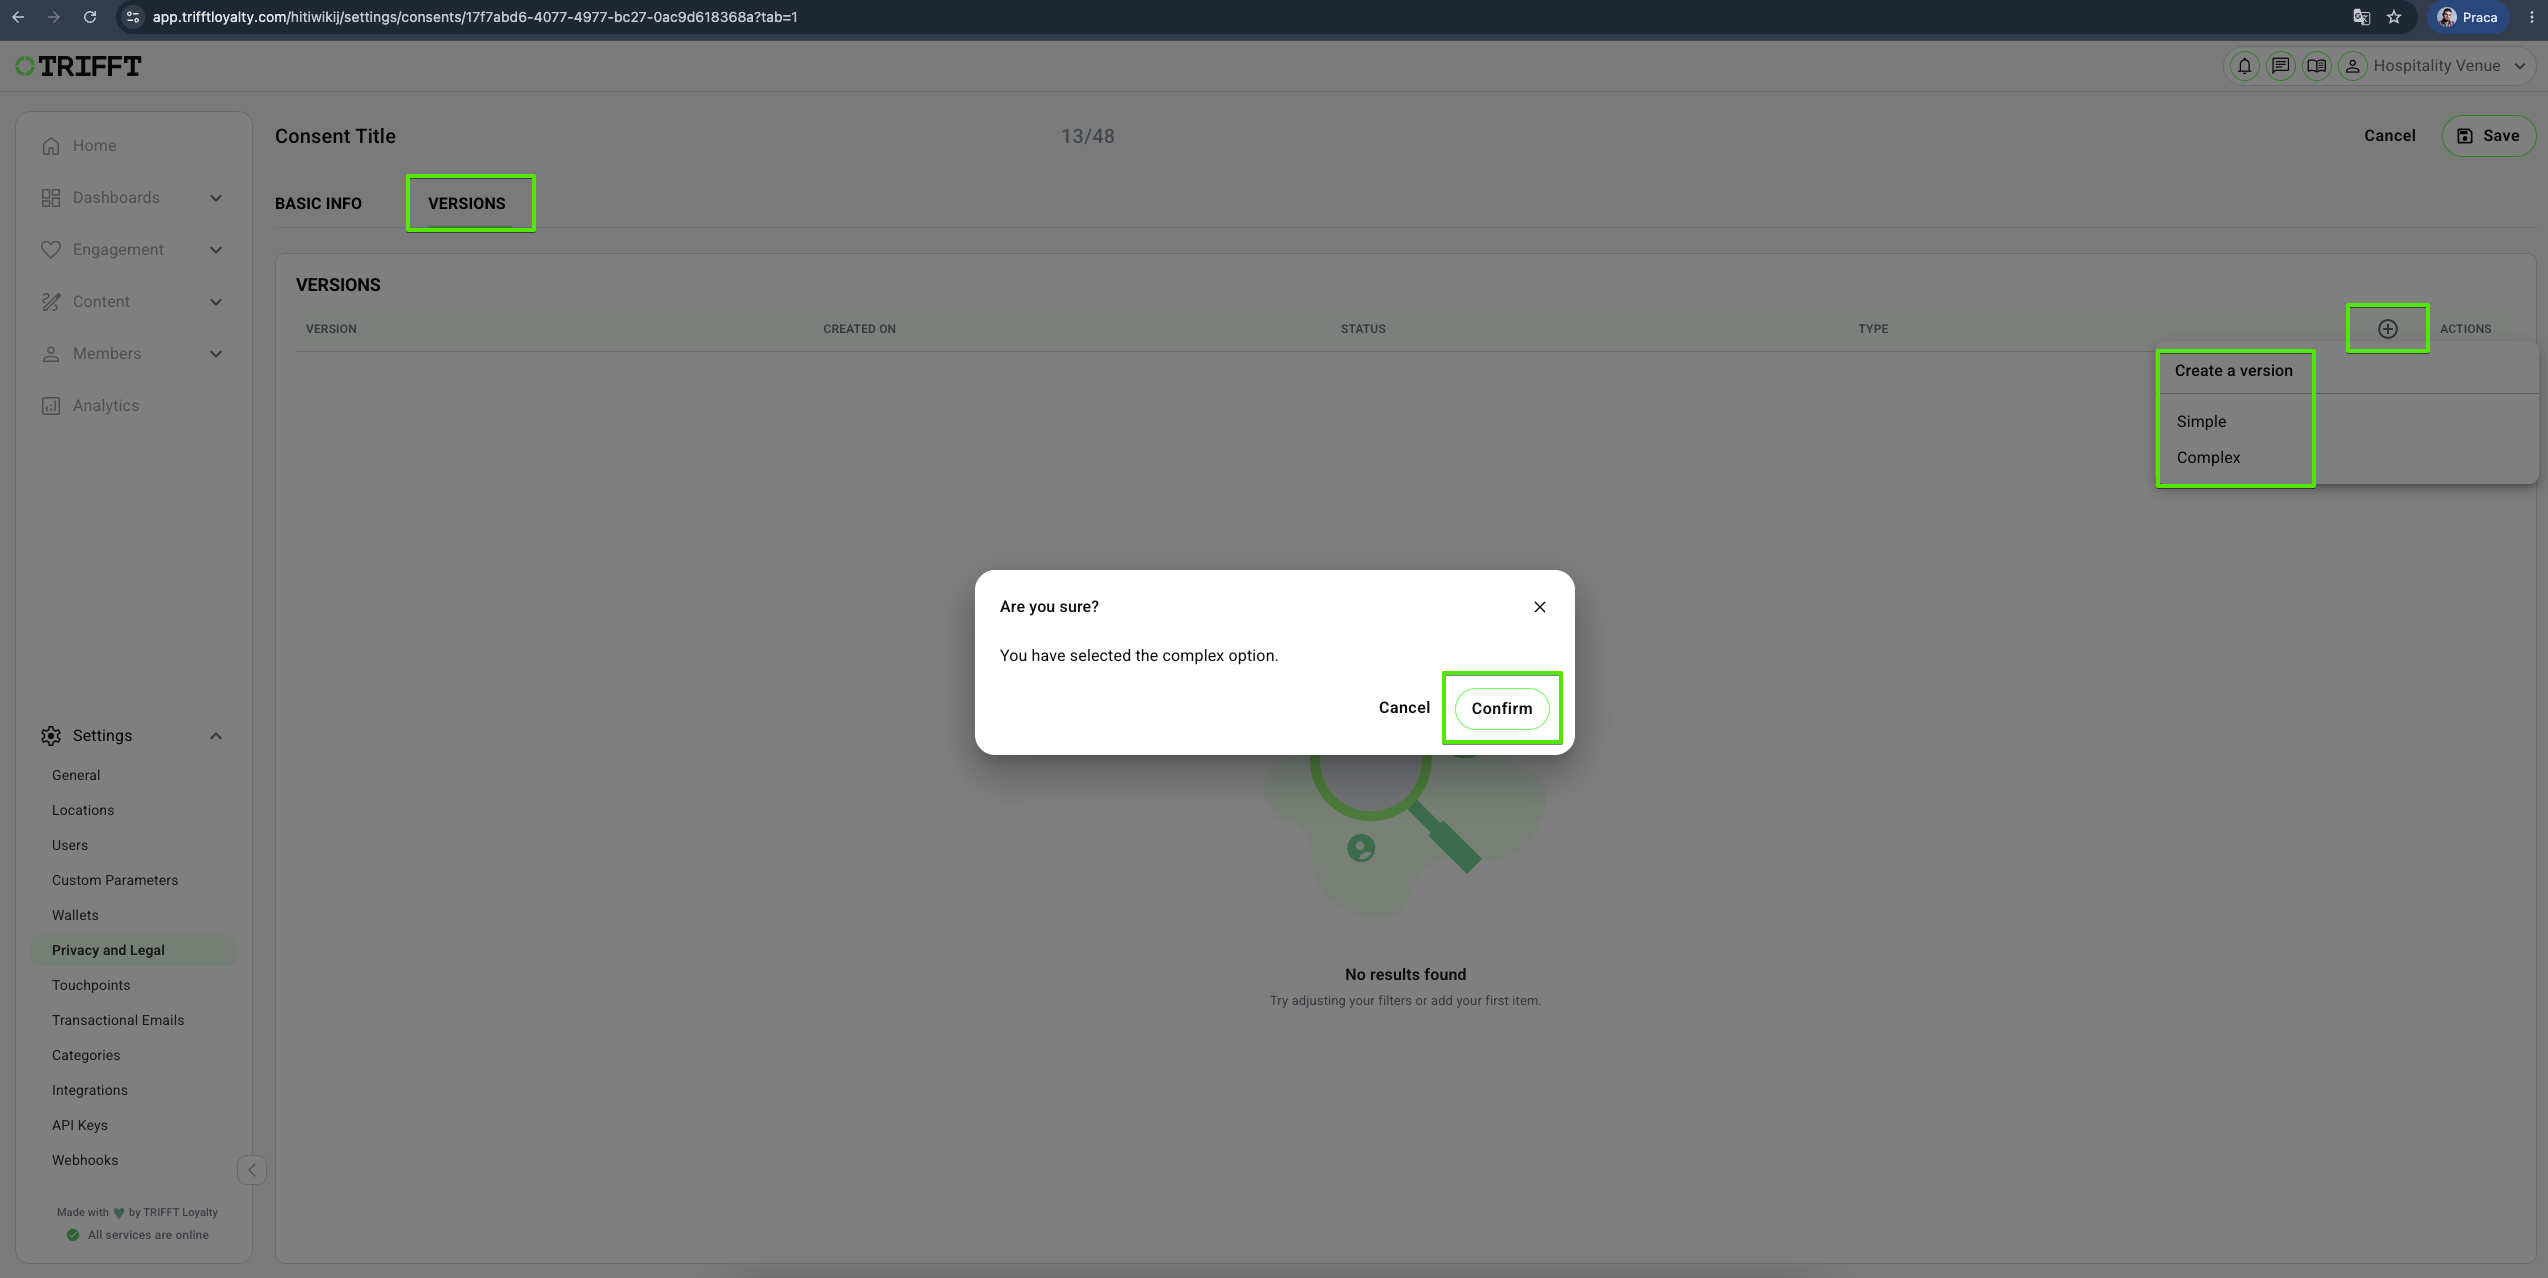
Would you like to change already existing consents?Navigate to this screen where you can find the list of all versions and just create their new version.
Creating a Simple consent version
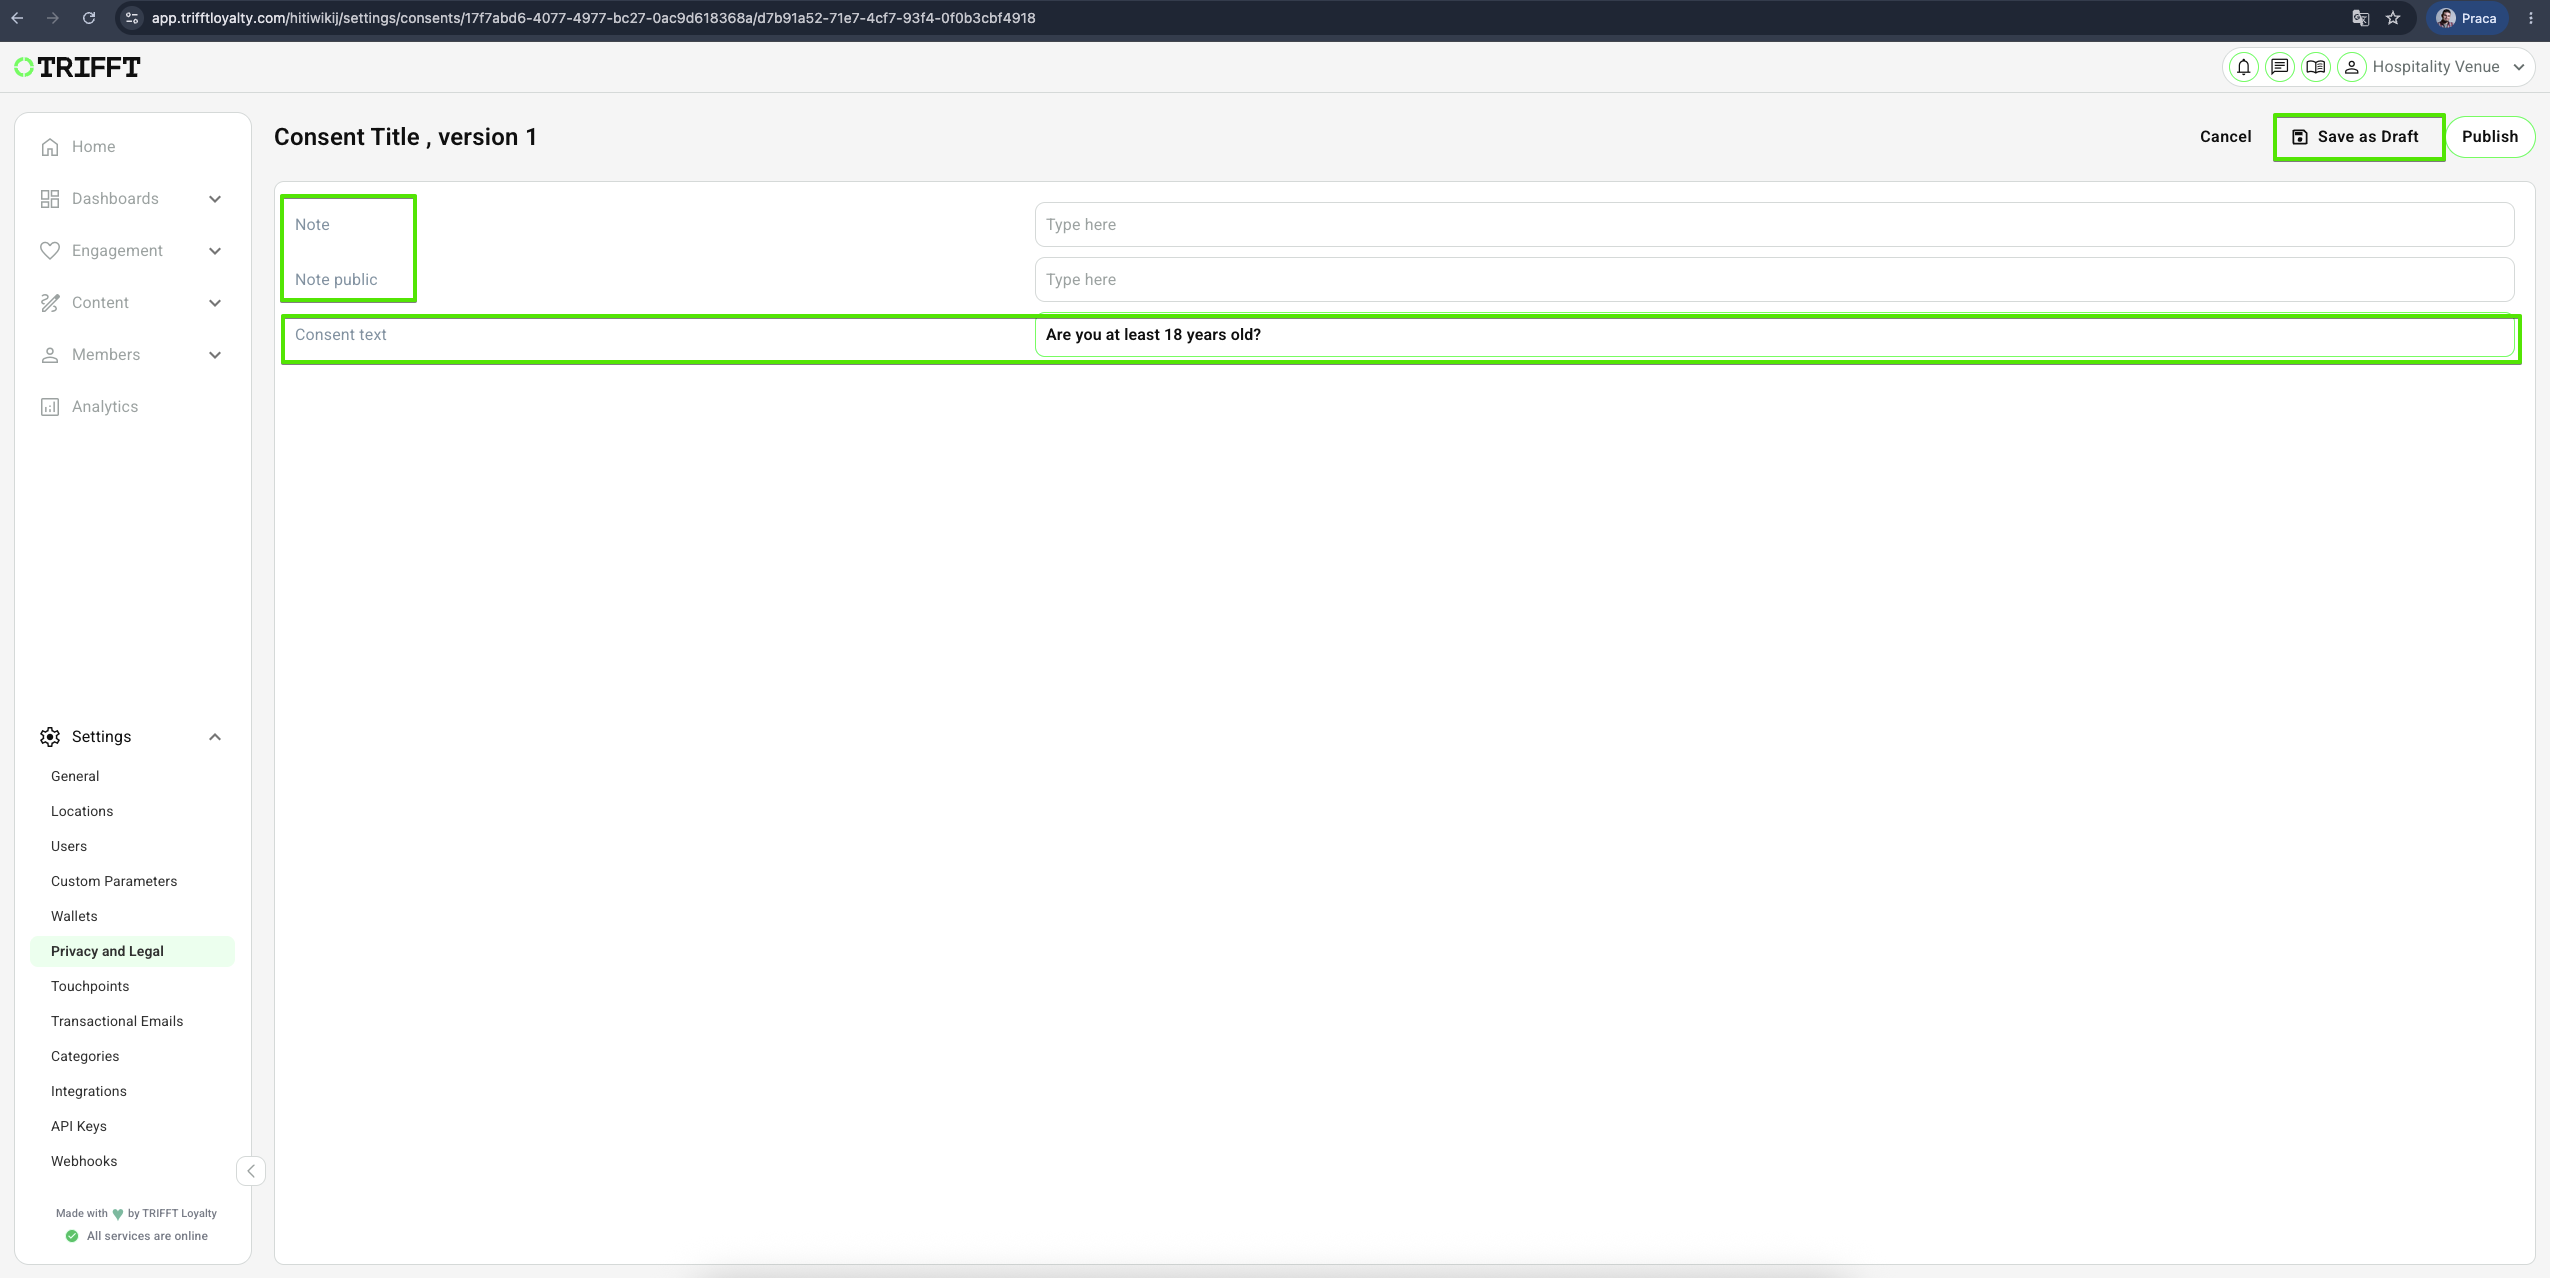
- Fill the Note, which will help you identify the consent in the future, and Note public, which will be visible to the customer.
- Both Note and Note Public can remain empty. Note Public is used to notify users about a new version of the consent. If Note Public is empty, the consent text will be displayed as the notification instead.
- Fill in the text of your consent, which will appear in the app.
- Confirm the settings with the Save as Draft button in the top right corner.
-
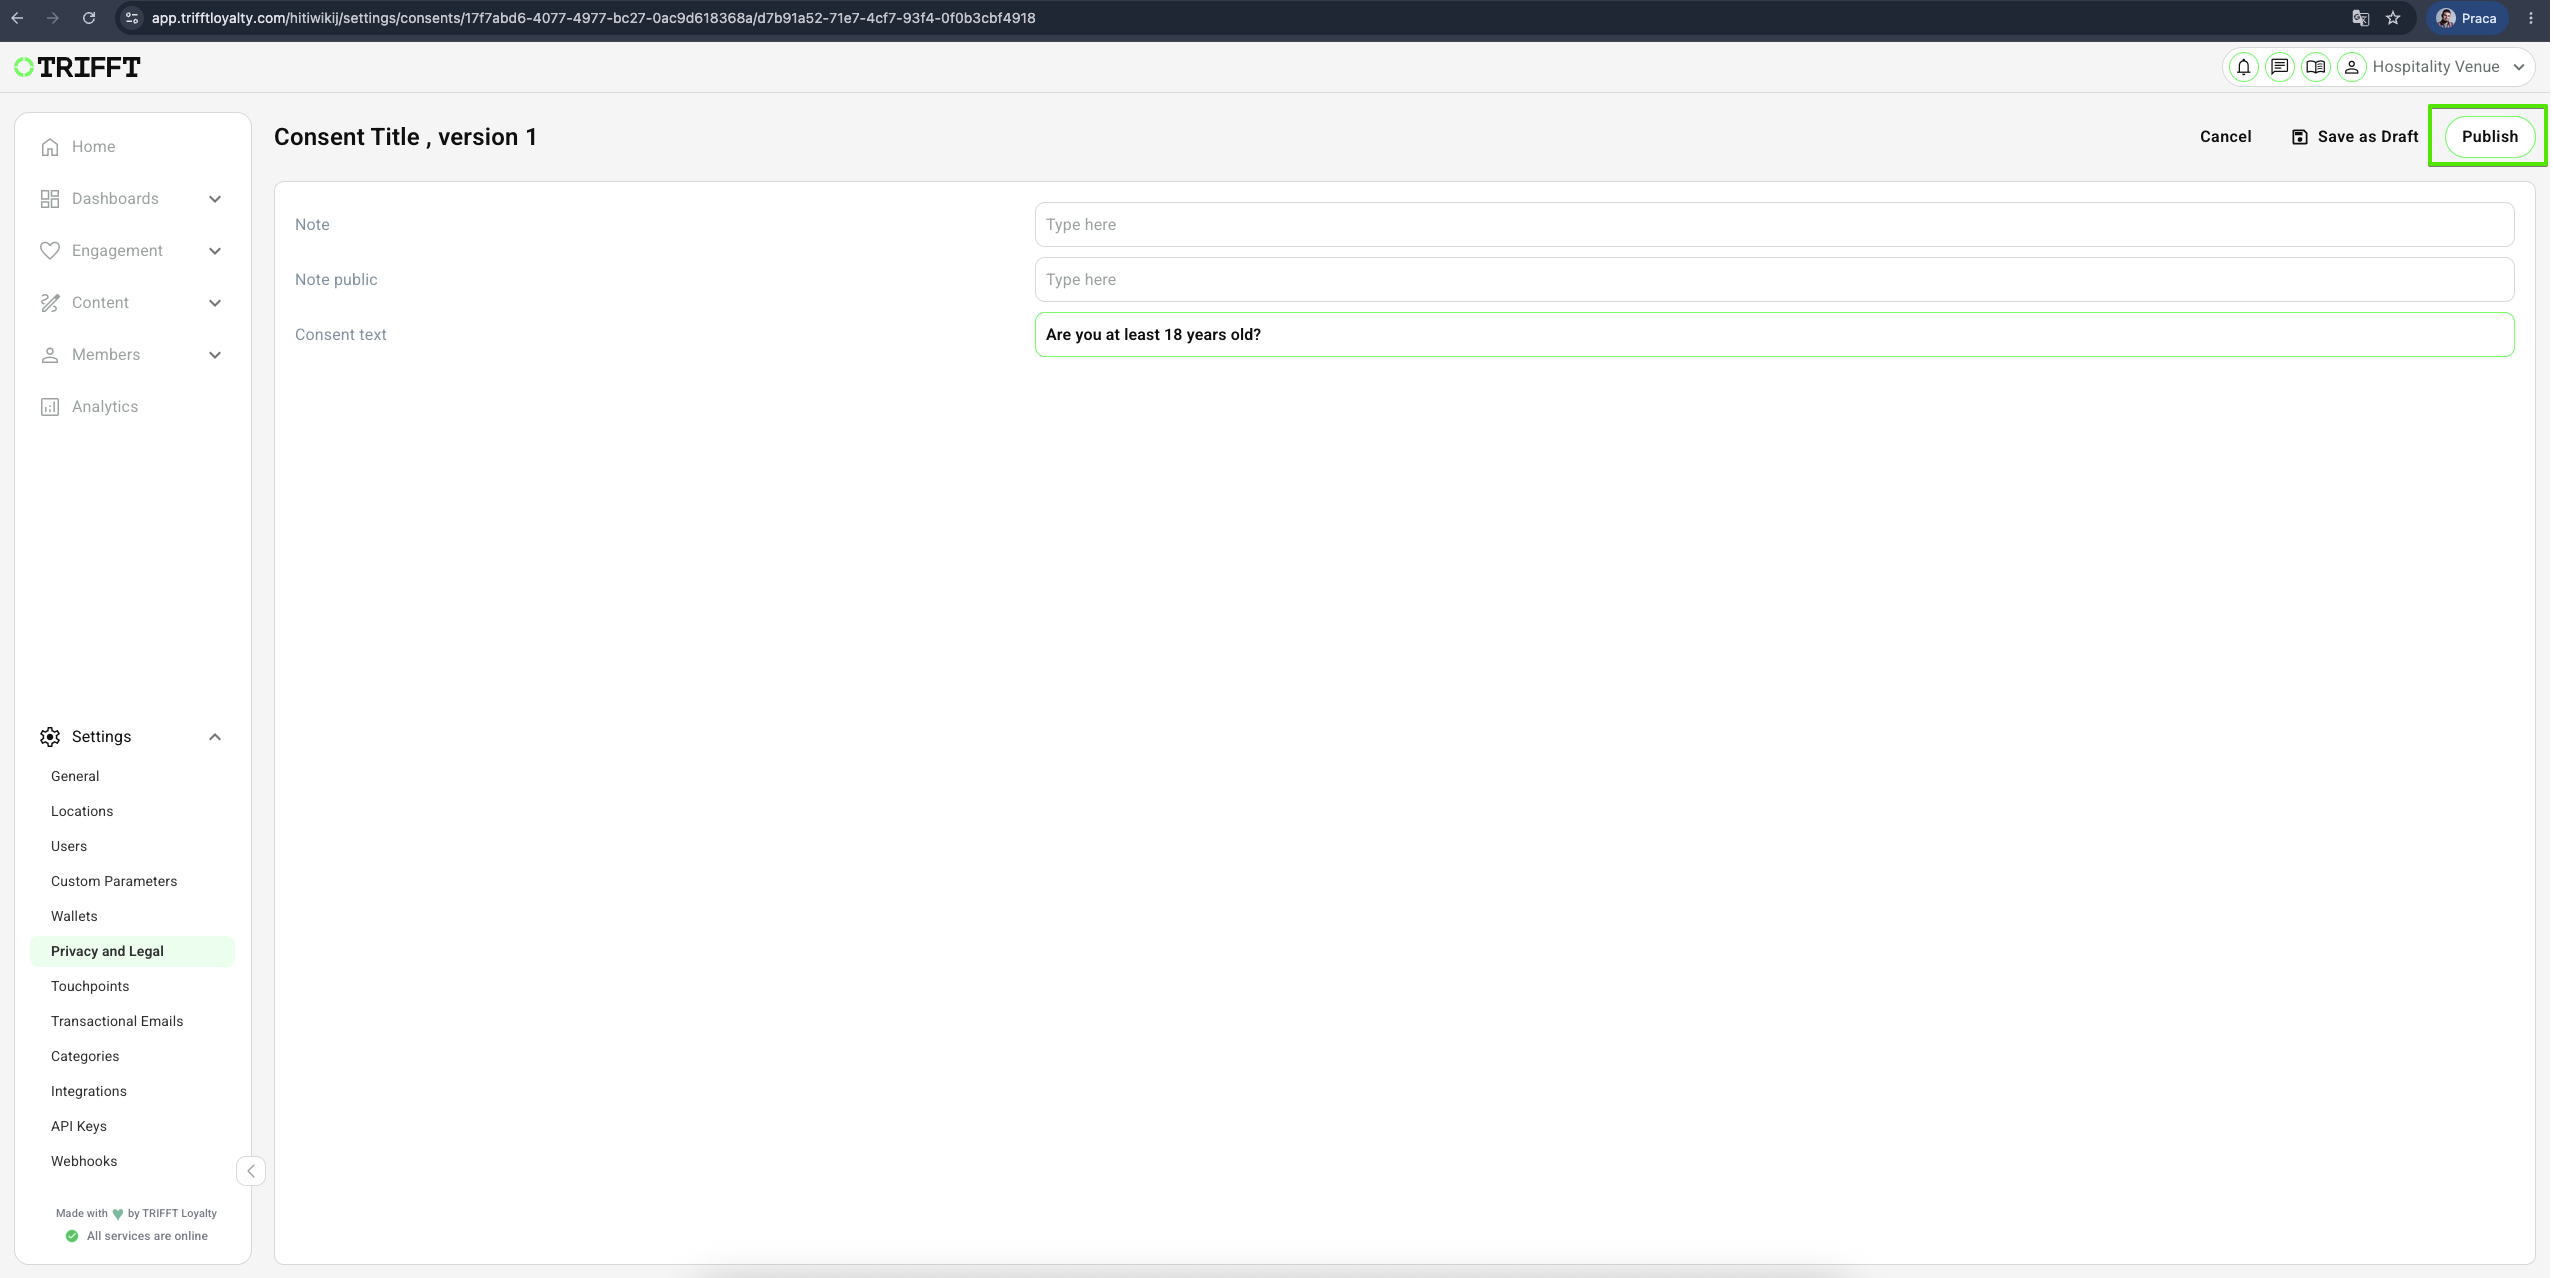
Once the version is created and saved as a draft, it's time to publish it.
-
Click on the Publish button in the top right corner to make the consent visible in the app.
Creating a complex consent version
-
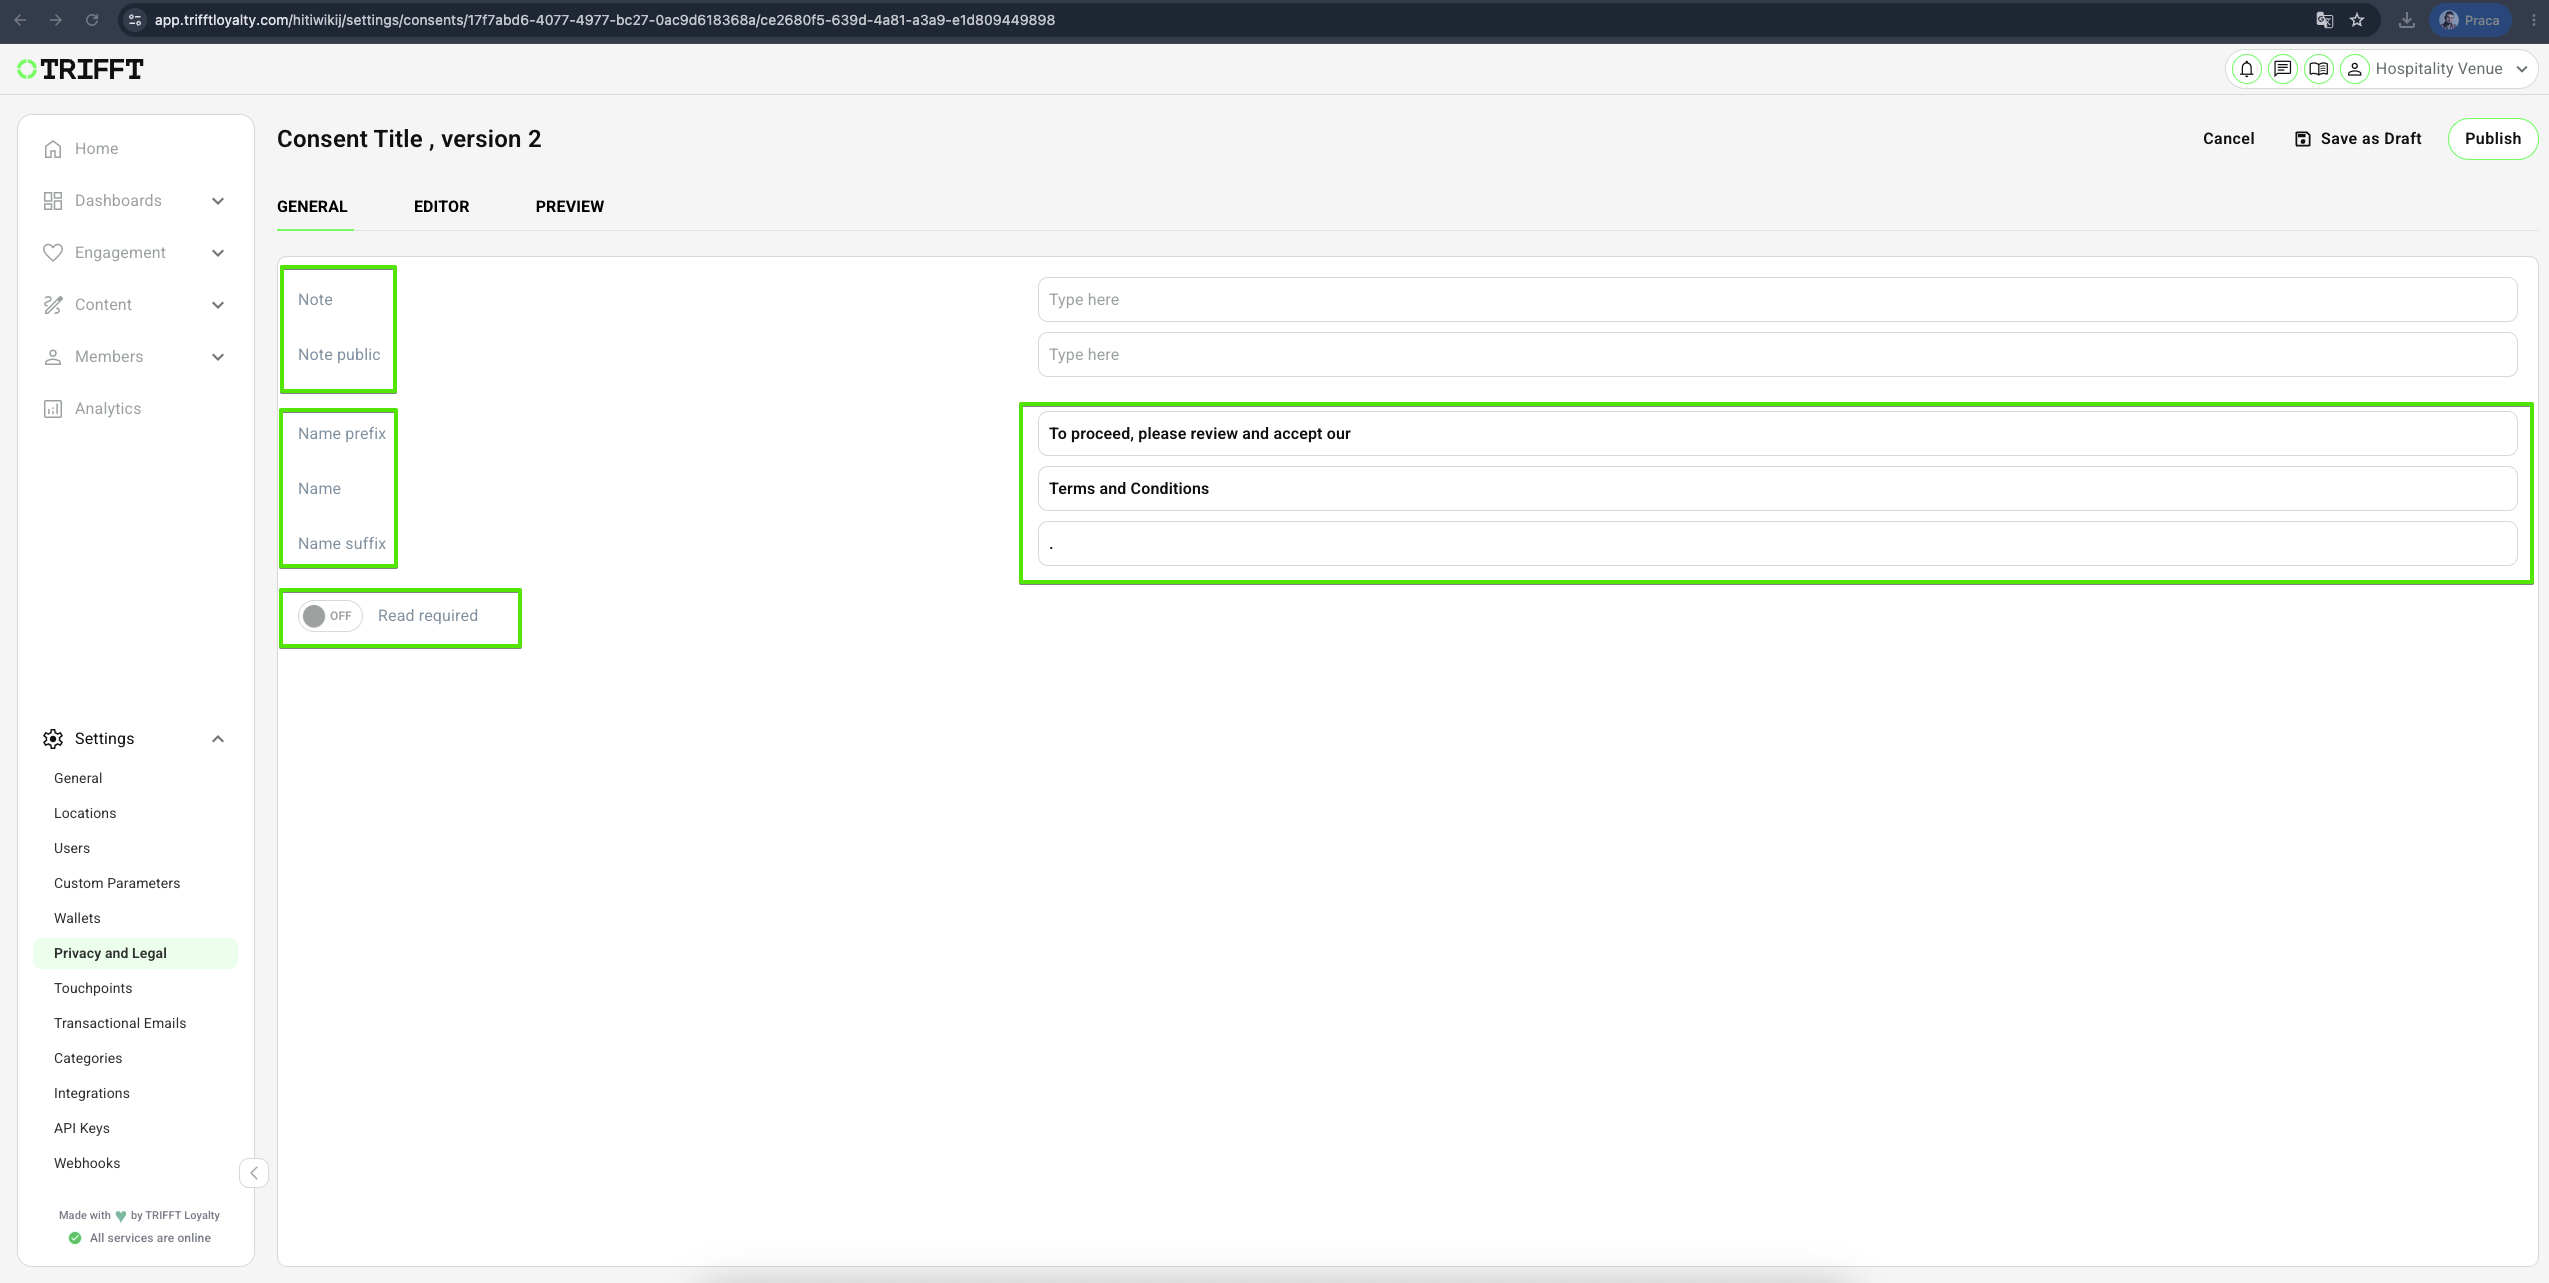
Fill the Note, which will help you identify the consent in the future, and Note public which will be visible for customer.
-
Both Note and Note Public can remain empty. Note Public is used to notify users about a new version of the consent. If Note Public is empty, the consent text will be displayed as the notification instead.
-
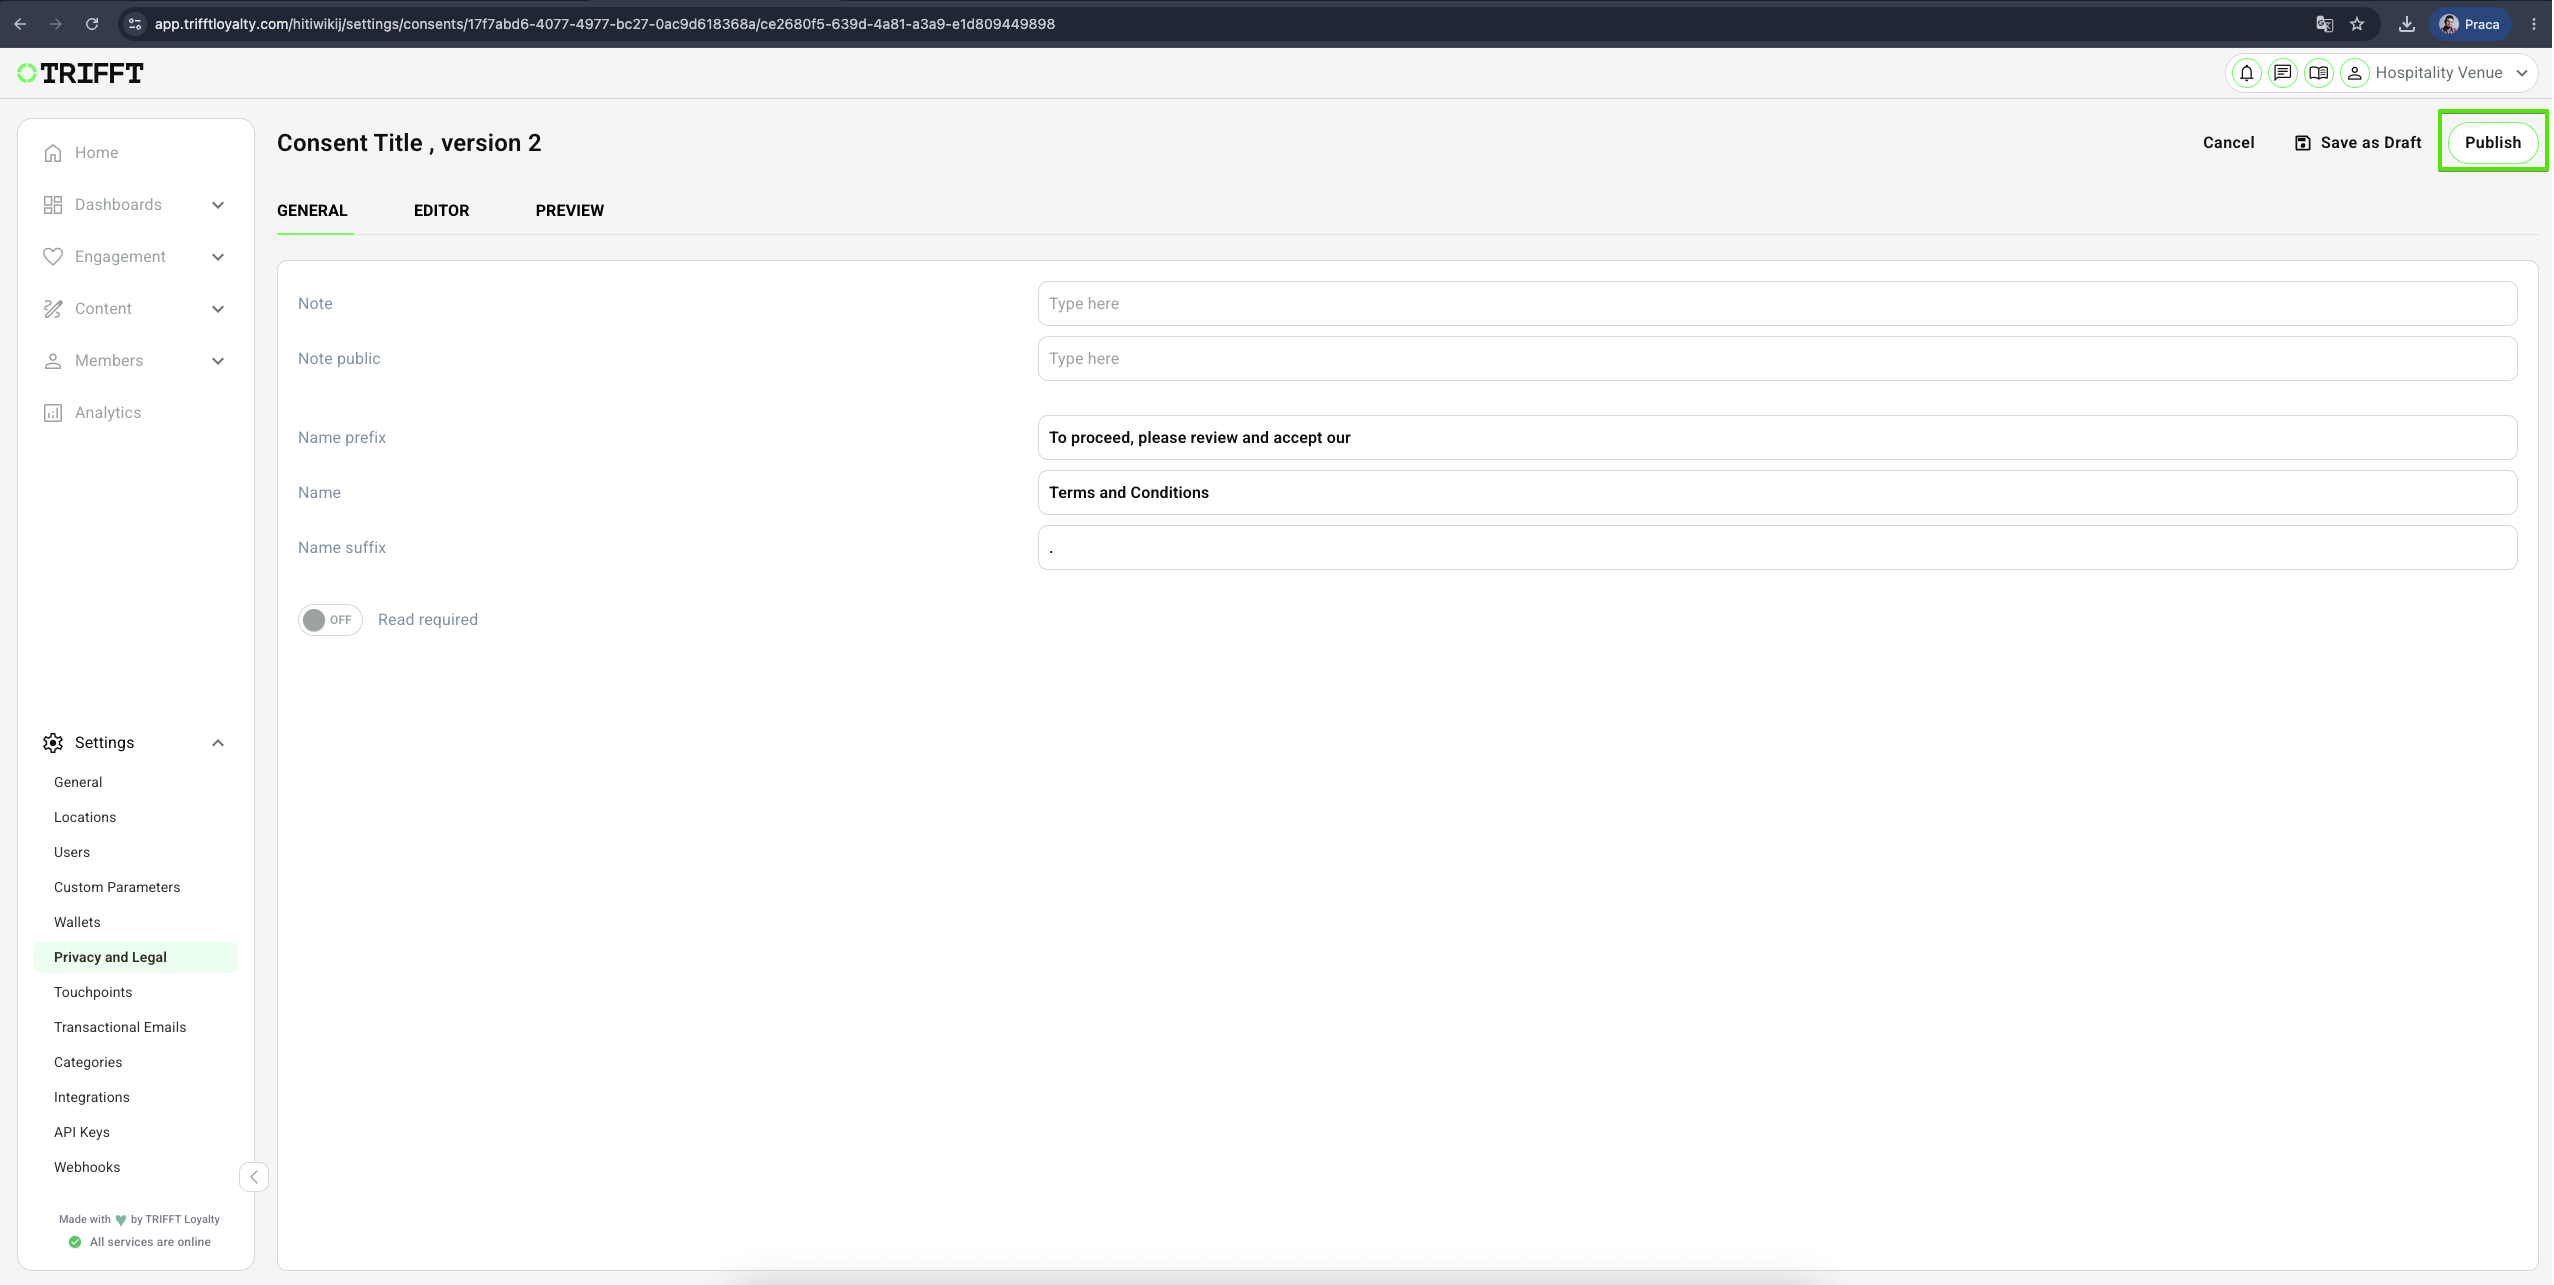
Set up the proper naming of the consent:
| Name | Description |
|---|---|
| Name prefix | Text before consent link (incl. spaces) |
| Name | Consent hyperlink to see consent details |
| Name suffix | Text after Consent link (incl. spaces) |

- Select the Read required checkbox if you require users to open and view the full consent before it can be accepted.
-
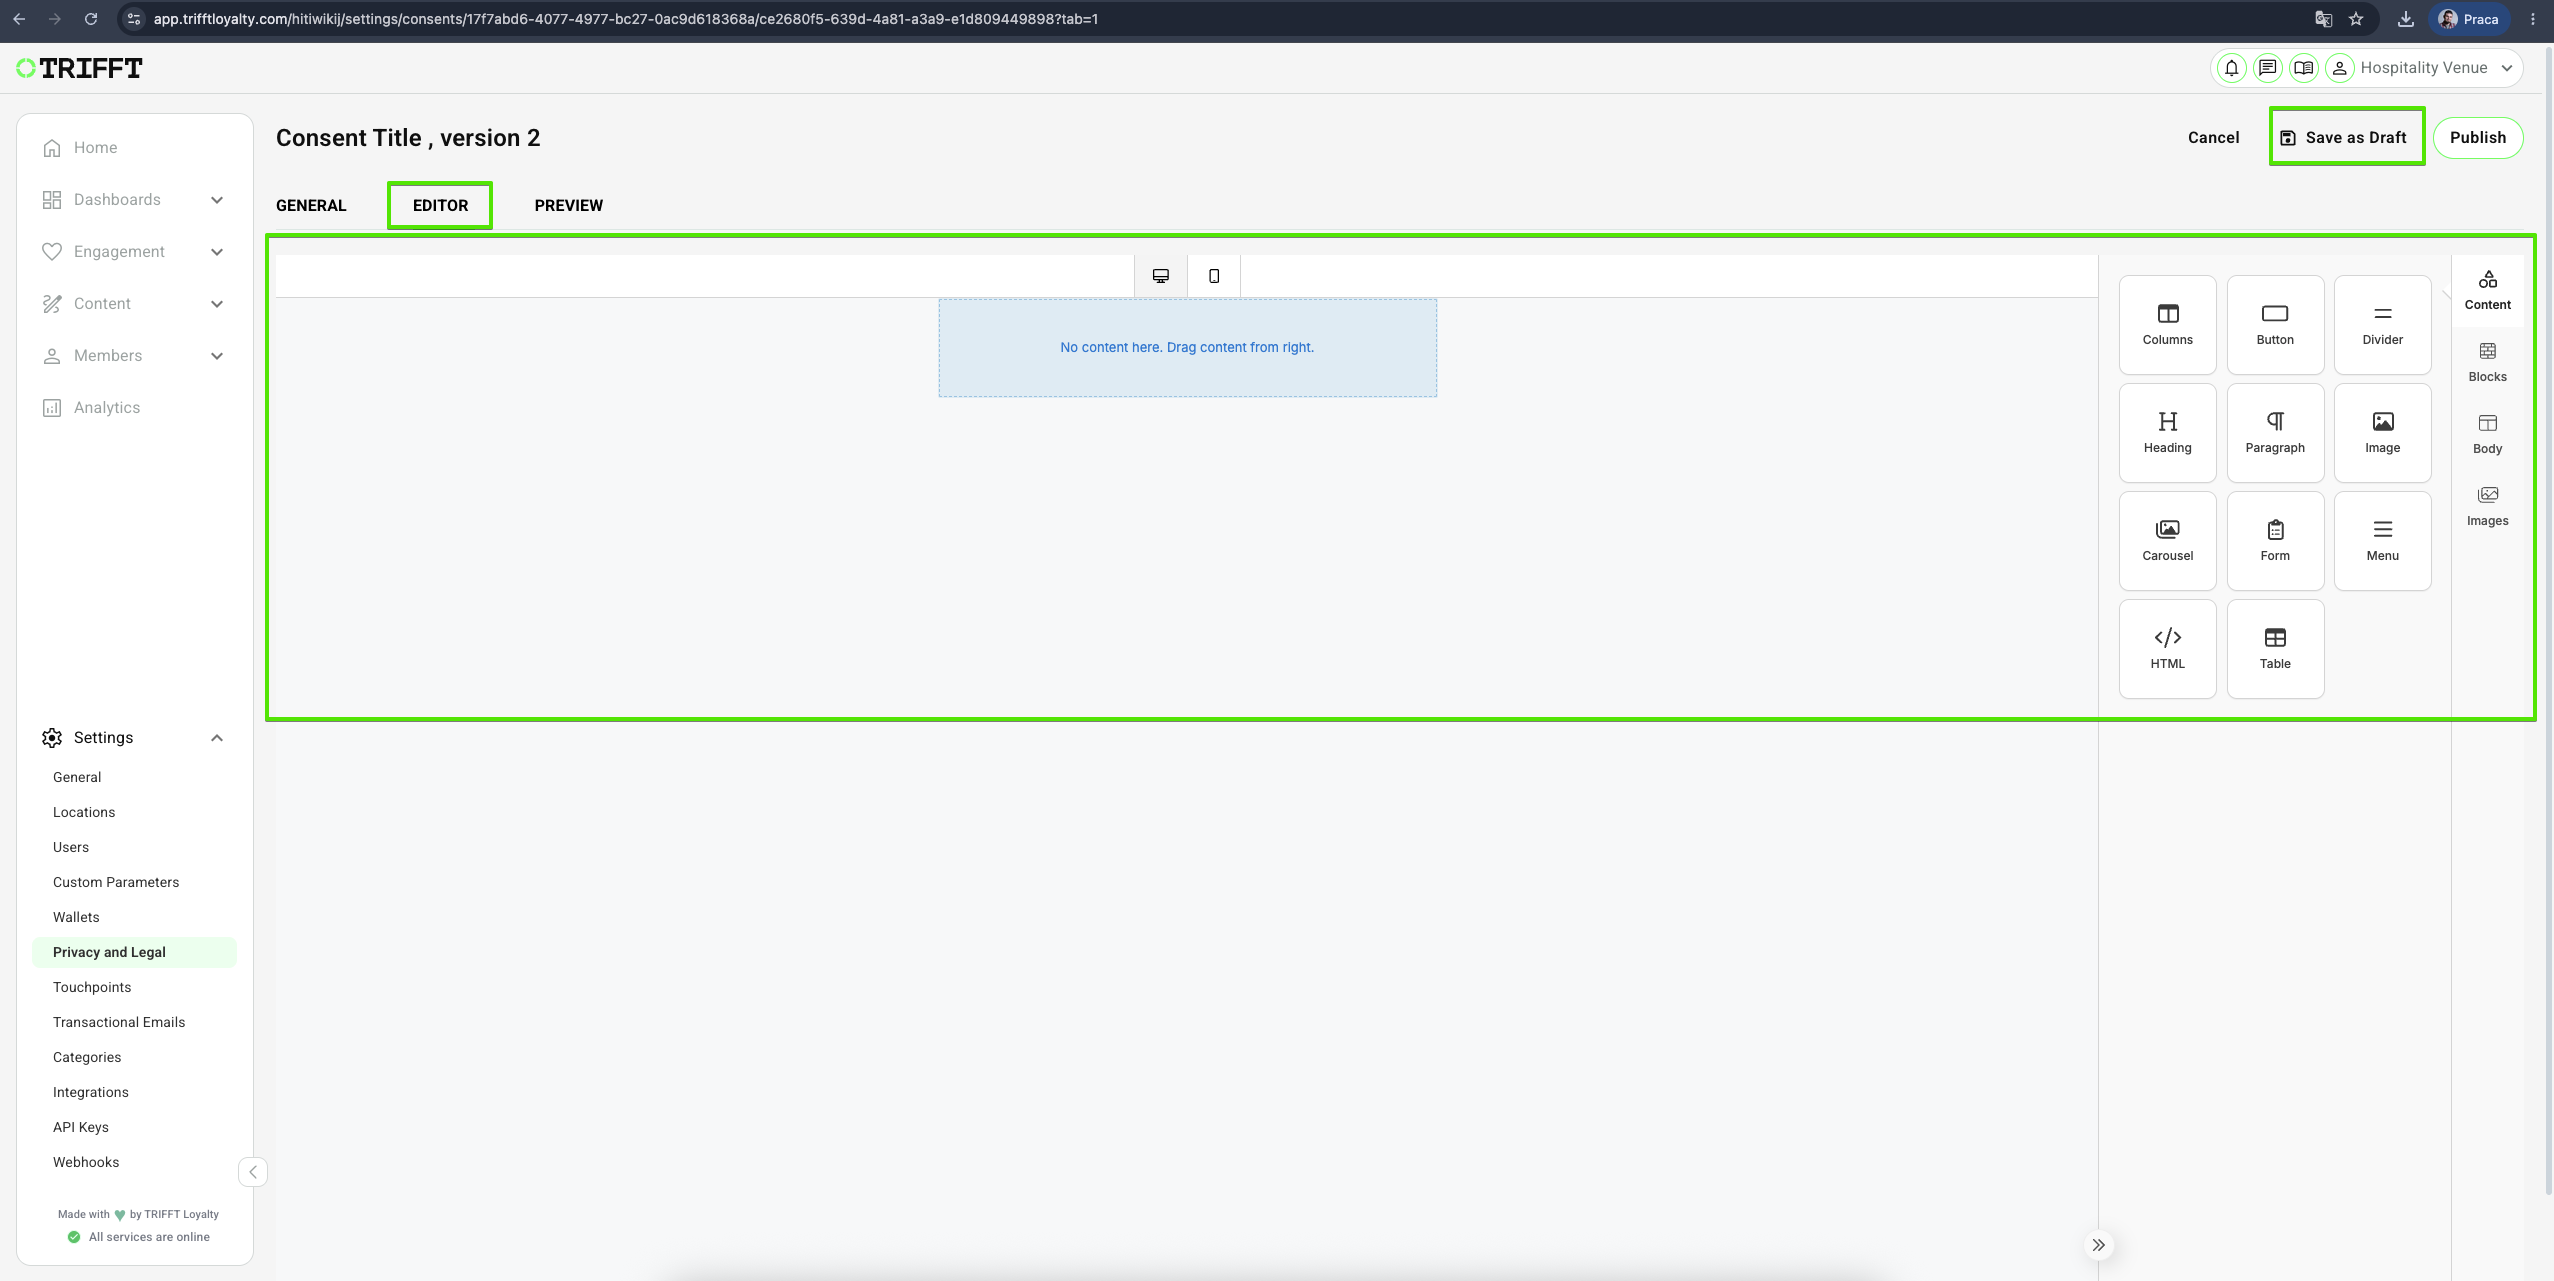
Once the general settings are set up, click on the Editor tab.
-
Prepare the body of your consent that the user can agree to. You can use formatting tools, images, buttons, etc. You can also use the Preview tab to show the final output that will be visible to the customer.
-
Once your consents are ready, click on the button Save as Draft in the top right corner.
-
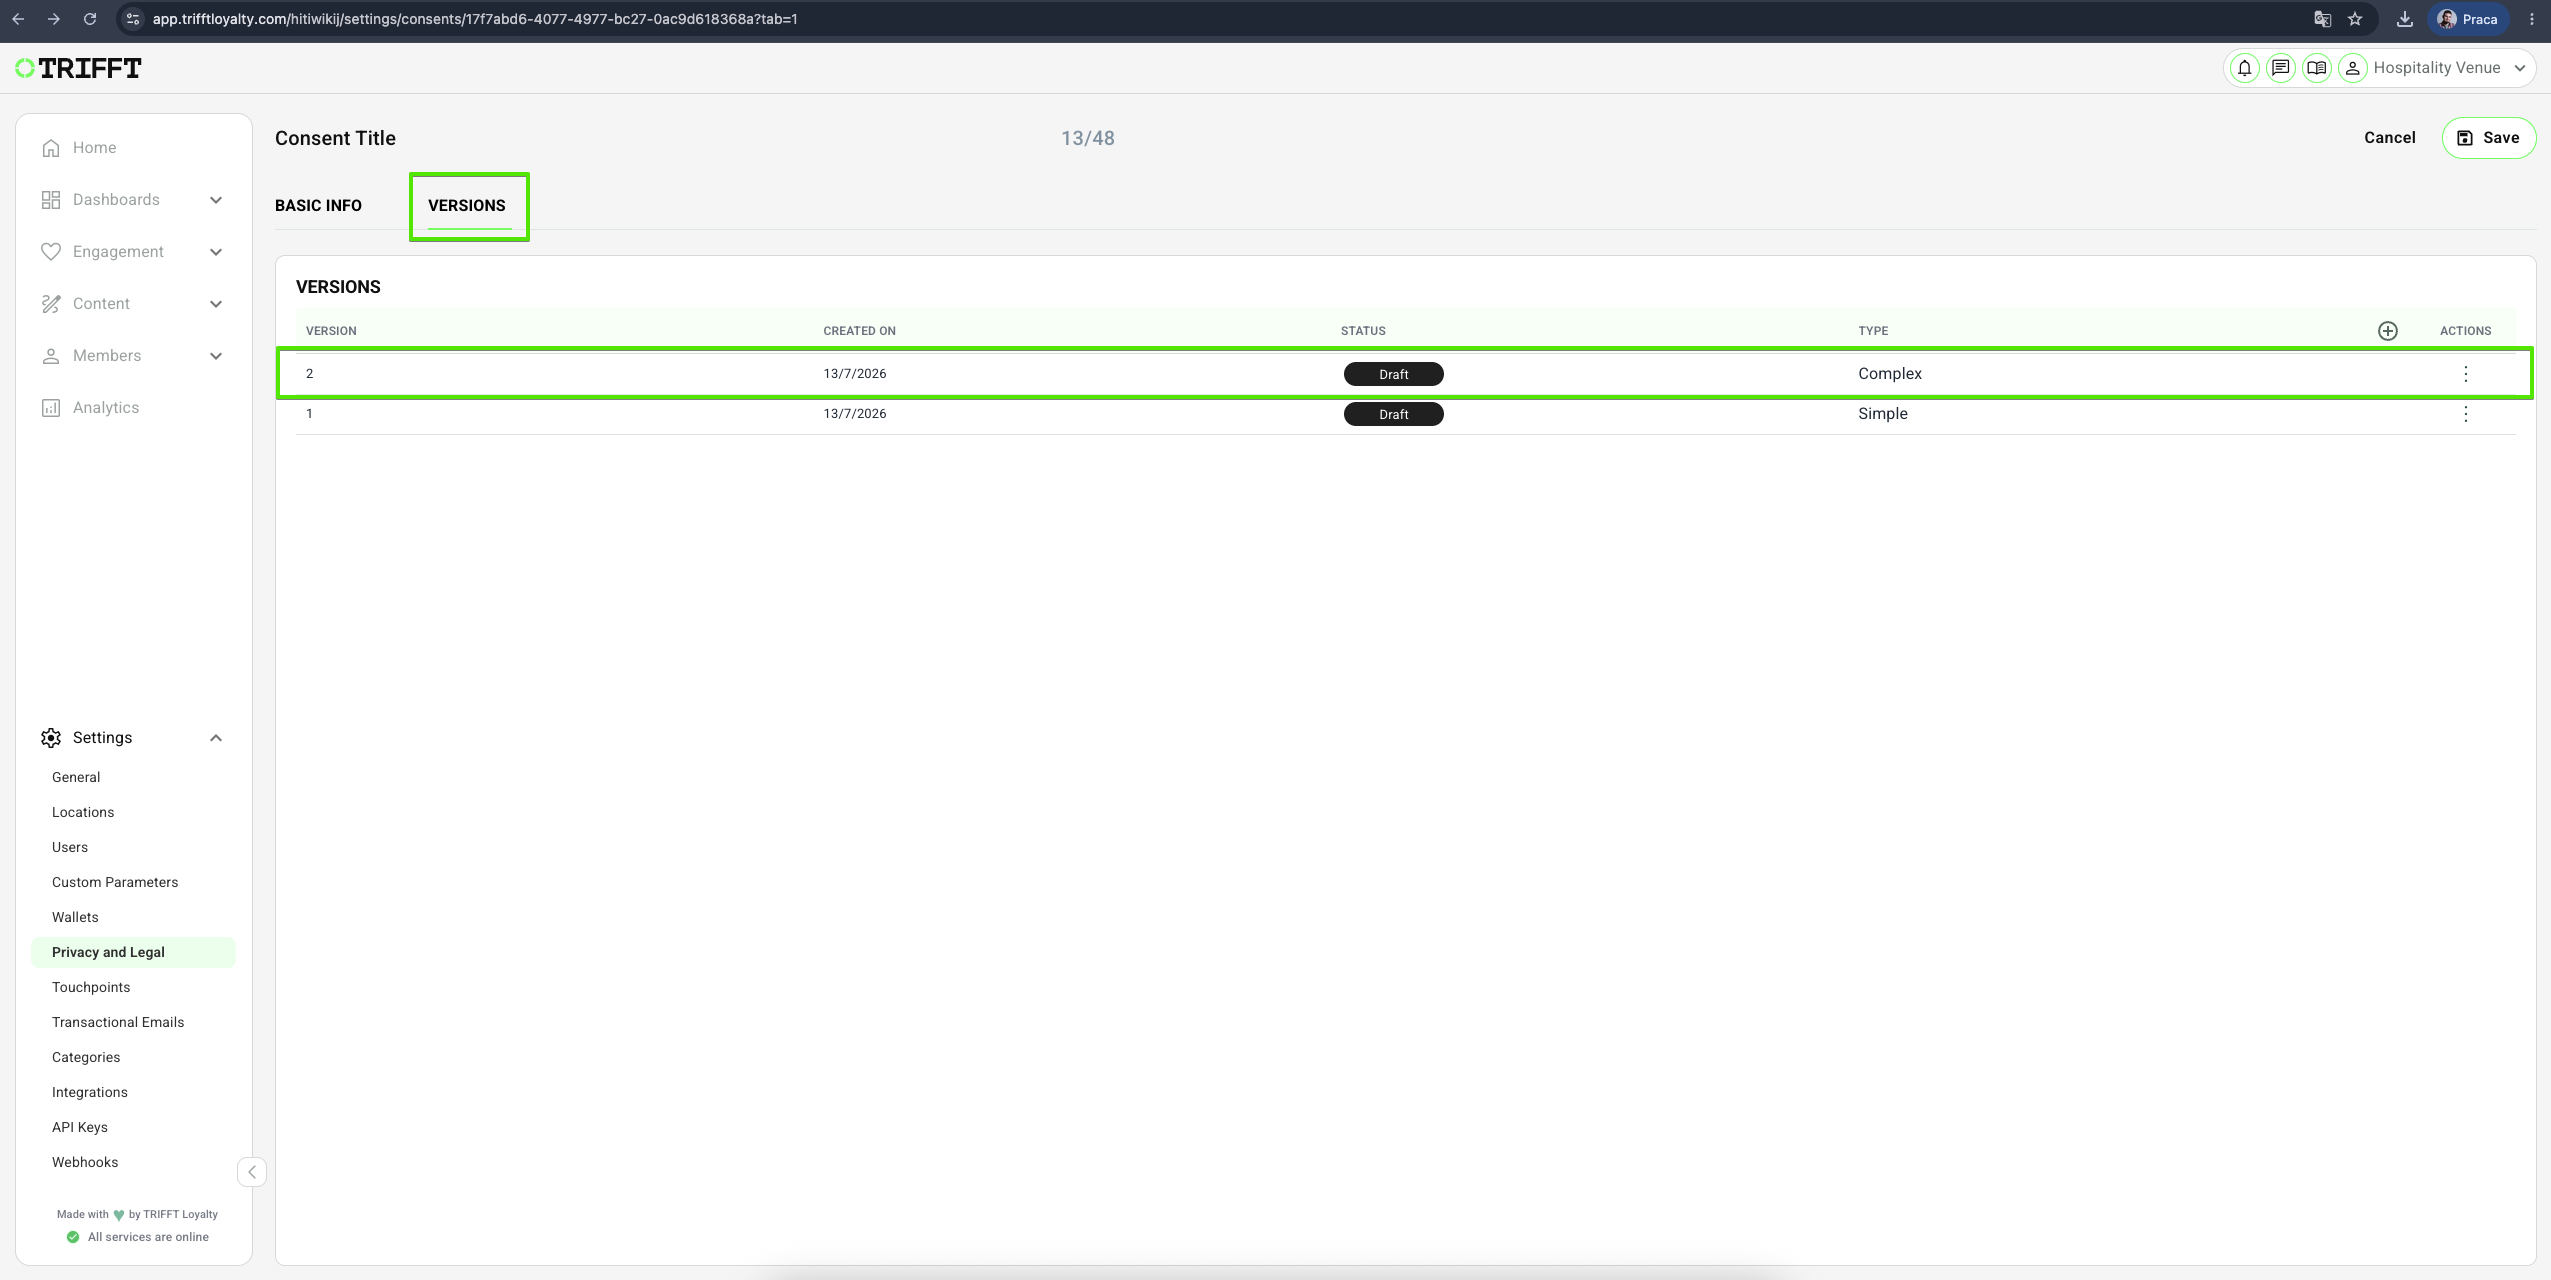
You just created a new version of your consent. Now it´s time to publish it to make it visible in the app.
-
Click on the Versions and choose the version you just created by clicking on it.
- Publish your consents by clicking on the Publish button in the top right corner.
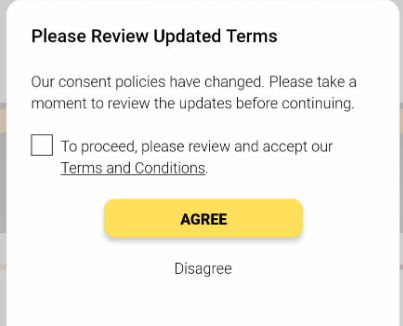
- After you create a new version of the consent, users will receive a notification inside their app that there has been an update to the consents, as shown in the picture below.
Prerequisites
- Access: Ensure you have the Admin role in the TRIFFT Cockpit to modify project-wide configuration settings.
- Legal Requirements: Confirm the specific consent categories required by your legal team (e.g., Marketing, Profiling, Third-party) based on your region (GDPR/CCPA).
- Integration Readiness: Ensure external marketing platforms are connected if you intend to sync consent statuses in real-time.
Configuration checklist
- Audit Trail: Consent changes are appearing correctly in the Audit Log with a unique member ID and timestamp.
- Integration Sync: Unsubscribing in TRIFFT instantly updates the "Suppressed" status in connected platforms like Klaviyo.
- Preference Center Access: The "Manage Preferences" link is visible and functional within the member profile in the app/web.
- Clear Language: Public titles and descriptions match the legal text provided by your compliance officer.
- Registration Flow: New members are presented with mandatory vs. optional consents during the signup process.
Updated 3 months ago