
Segments Other Functions
Public Segments
- Definition: Public segments are visible to members in the app/on the web, and members can self-register to these segments.
- Purpose: Use of the public segment is useful when you want to ask a customer about their preferences. According to these preferences, he will see the content in the app.
Set up a Public Segment
- Follow the first 2 steps from the article Segments Set Up.
- In the second step just click on the Public checkbox.
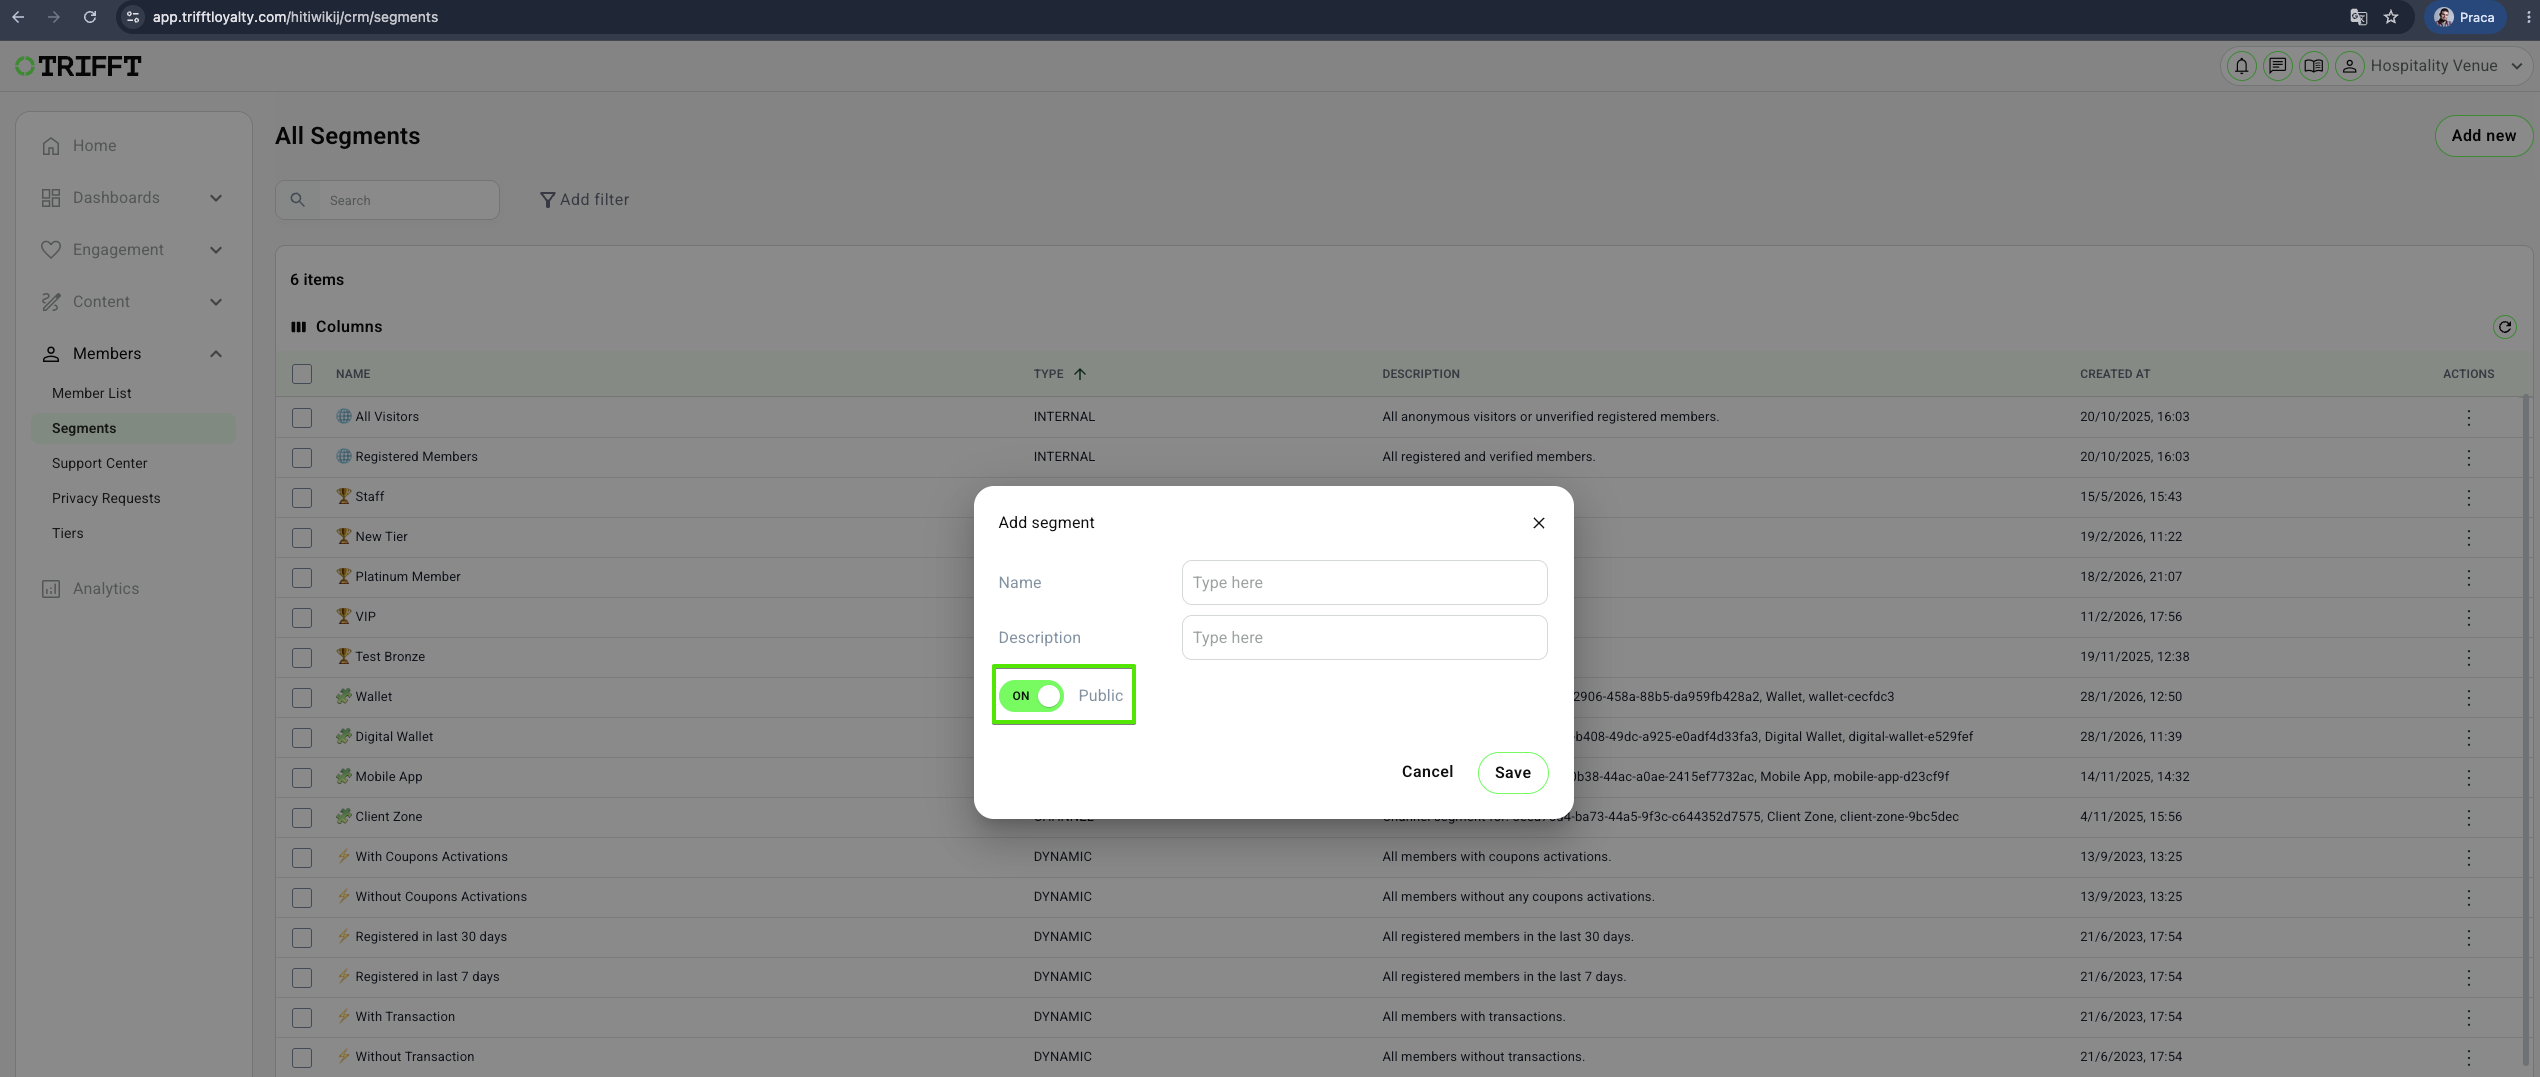
Let the customer join this Segment
You just created a segment which is accessible to customer. There are 2 ways how he can self-register into this segment.
-
Onboarding Process
Do you want to show the list of Public Segments to customer right after registration?
Setup the onboarding screen of the type Preference Center Screen firstly. Example of this kind of onboarding screen bellow: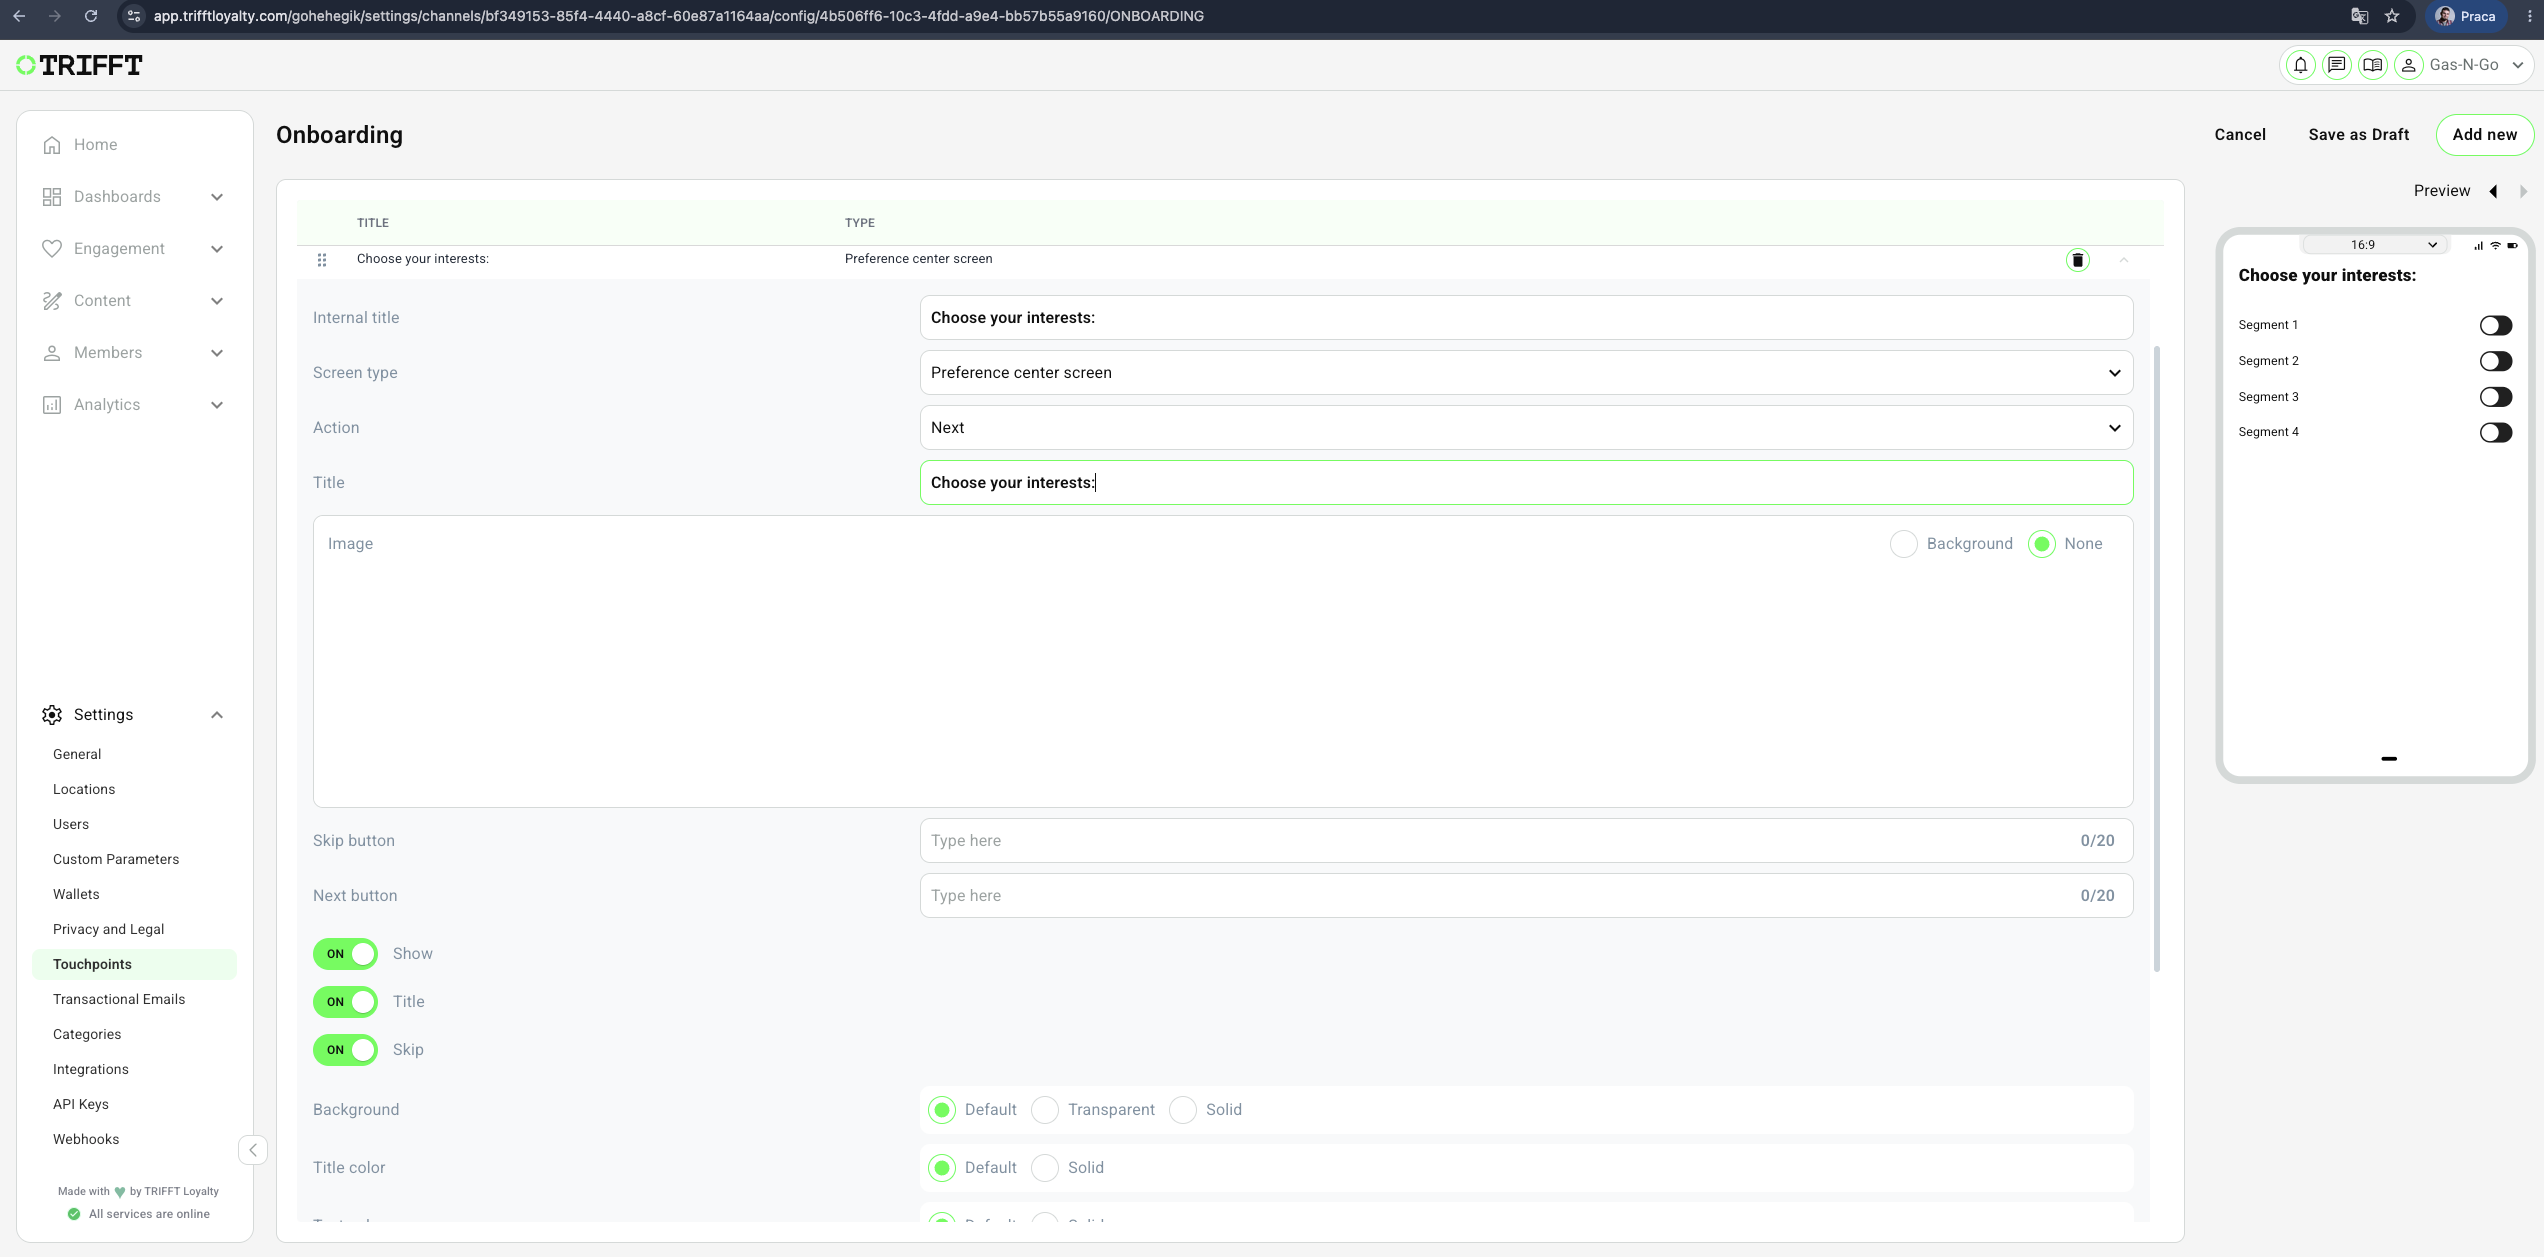
-
Change of Preferences
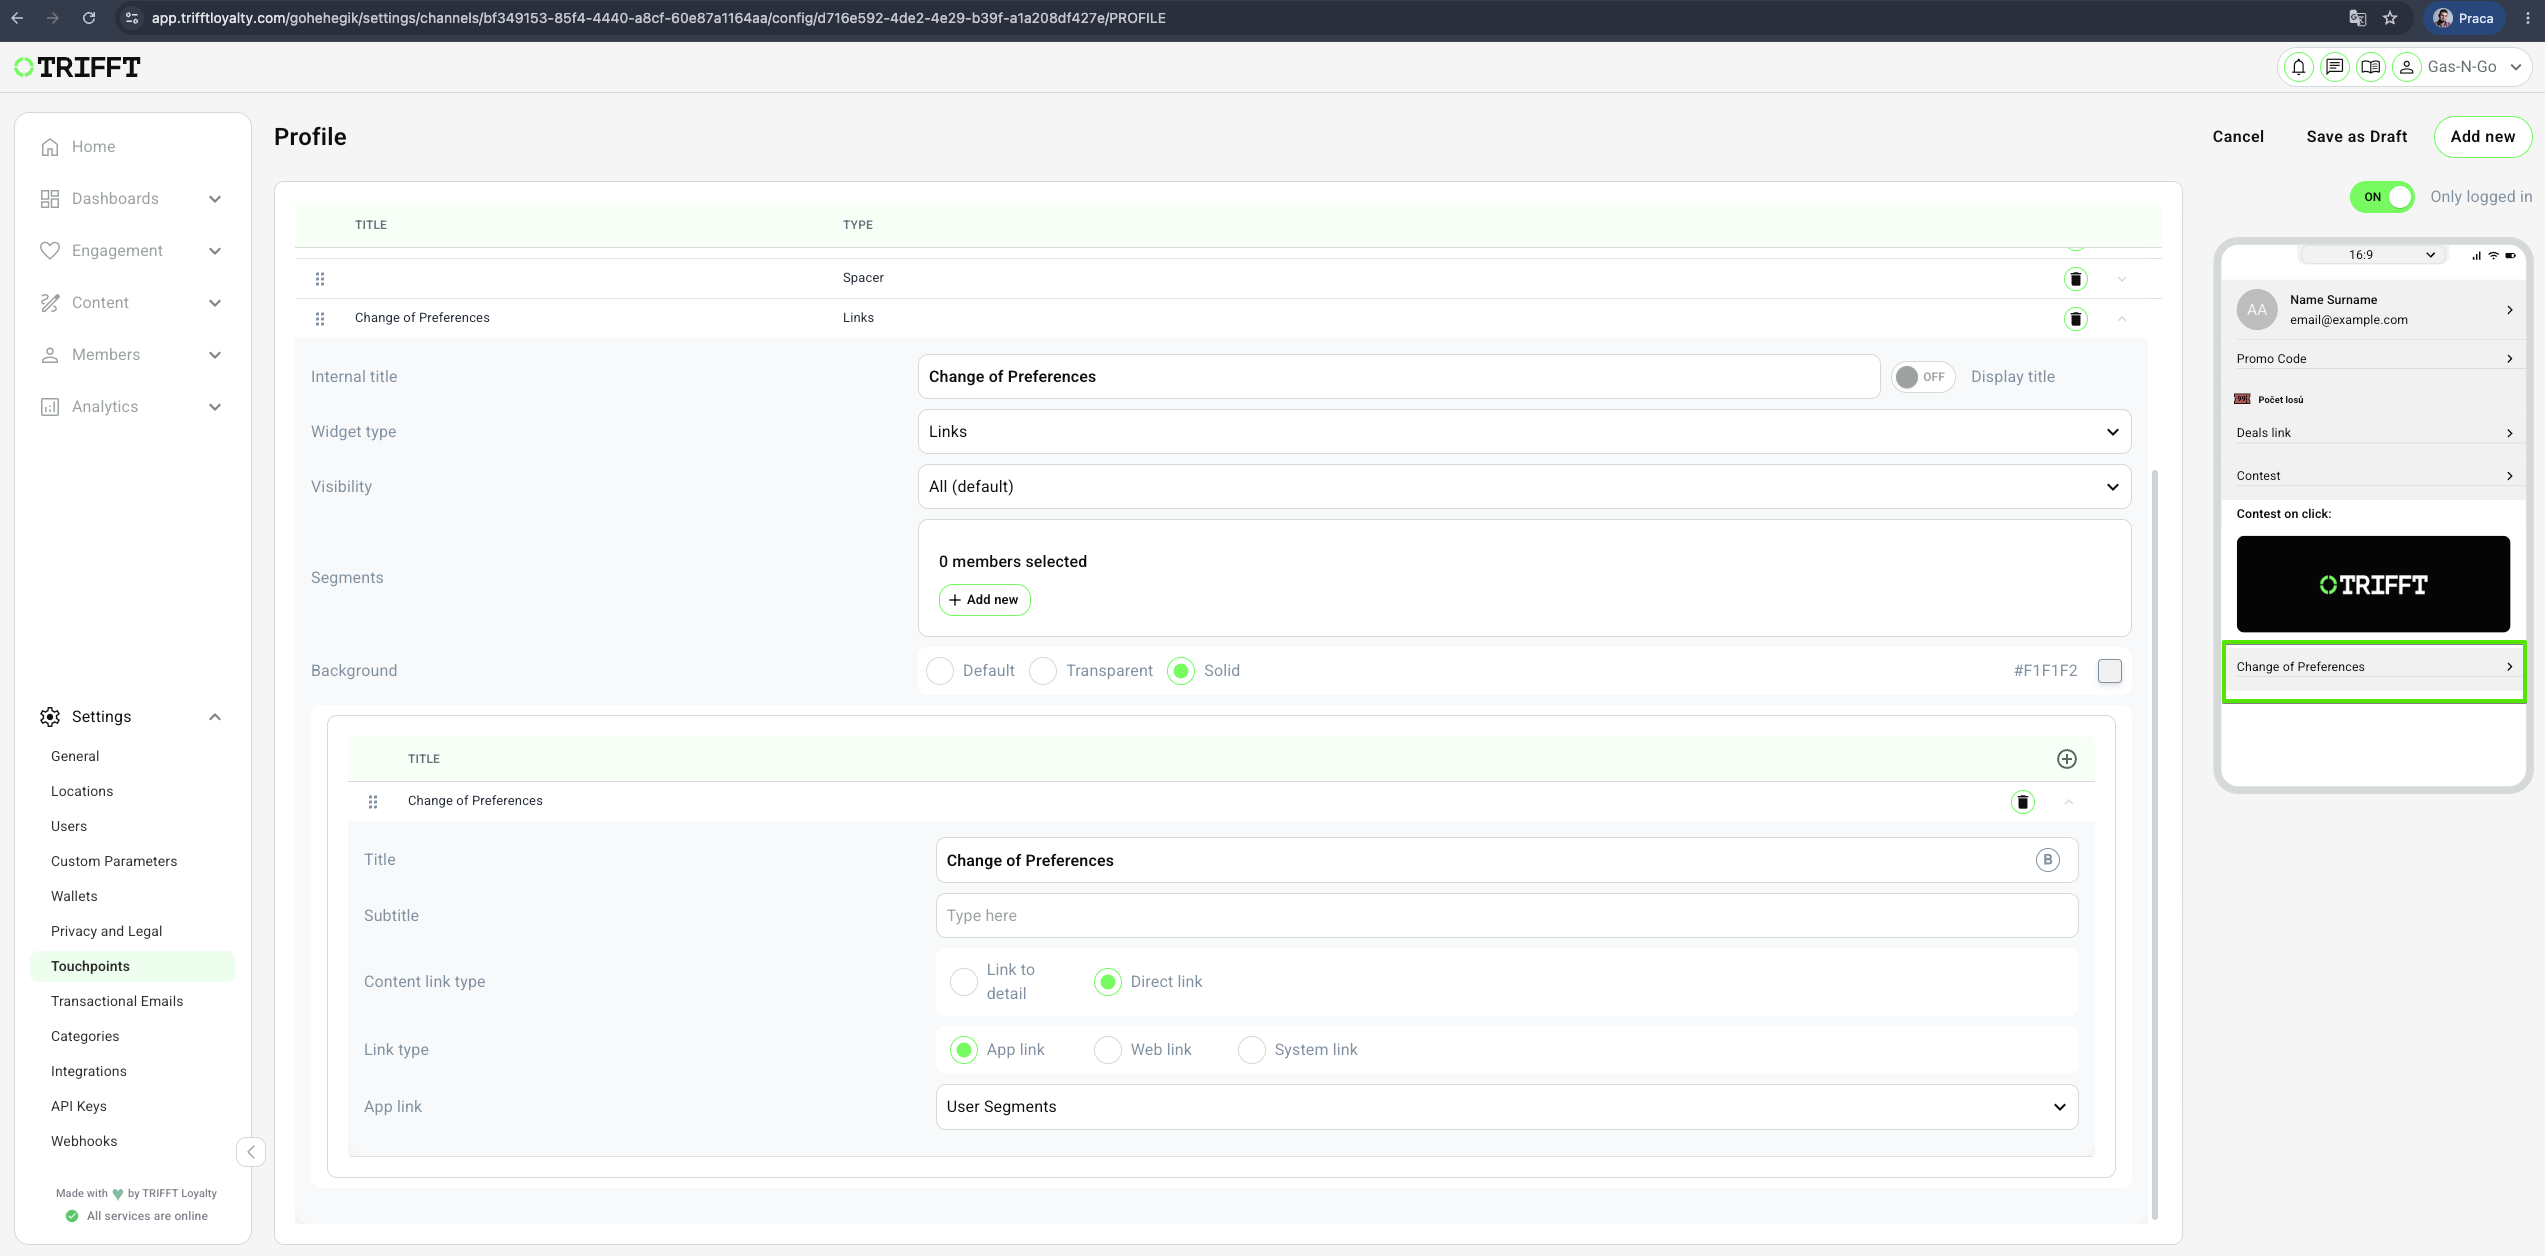
Do you want to let the customer change his preferences later?
Setup the right widget in the Profile linked to the User Segments so customer can change his preferences easily. Example of the widget settings bellow:
Example Use Case
Scenario:The company wants to create many articles in the app, such as articles about food, cocktails, restaurant news, cooking tips and tricks, etc.
However, they do not want to overwhelm all customers with all these articles and instead want to show each customer only the content that is relevant to them—based on the segments they self-registered to.
Customer is asked about her/his preferences right after the registration during the onboarding process.
- Setup the Public Segments.
- Setup the onboarding screen of the type Preference Center Screen
- You can also add widget in the Profile linked to the User Segments so customer can change her/his preferences easily
Editing Segments
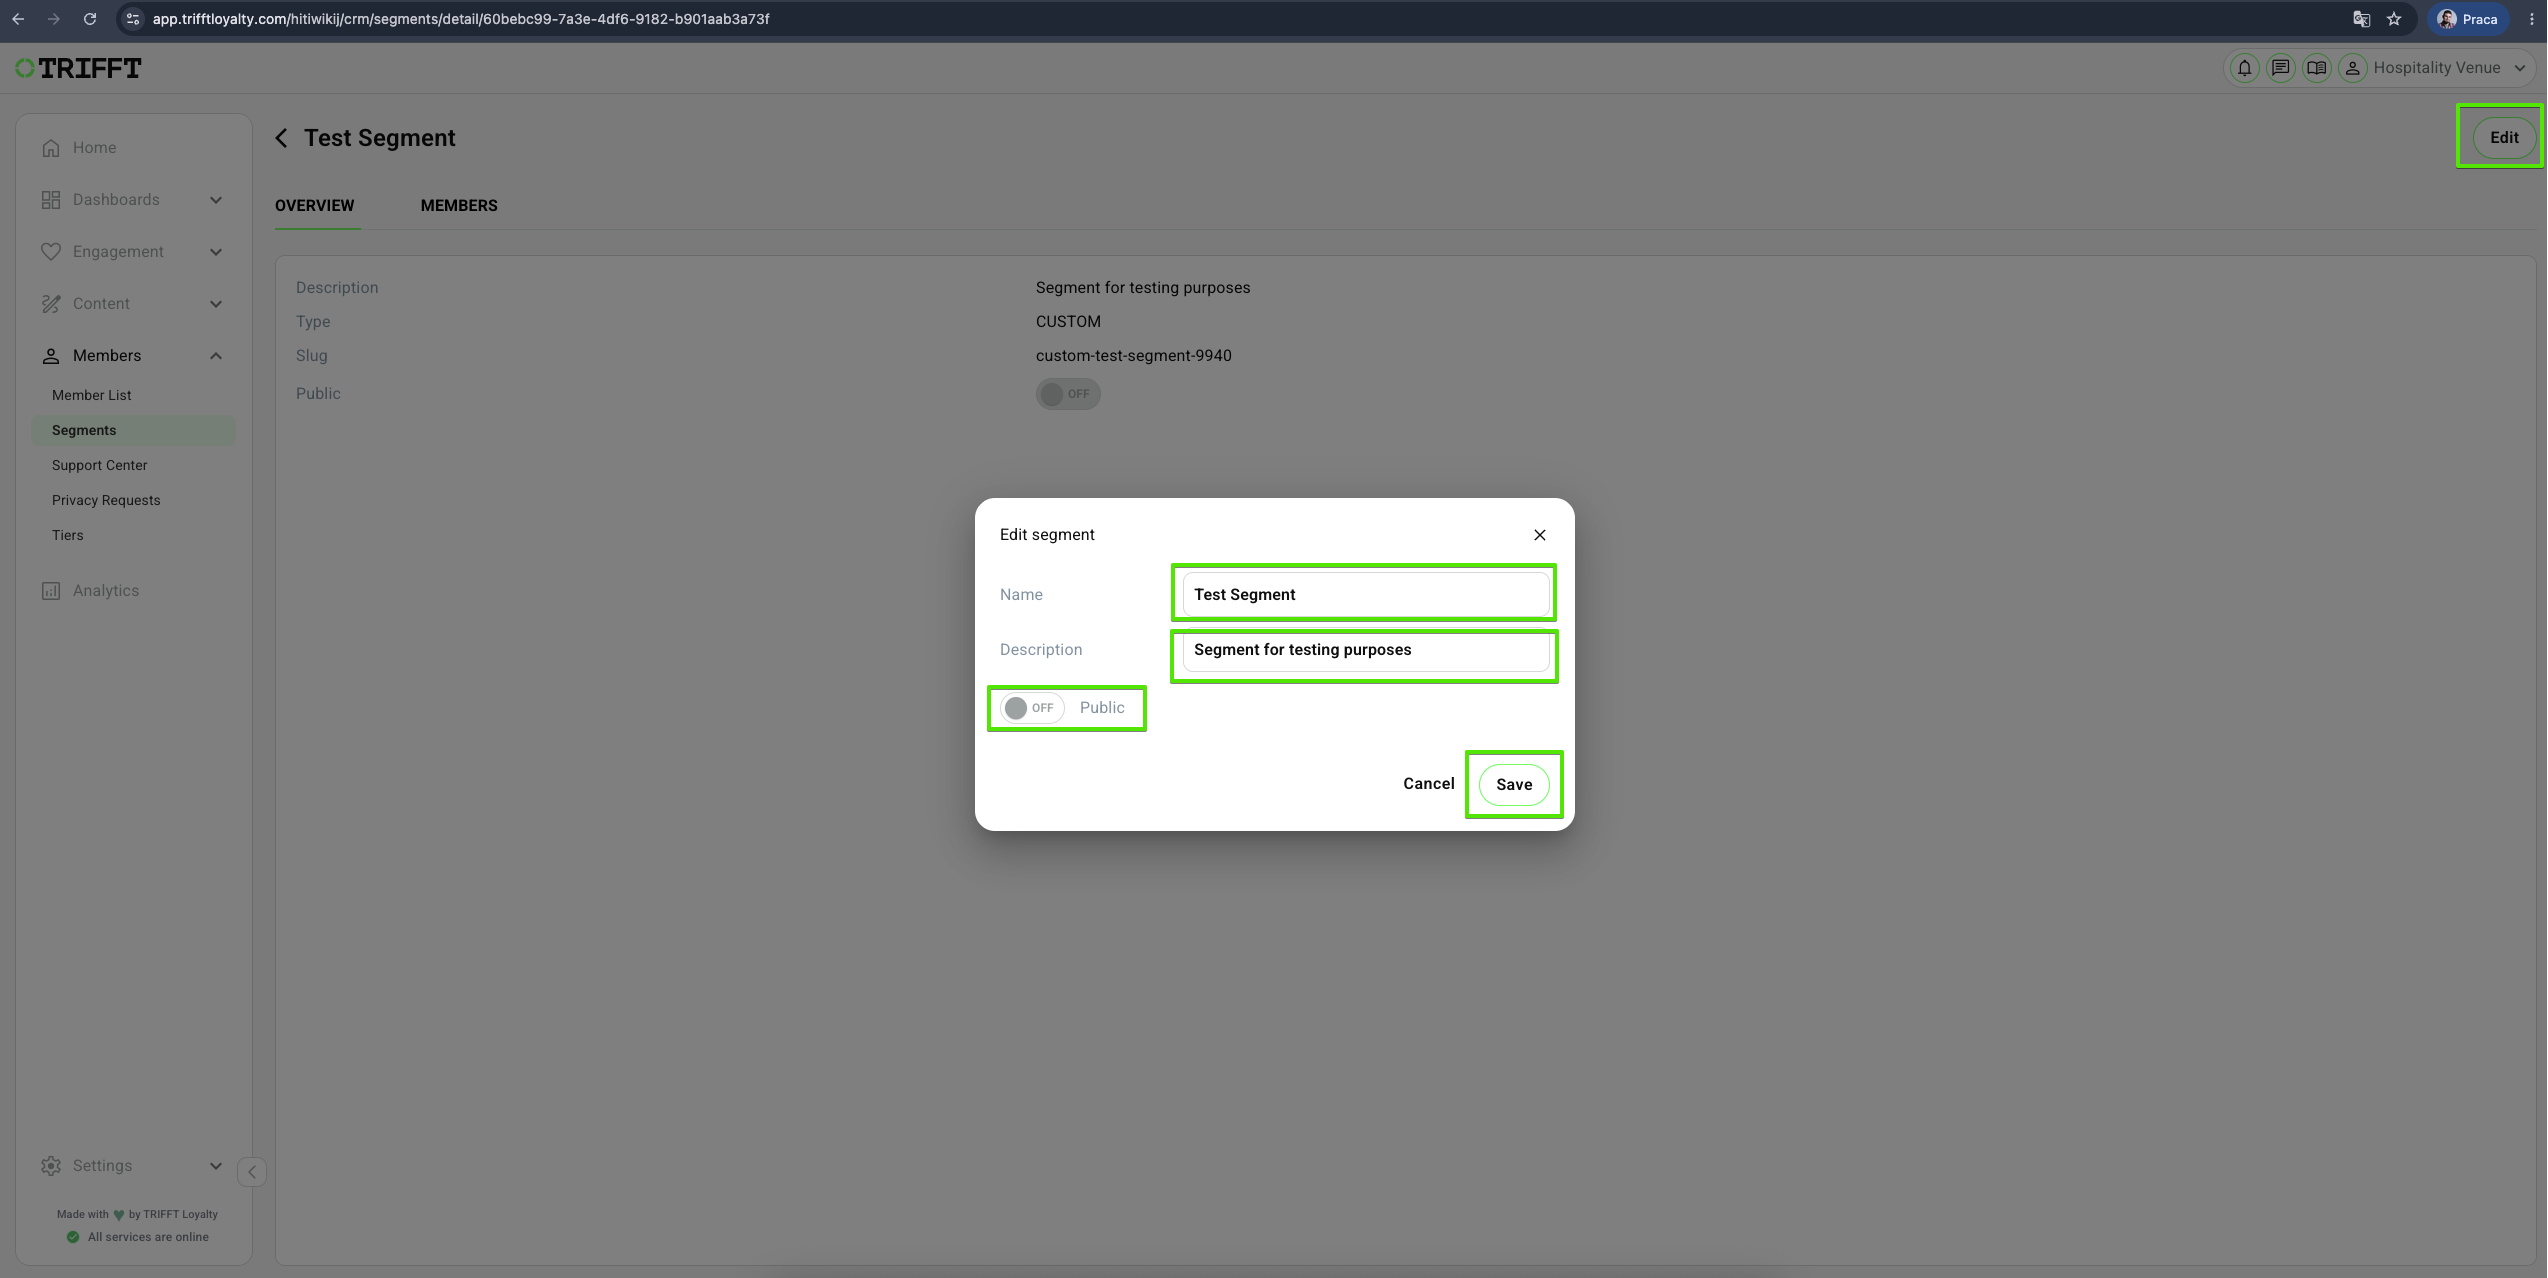
- Go to Content Cockpit > Members > Segments > Click the desired Segment
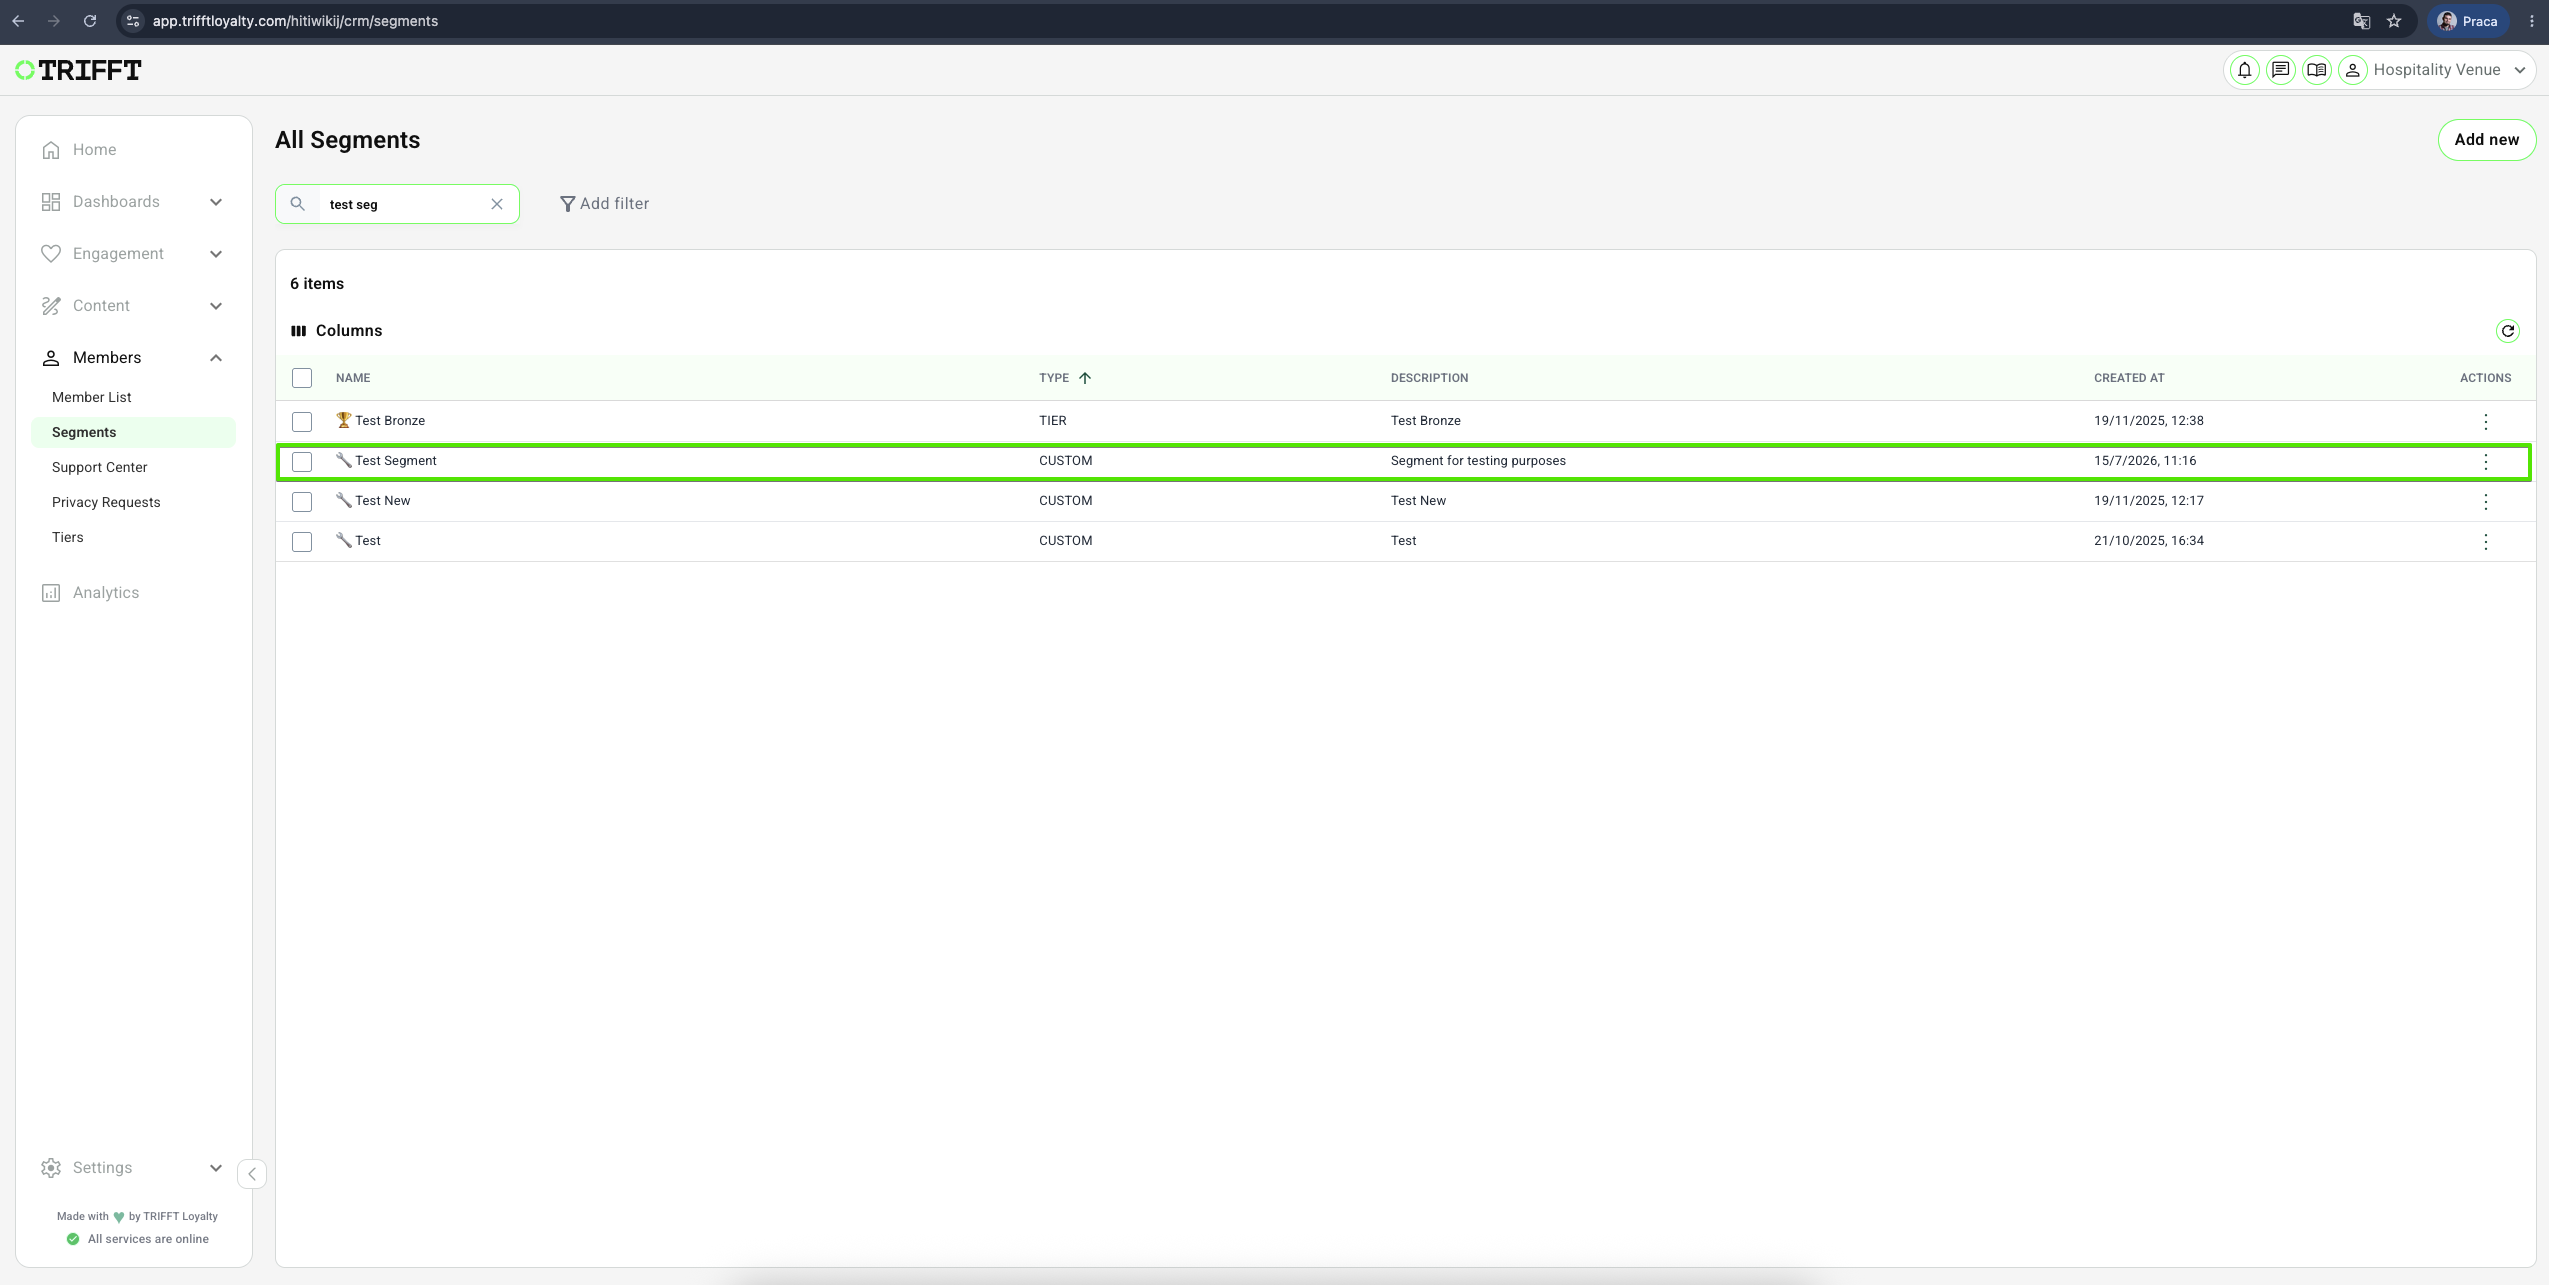
- Click on Edit, make your changes, and Save
Duplicating Segments
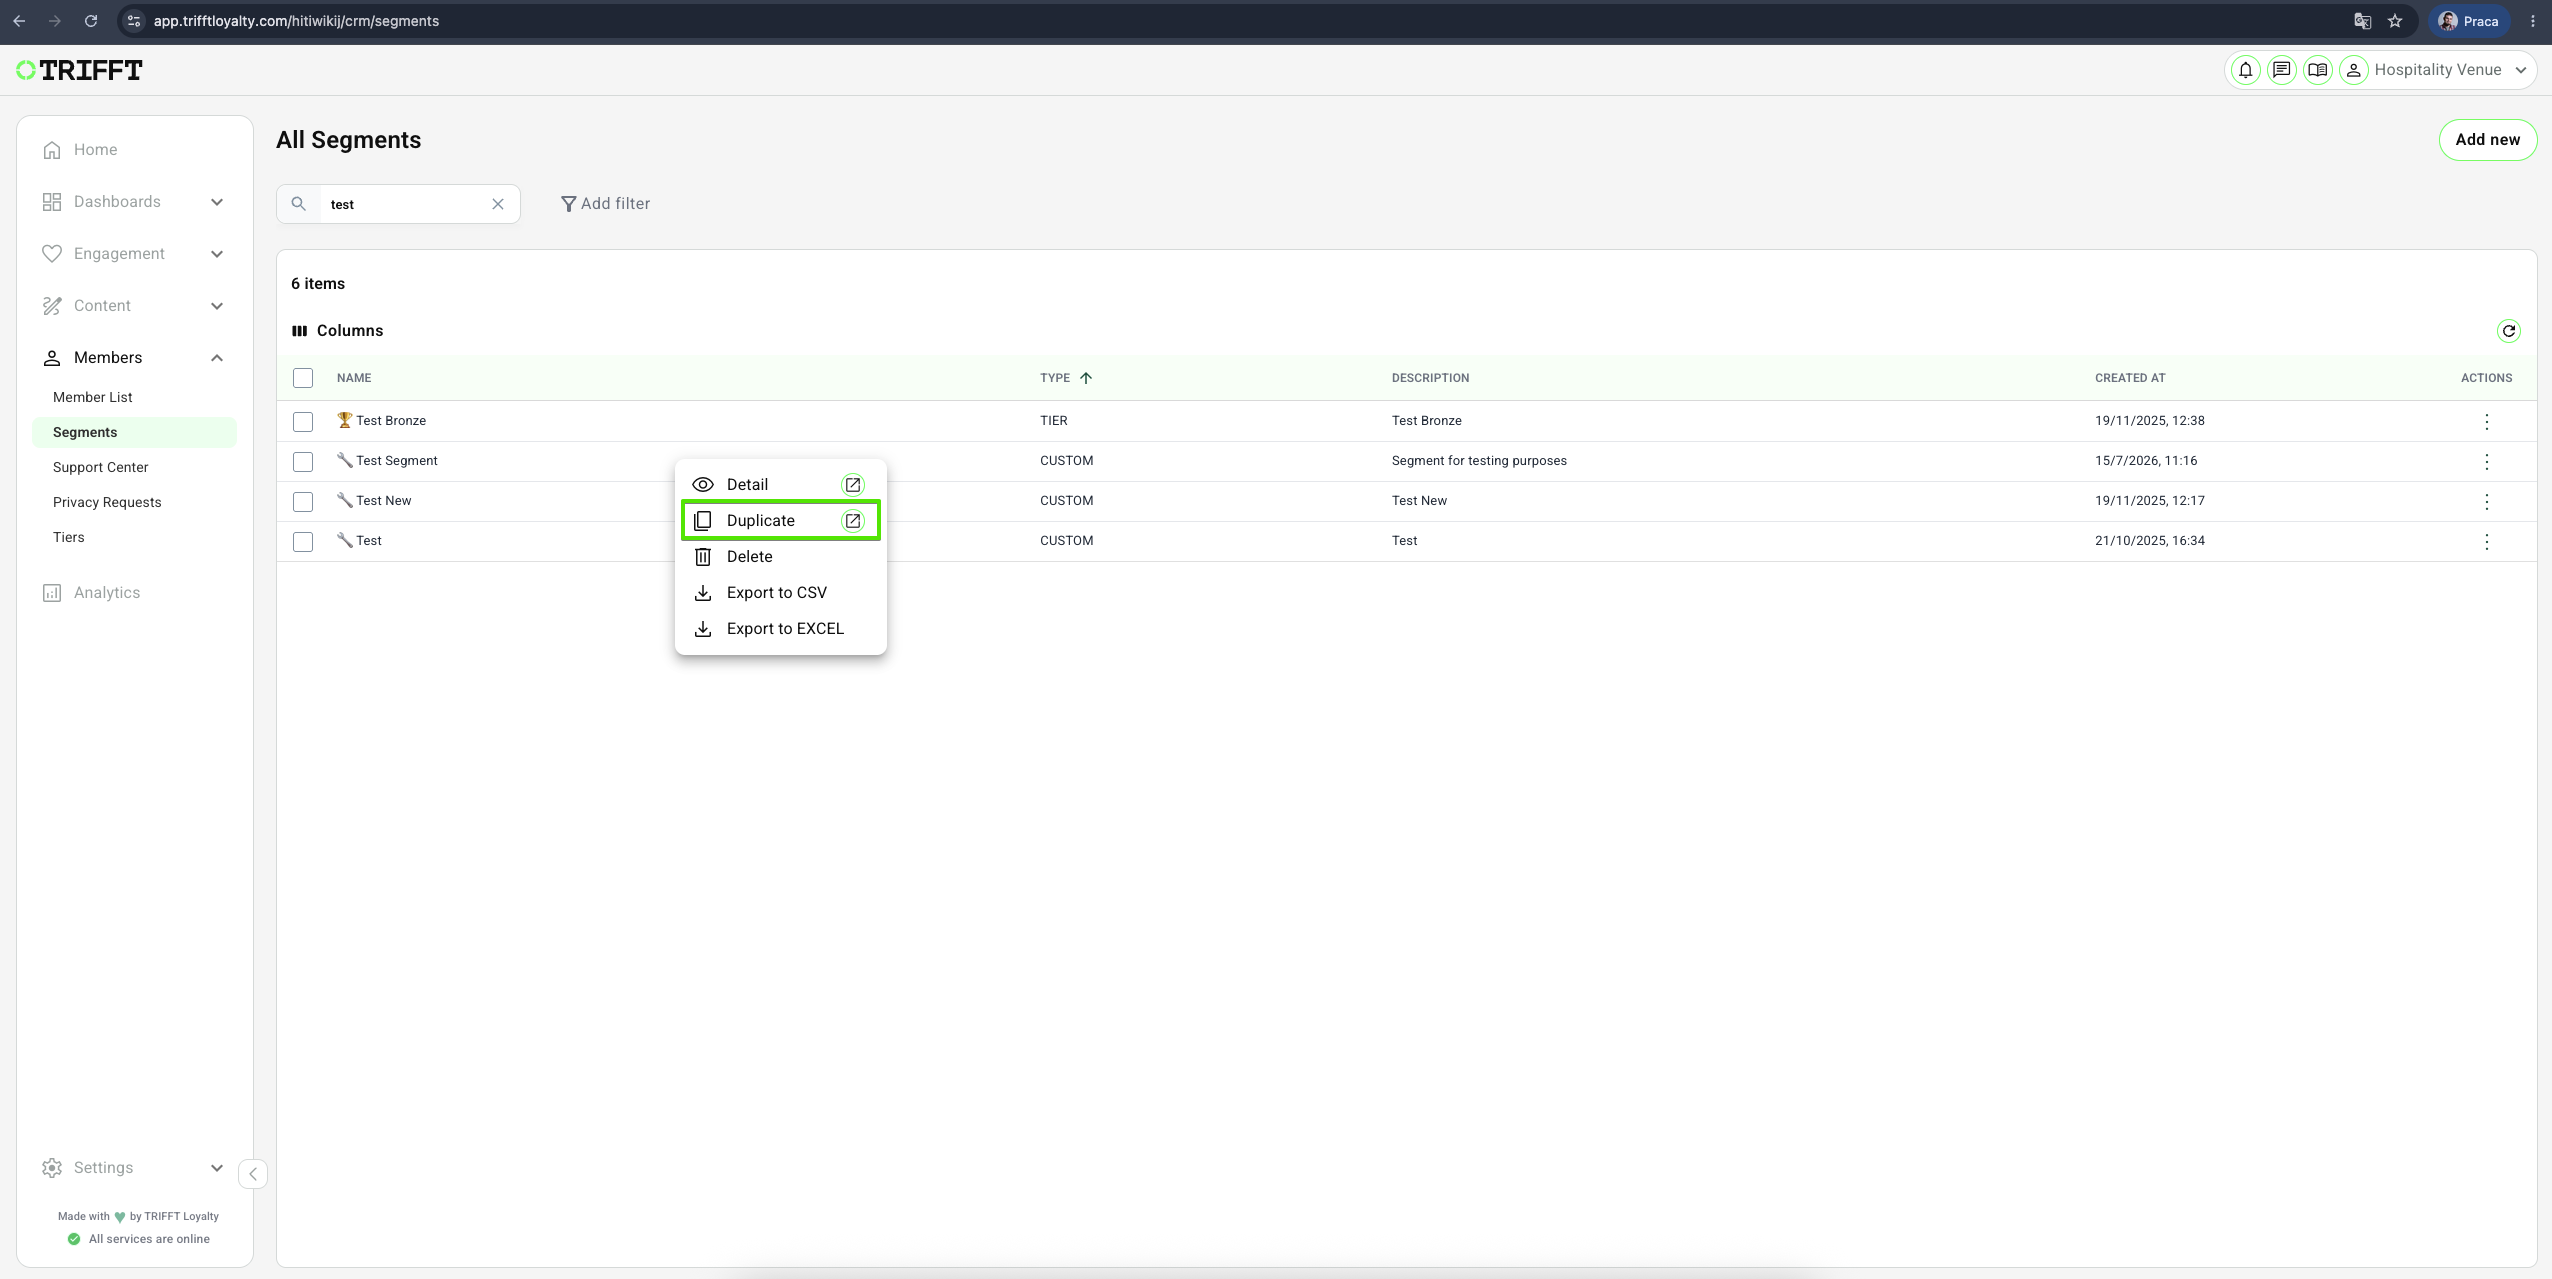
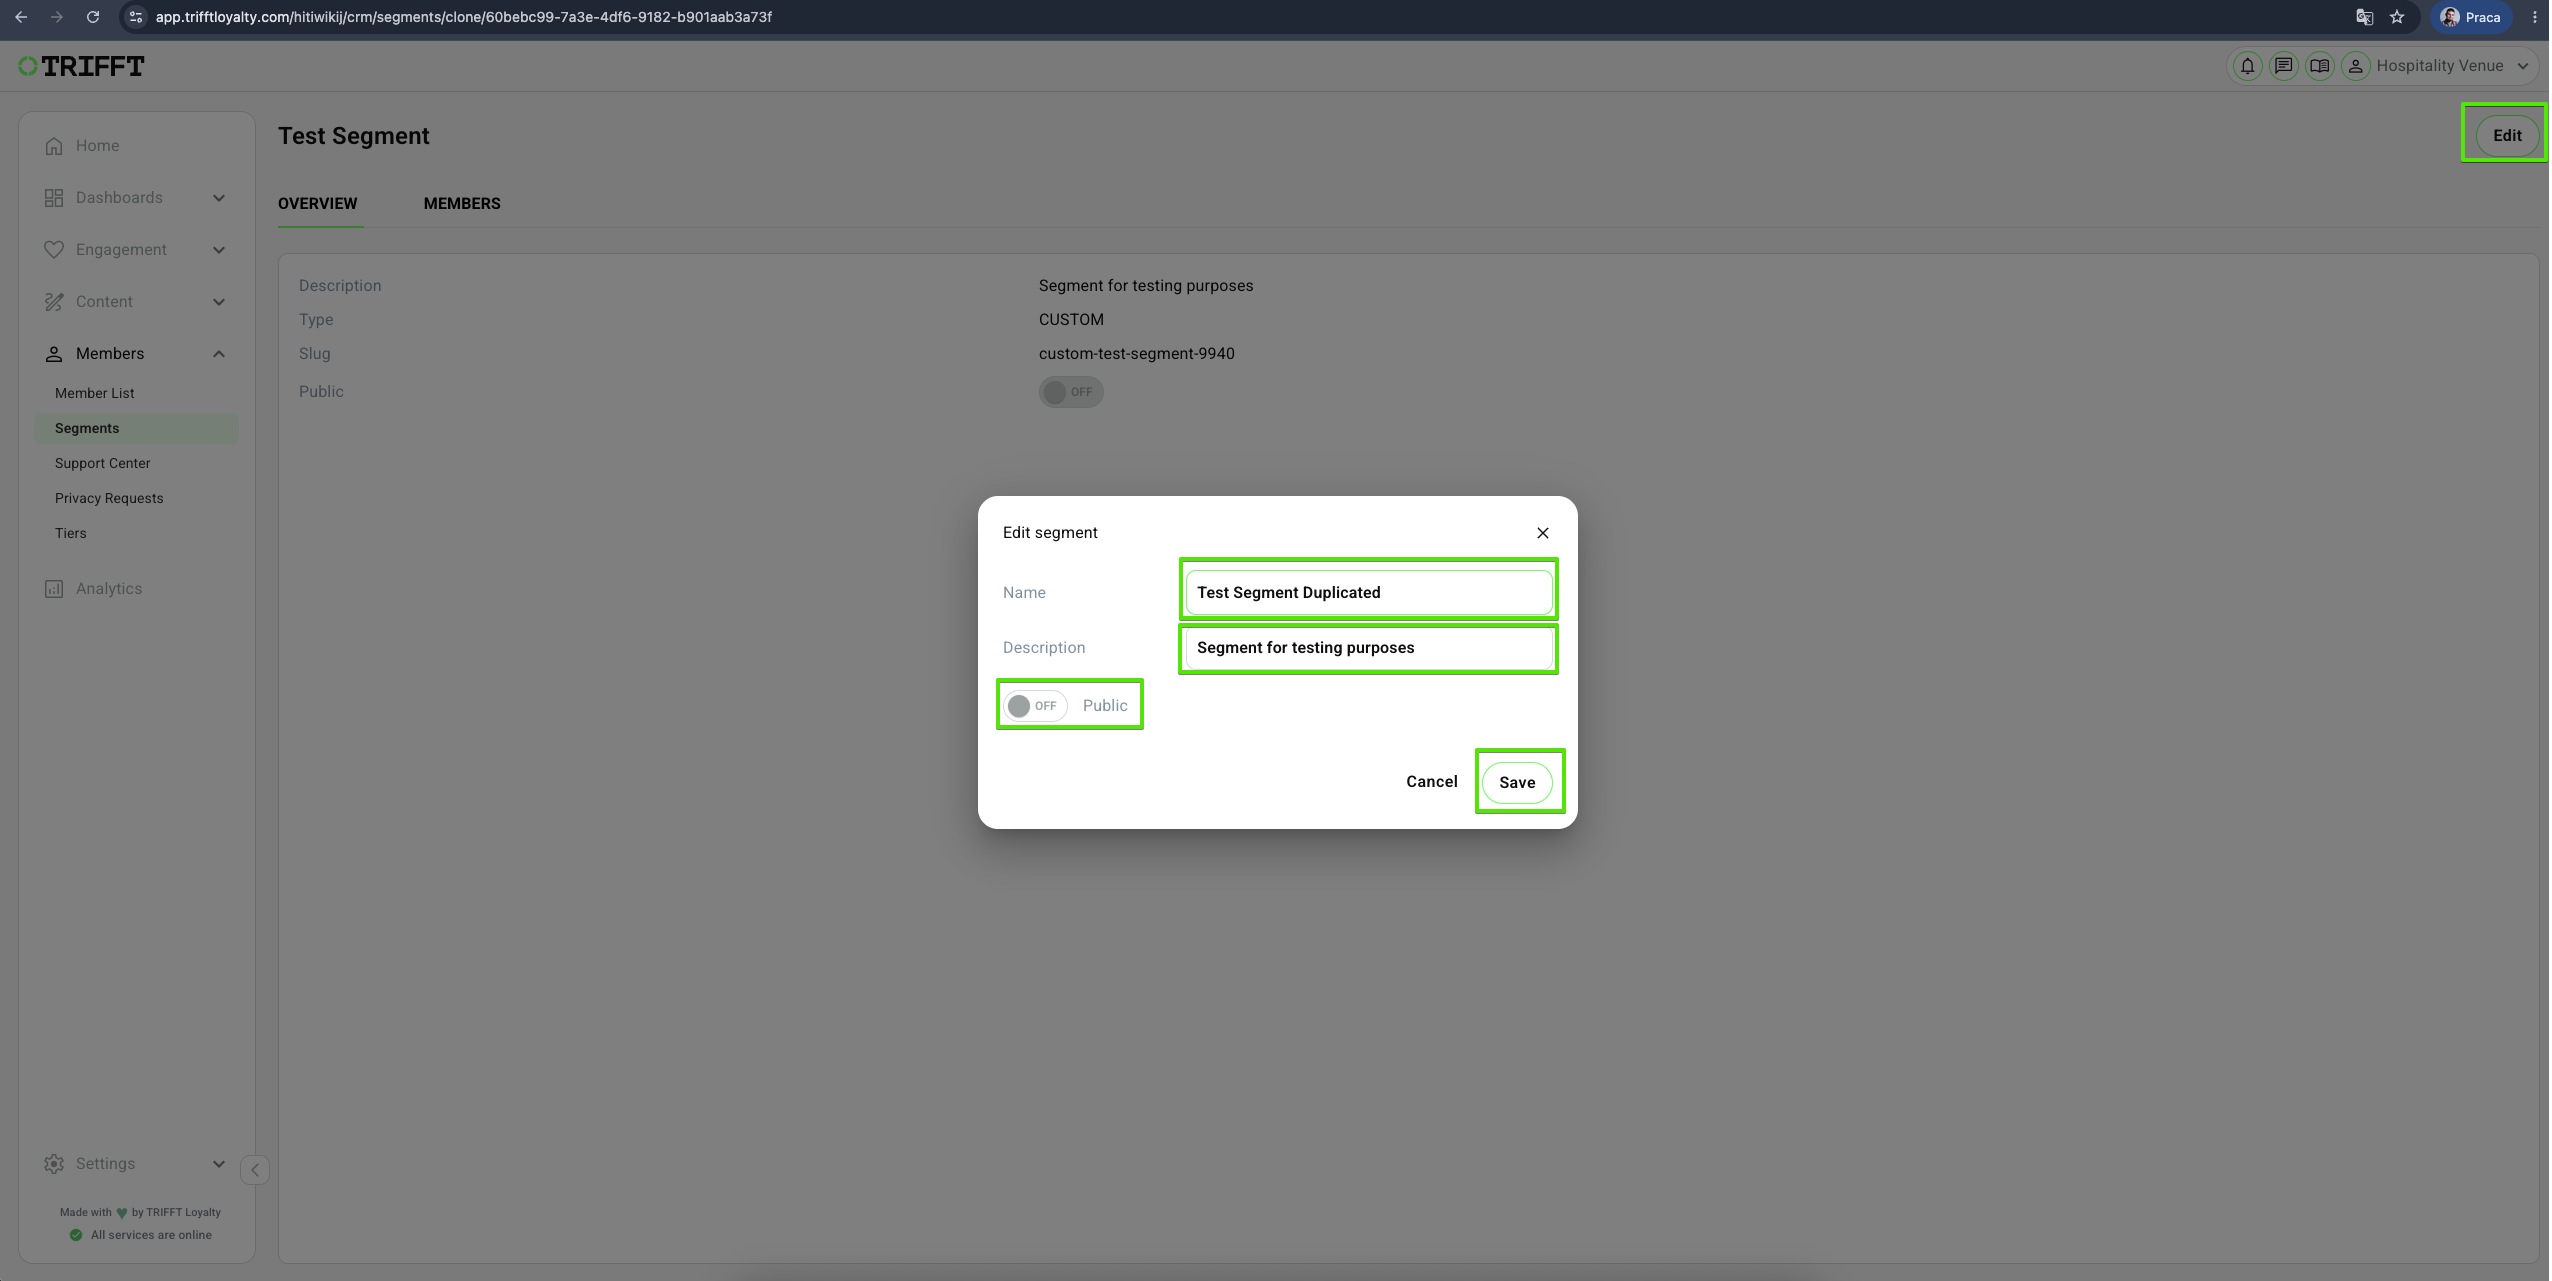
- Go to Content Cockpit > Members > Segments > Right-click the desired Segment > Duplicate > Edit what is needed and Save
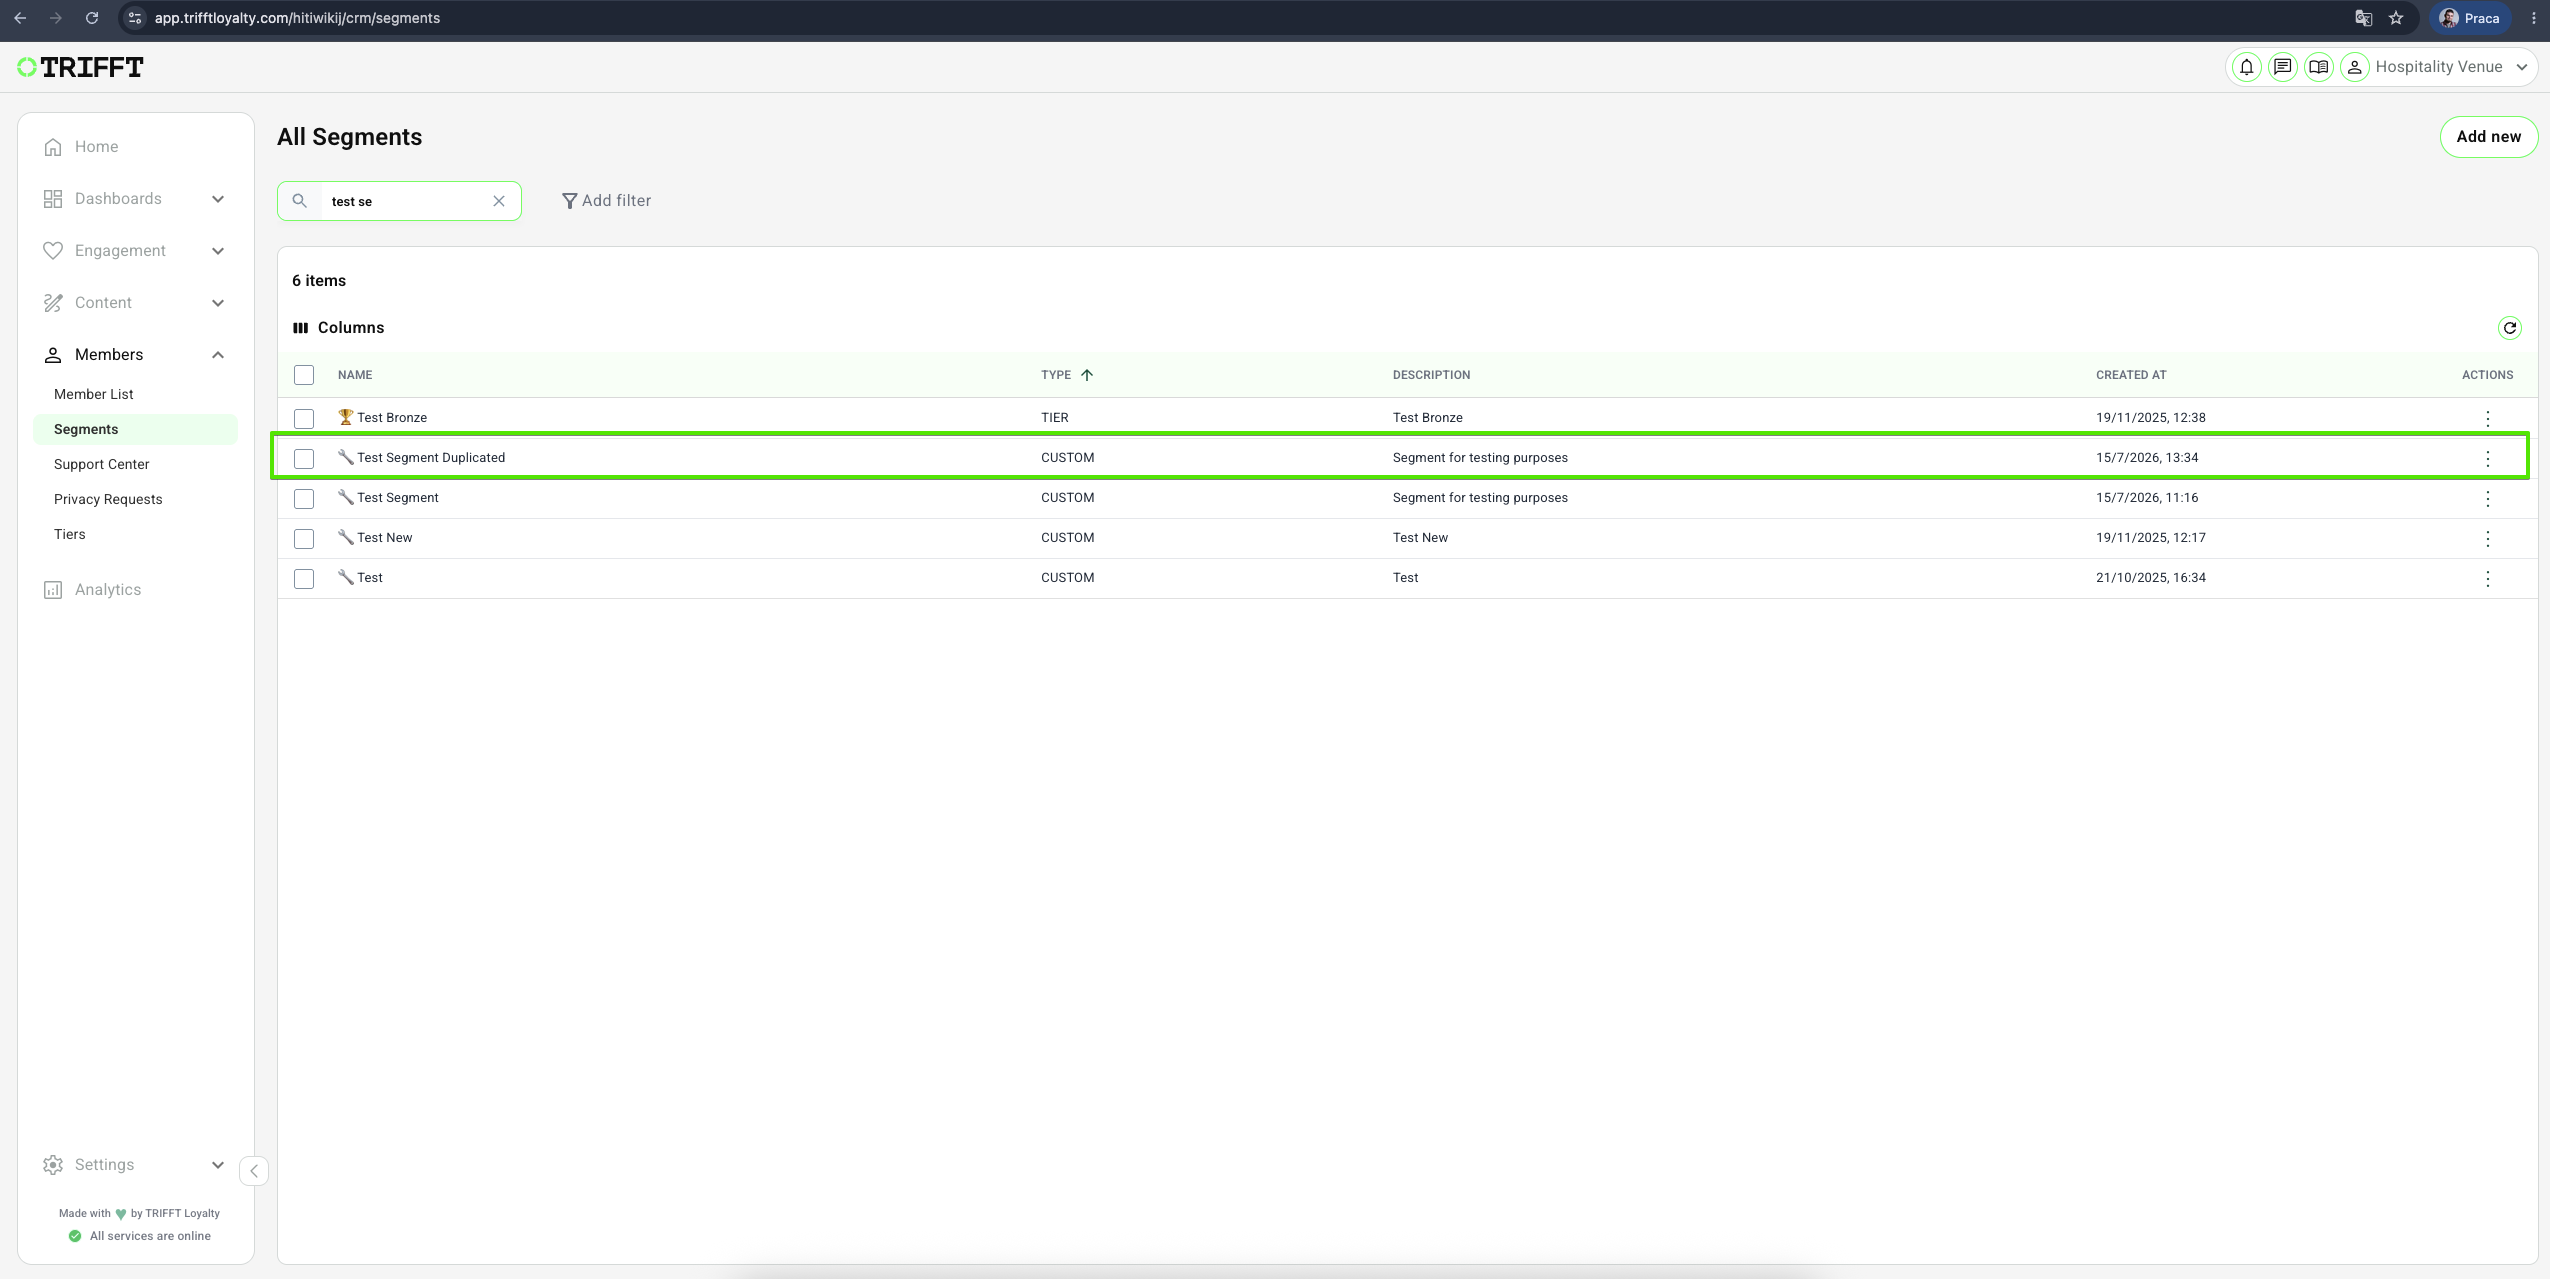
- The duplicated Segment will appear on the All Segments list
Deleting Segments
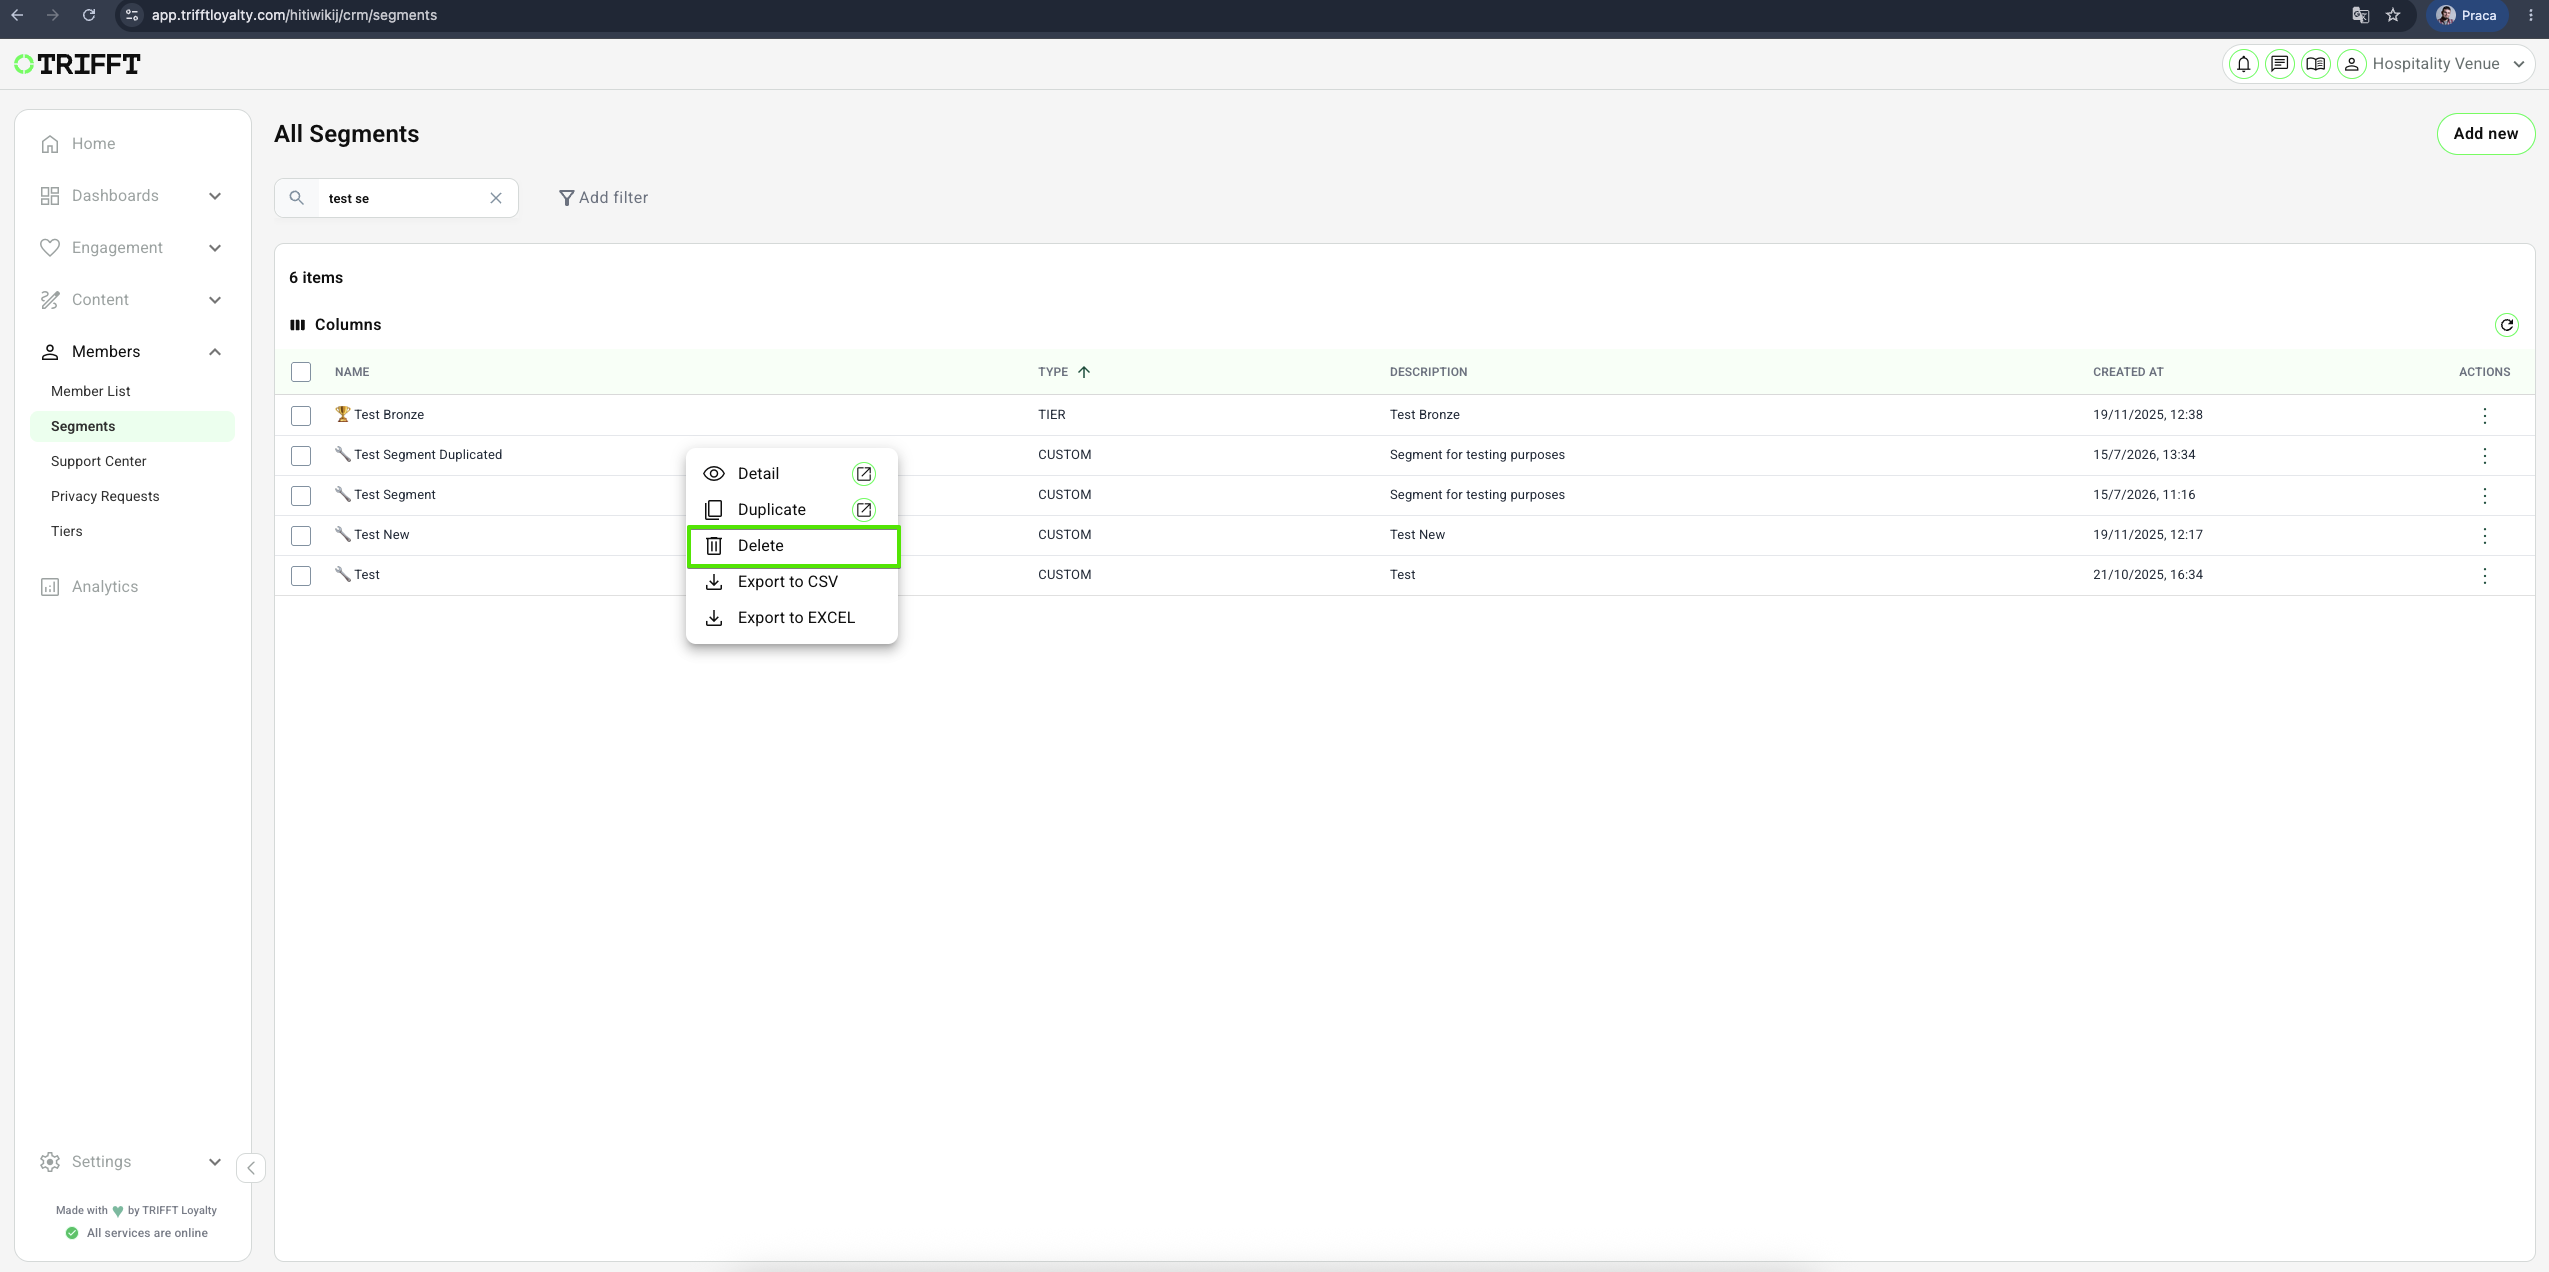
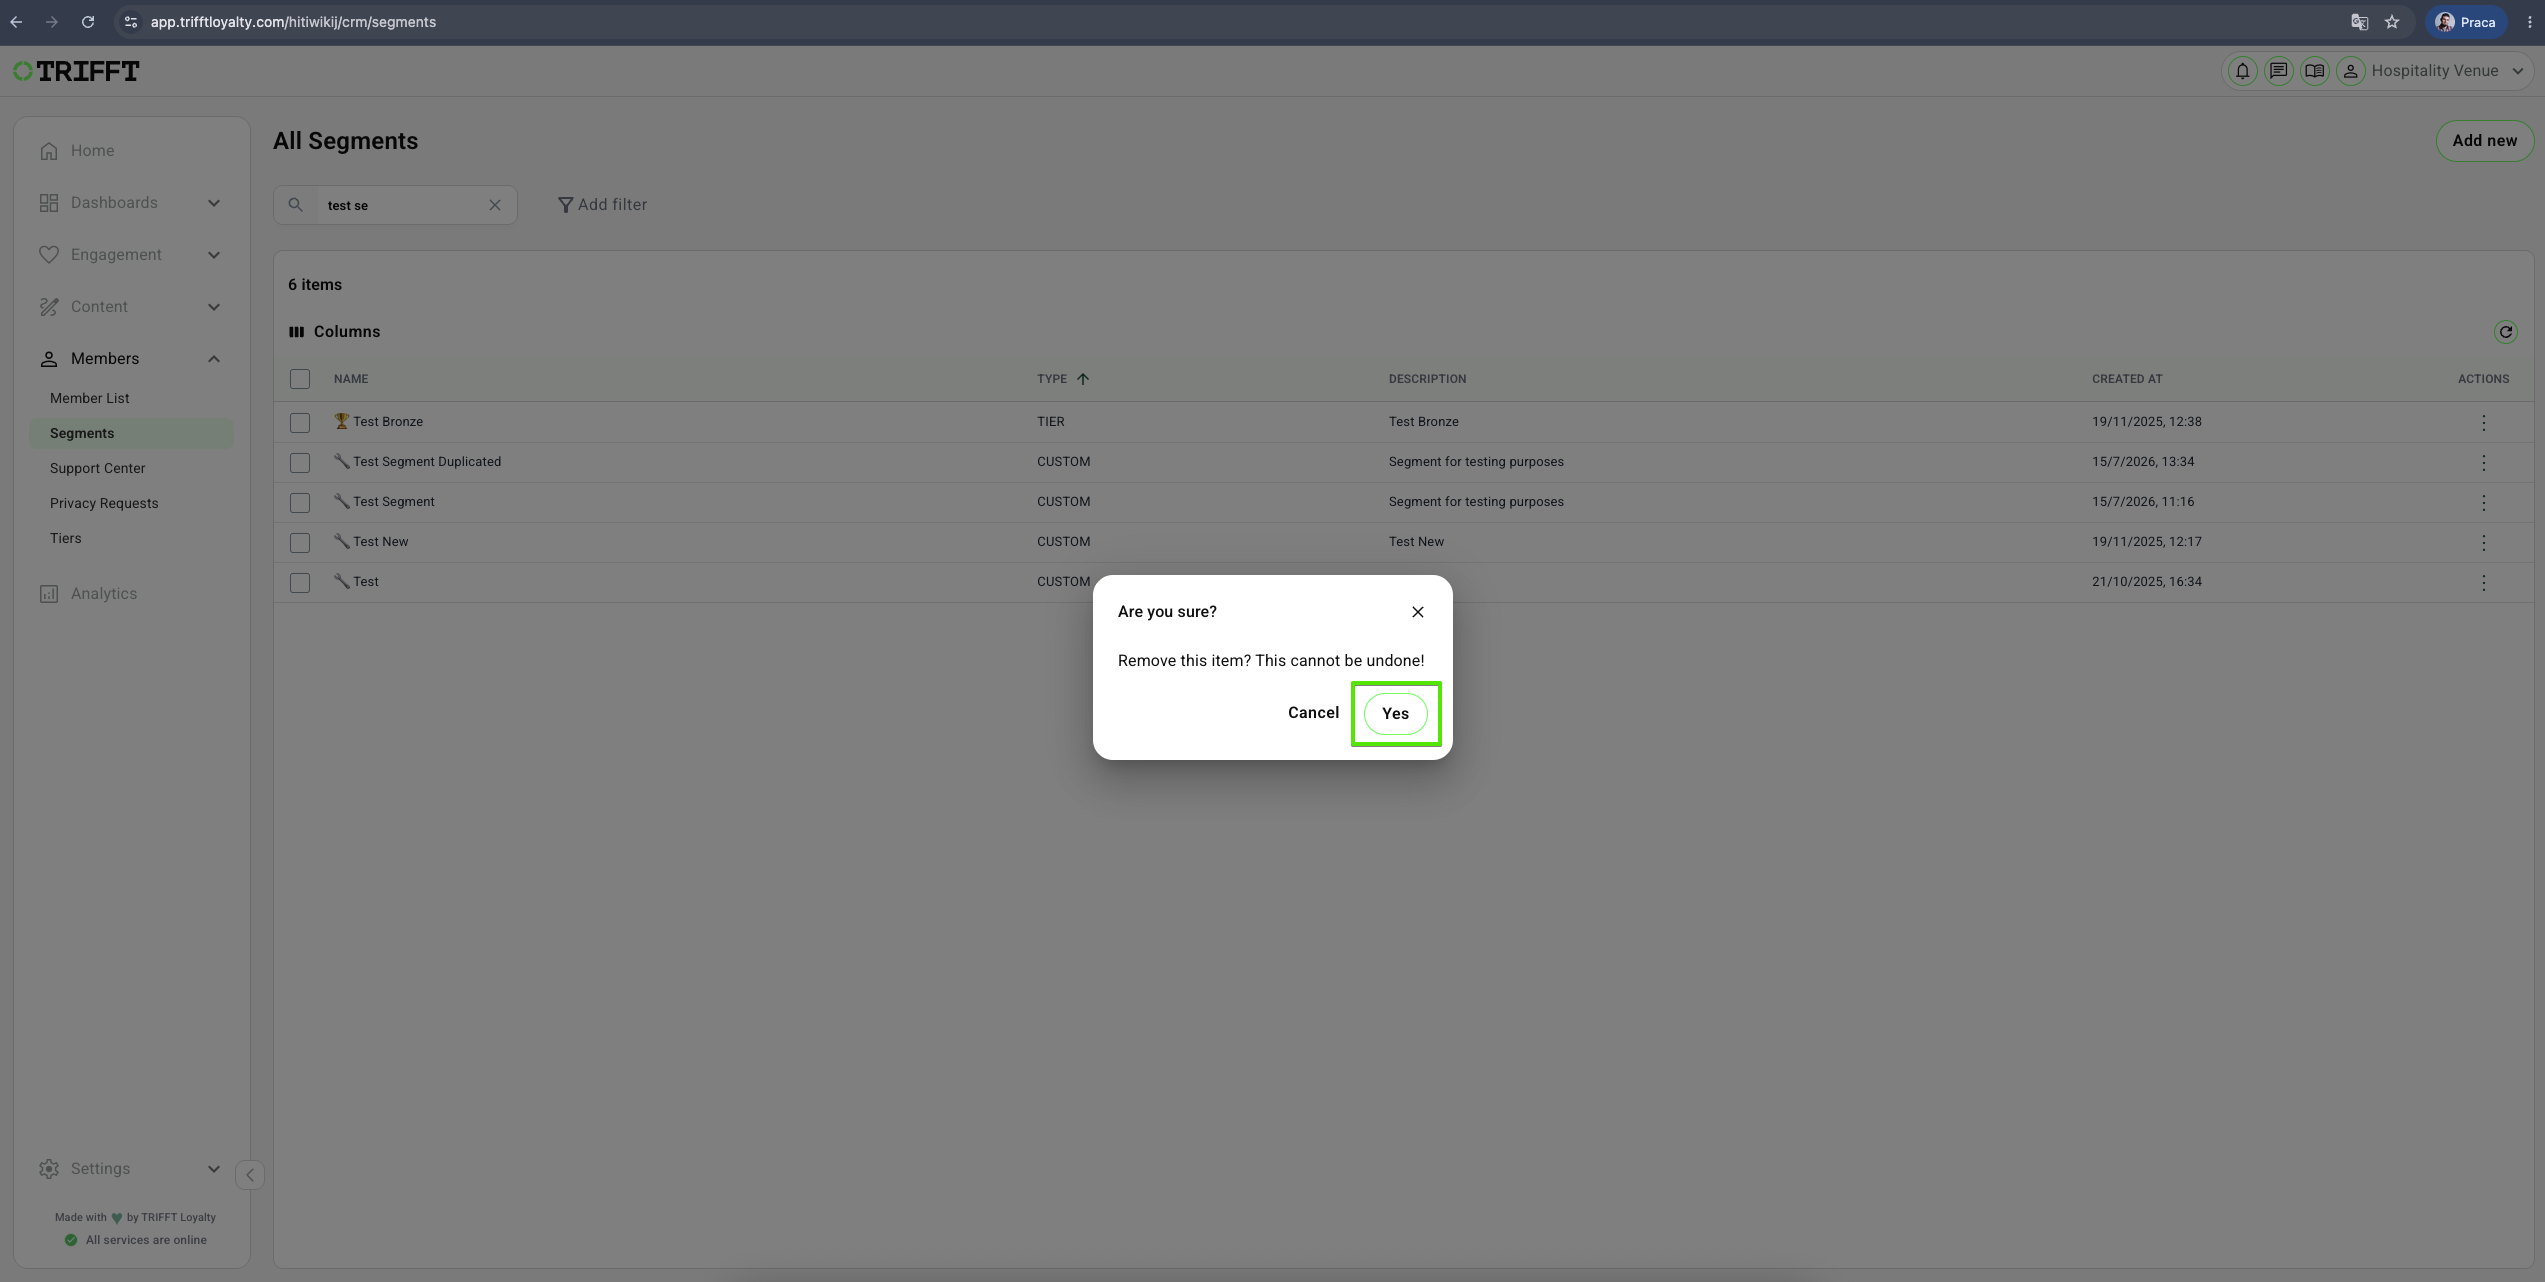
- Go to Content Cockpit > Members > Segments > Right-click the desired Segment > Delete & Confirm with Yes
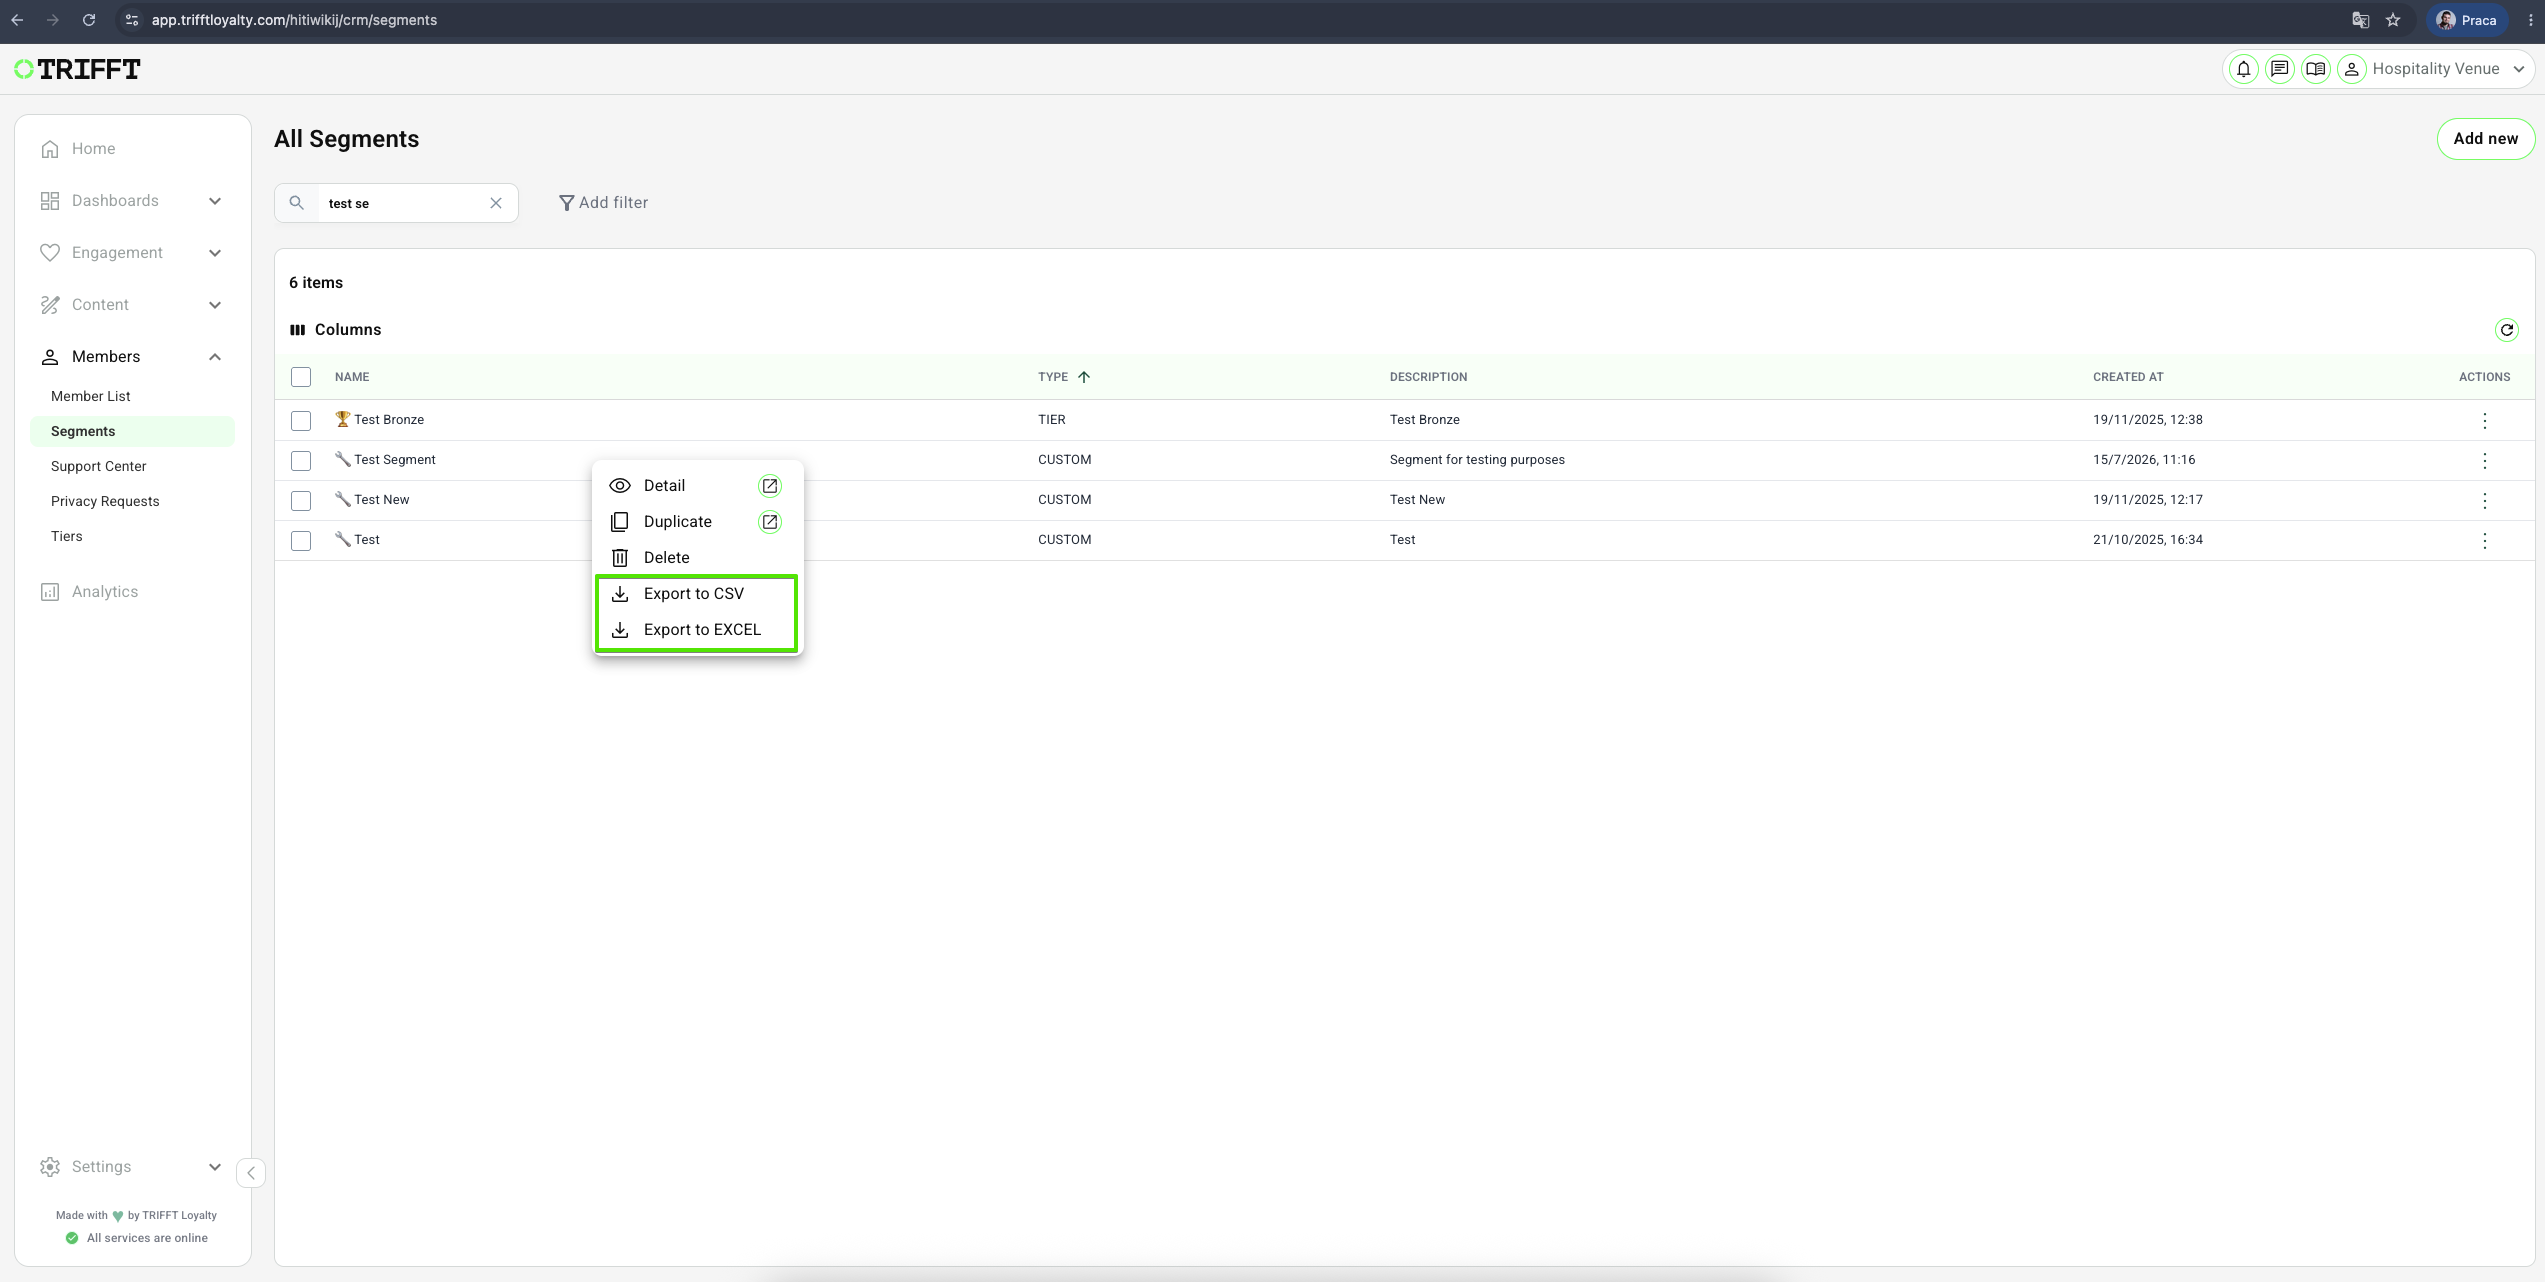
Export Segments Analytics
- Go to Content Cockpit > Members > Segments > Right-click the desired Segment > Export to CSV/EXCEL
| Topic / function | Segments |
|---|---|
| Audience | CRM / Marketing Ops / Lifecycle owner |
| Goal | Maintain, edit, pause, troubleshoot, and improve the setup over time |
Ongoing management checklist
- Dynamic Integrity: Confirm that Dynamic segments are refreshing automatically as member behaviors change.
- Naming Convention: Ensure internal names remain descriptive (e.g., including the date or specific threshold) for easy team collaboration.
- Integration Parity: Check that segment counts in TRIFFT roughly match the list/segment sizes in Klaviyo or Bloomreach.
- Null Value Handling: Verify that filters correctly account for members with missing data to avoid accidental exclusion.
- Translation Sync: For Public segments, ensure the display name is updated in all active languages after any name change.
- Redundancy Audit: Delete segments that have "0" members for over 90 days or were created for past, non-recurring promotions.
Updated 3 months ago