
Promo Events Other Functions
Adding Promo codes
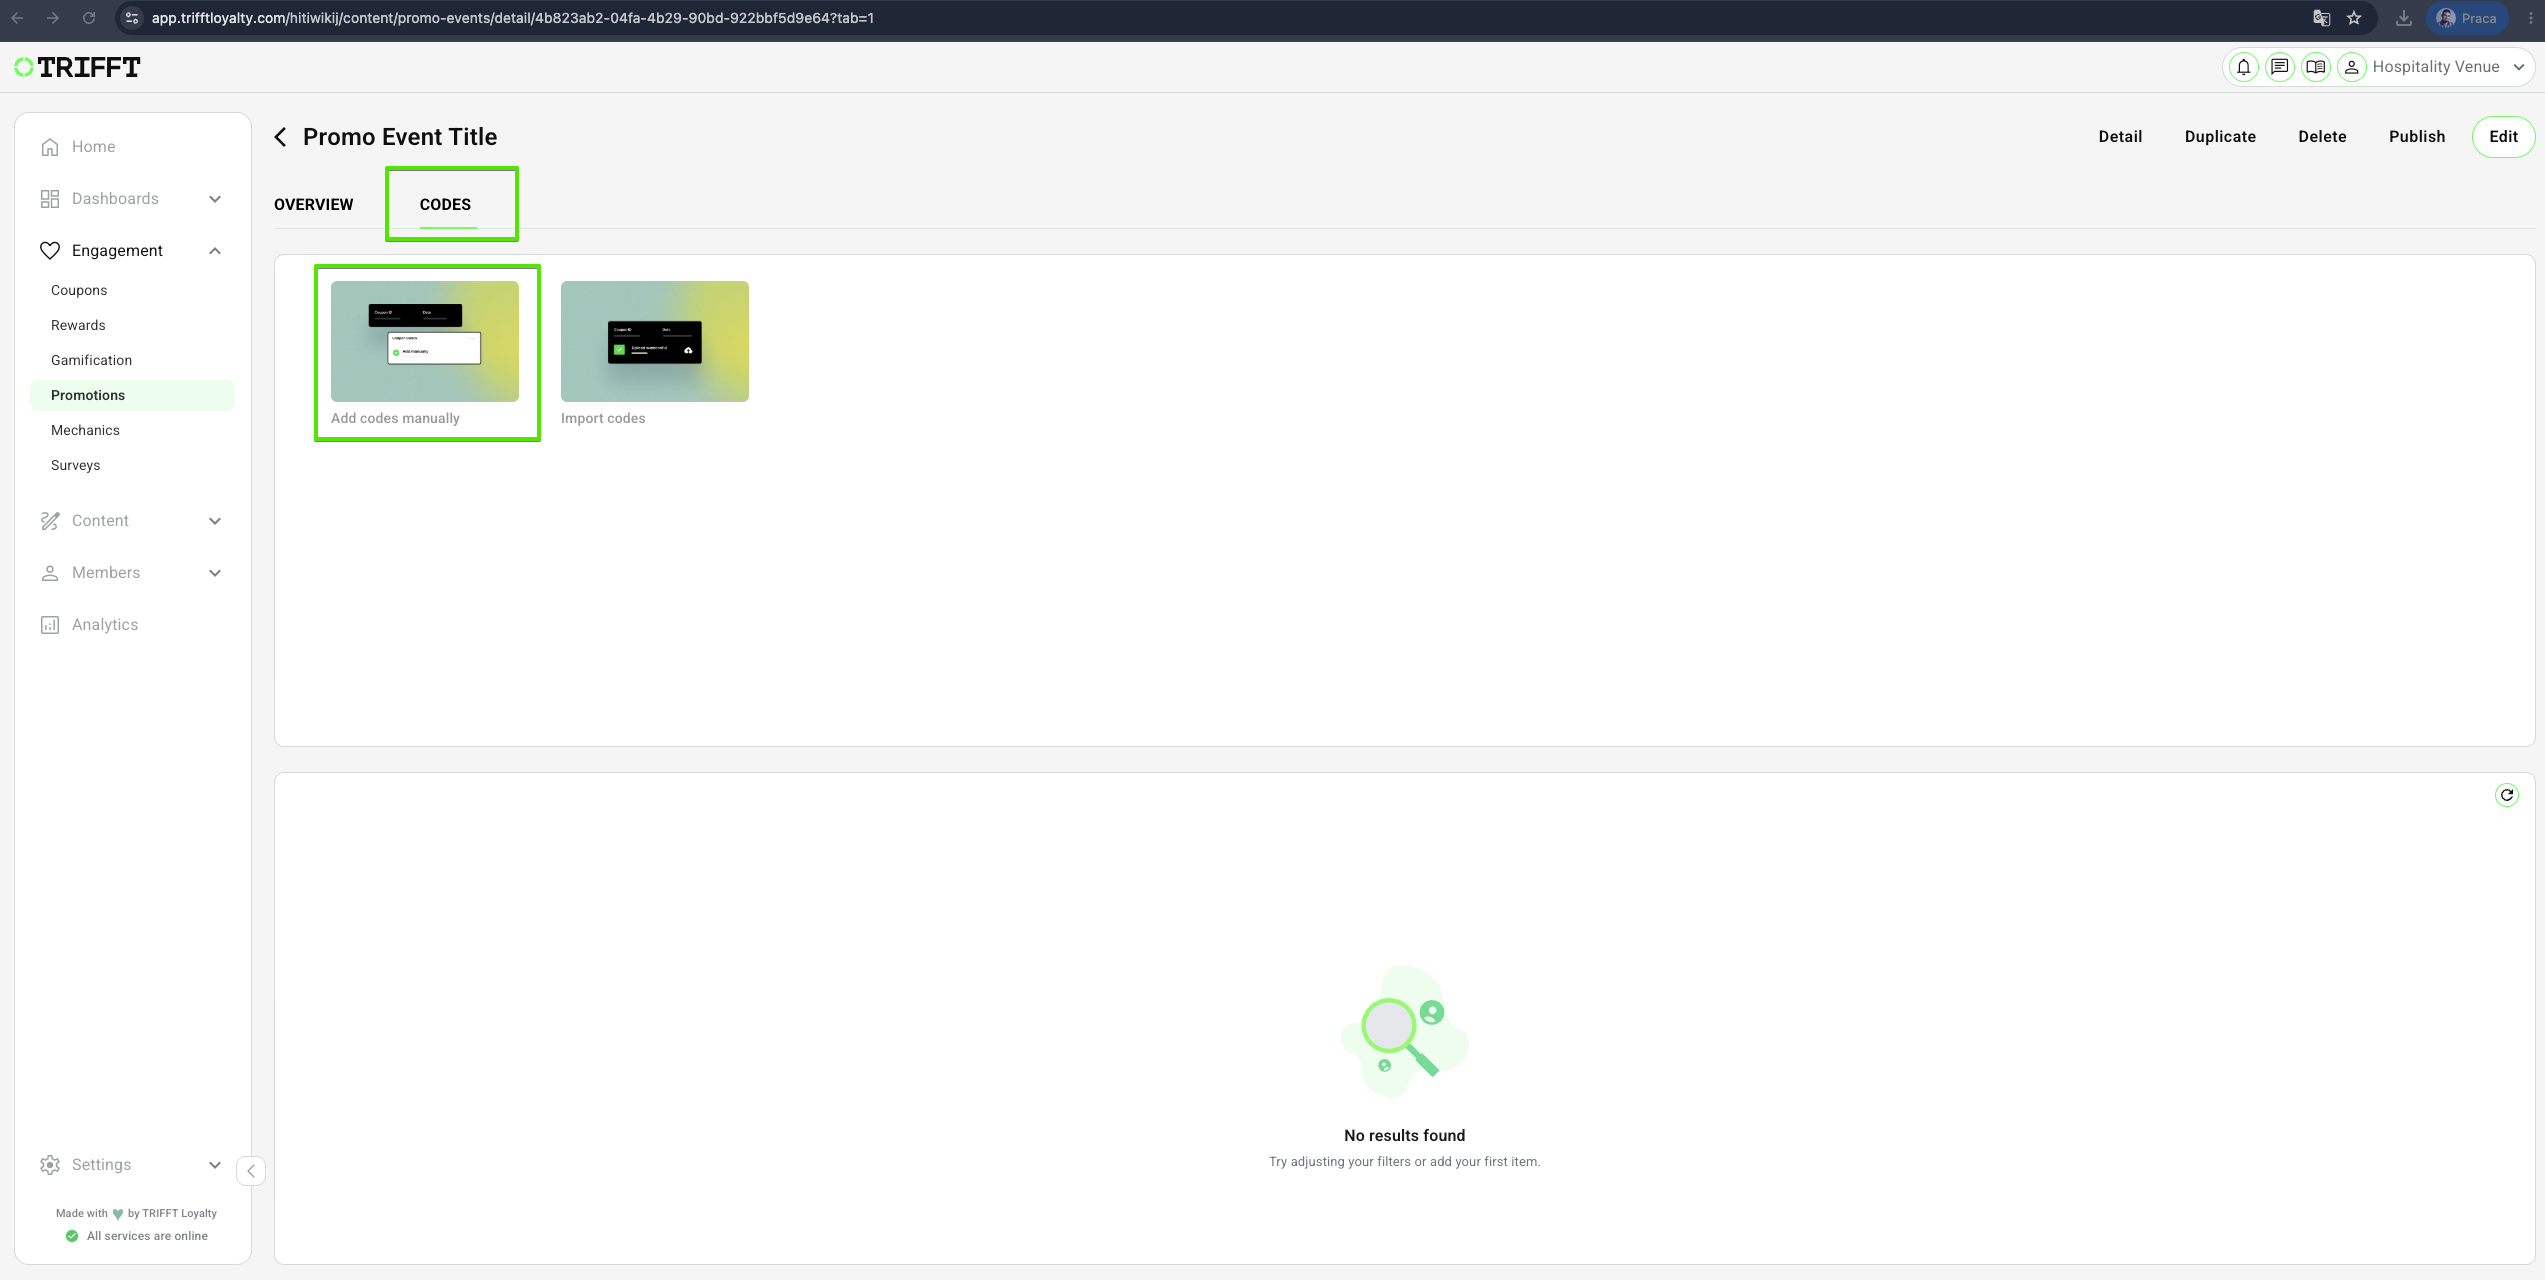
- After creating and saving the promo event, its detail page opens. Navigate to the Codes tab, where you can assign a promo code to this event. You can create codes manually or import them from a CSV or XLS file.
- For creating a code manually, click Add codes manually, or you can import the list of your codes.
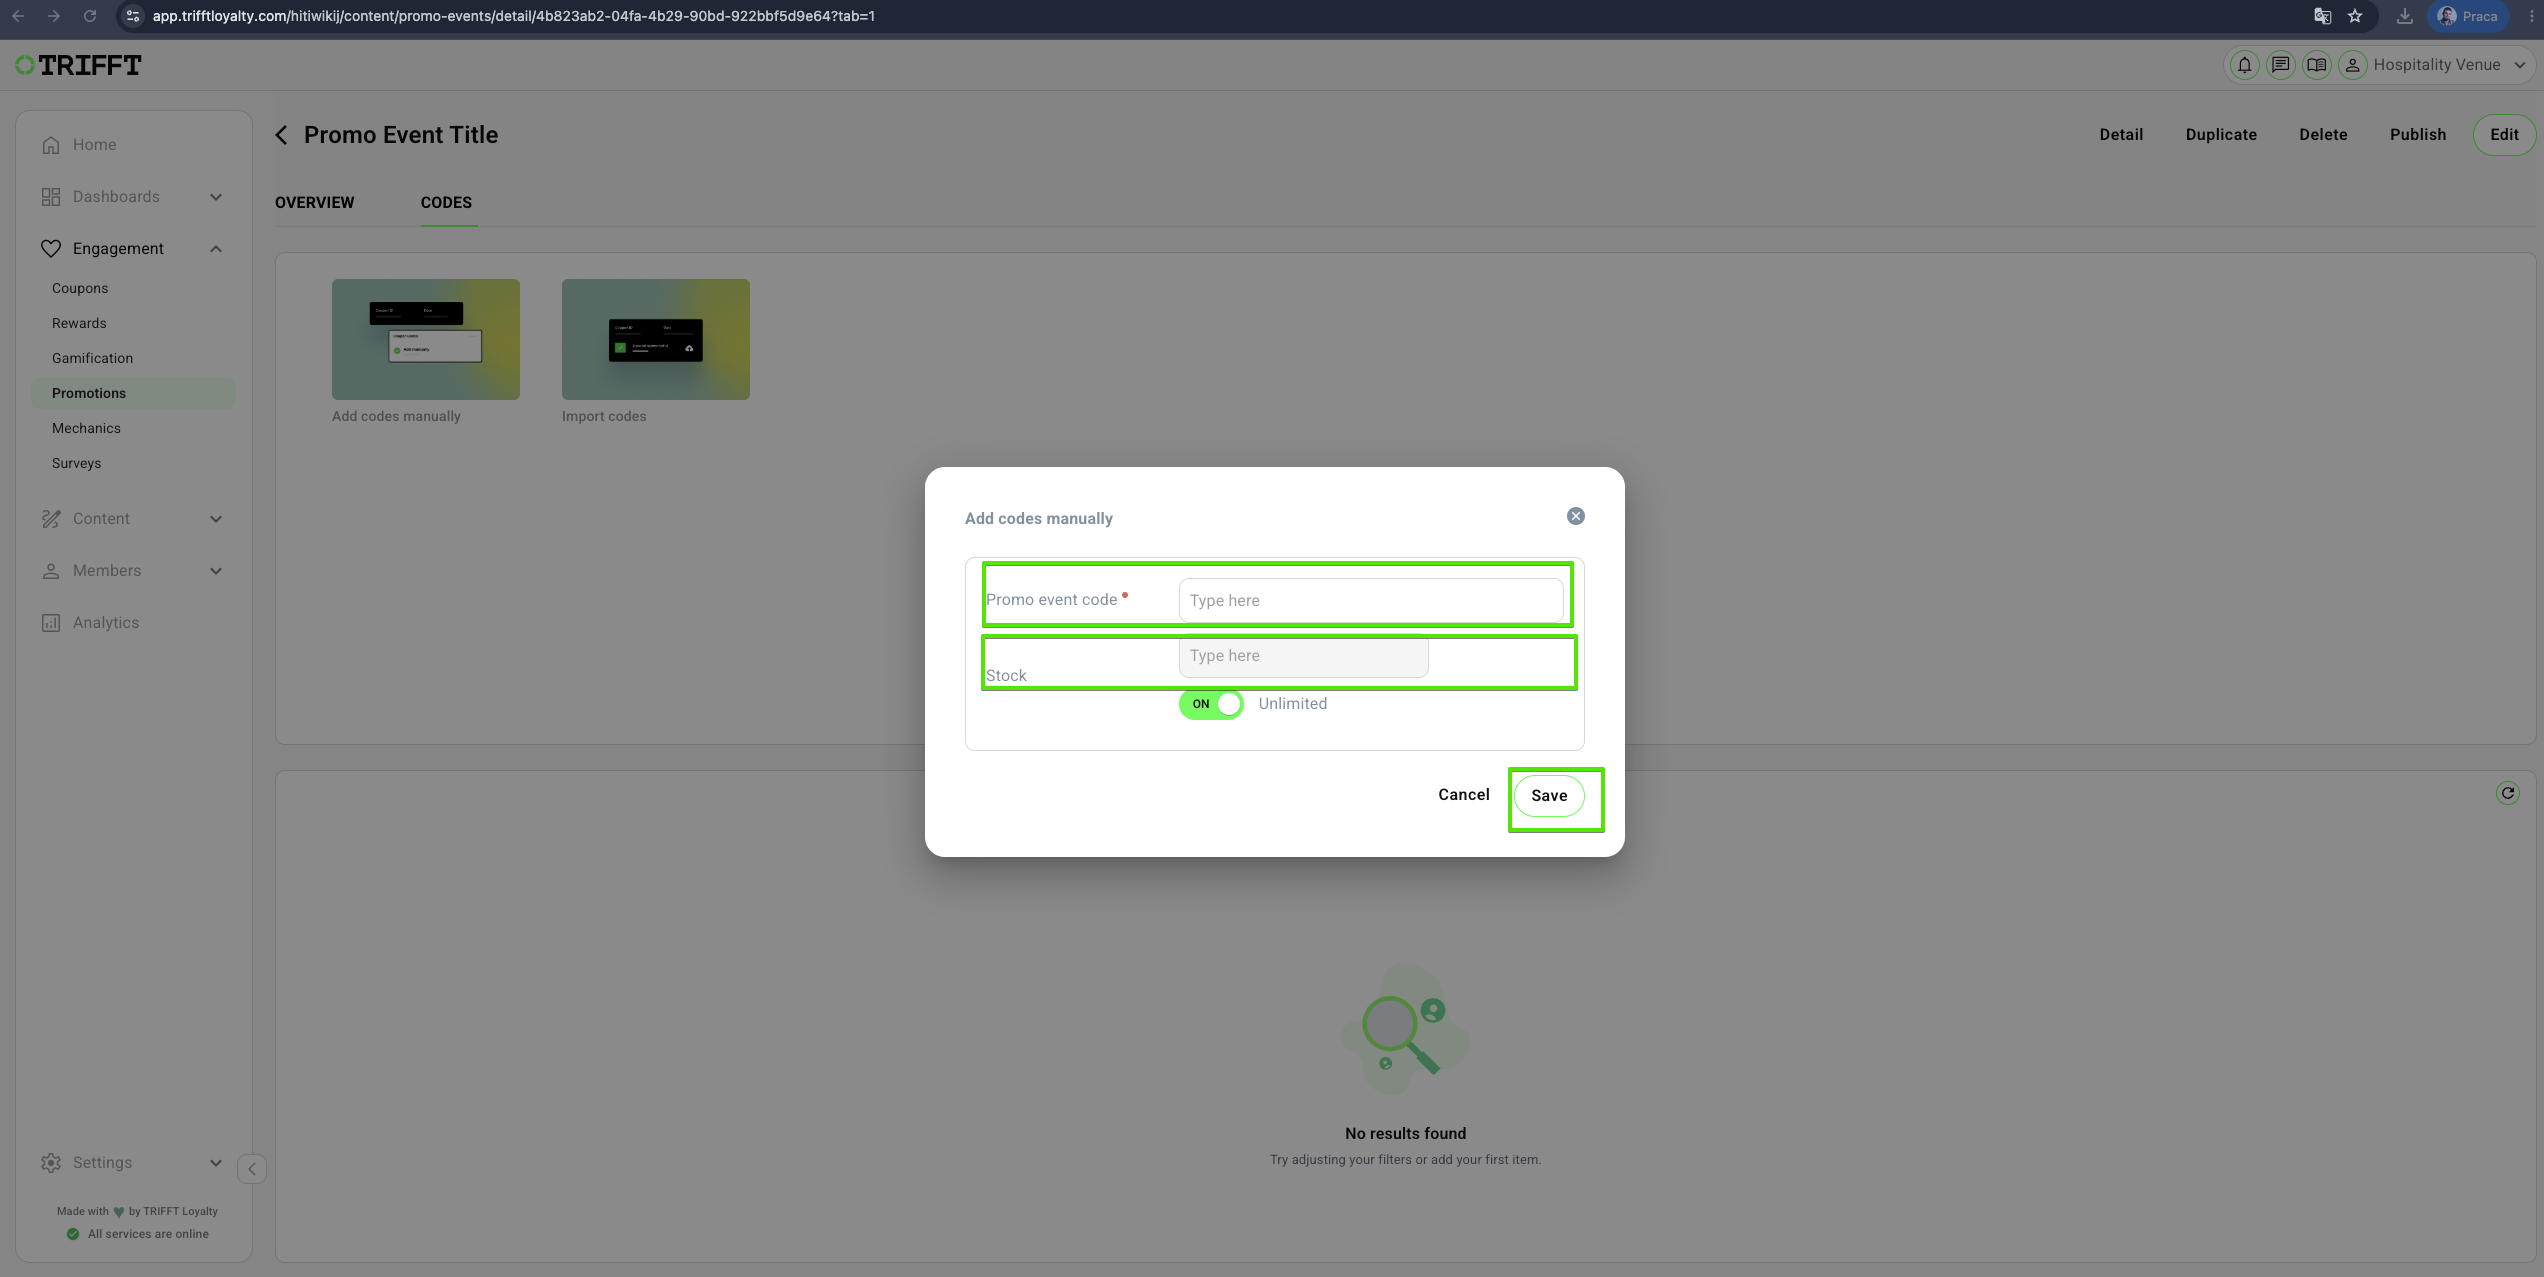
- In the new window, enter the desired code.
- Optional: If you want to limit the number of times the code can be used, check the Stock option and set the allowed usage limit.
- Click Save to confirm.
- Once saved, the promo code is set, and the promo event is successfully configured.
Importing Codes
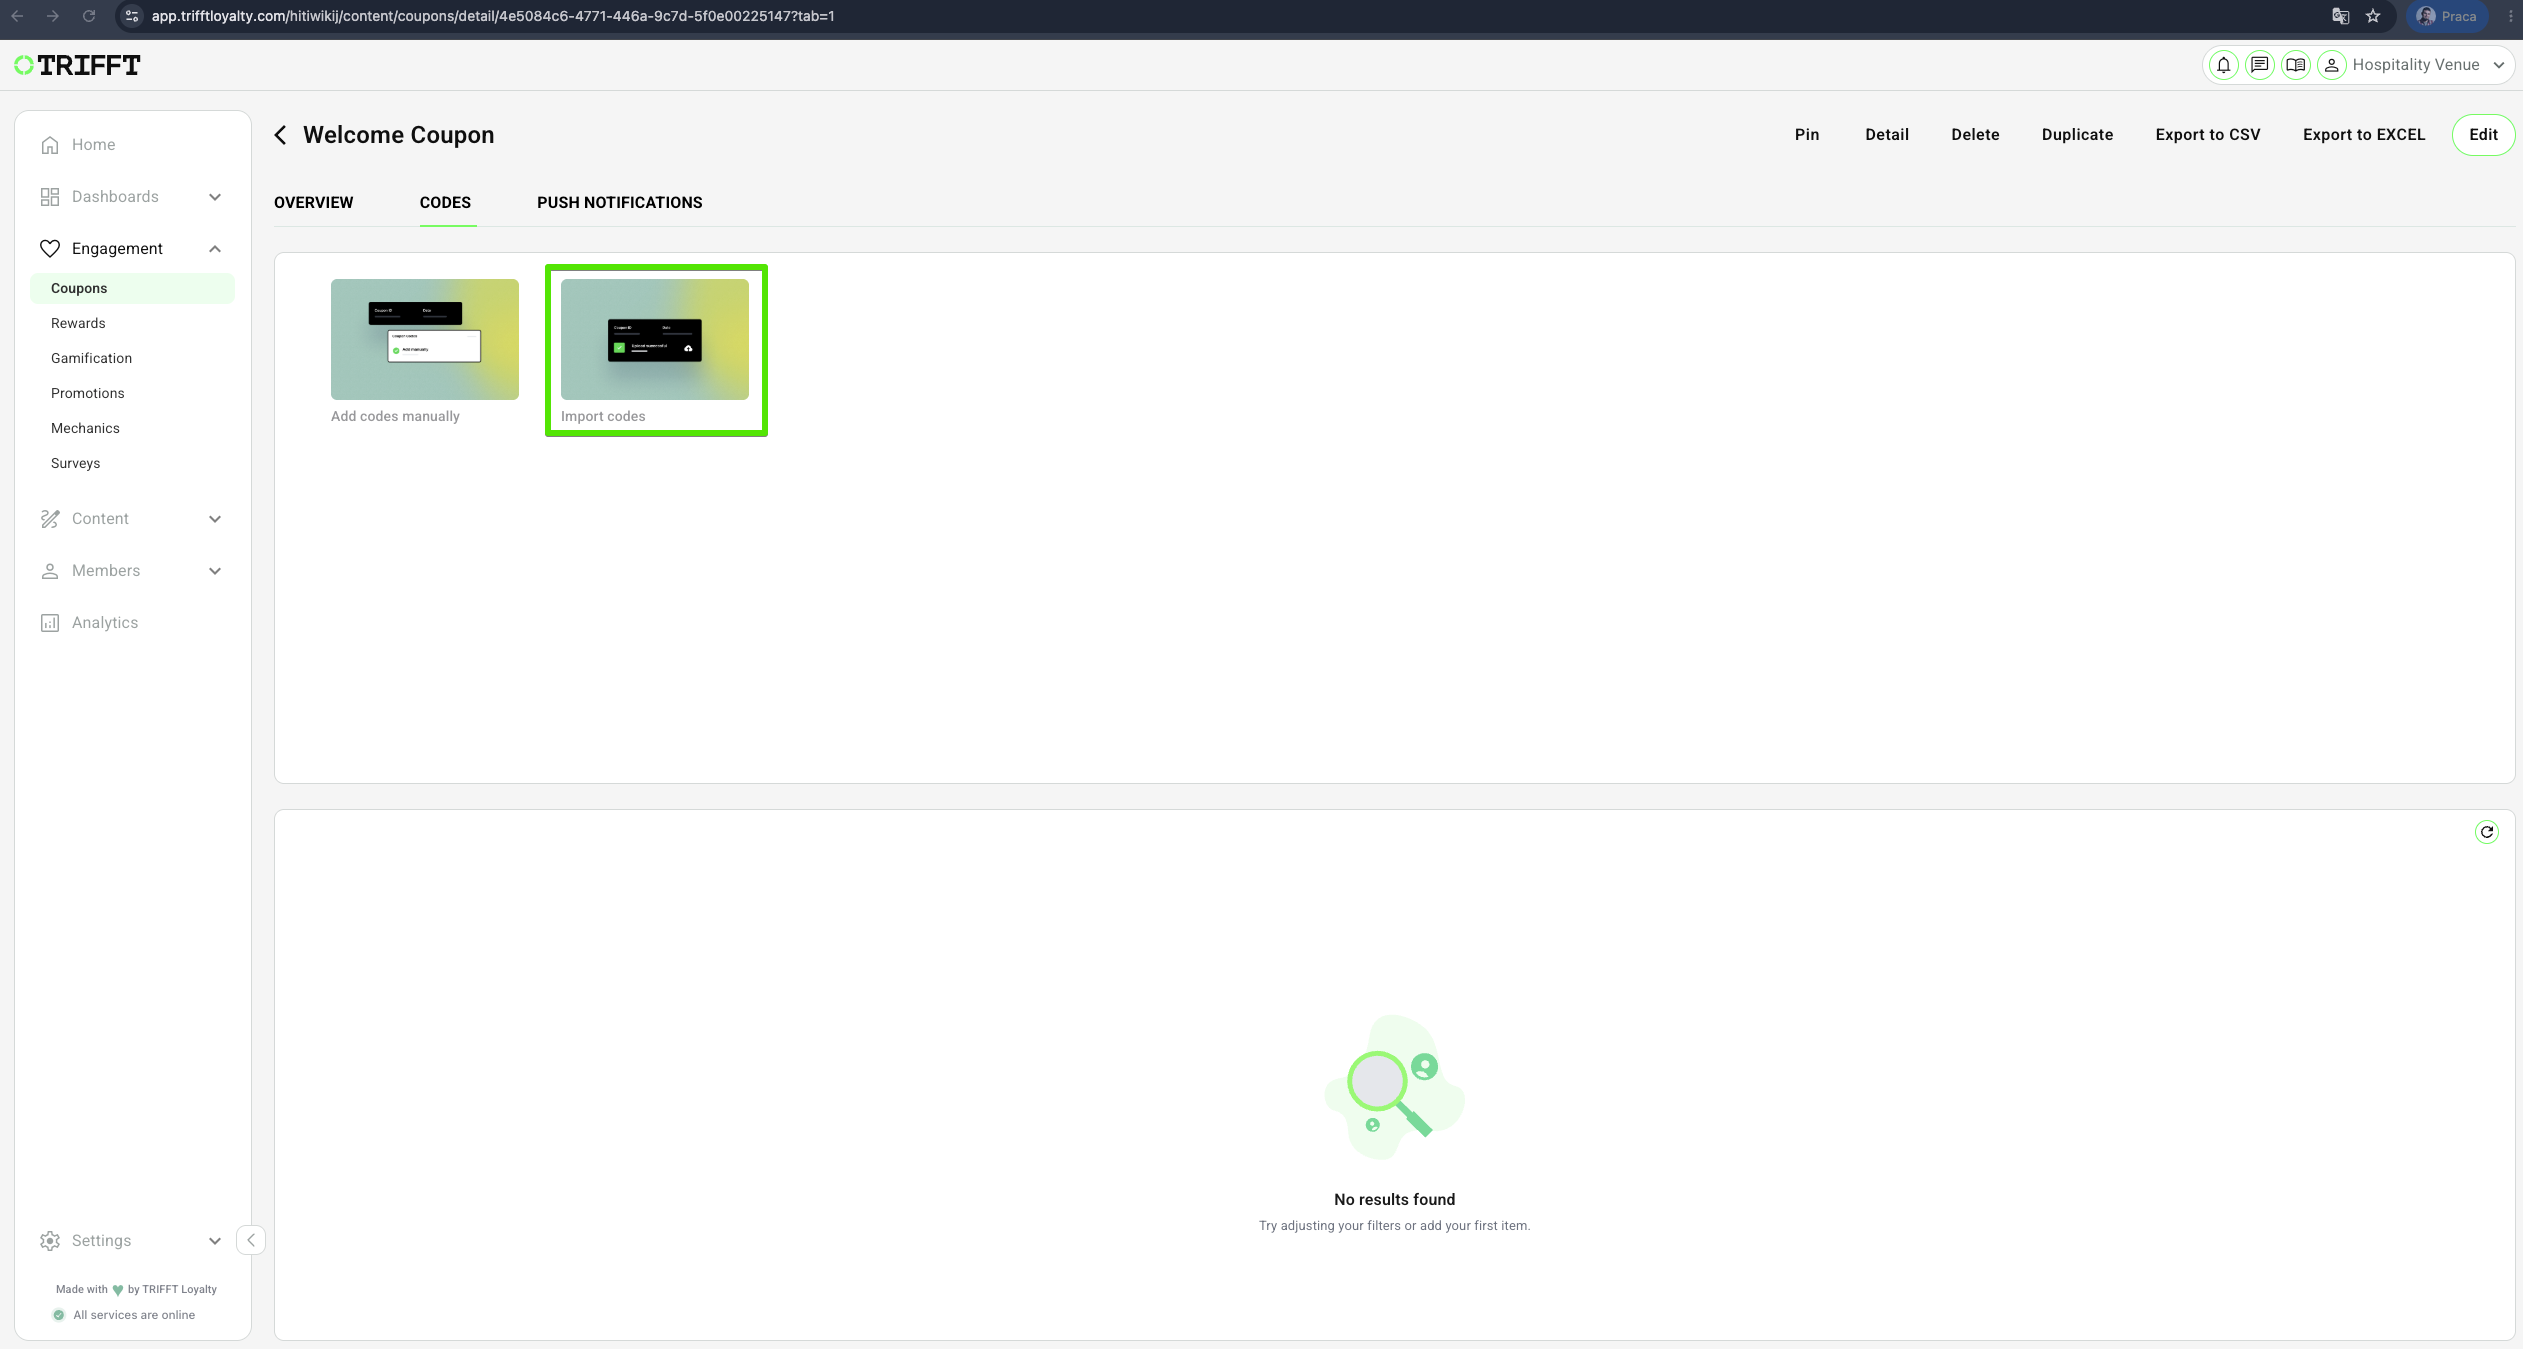
- You can download the coupon_codes_example.csv file for reference
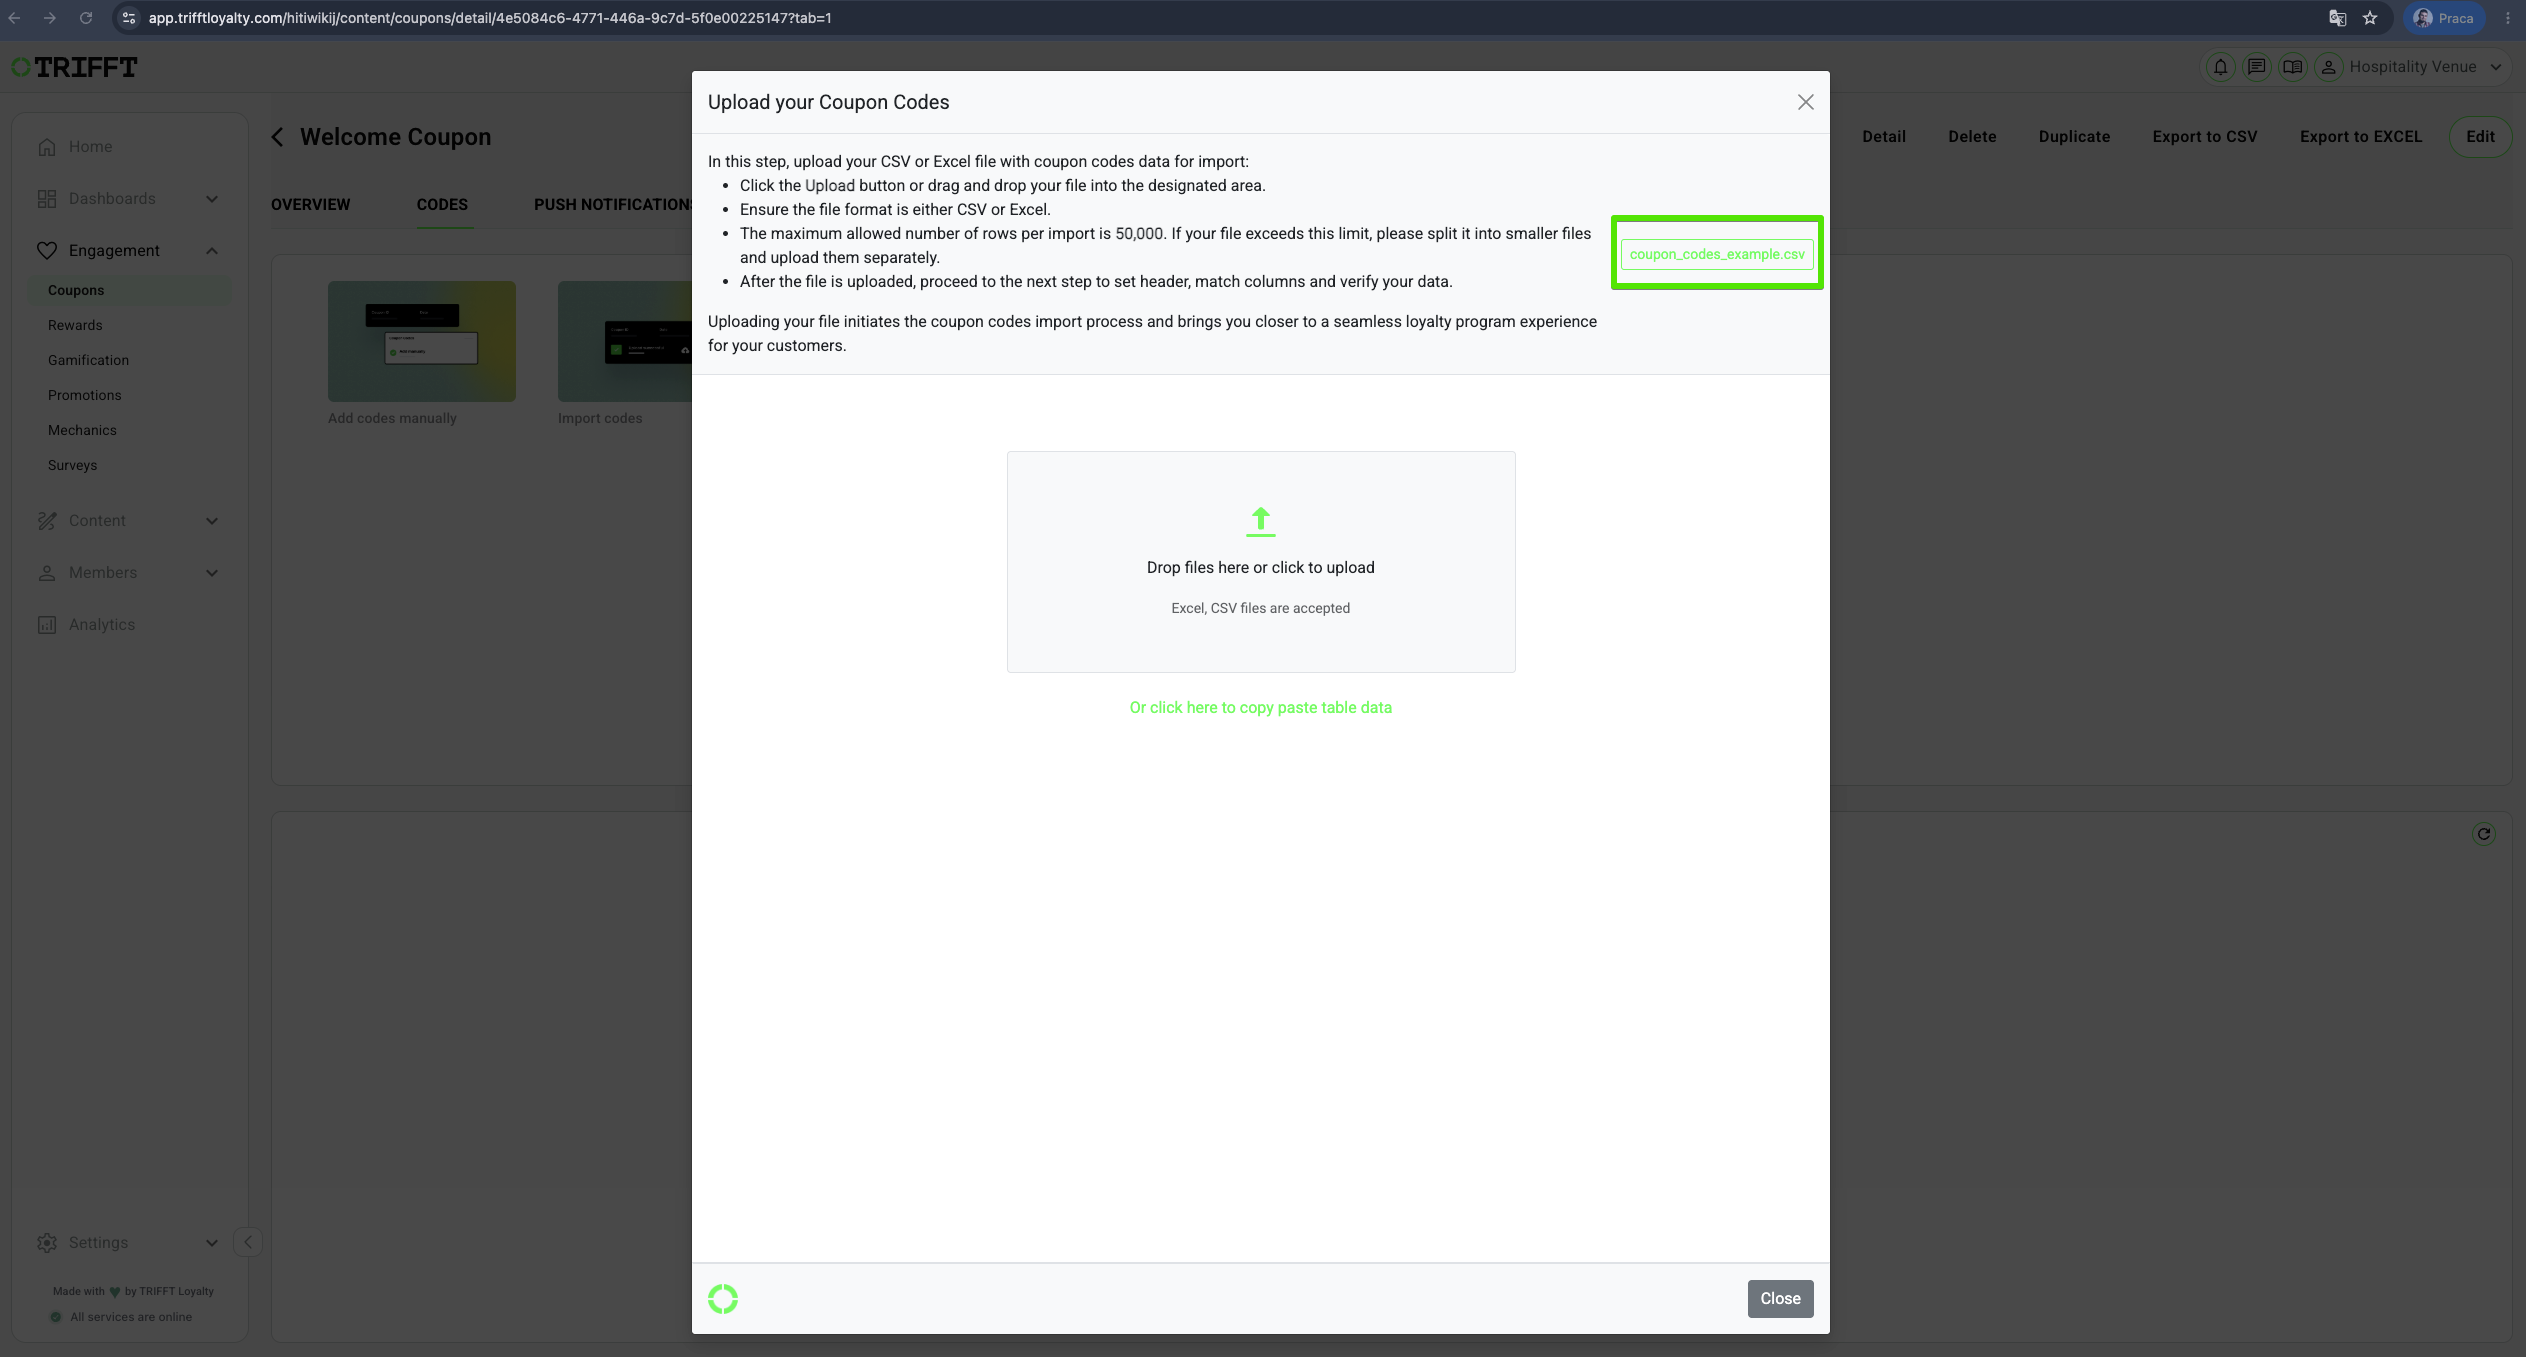
- Upload the Codes
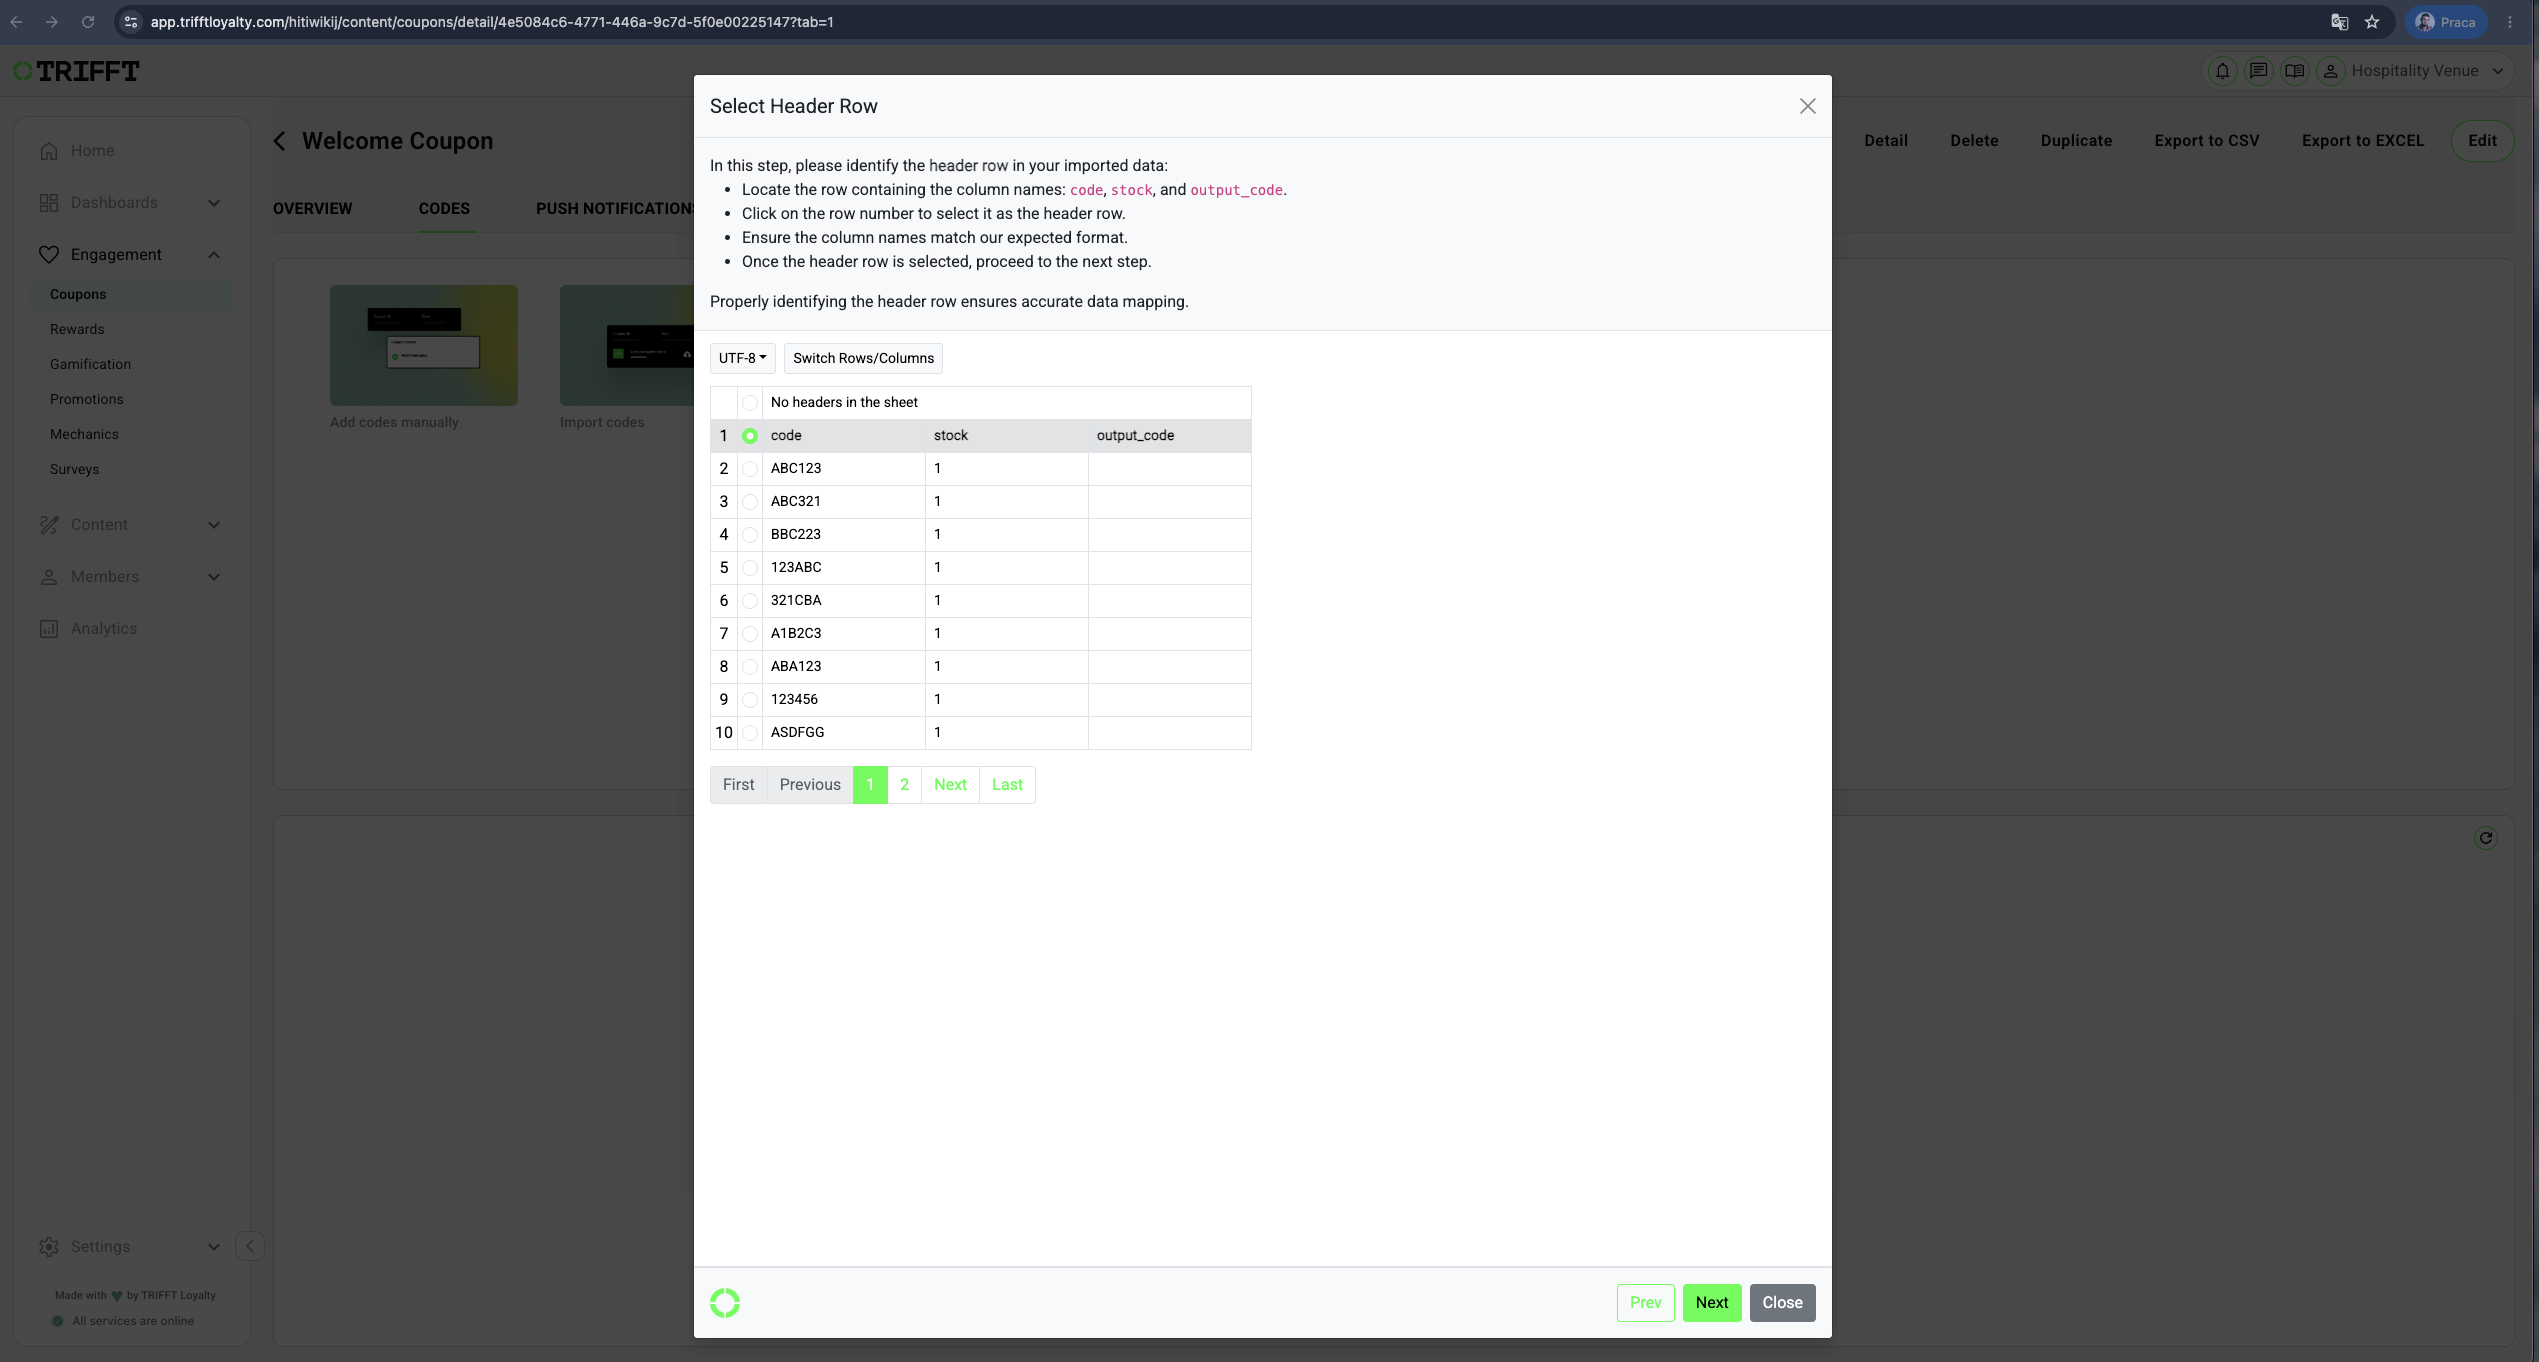
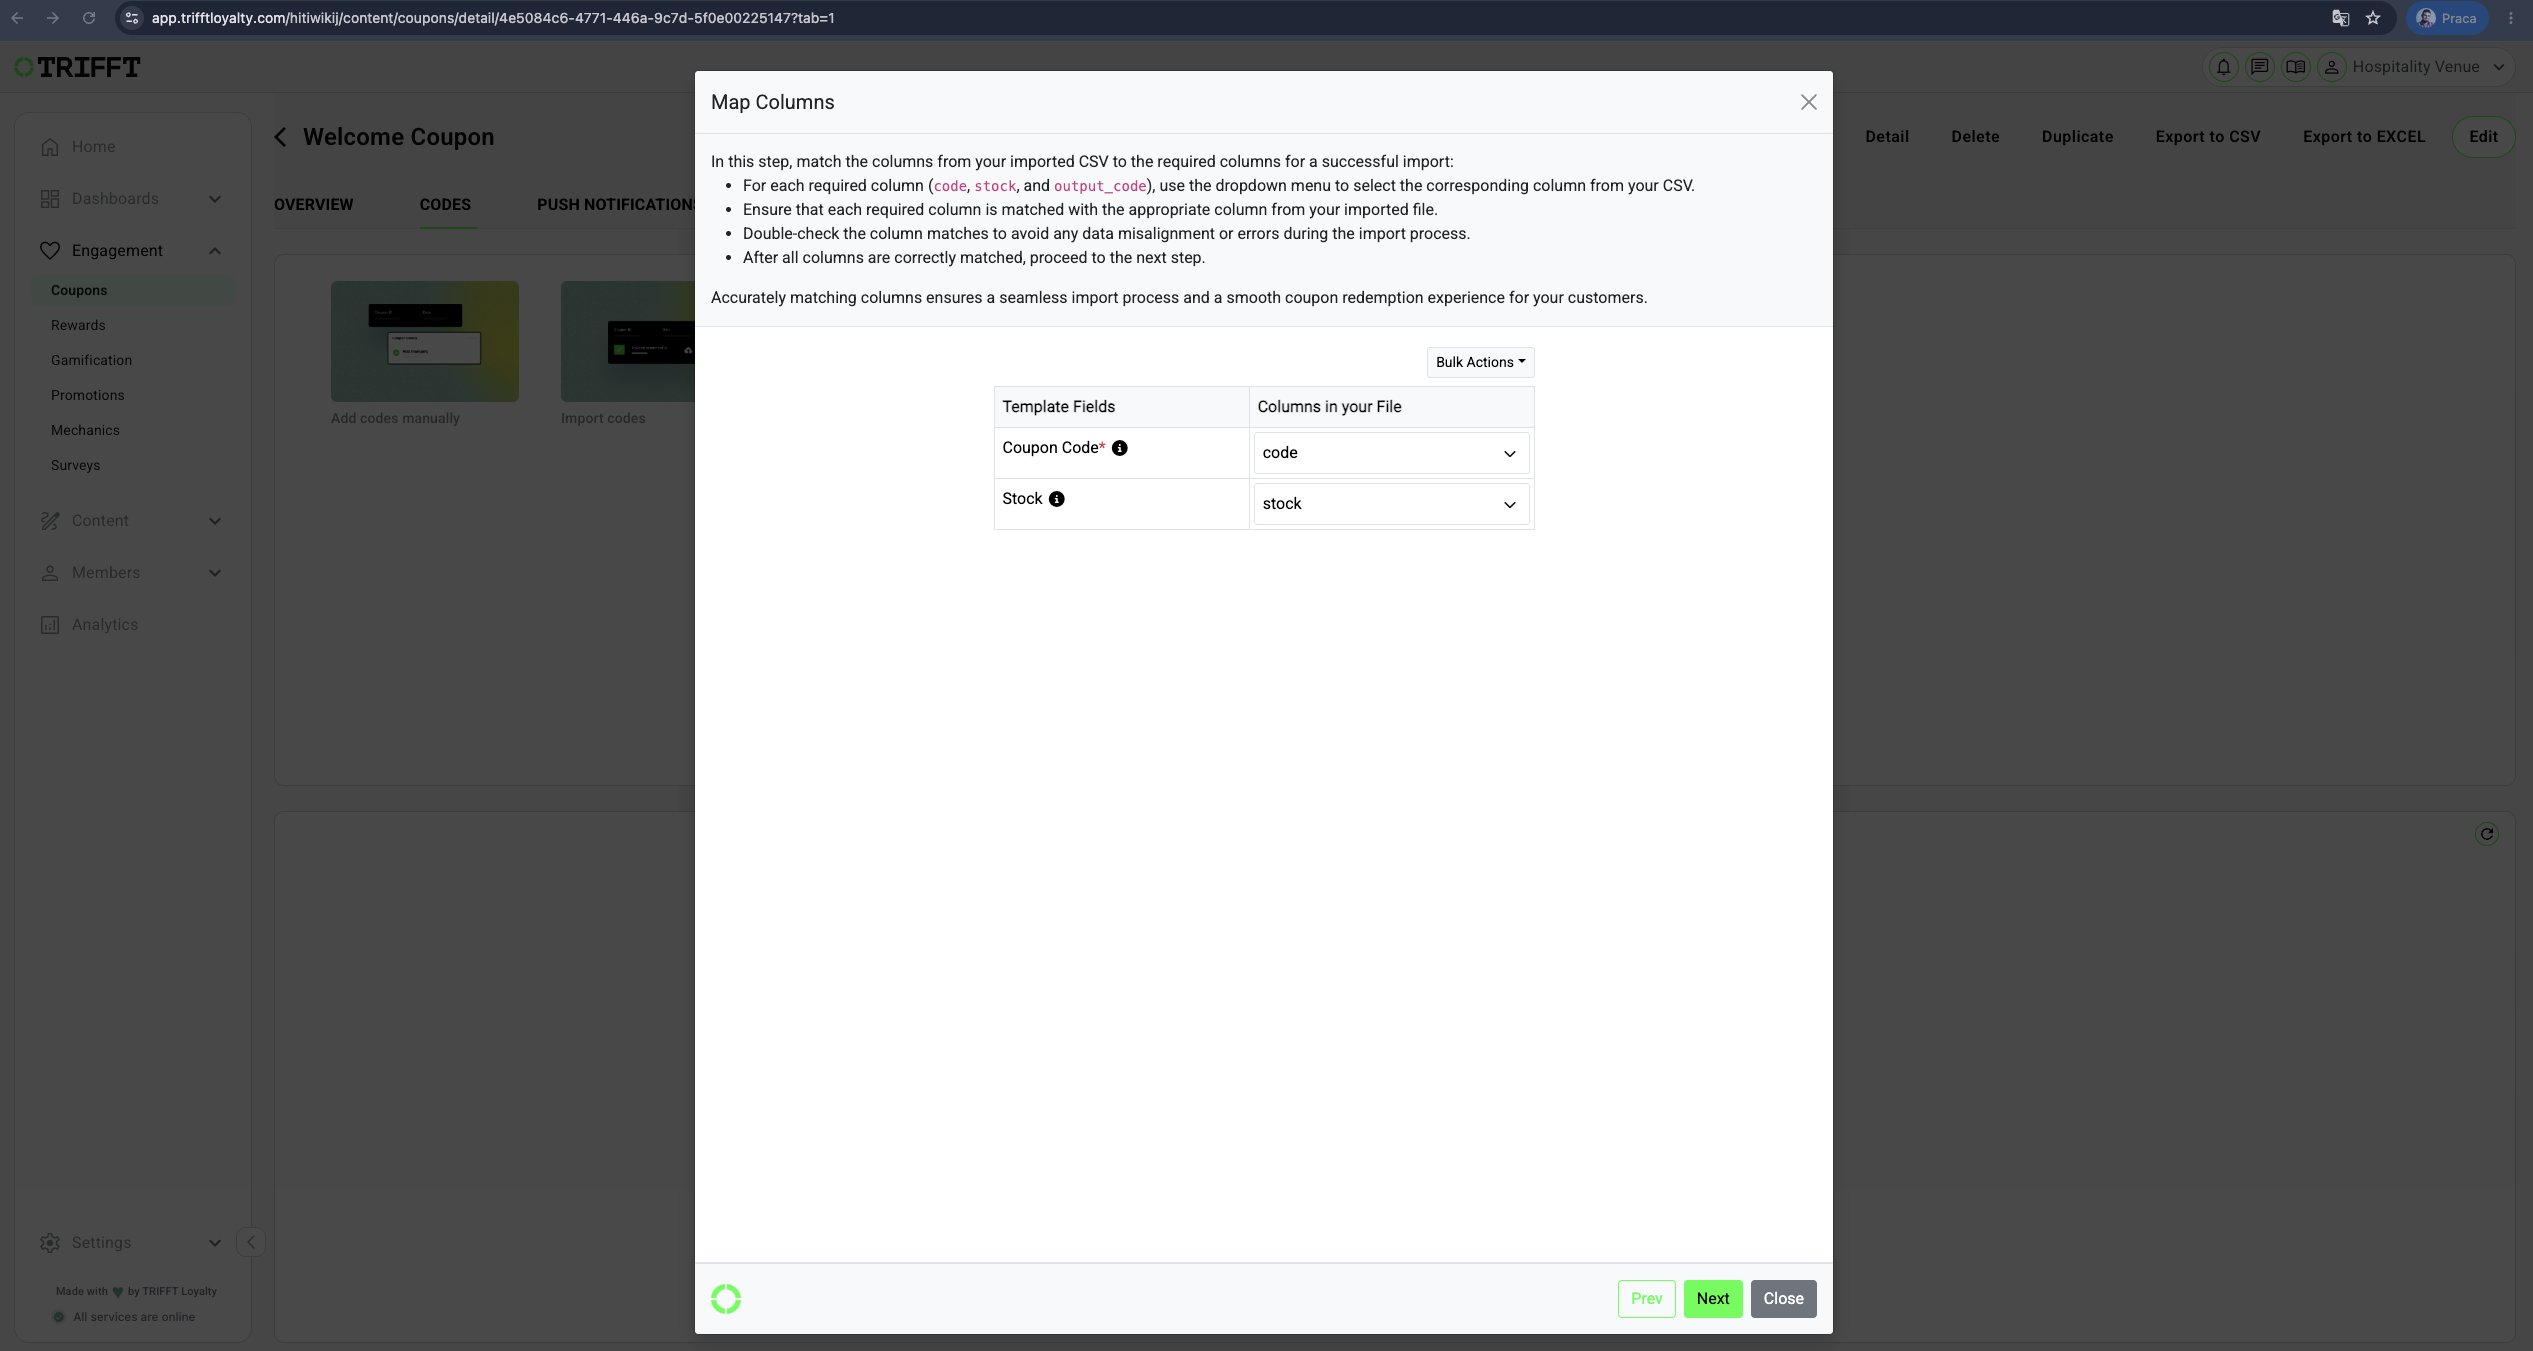
- Follow the guidelines:
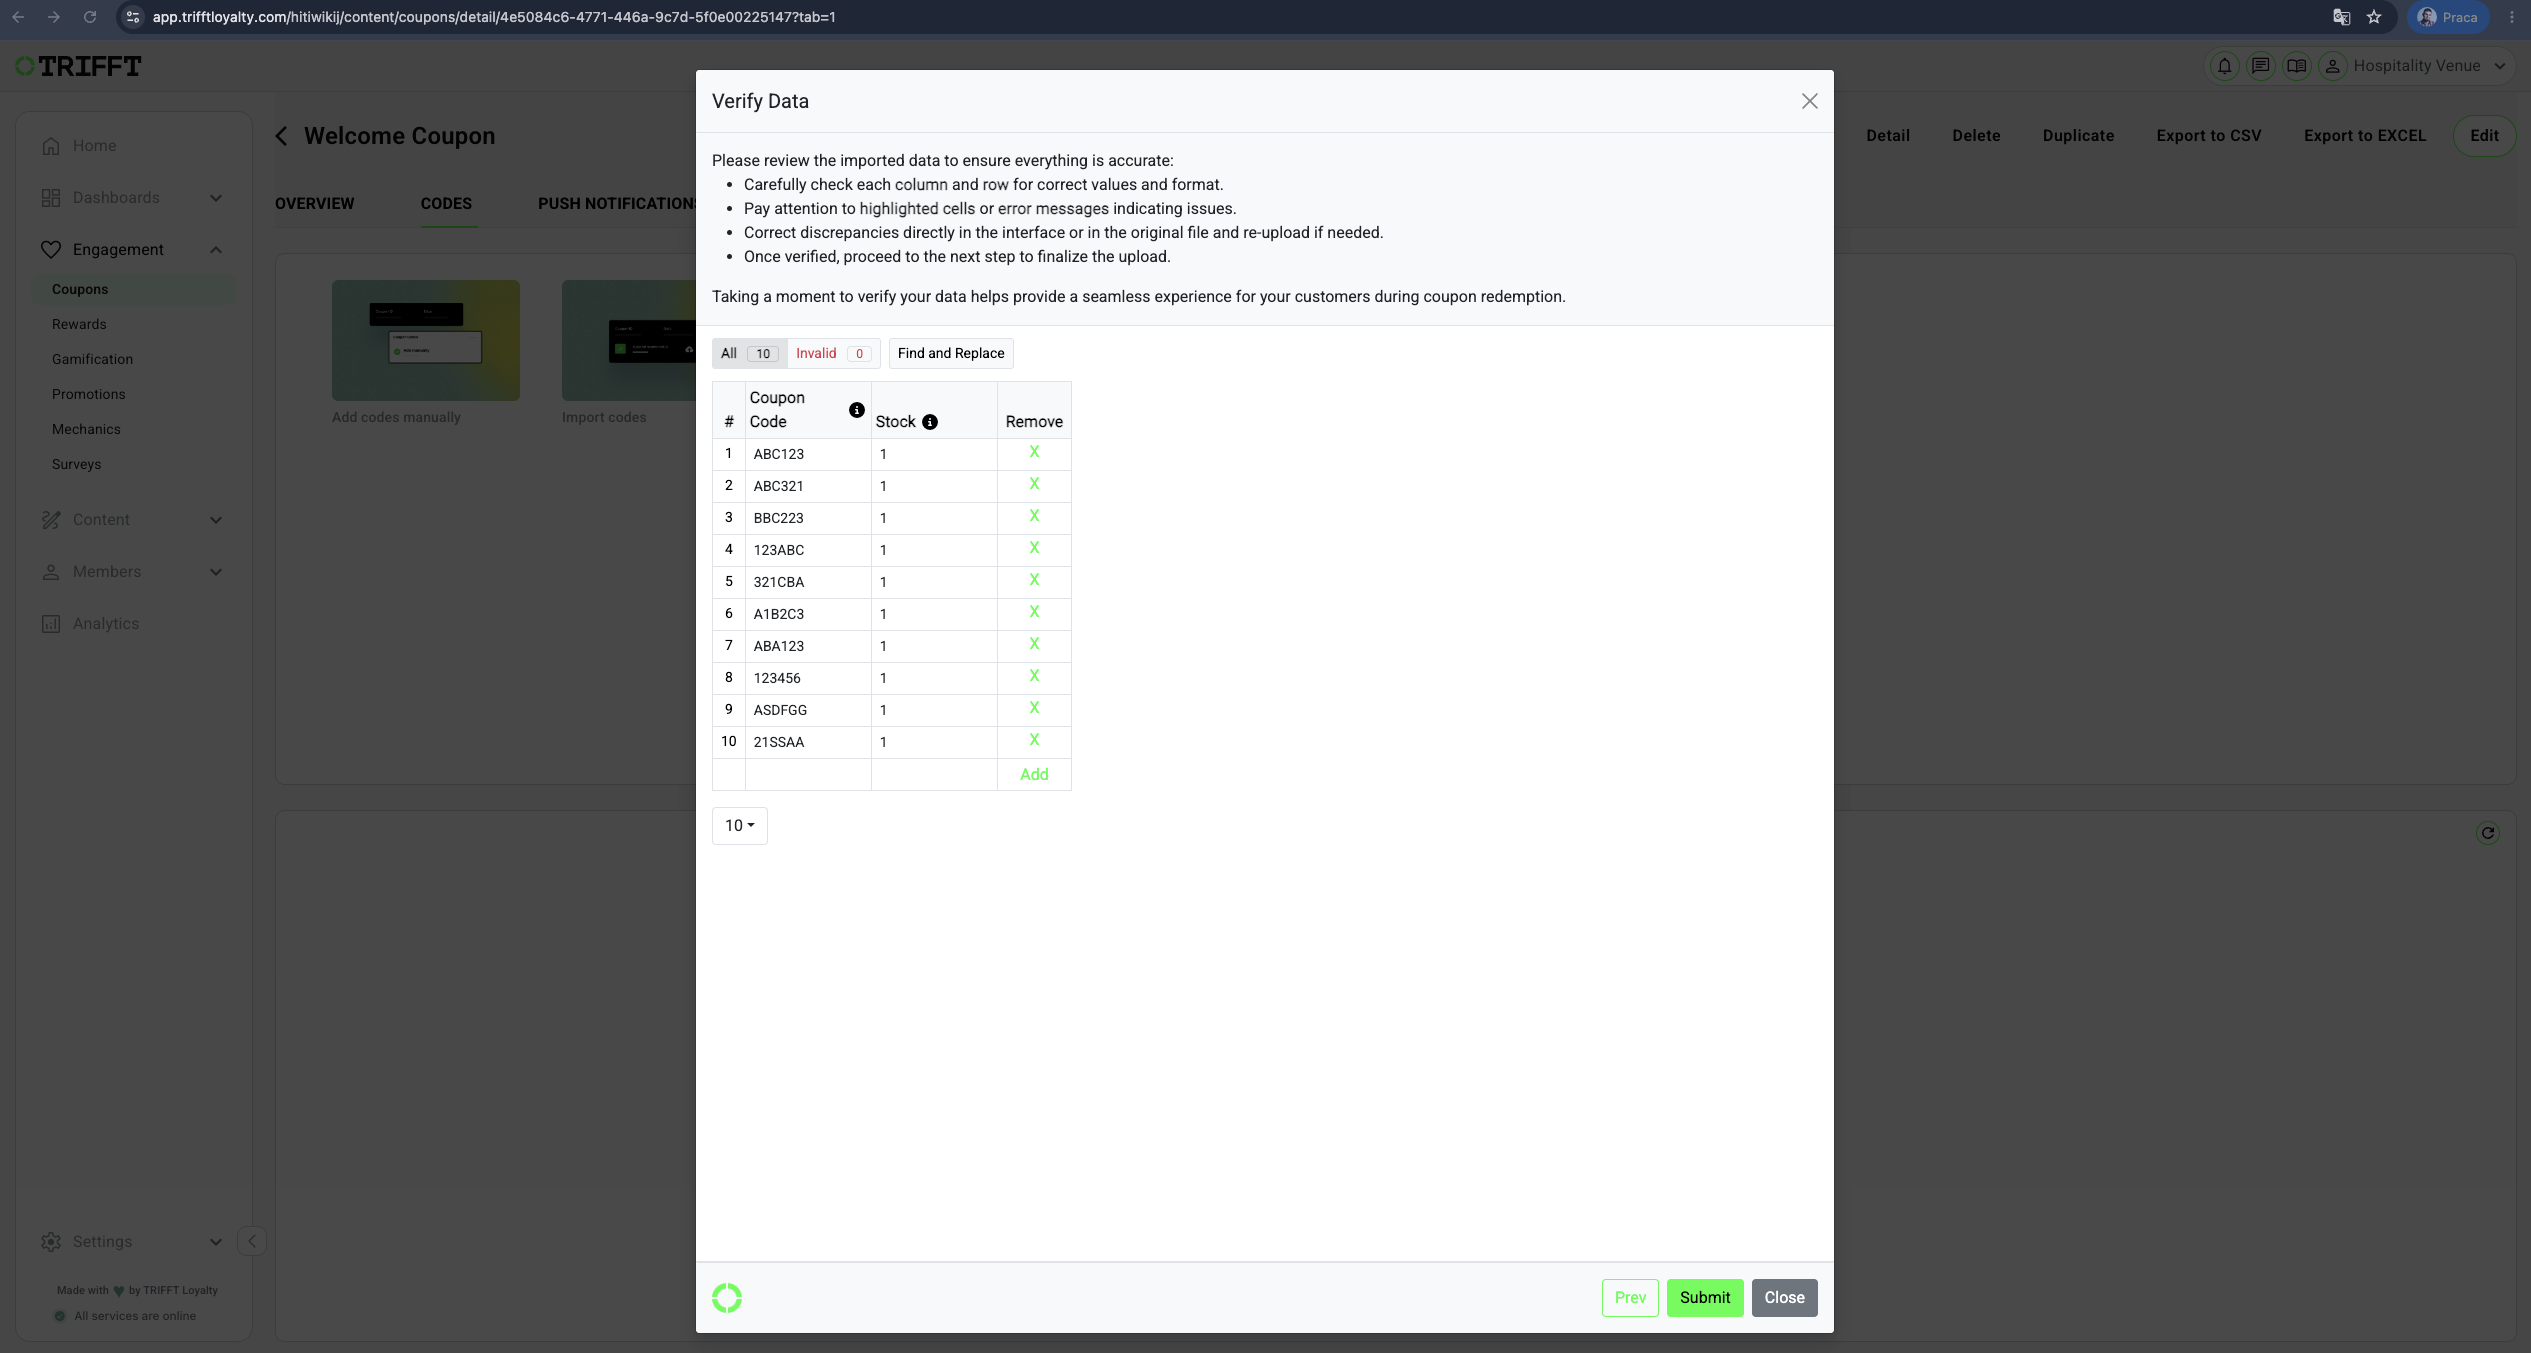
- Verify data and submit:
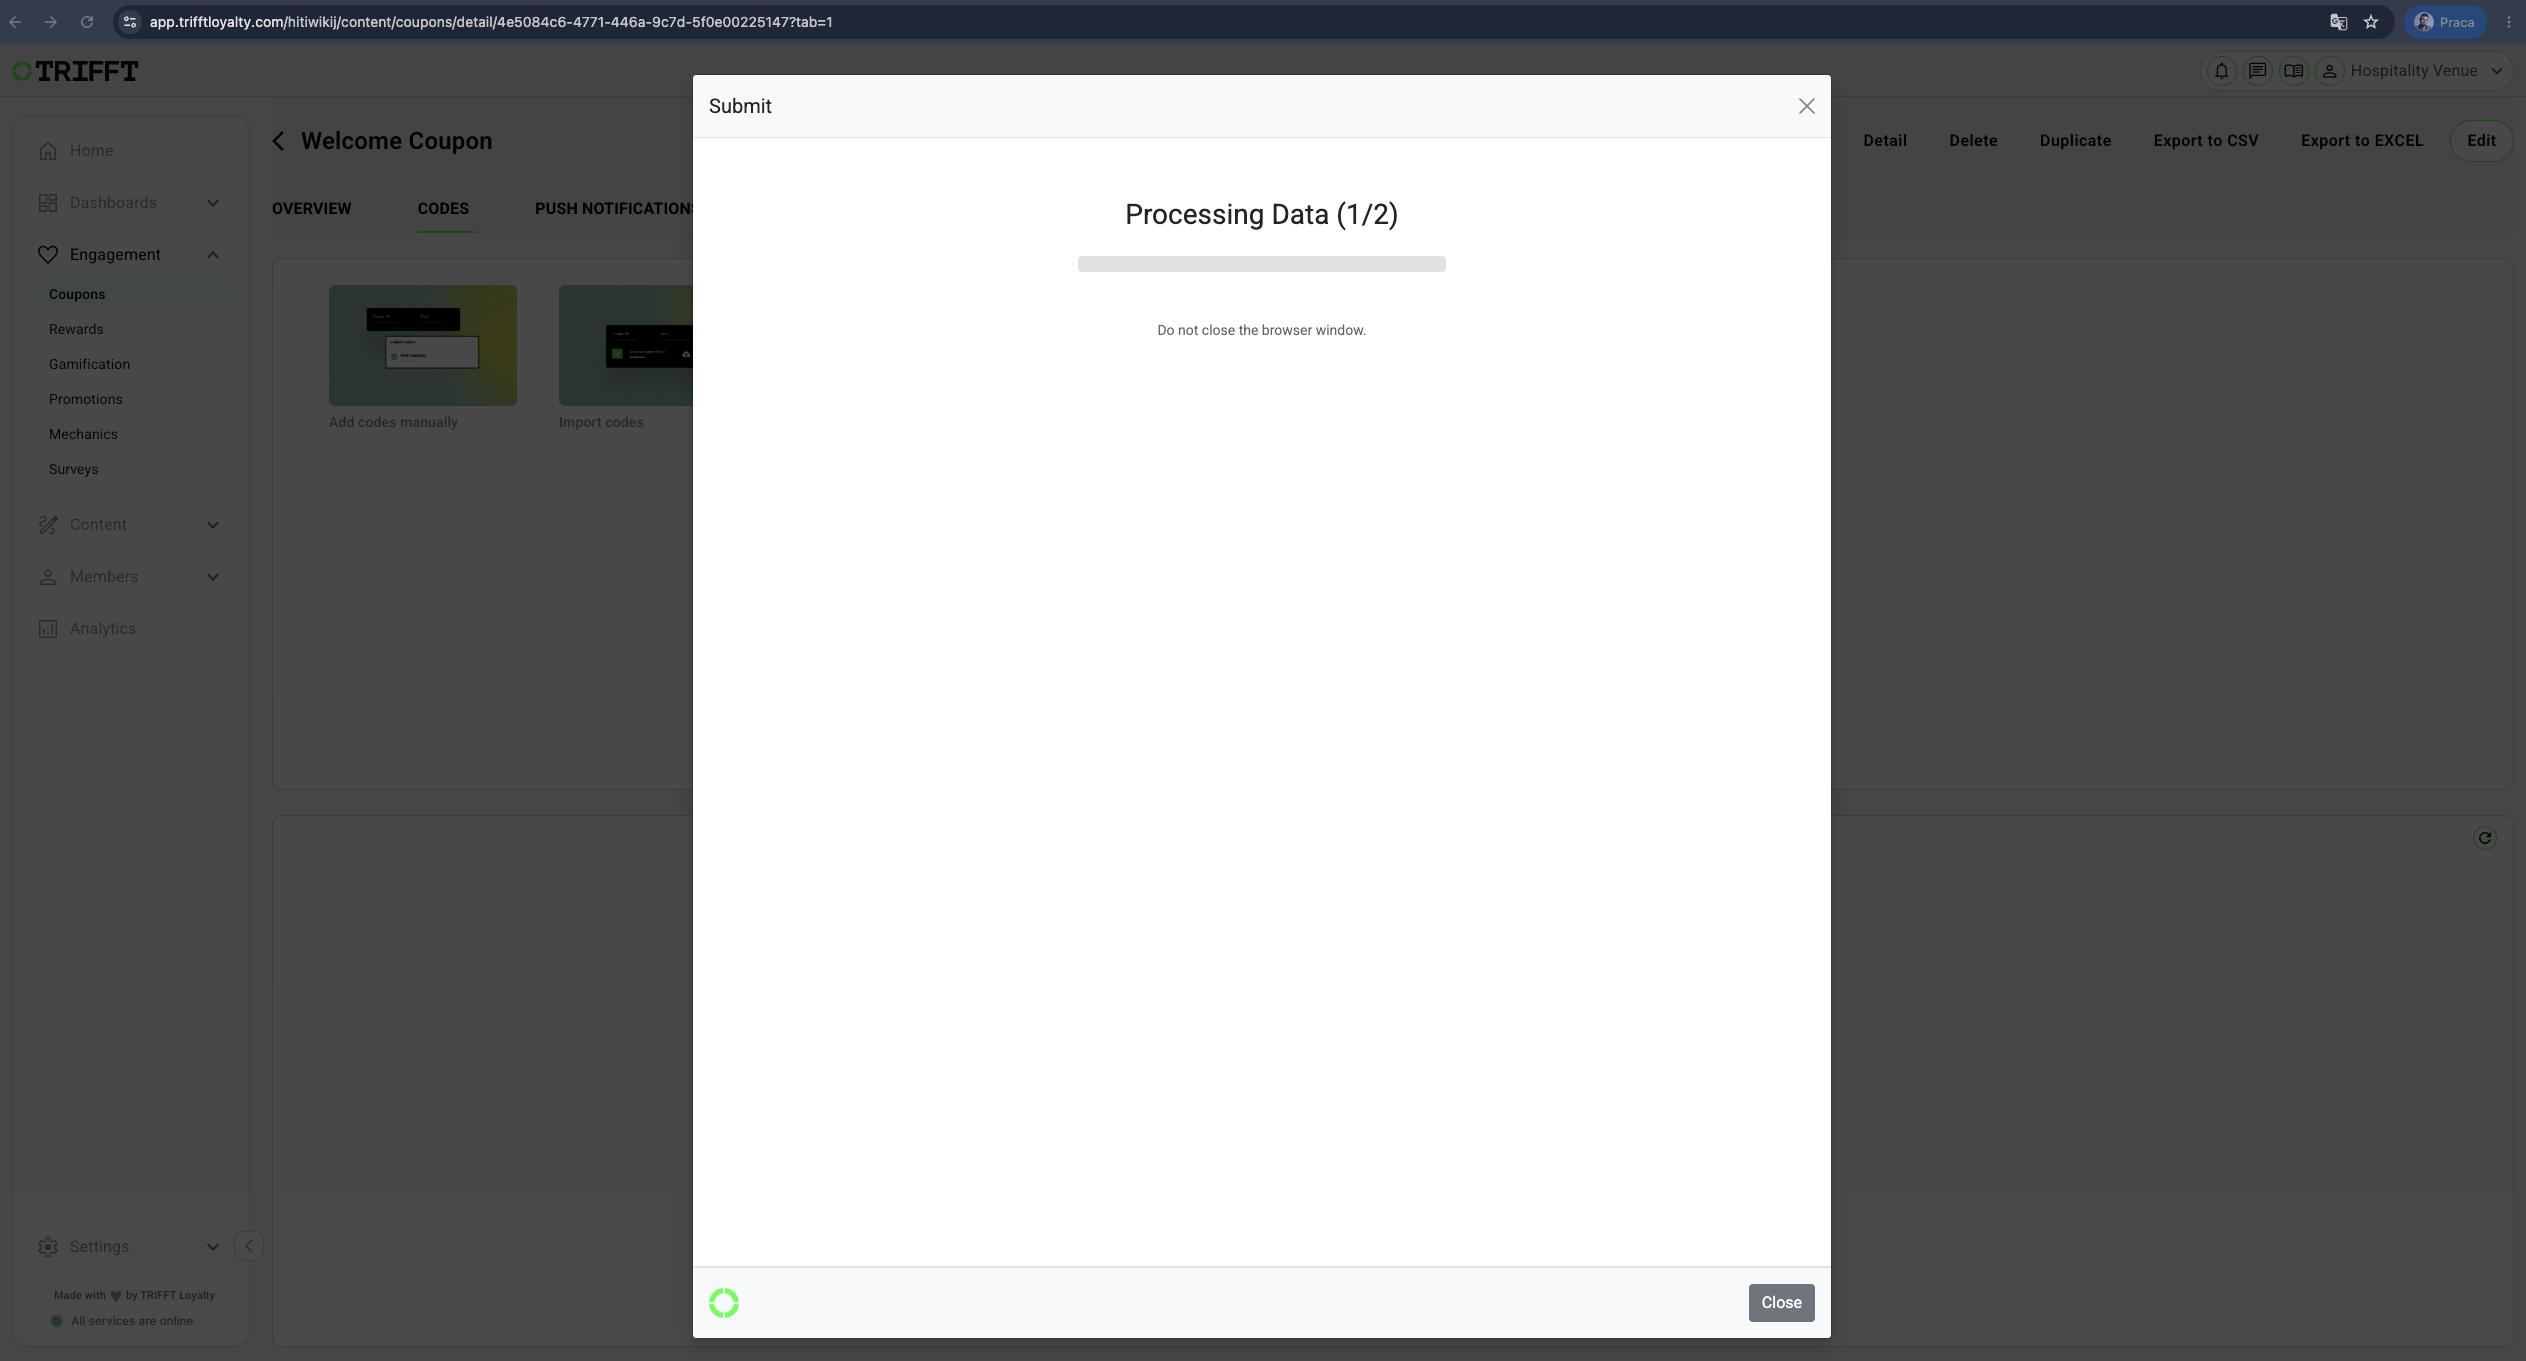
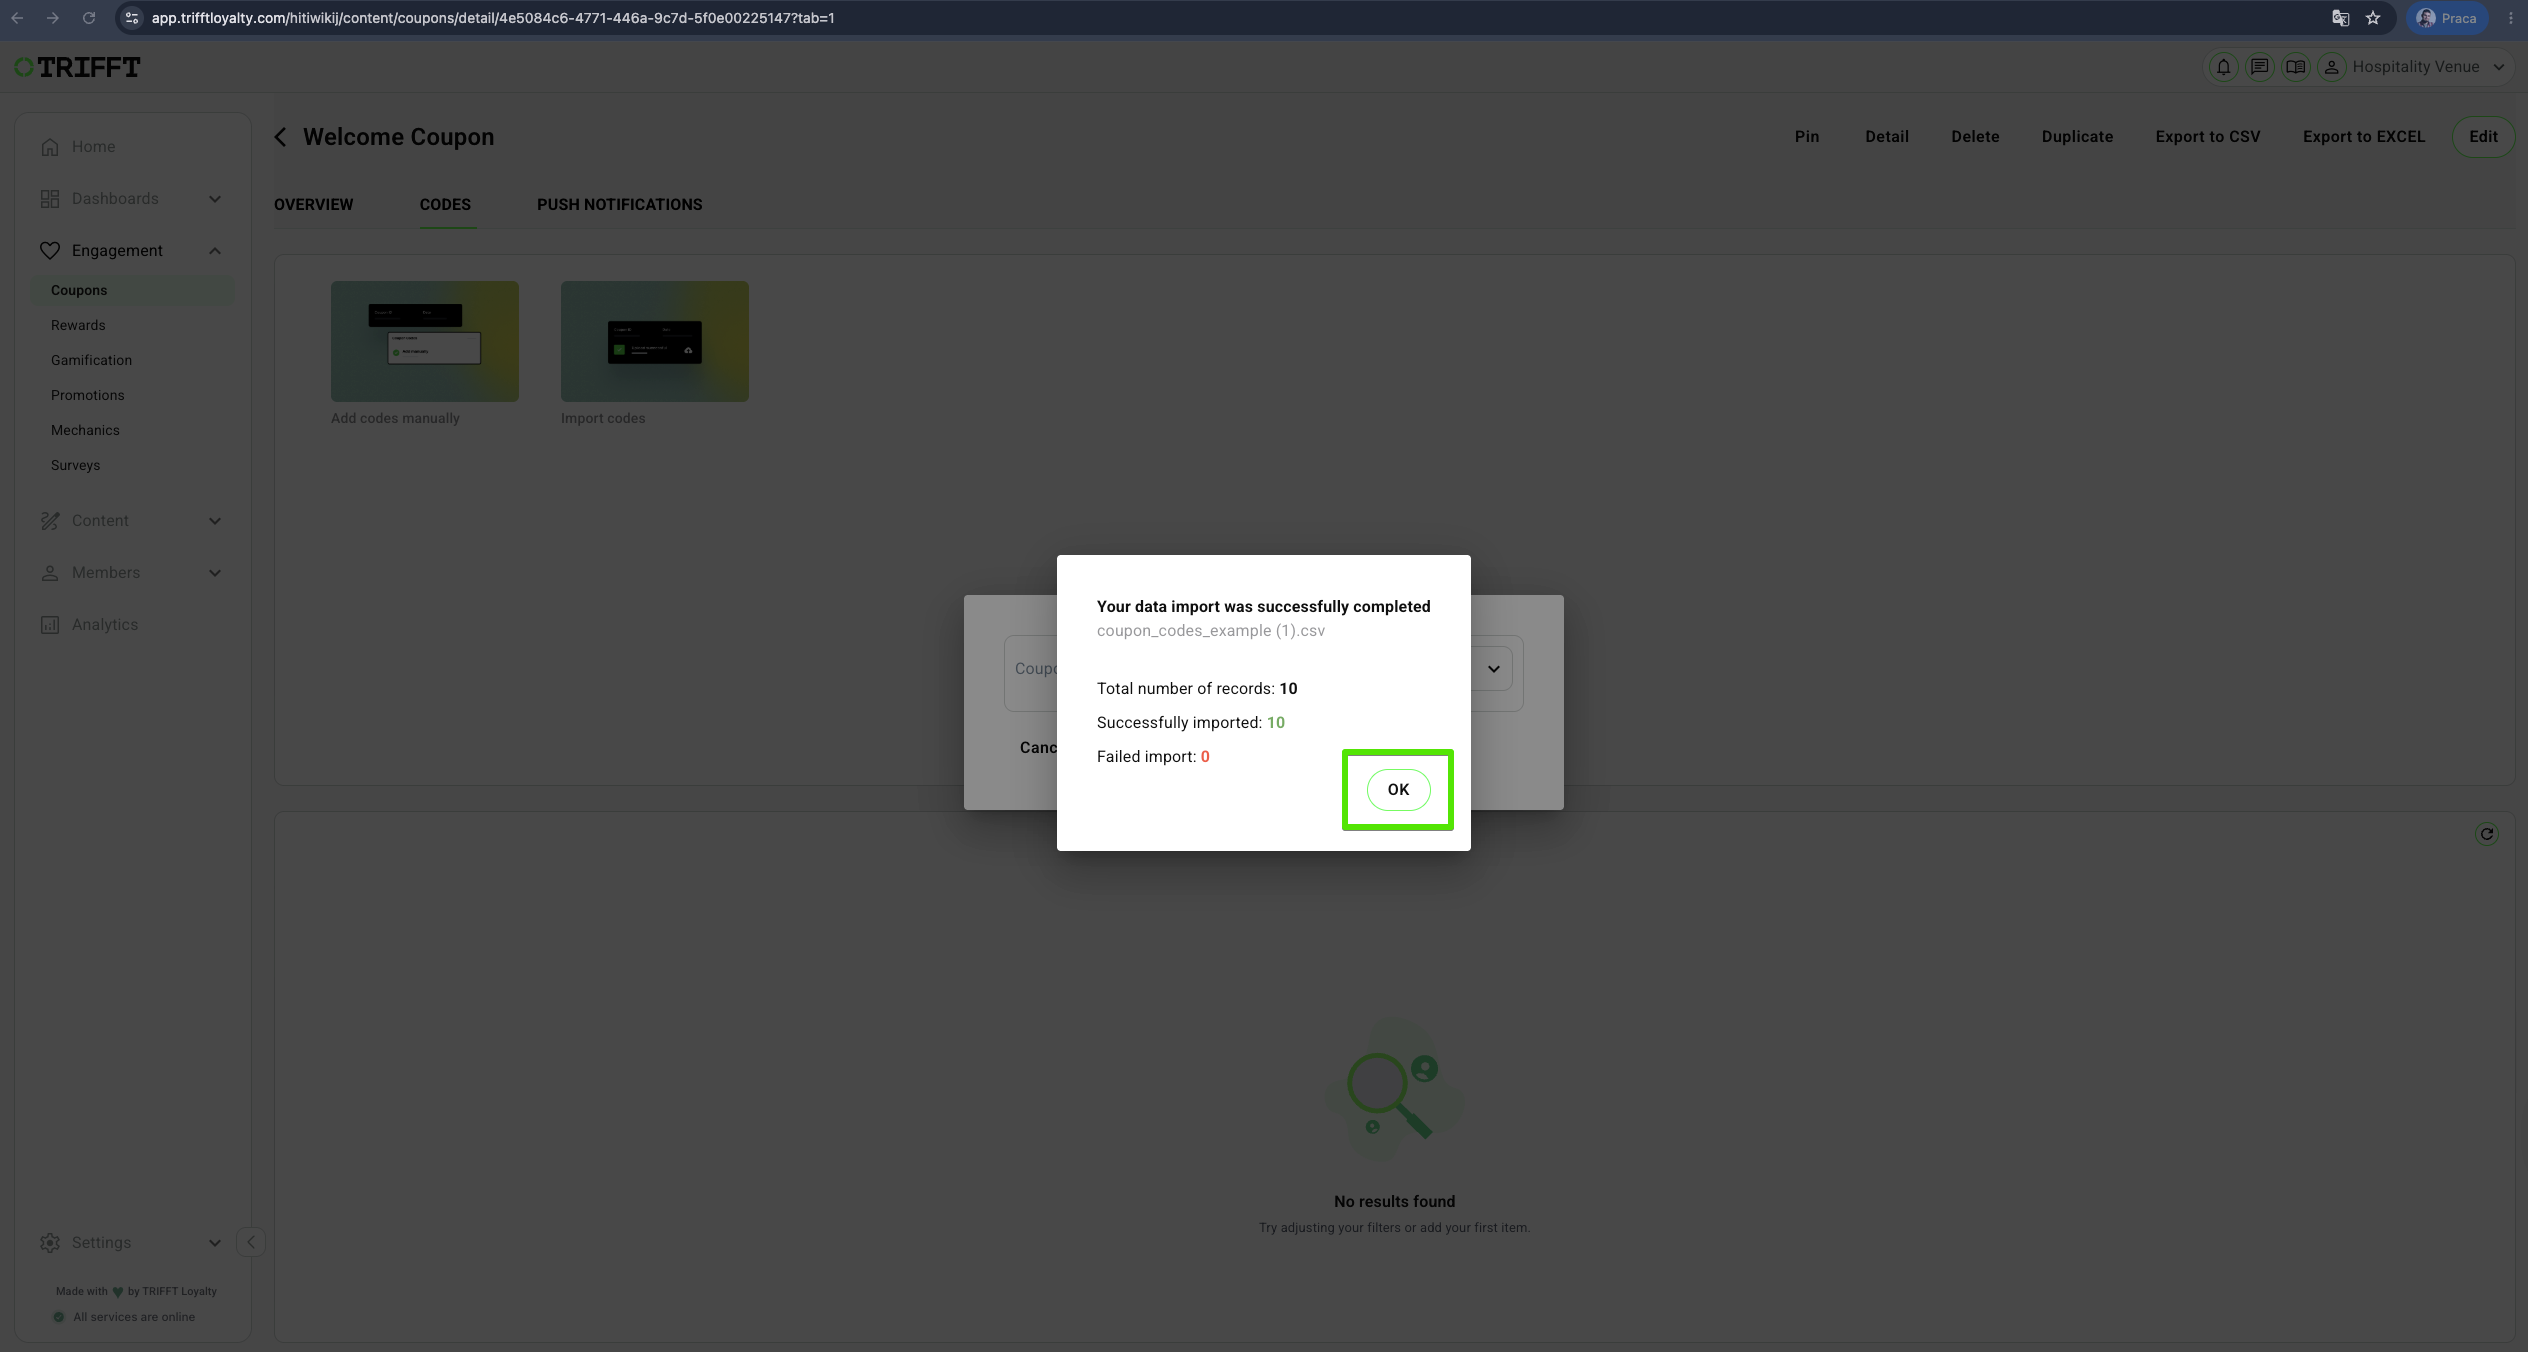
- Confirm the process by clicking OK:
Edit Promo Events
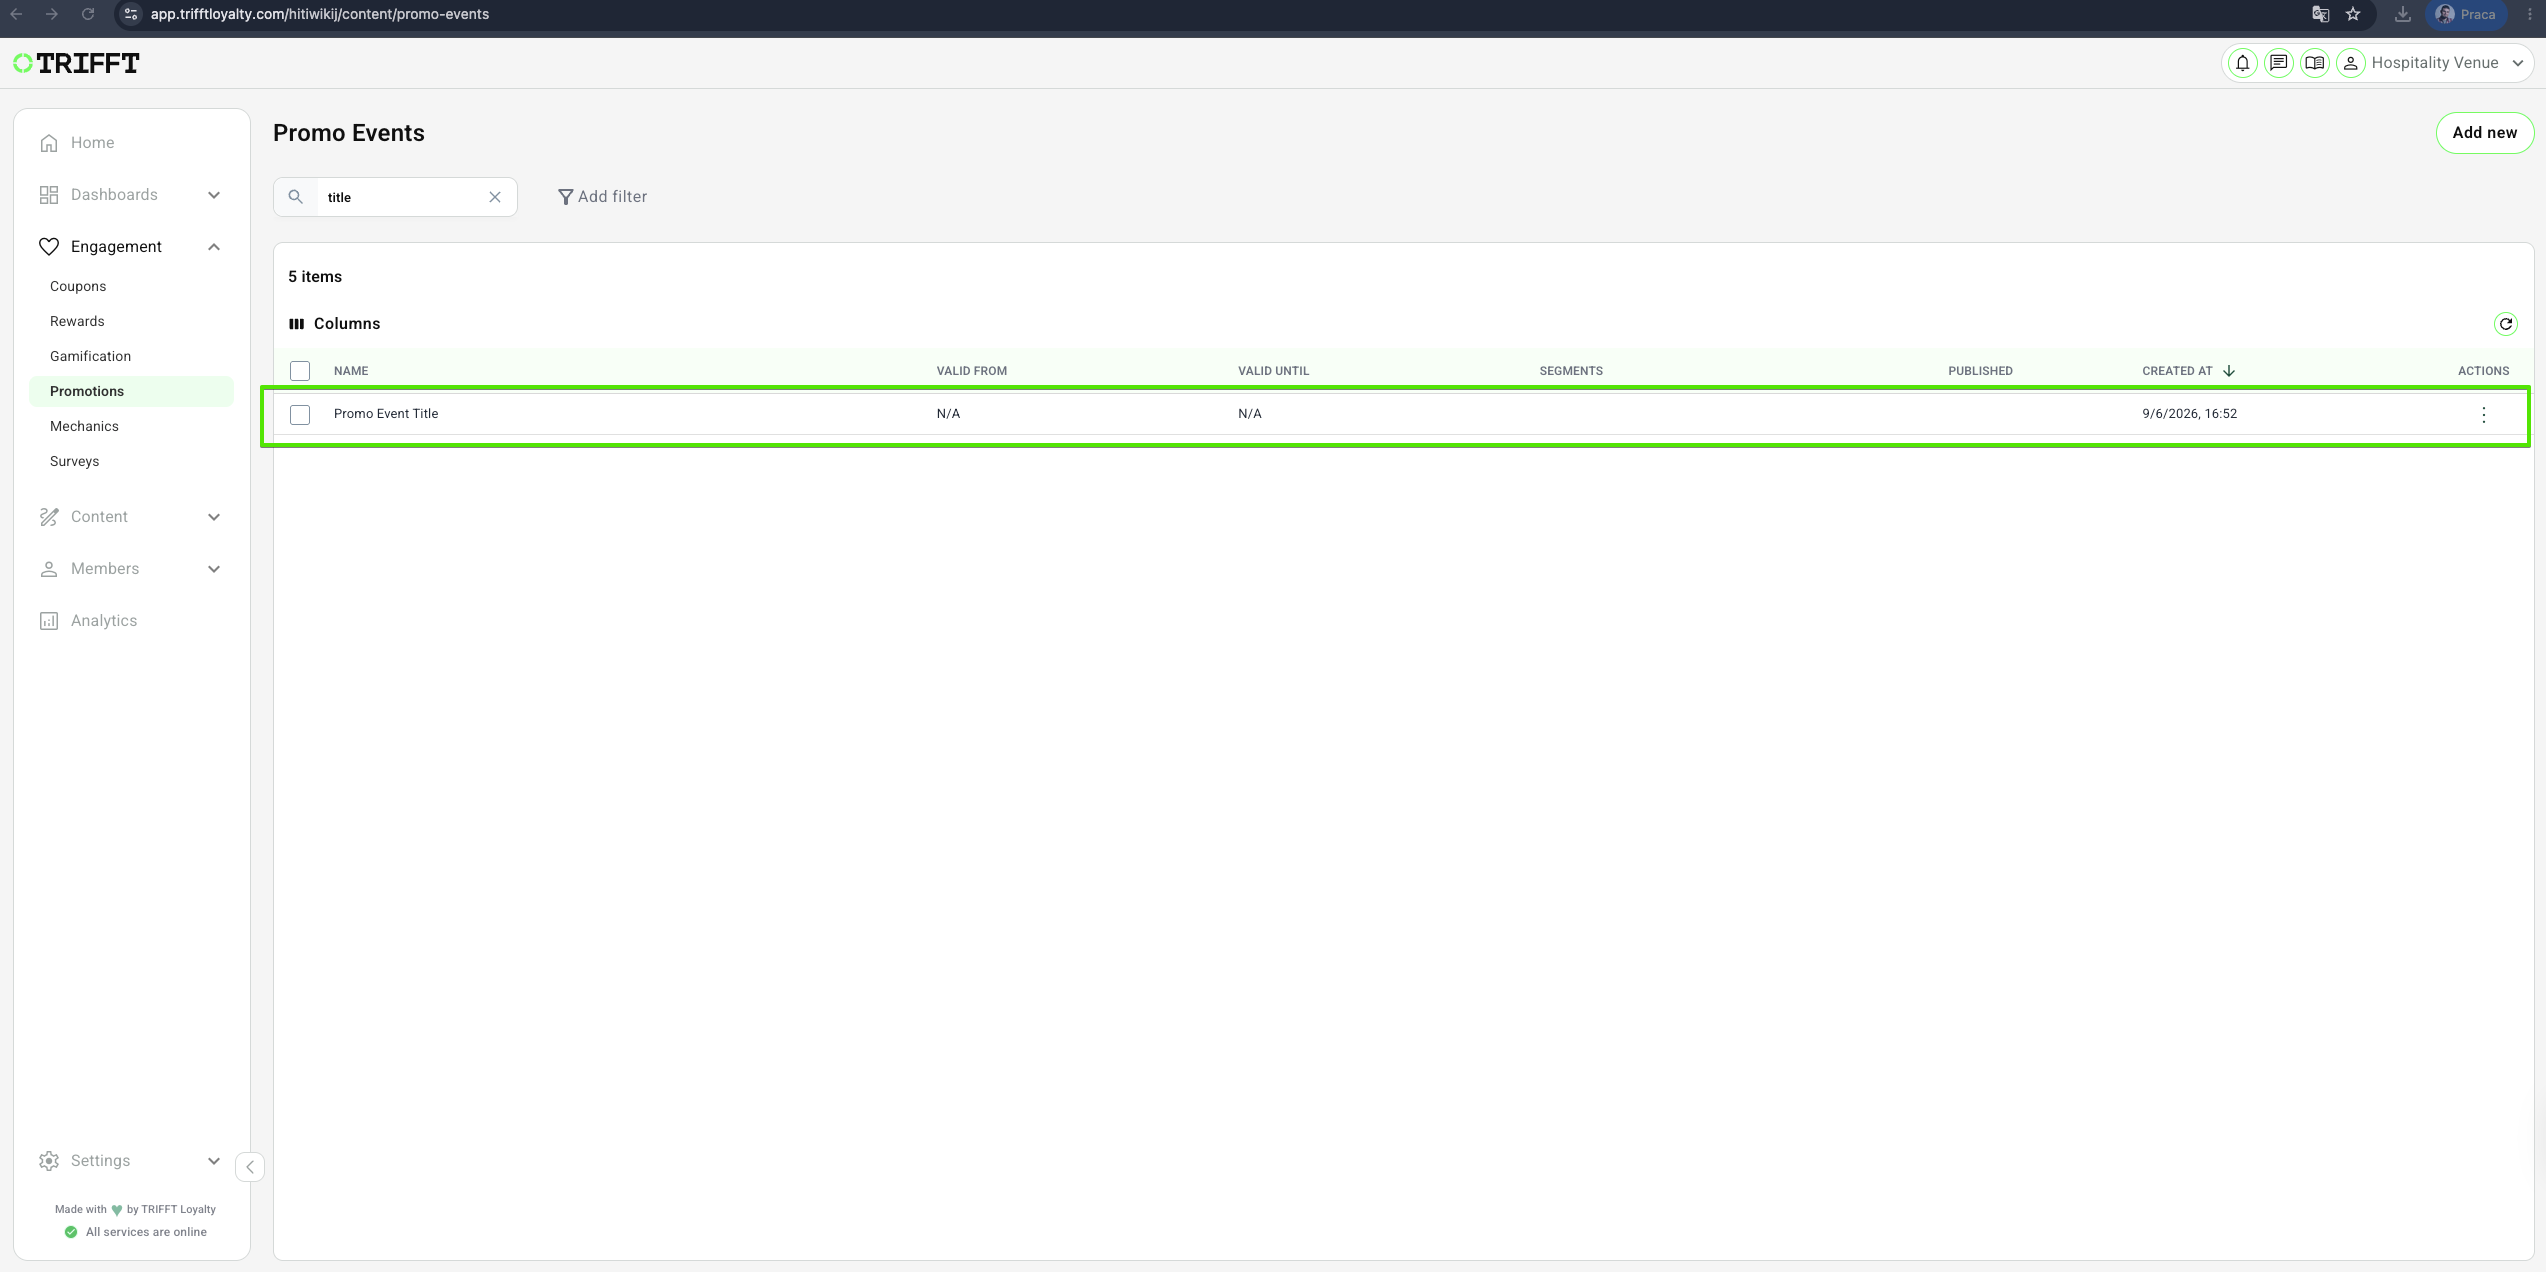
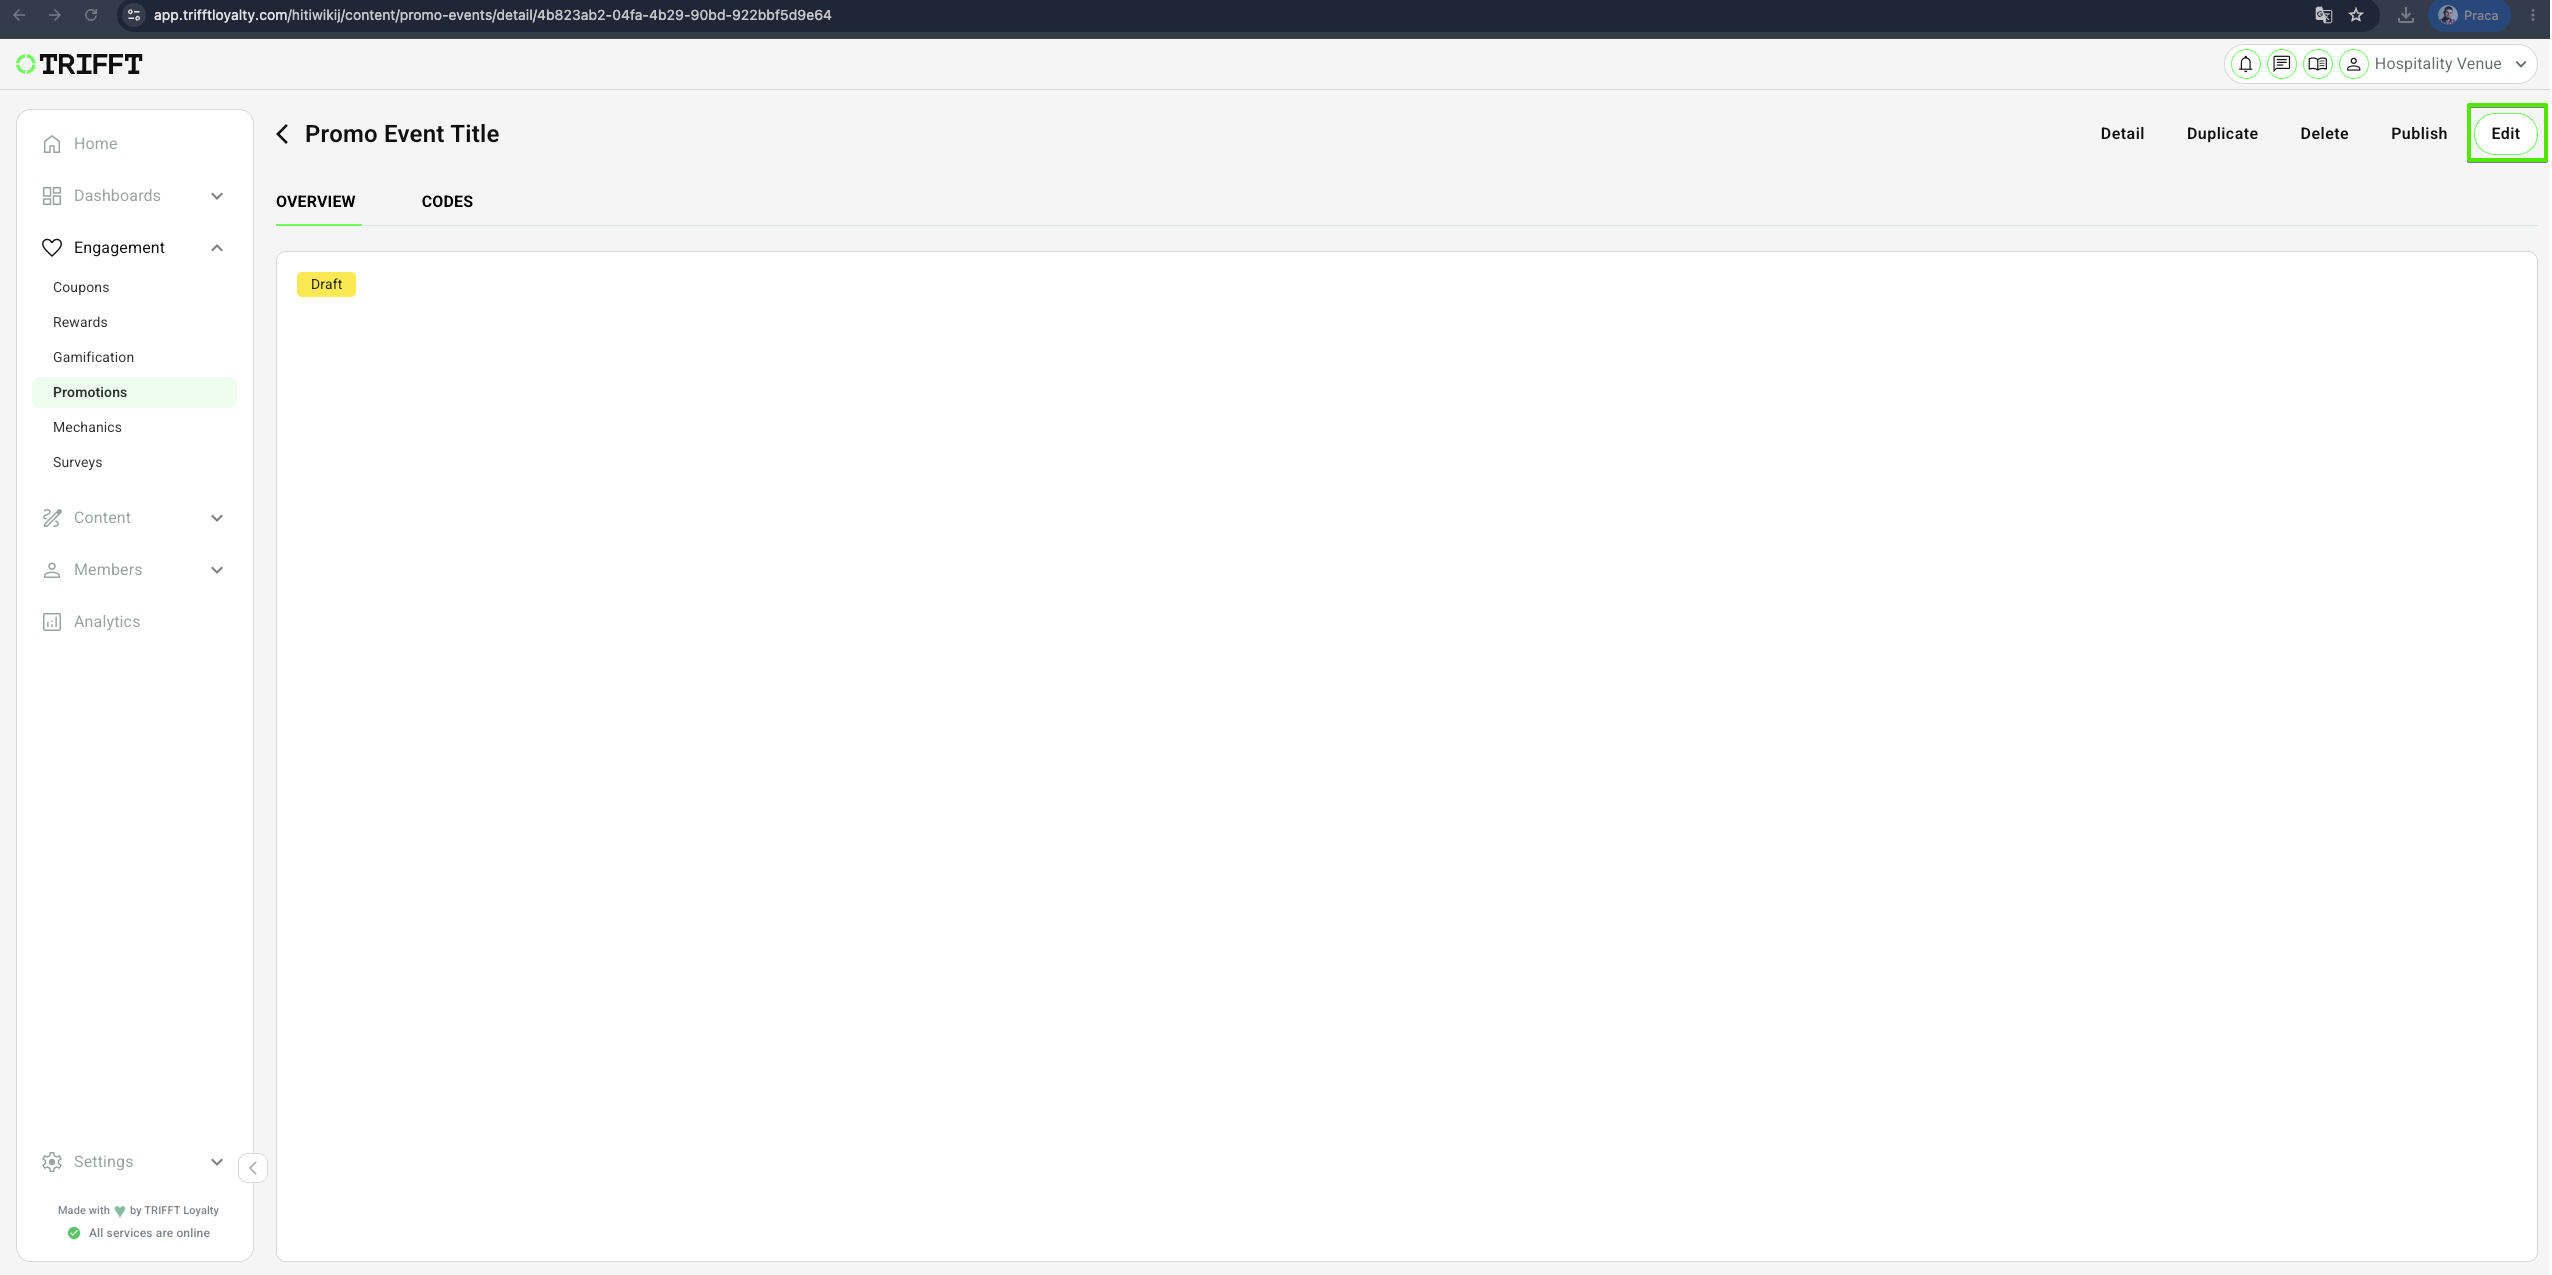
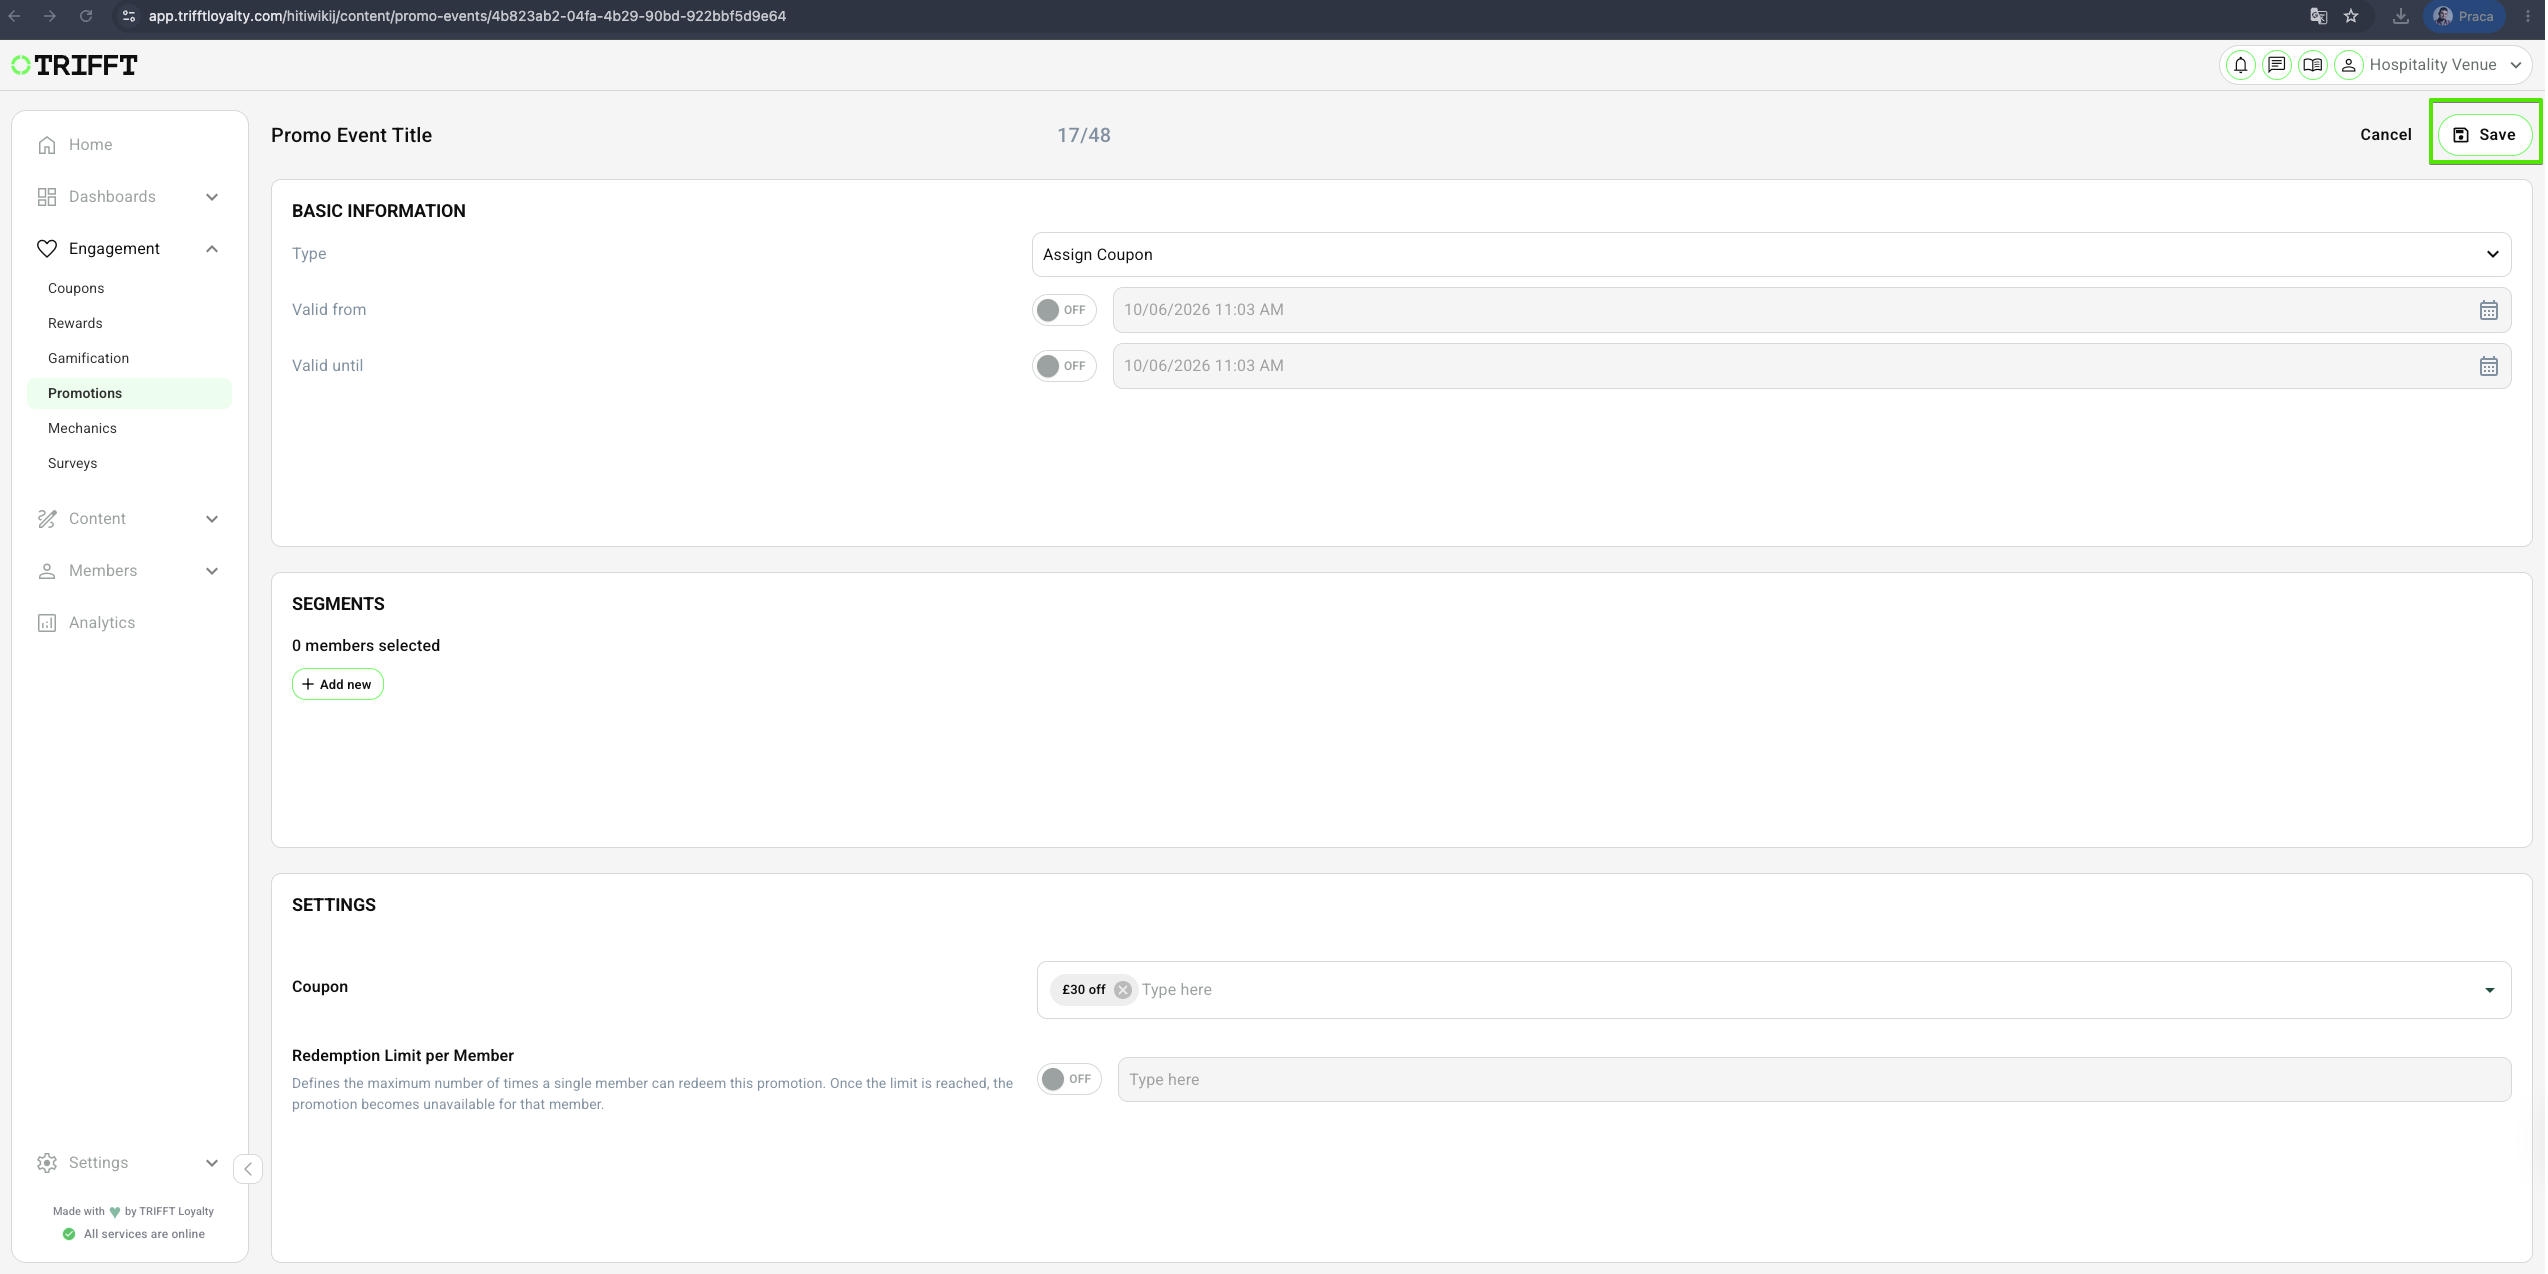
- Navigate to Engagement > Promotions > Click the desired Promotion > Edit > Make your changes & Save.
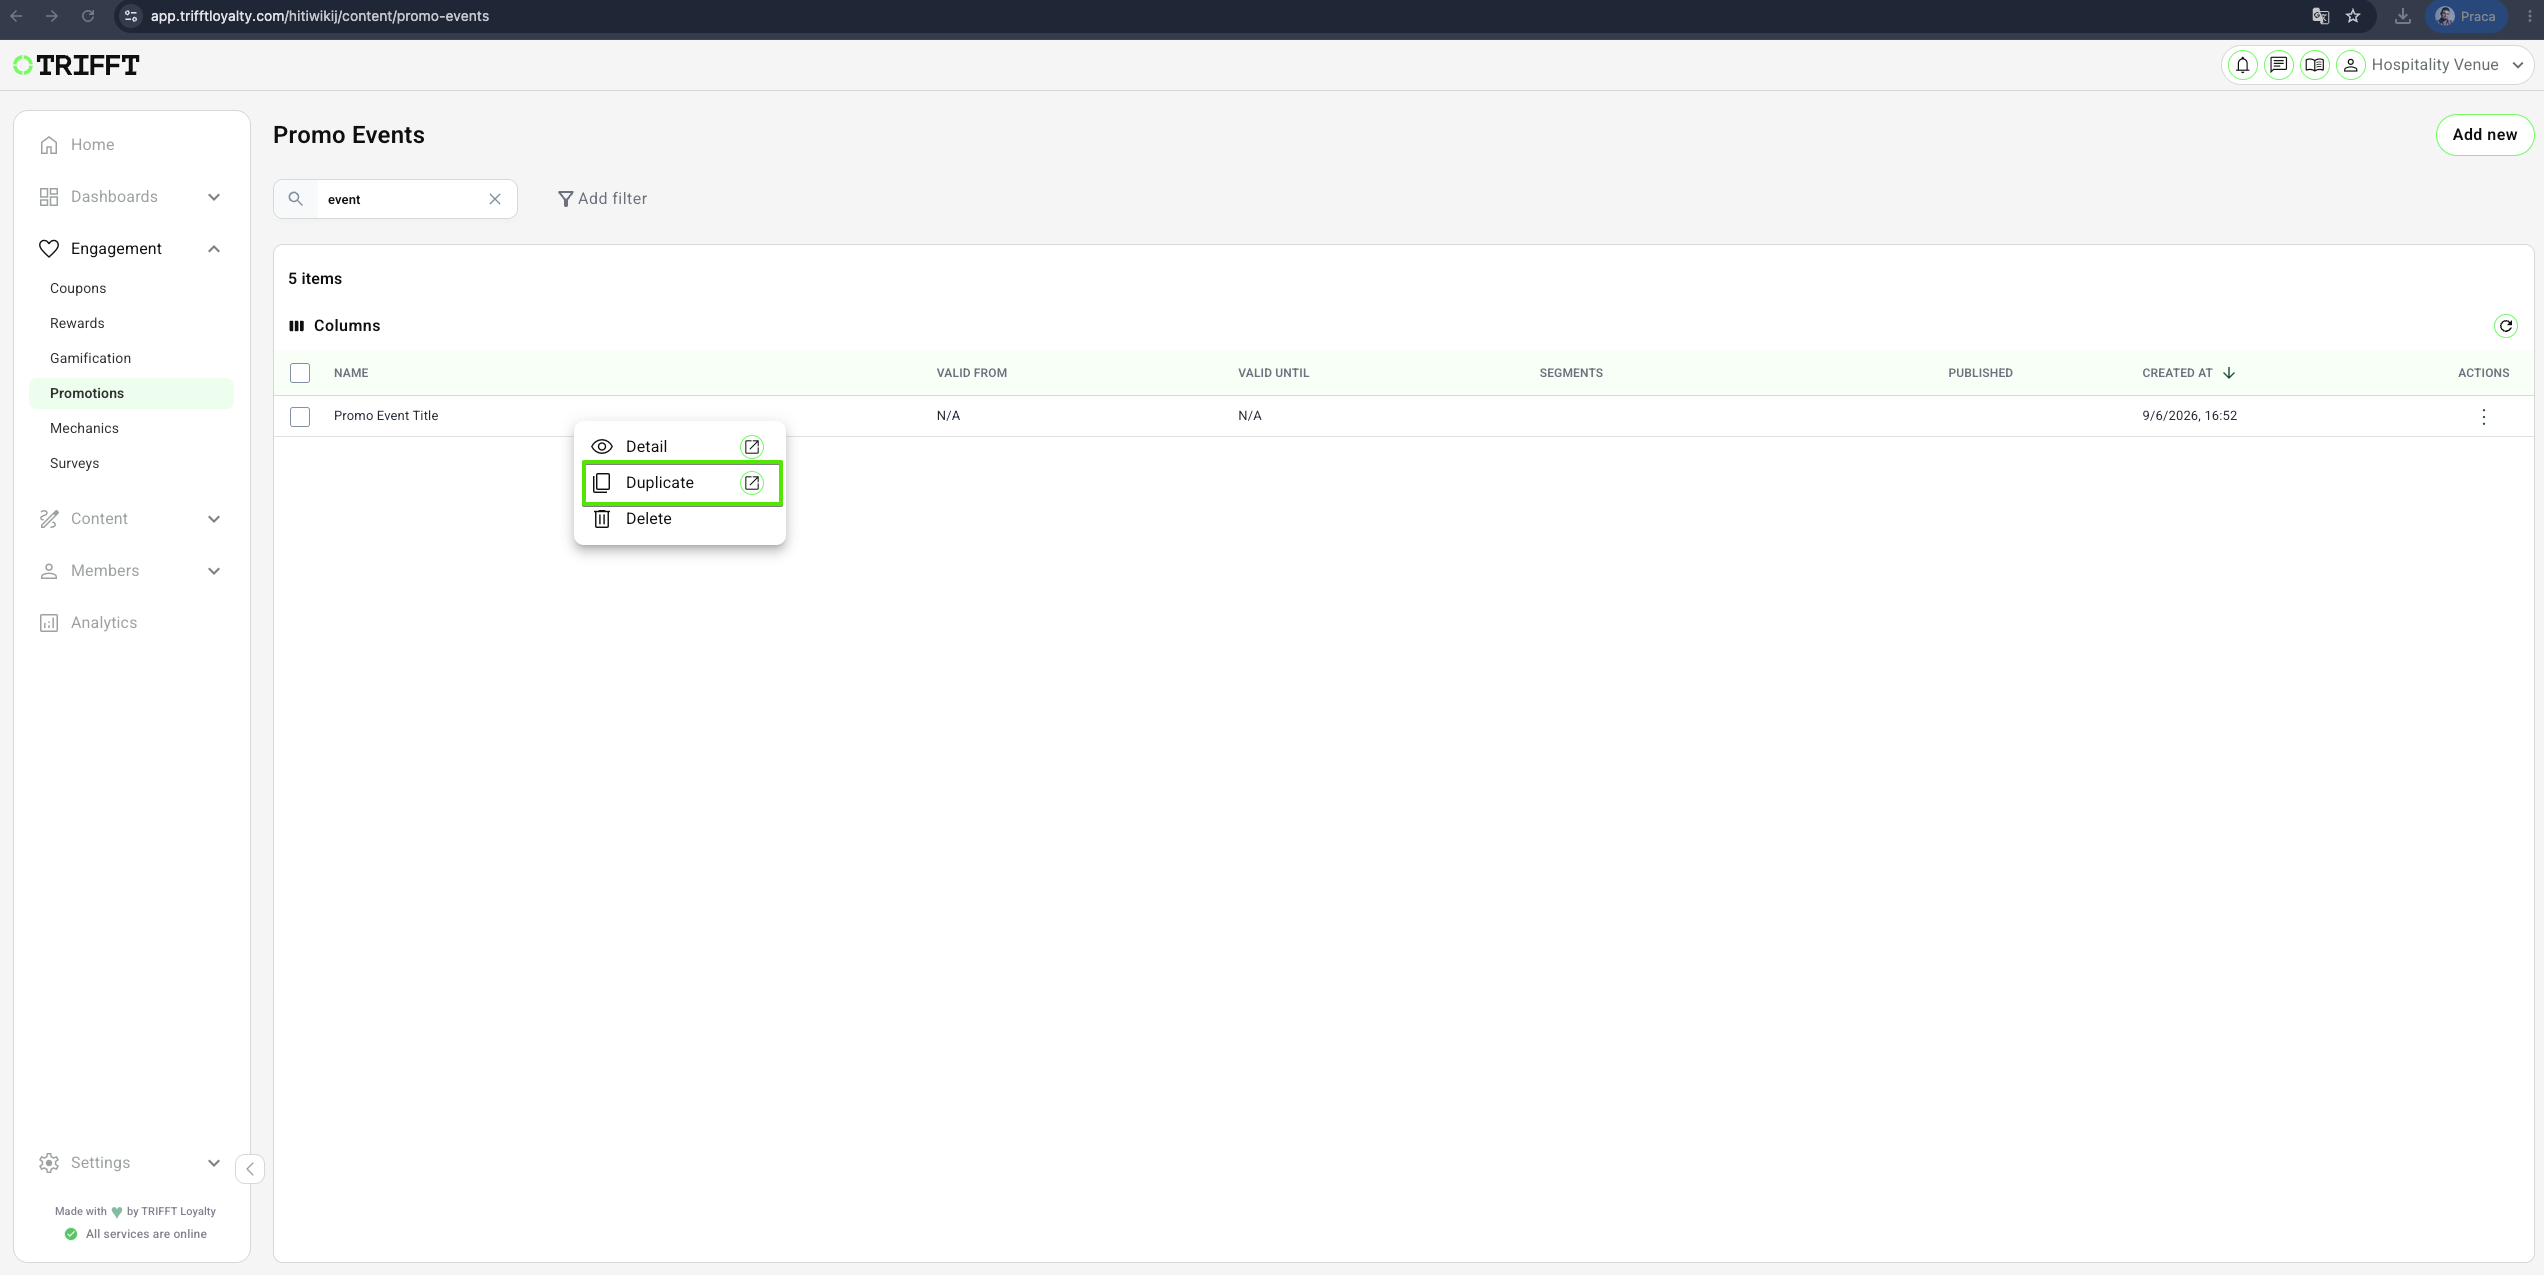
Duplicate Promo Events
- Navigate to Content Cockpit > Engagement > Promotions > Right-click the desired Promotion > Duplicate & Save.
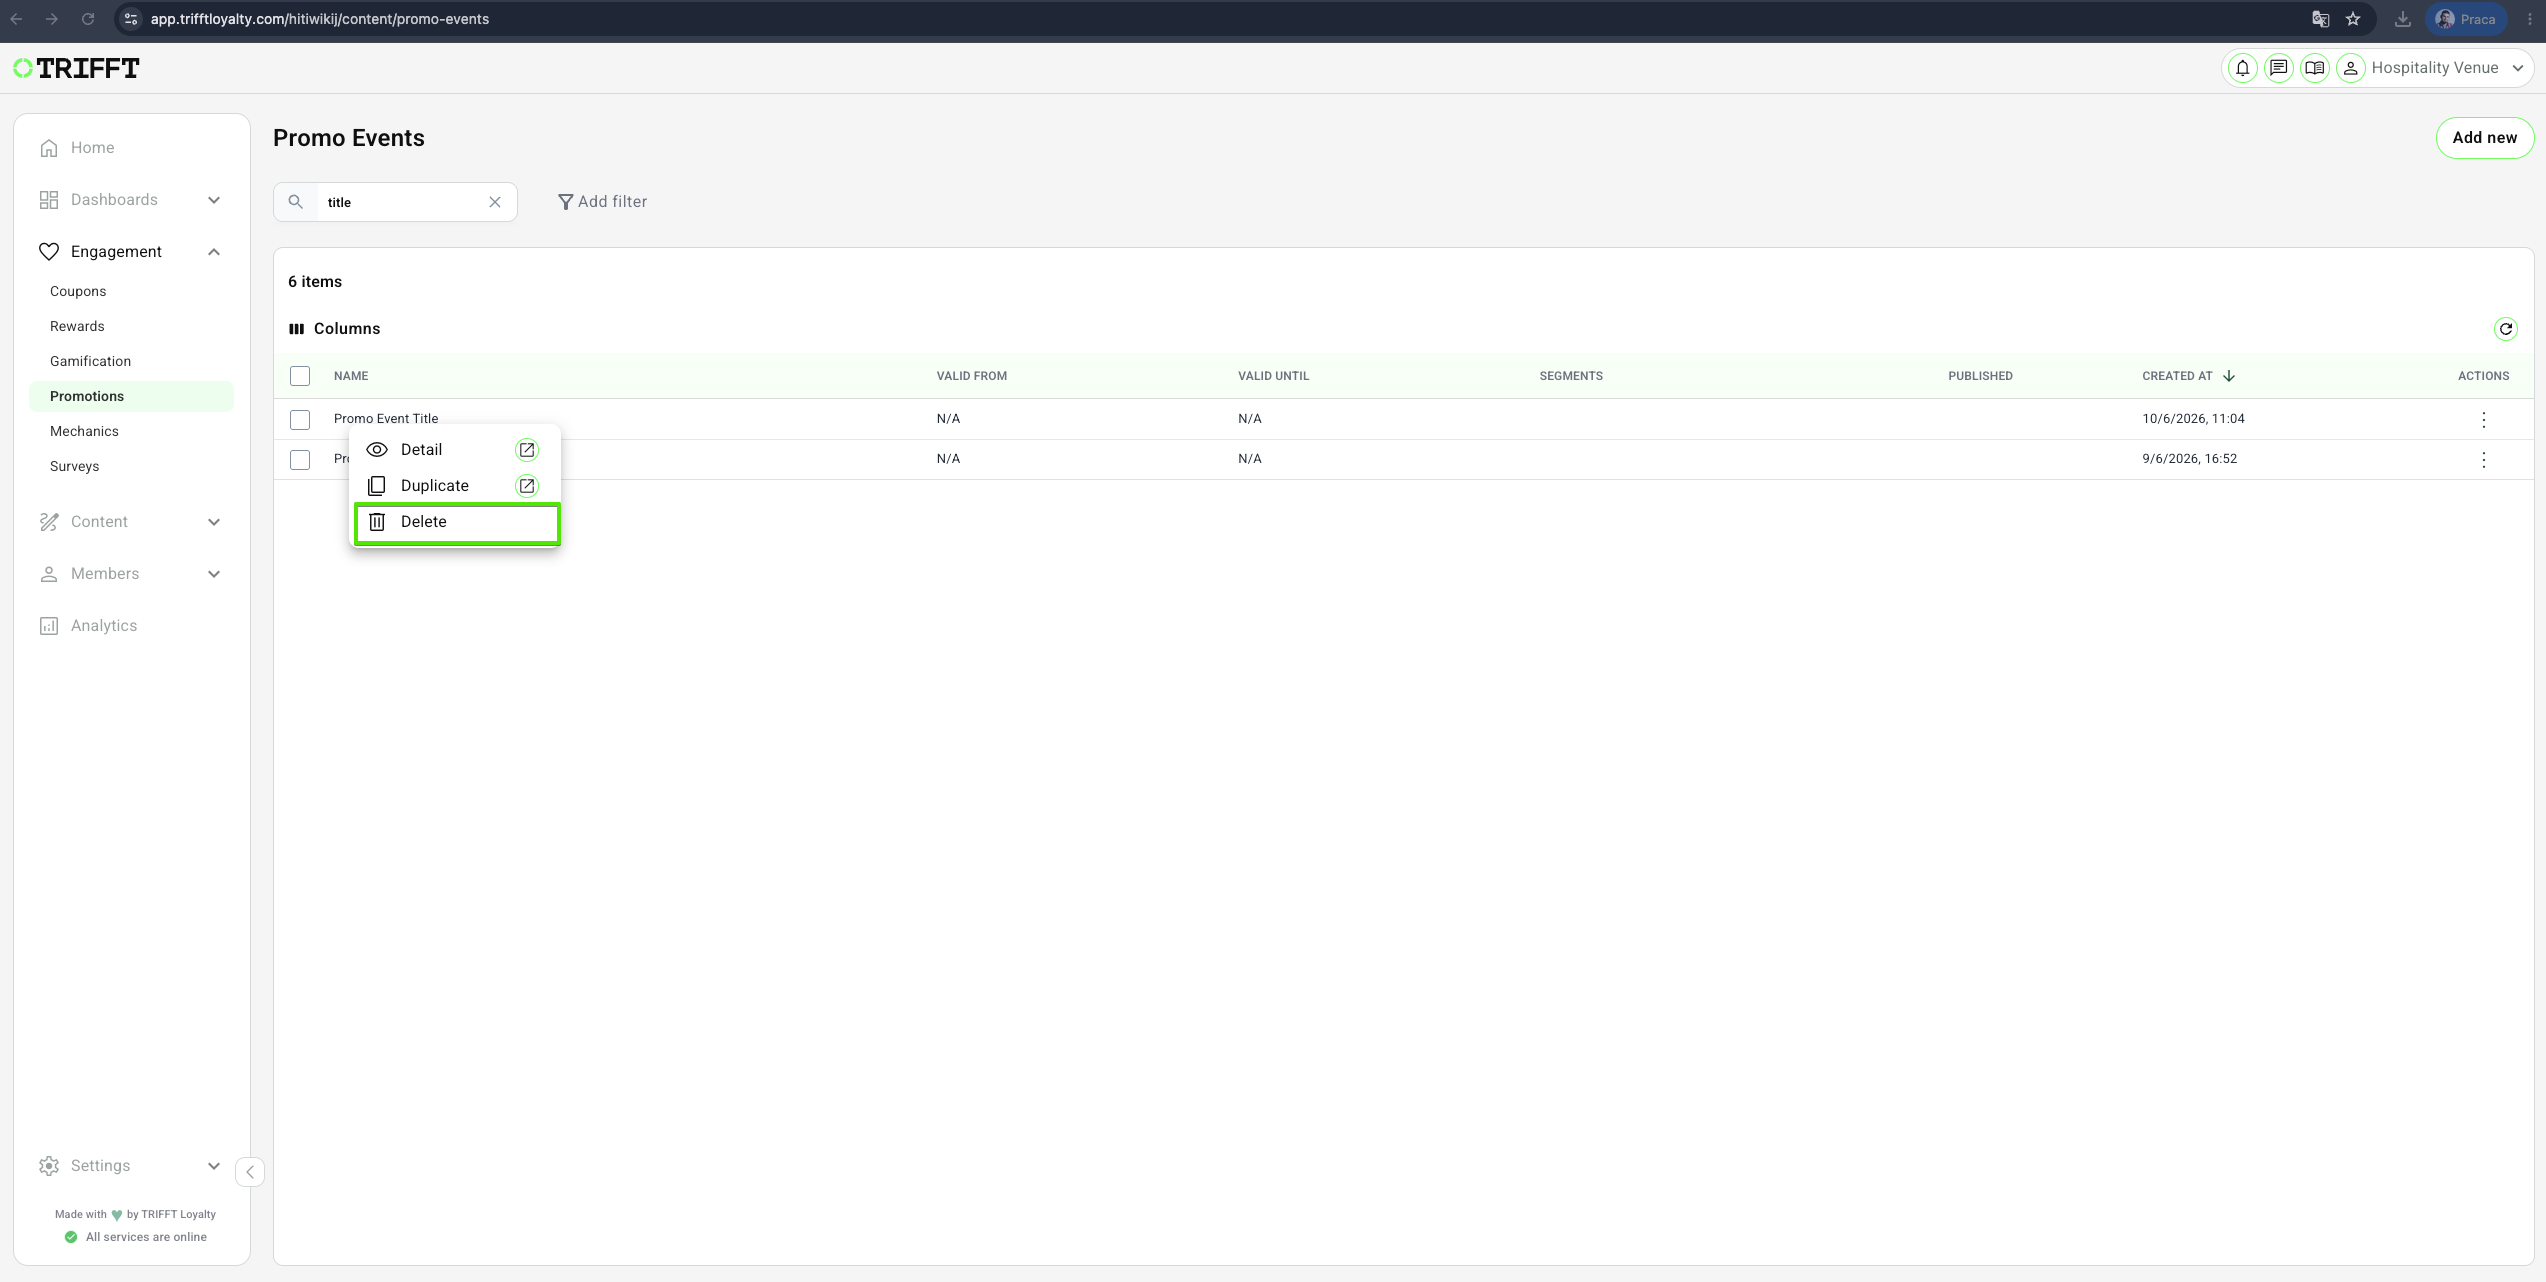
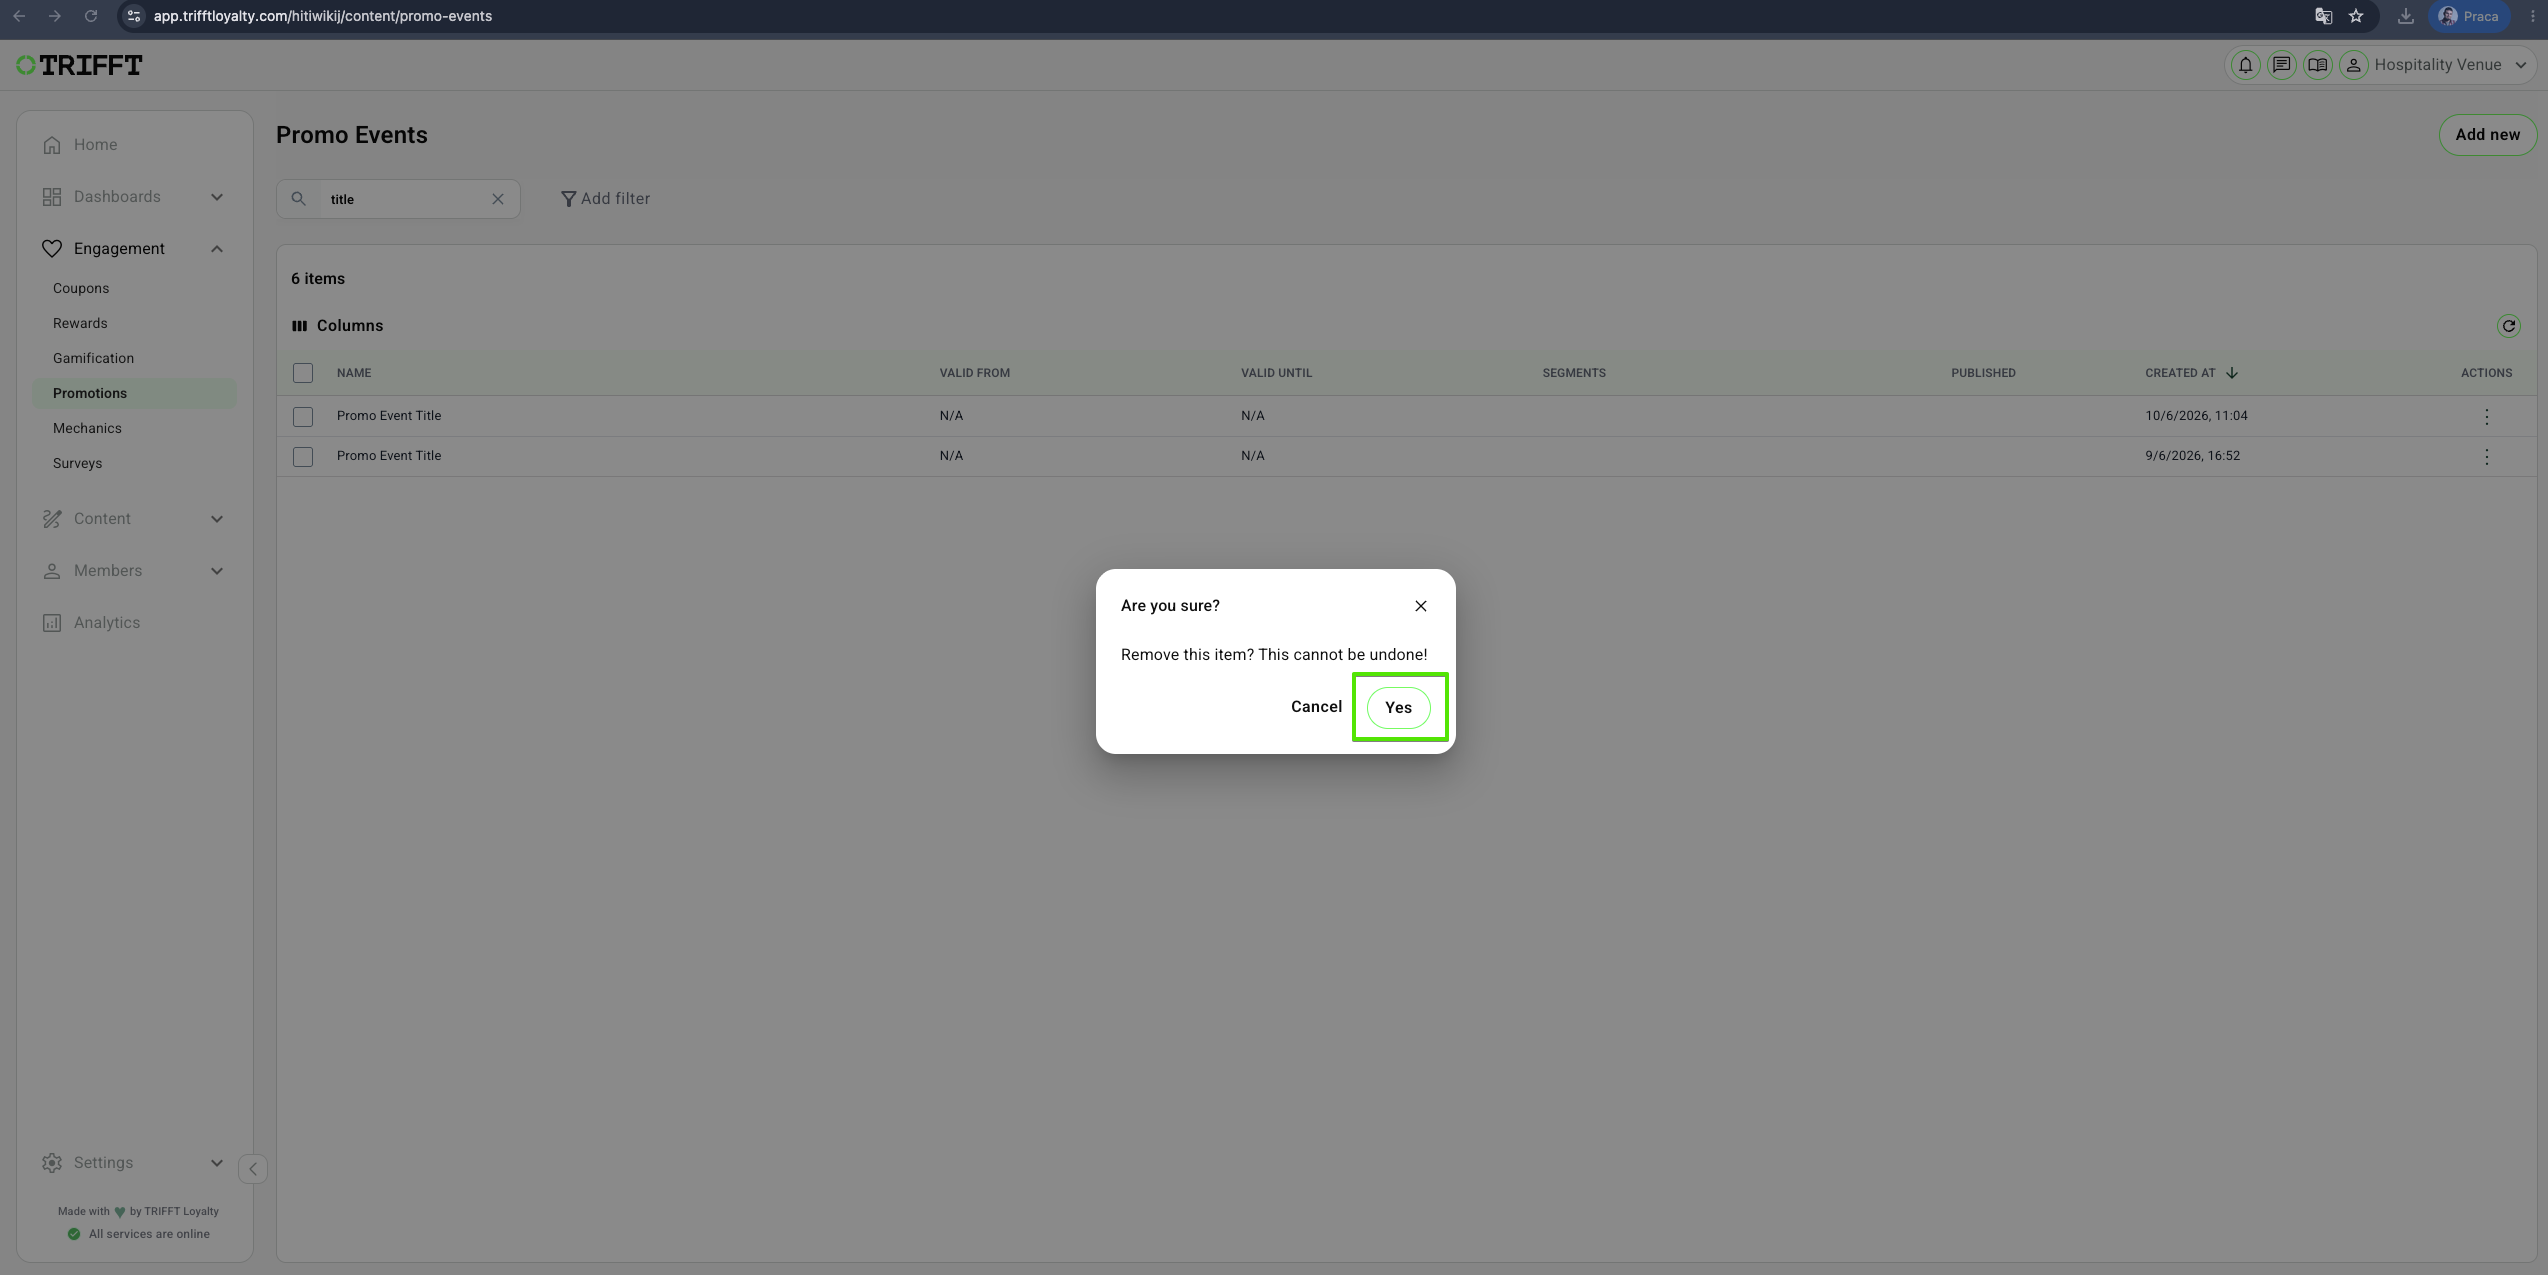
Delete Promo Events
- Navigate to Content Cockpit > Engagement > Promotions > Right-click the desired Promotion > Delete & Confirm with Yes.
Efficiency Tip — Cloning saves significant time by preserving complex product filters and segmentation rules from previous campaigns.
Use Cases
Assigning a Coupon via QR Code in Client Zone
This use case allows a member to receive a coupon by scanning a QR code printed on a physical card or other promotional material. The QR code opens Client Zone, where the customer logs in or completes registration. After authentication, the configured coupon is assigned to the member automatically.
This setup can support both newly registered and existing members. Enable parameter processing for registration, login, or both, depending on the intended campaign flow.
1. Configure the Custom Parameter
Navigate to Settings → Custom Parameters and click Add new.
Create a Custom Parameter that will receive the promotion code from the URL and process it when the customer registers or logs in.
Use the following settings:
| Setting | Value |
|---|---|
| Title | Enter a name for the Custom Parameter, for example Promo Token |
| Description | Describe the purpose of the parameter, for example: Promotion token processed automatically during registration or login. |
| Entity | Member |
| Context | Enter the name of the group in which the parameter should be stored in the member profile, for example Promotions |
| Type | String |
| Publicity | ON |
| Is Hidden | ON |
| Slug | Enter a unique slug, for example token |
| Visibilities | Registration, Profile Page |
| Mappings | Promotion Code |
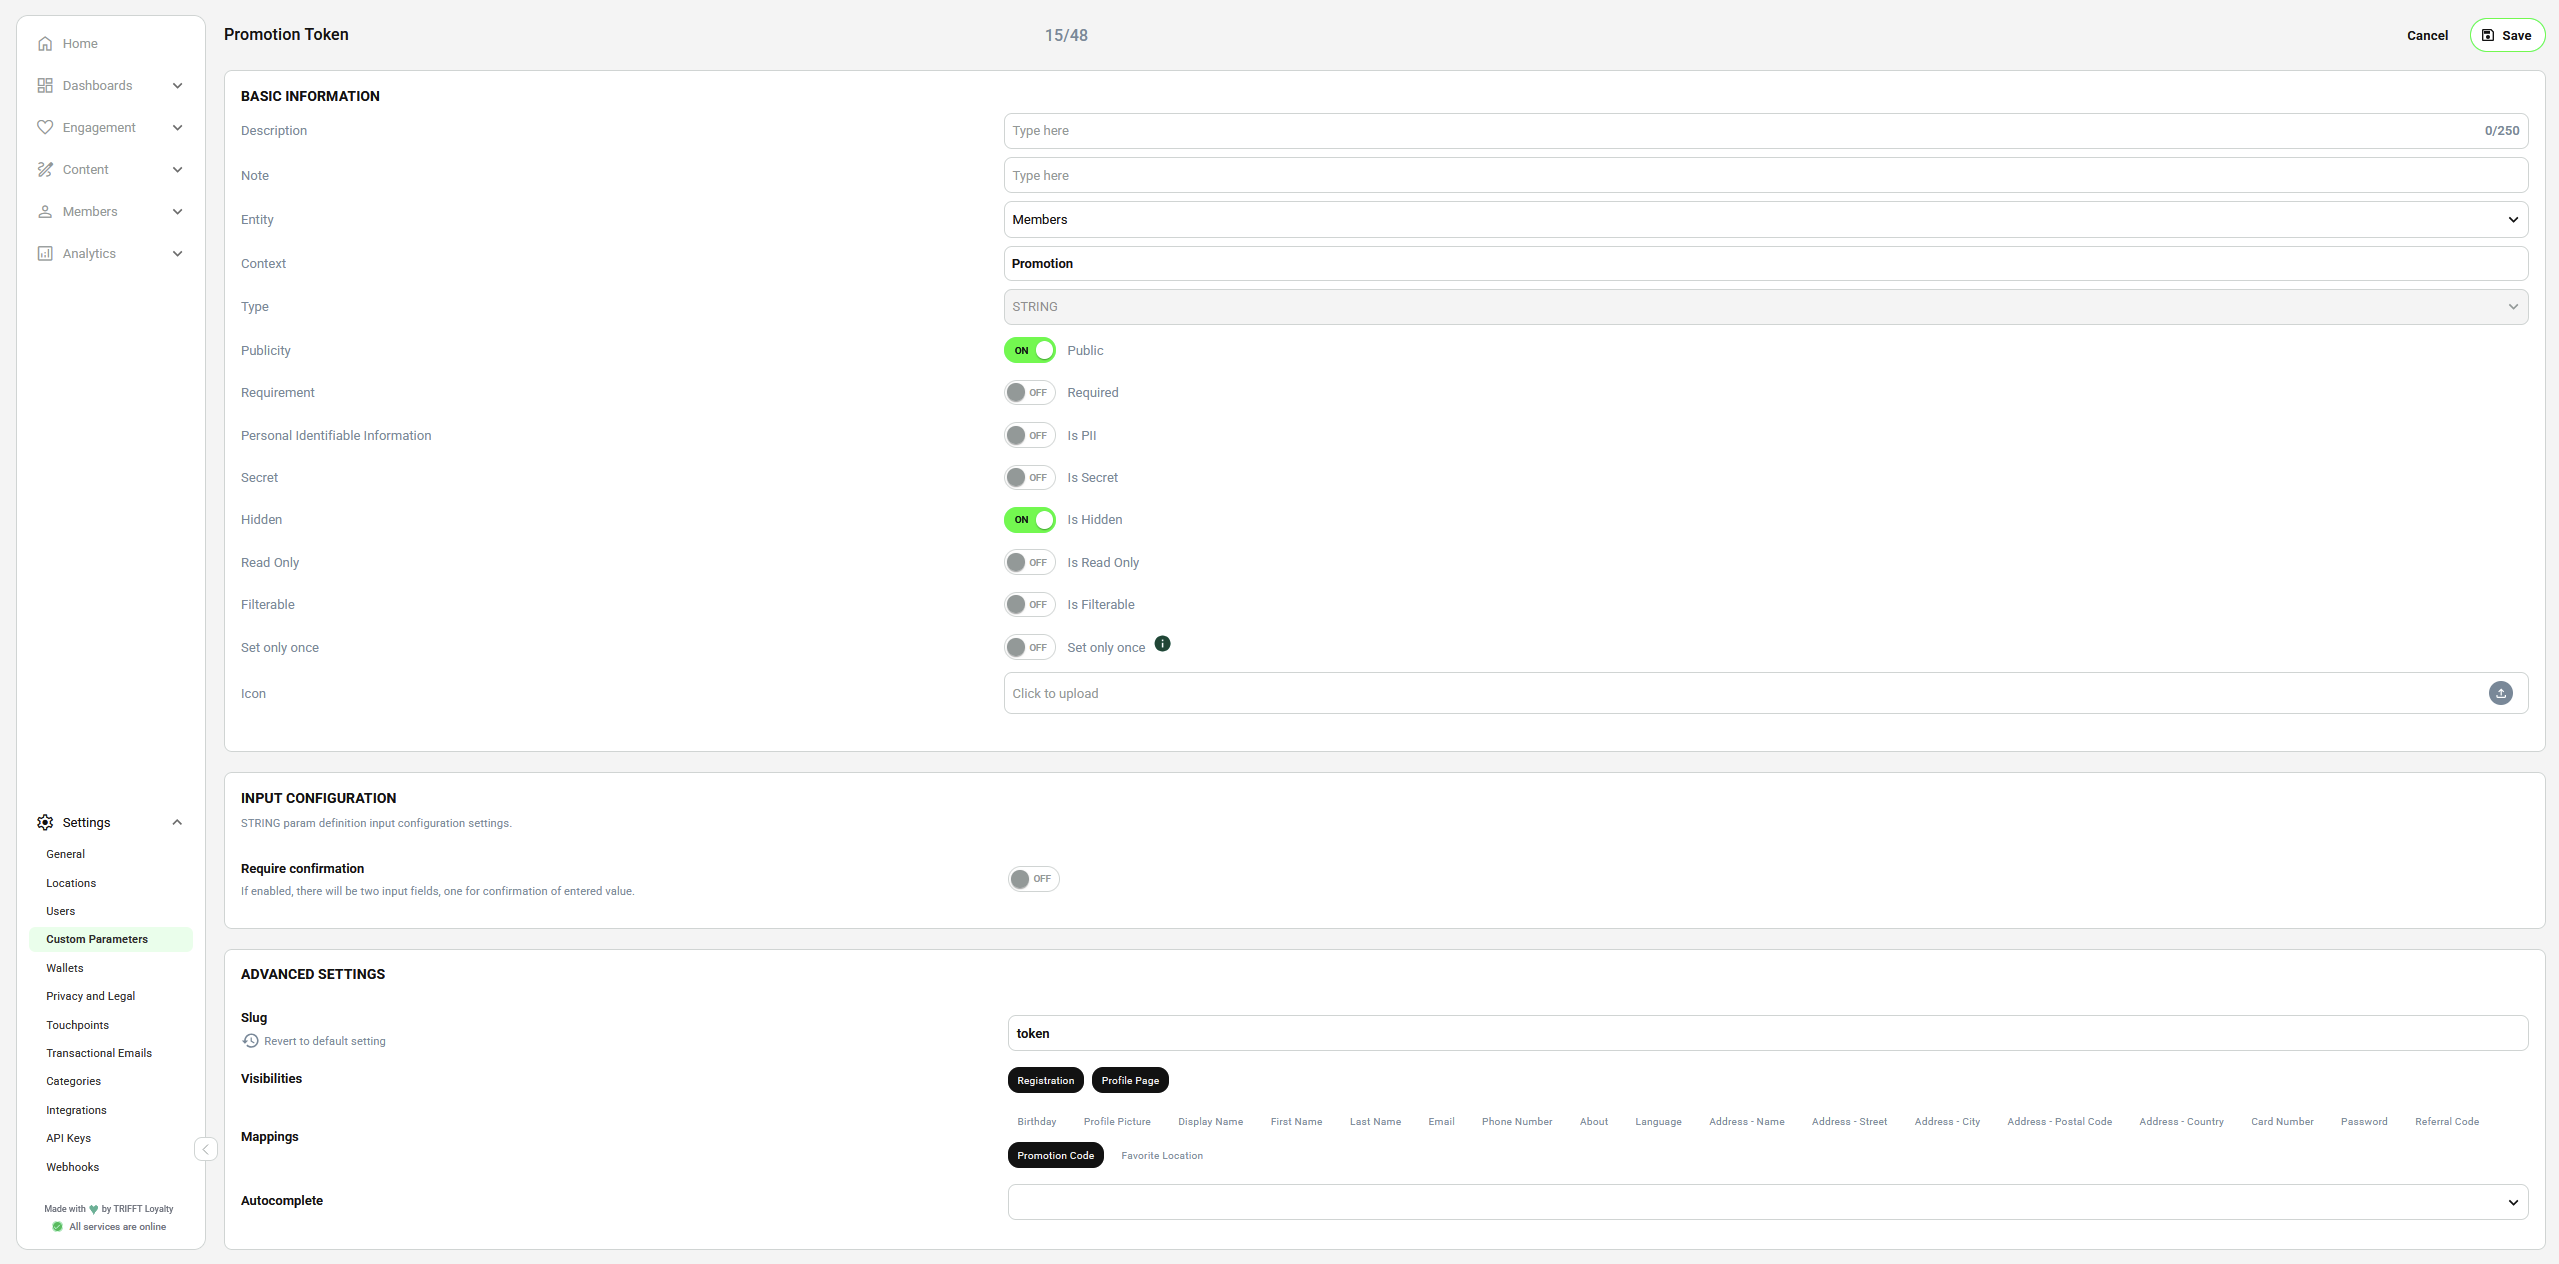
Example of Custom Parameter's Settings
If a suitable Custom Parameter mapped as
Promotion Codealready exists, you can reuse it instead of creating a new one.
2. Enable Parameter Processing in Client Zone
Navigate to Settings → Touchpoints → Client Zone and open the Settings tab.
Configure parameter processing according to whether the promotion should be available to newly registered members, existing members, or both.
| Setting | Value |
|---|---|
| Process Params on Registration | Set to ON if the promotion should be processed for newly registered members |
| Registration Process Params List | Select the Custom Parameter created in the previous step |
| Process Params on Login | Set to ON if the promotion should be processed for existing members when they log in |
| Login Process Params List | Select the Custom Parameter created in the previous step |
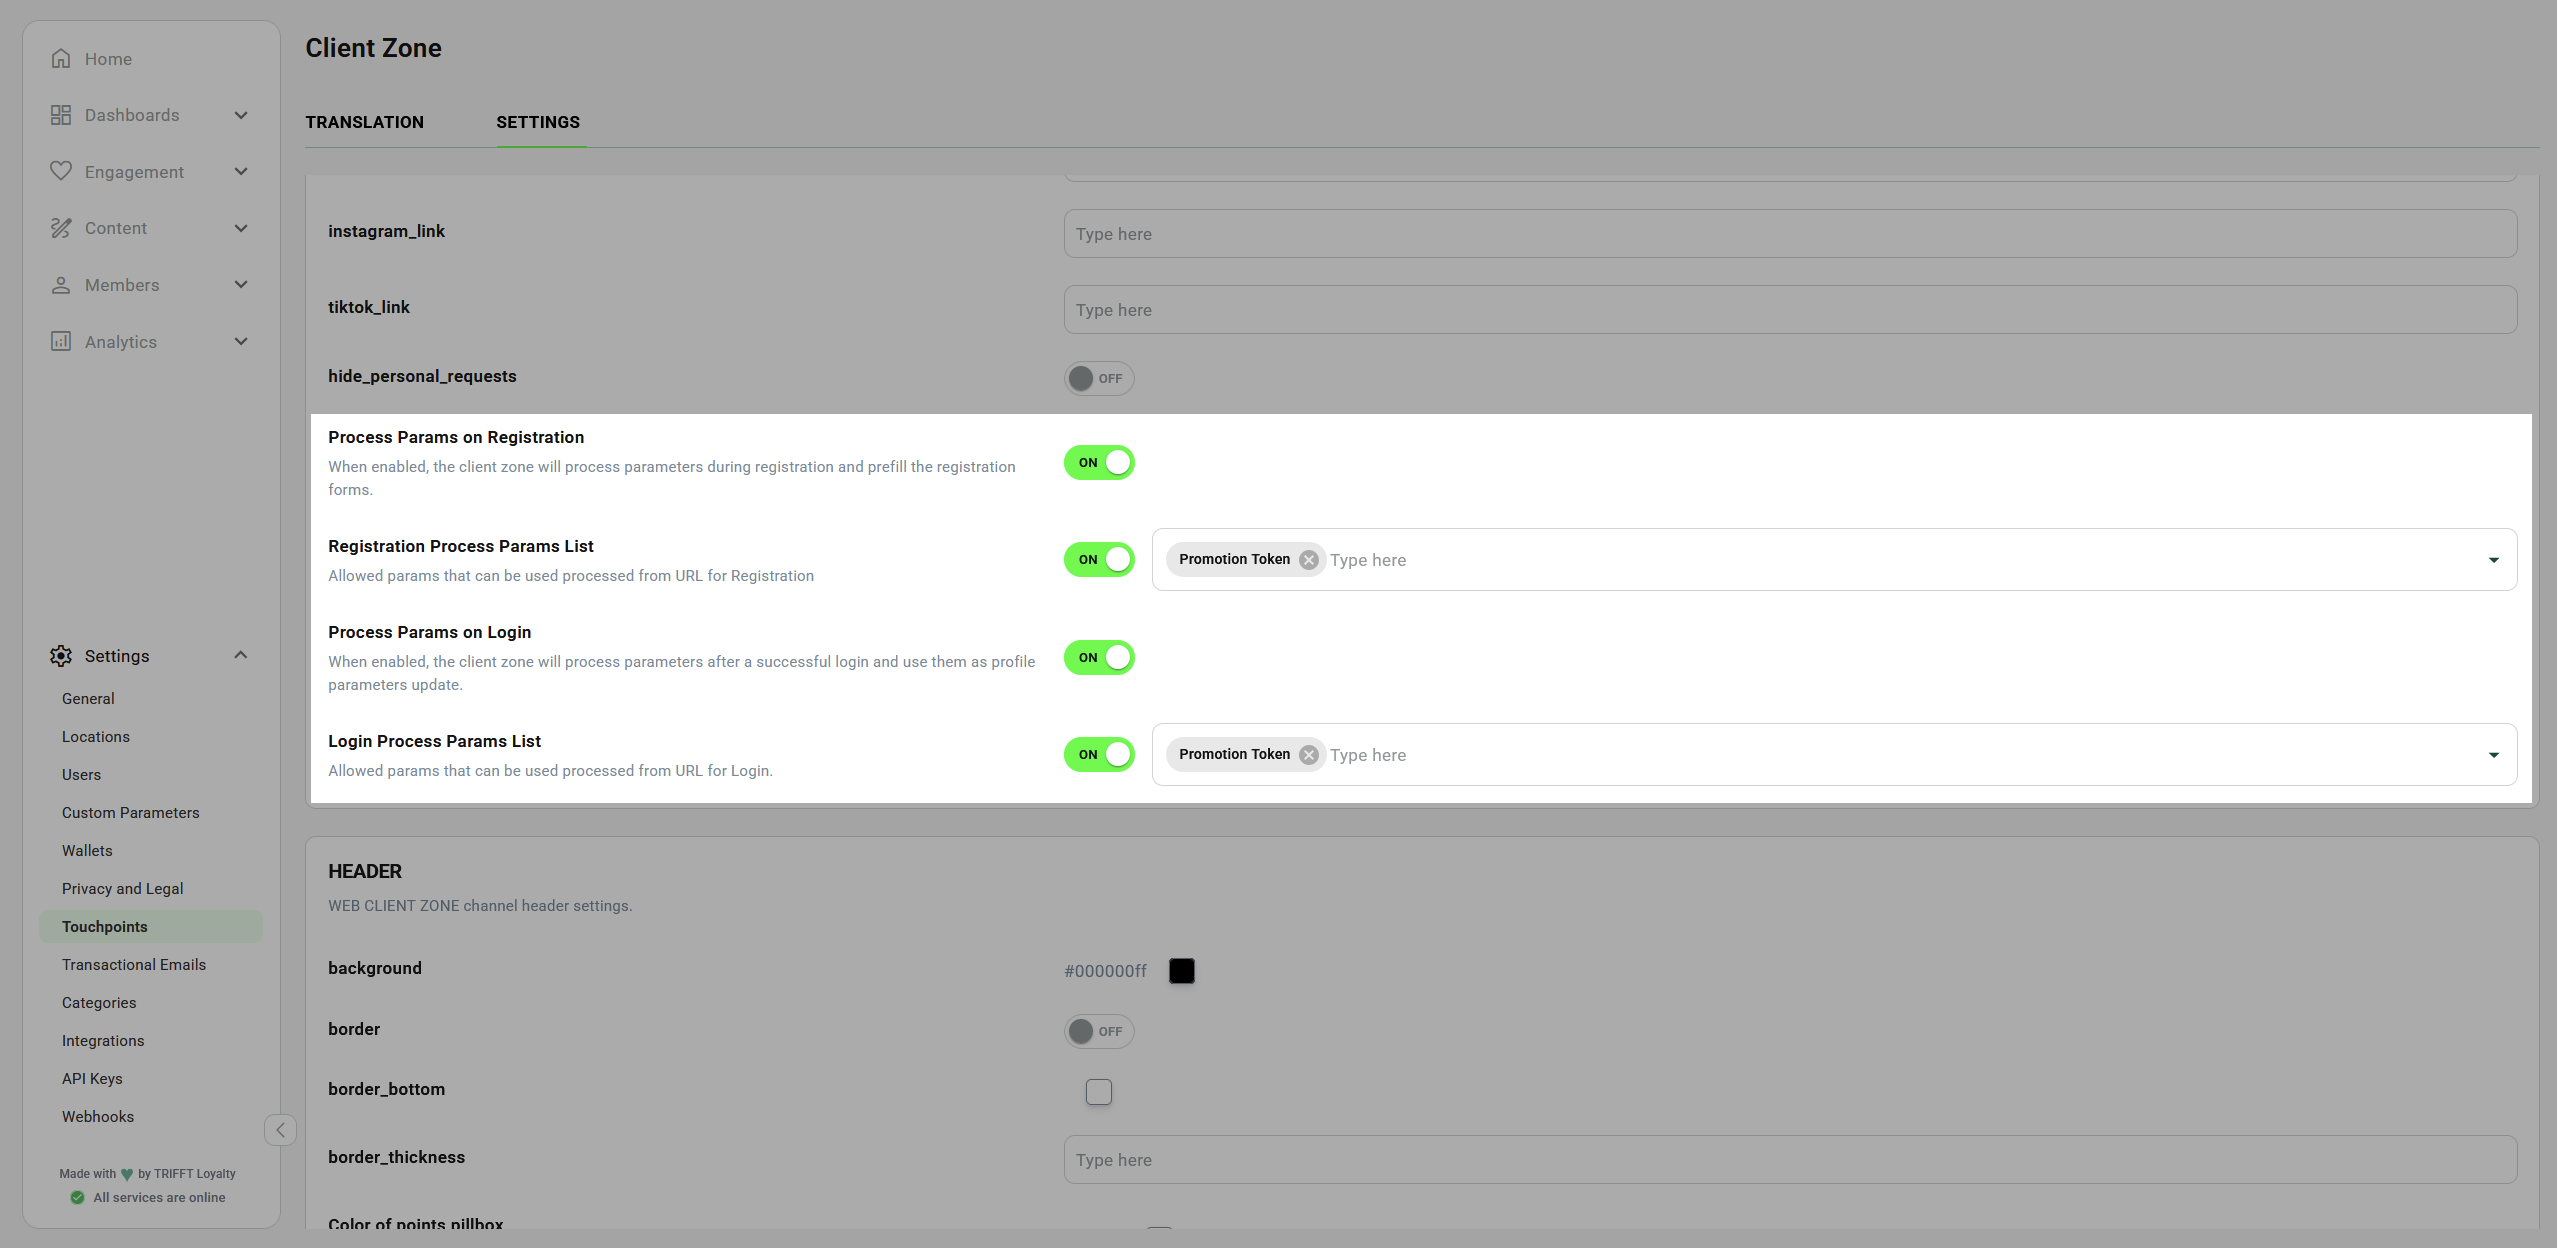
Processing Promotion Token Custom Parameter for both - already registered members and the new registrations
3. Create the Coupon
Create the coupon that should be assigned to the member after the QR code is used.
For detailed instructions, see Coupons Set Up.
4. Create the Promotion
Navigate to Engagement → Promotions and click Add new.
Configure the promotion using the following settings:
| Setting | Value |
|---|---|
| Promo Event Title | Enter the name of the promotion |
| Type | Assign Coupon |
| Valid From / Until | Define the period during which members can receive the coupon through the QR code |
| Segments | All visitors |
| Coupon | Select the coupon created in the previous step |
| Redemption Limit per Member | Enable this option and set it to 1 if each member may use the promotion only once. Leave it disabled if a member may use the promotion without a per-member limit. |
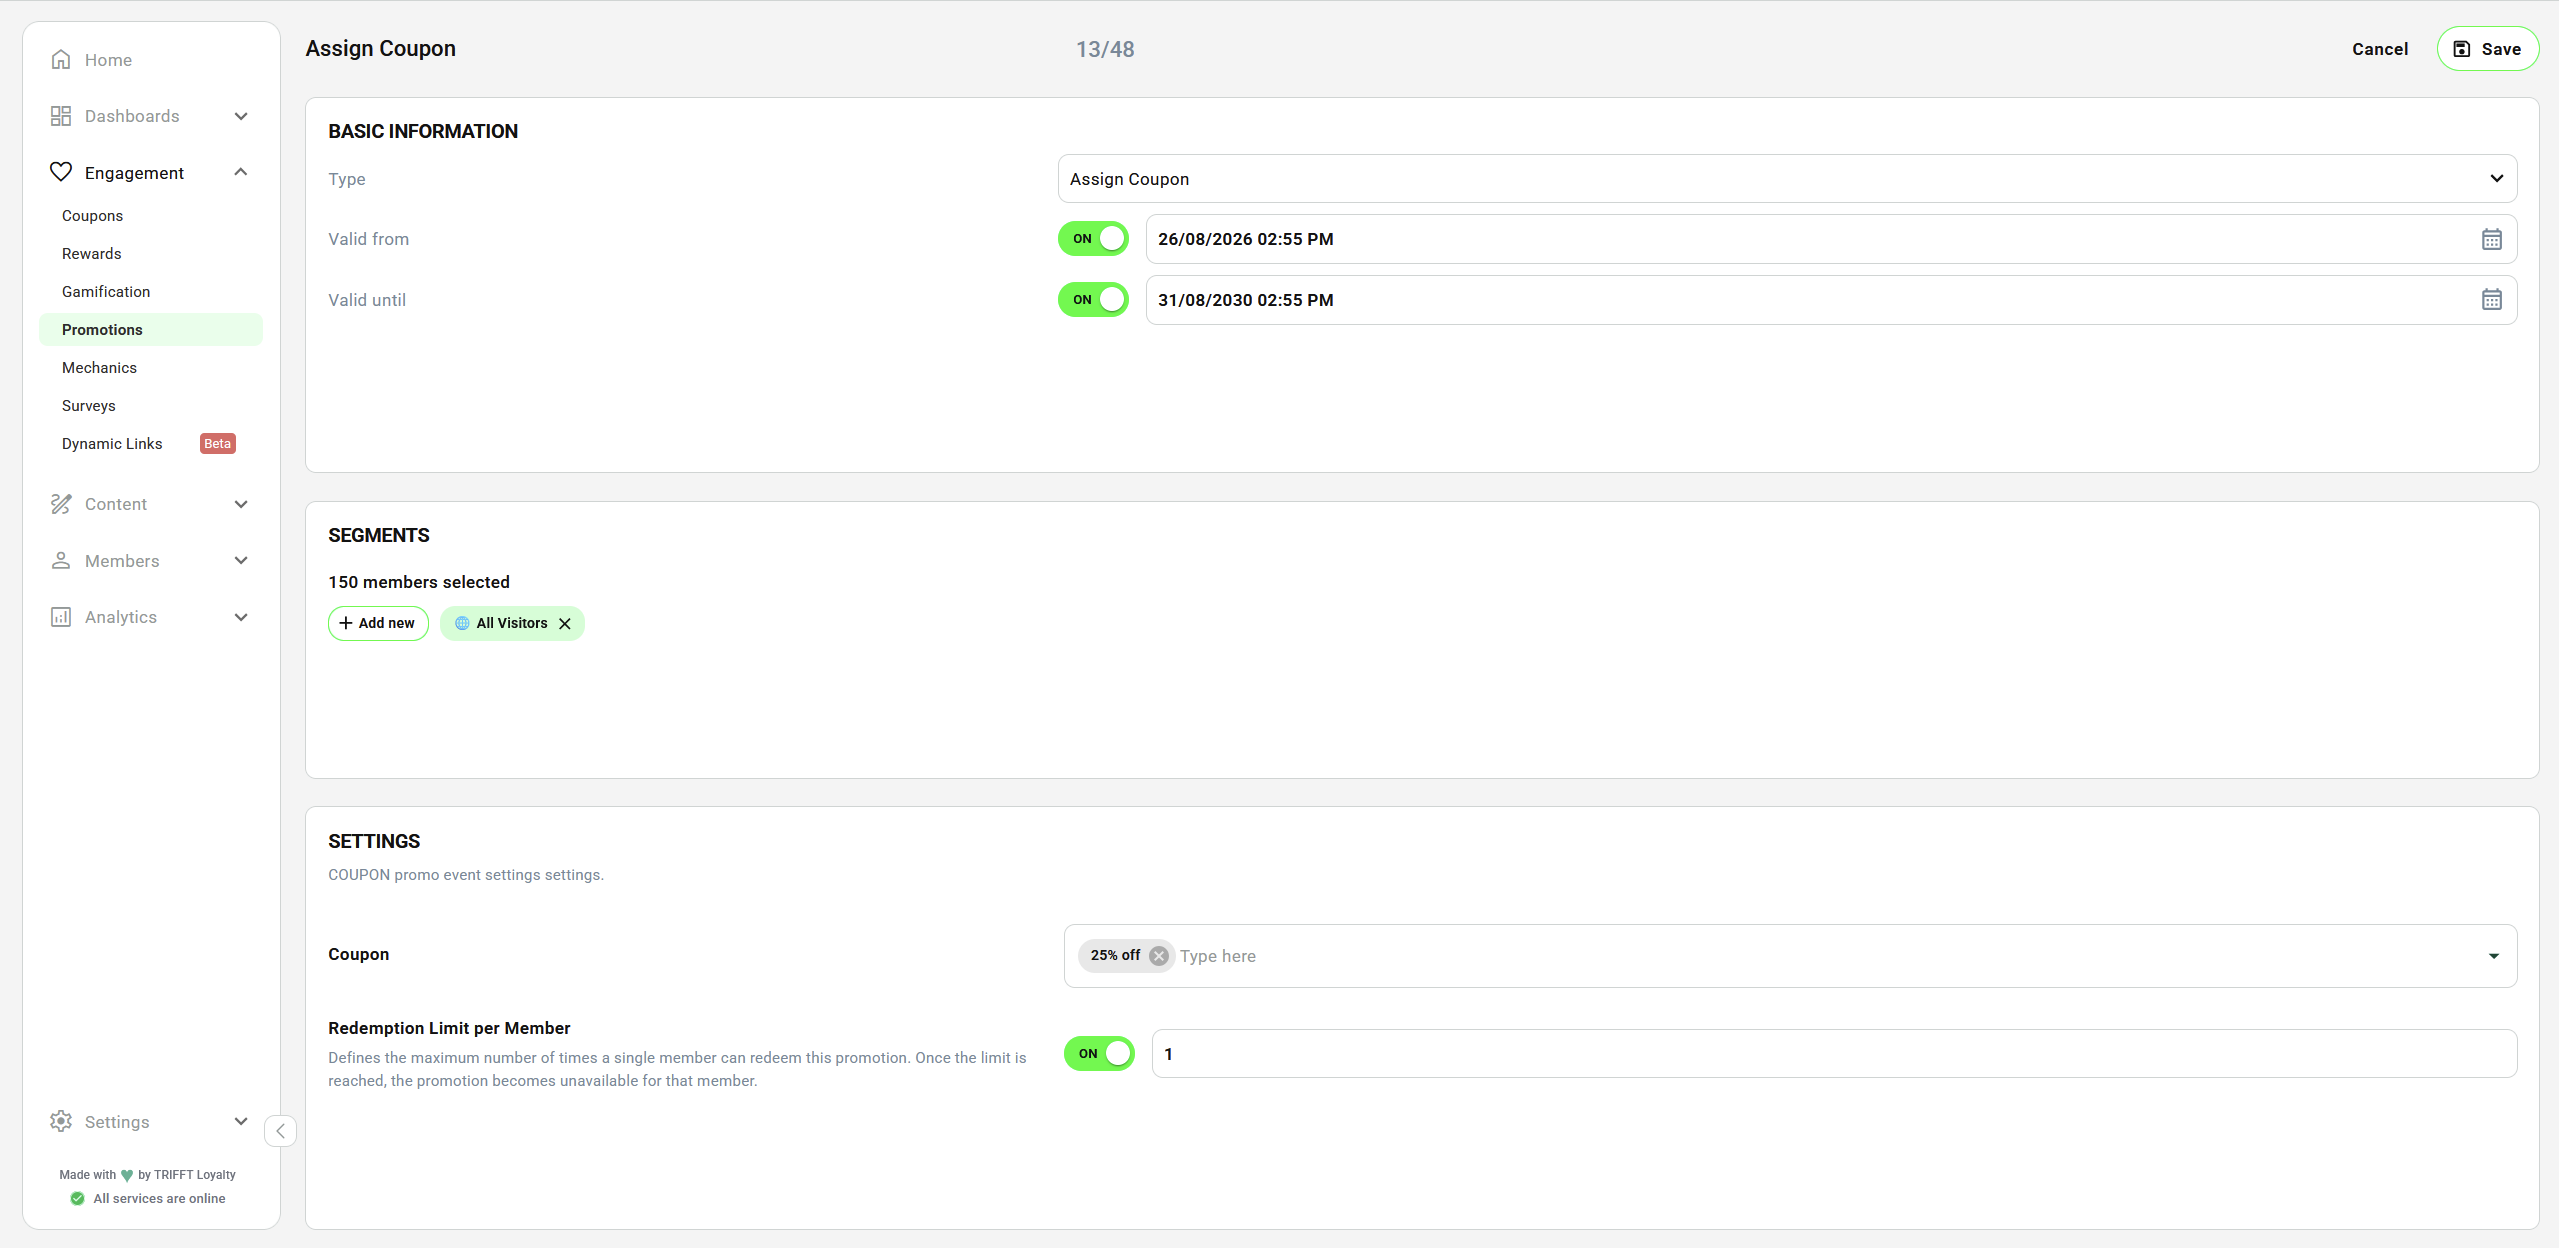
The promotion is processed only while it is valid. Outside the configured Valid From / Until period, the QR code will not assign the coupon.
Once the promotion is created, save it and open the CODES tab where you need to import your own promo codes.
5. Create the URL and QR Code
Create a URL using the following structure:
<Client Zone URL>/?<custom-parameter-slug>=<promo-code>
For example, if:
- the Client Zone URL is
https://yourclientzone.com/; - the Custom Parameter slug is
token; - the promotion code is
code123;
use the following URL:
https://yourclientzone.com/?token=code123
Use a QR code generator of your choice to generate a QR code from the complete URL.
TRIFFT does not provide a QR code generator. The QR code must be created using an external tool and must contain the complete URL exactly as configured above.
Result
When a customer scans the QR code:
- Client Zone opens with the promotion code included in the URL.
- The customer logs in or completes registration.
- Client Zone processes the selected Custom Parameter.
- TRIFFT identifies the active promotion from the promotion code.
- The configured coupon is assigned to the member, provided that the promotion is valid and the member has not reached the redemption limit.
The same QR code can be distributed to multiple customers. Eligibility and repeated use are controlled by the promotion validity, segment configuration, and the Redemption Limit per Member setting.
Updated 29 days ago