
Segments Set Up
This Technical Setup Guide provides the configuration steps required to define and manage Segments within the TRIFFT Cockpit for targeted engagement and automation.
Create a new Segment
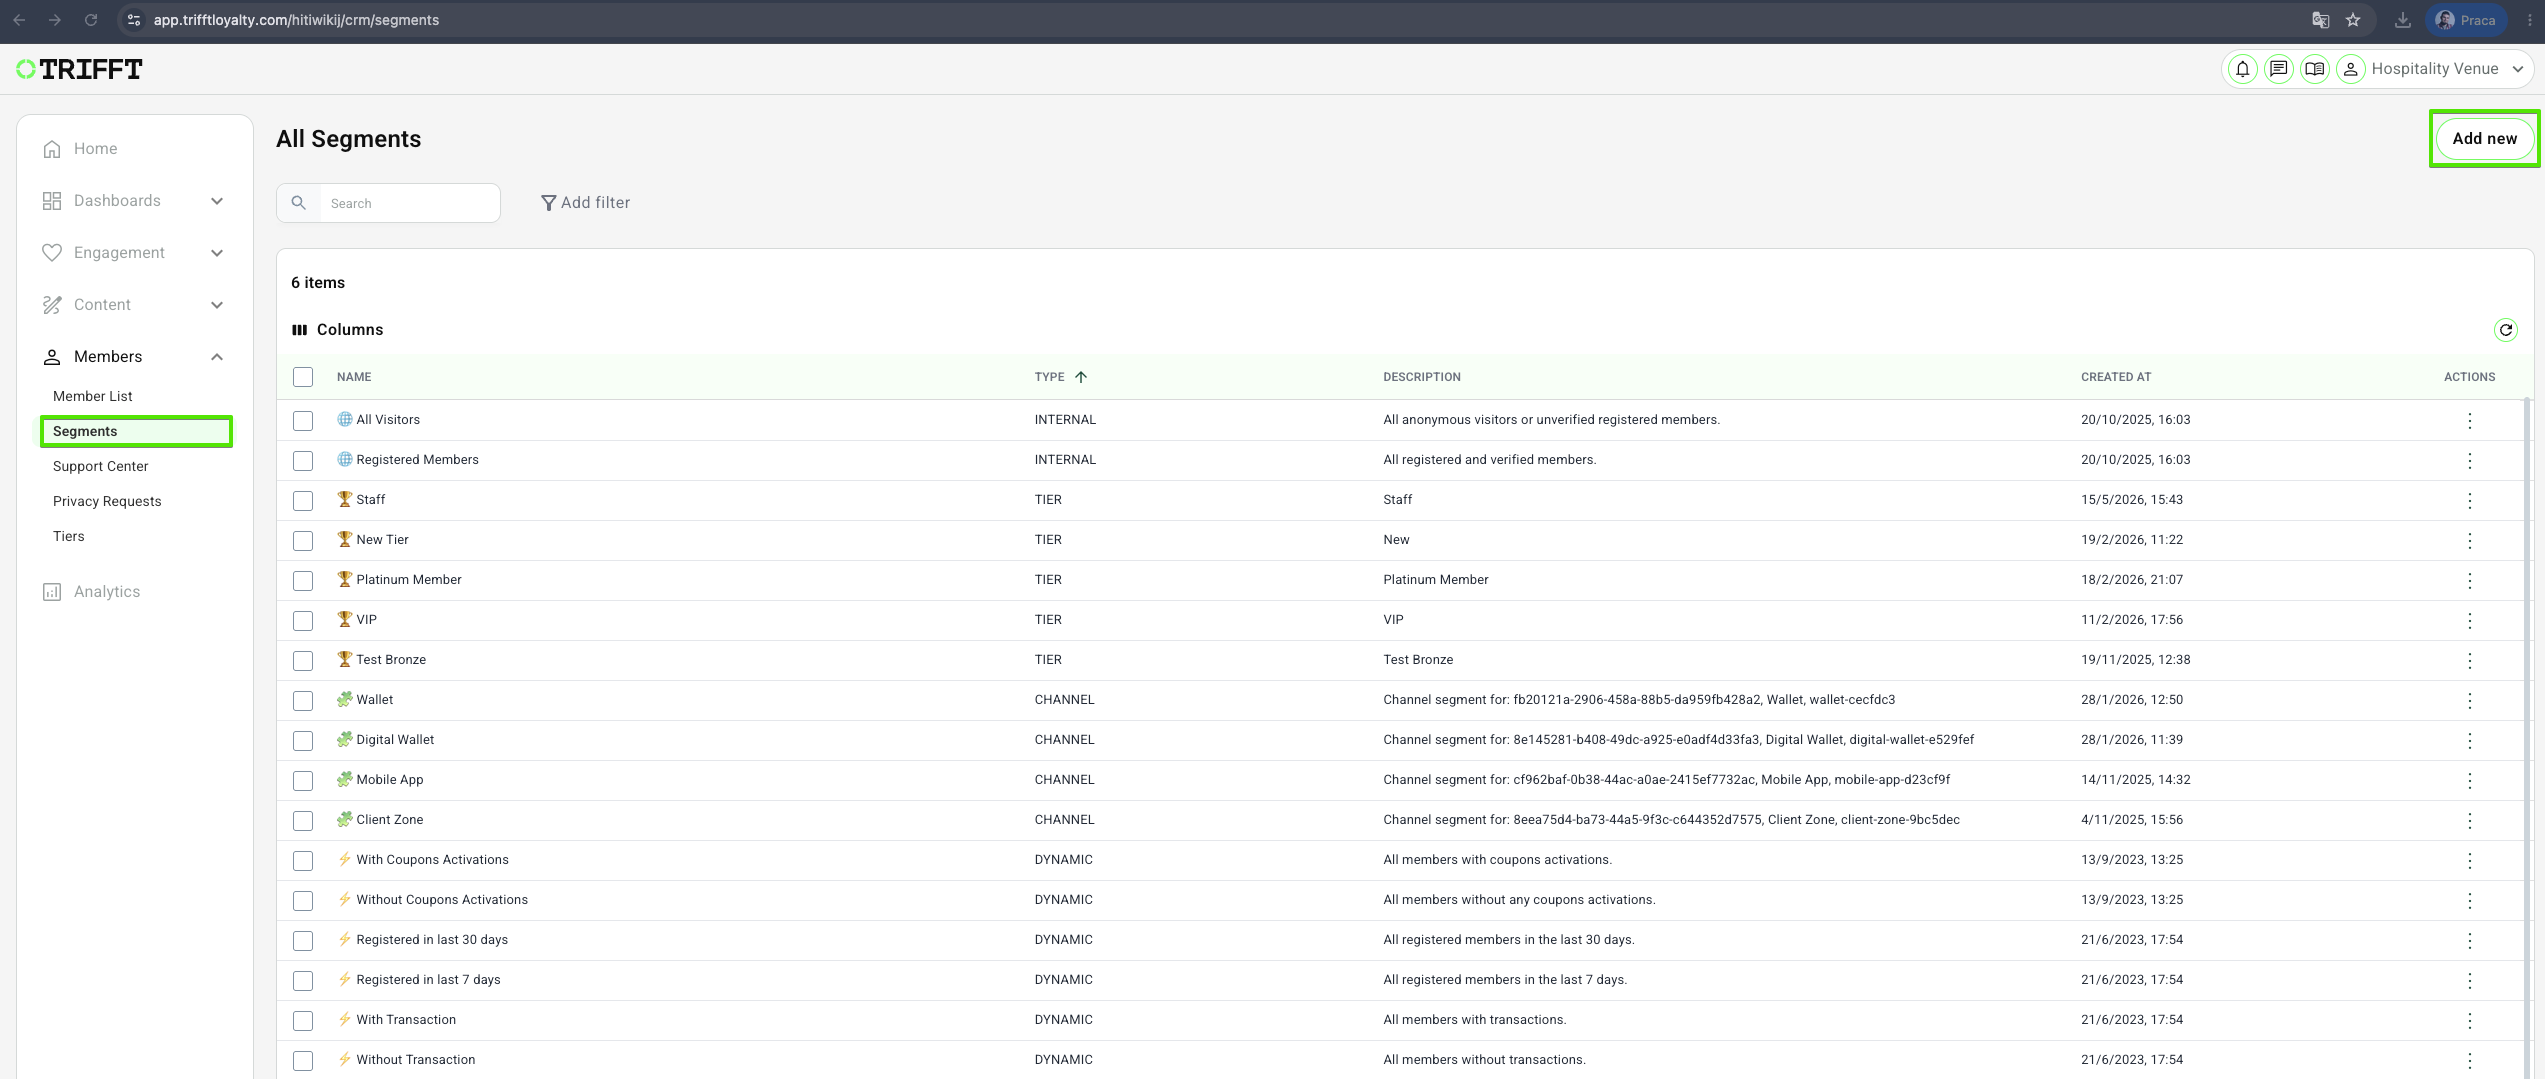
- Navigate to the Members > Segments.
- You will see a list of All Segments saved in your project.
- To create a new Segment, click the Add New button located in the top-right corner of the page.
Set up the Segment
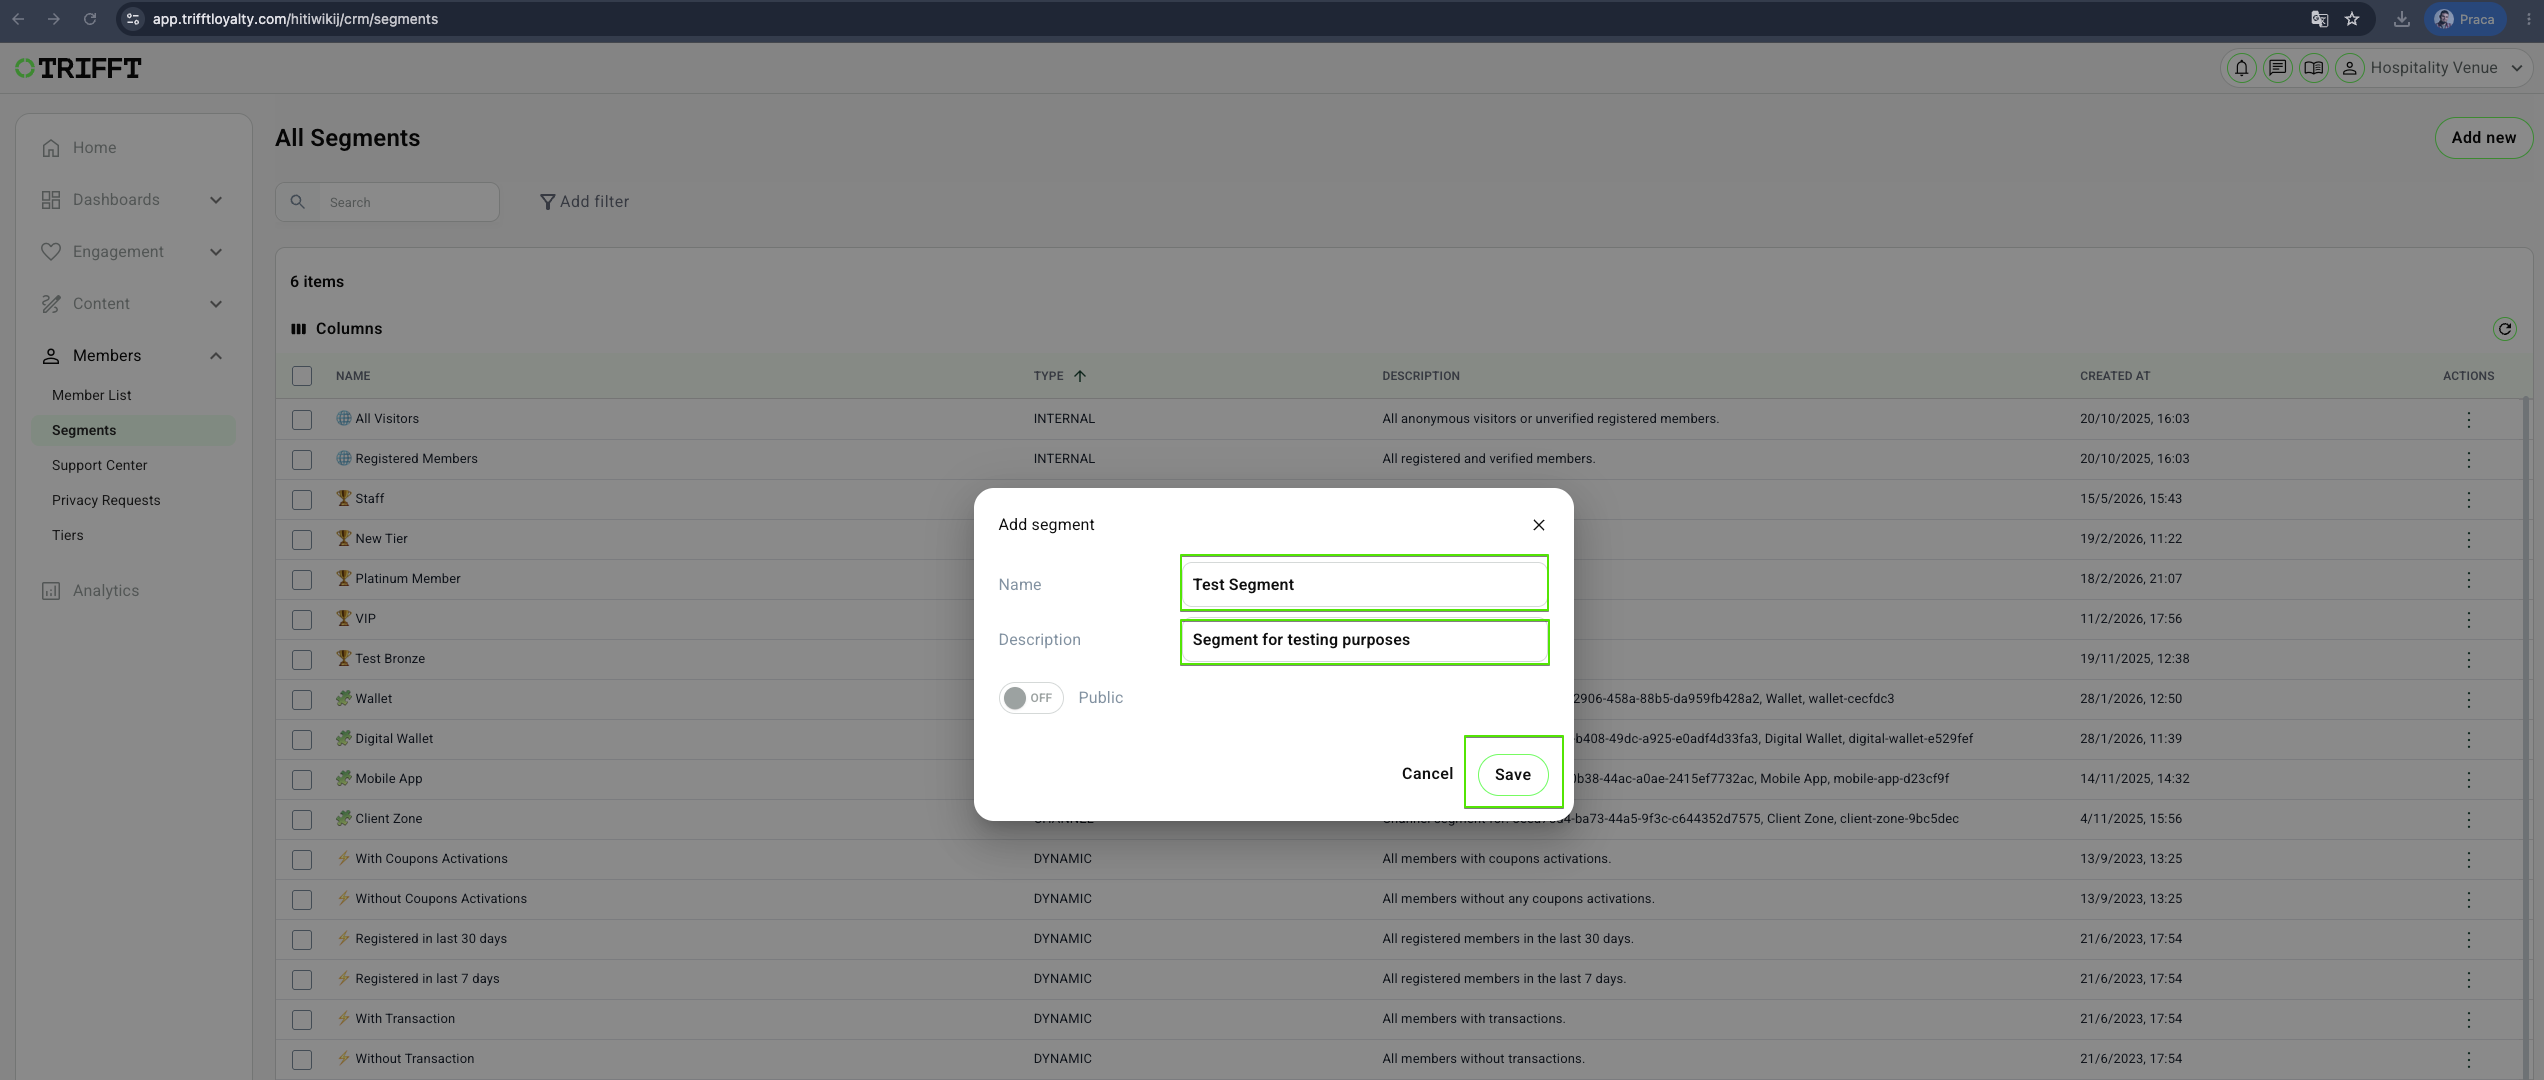
- Set a Name for the segment. When assigning the segment, you will find it by this name.
- Set a Description for the segment. This description will only be visible in the list of all segments.
- Click on the Save button.
- Public (optional): Switch the toggle Public if you wish to make the segment public. Public segments are visible to members in the app/on the web, and Members can self-register to these Segments. You can find more information in the article public segments.
Add members
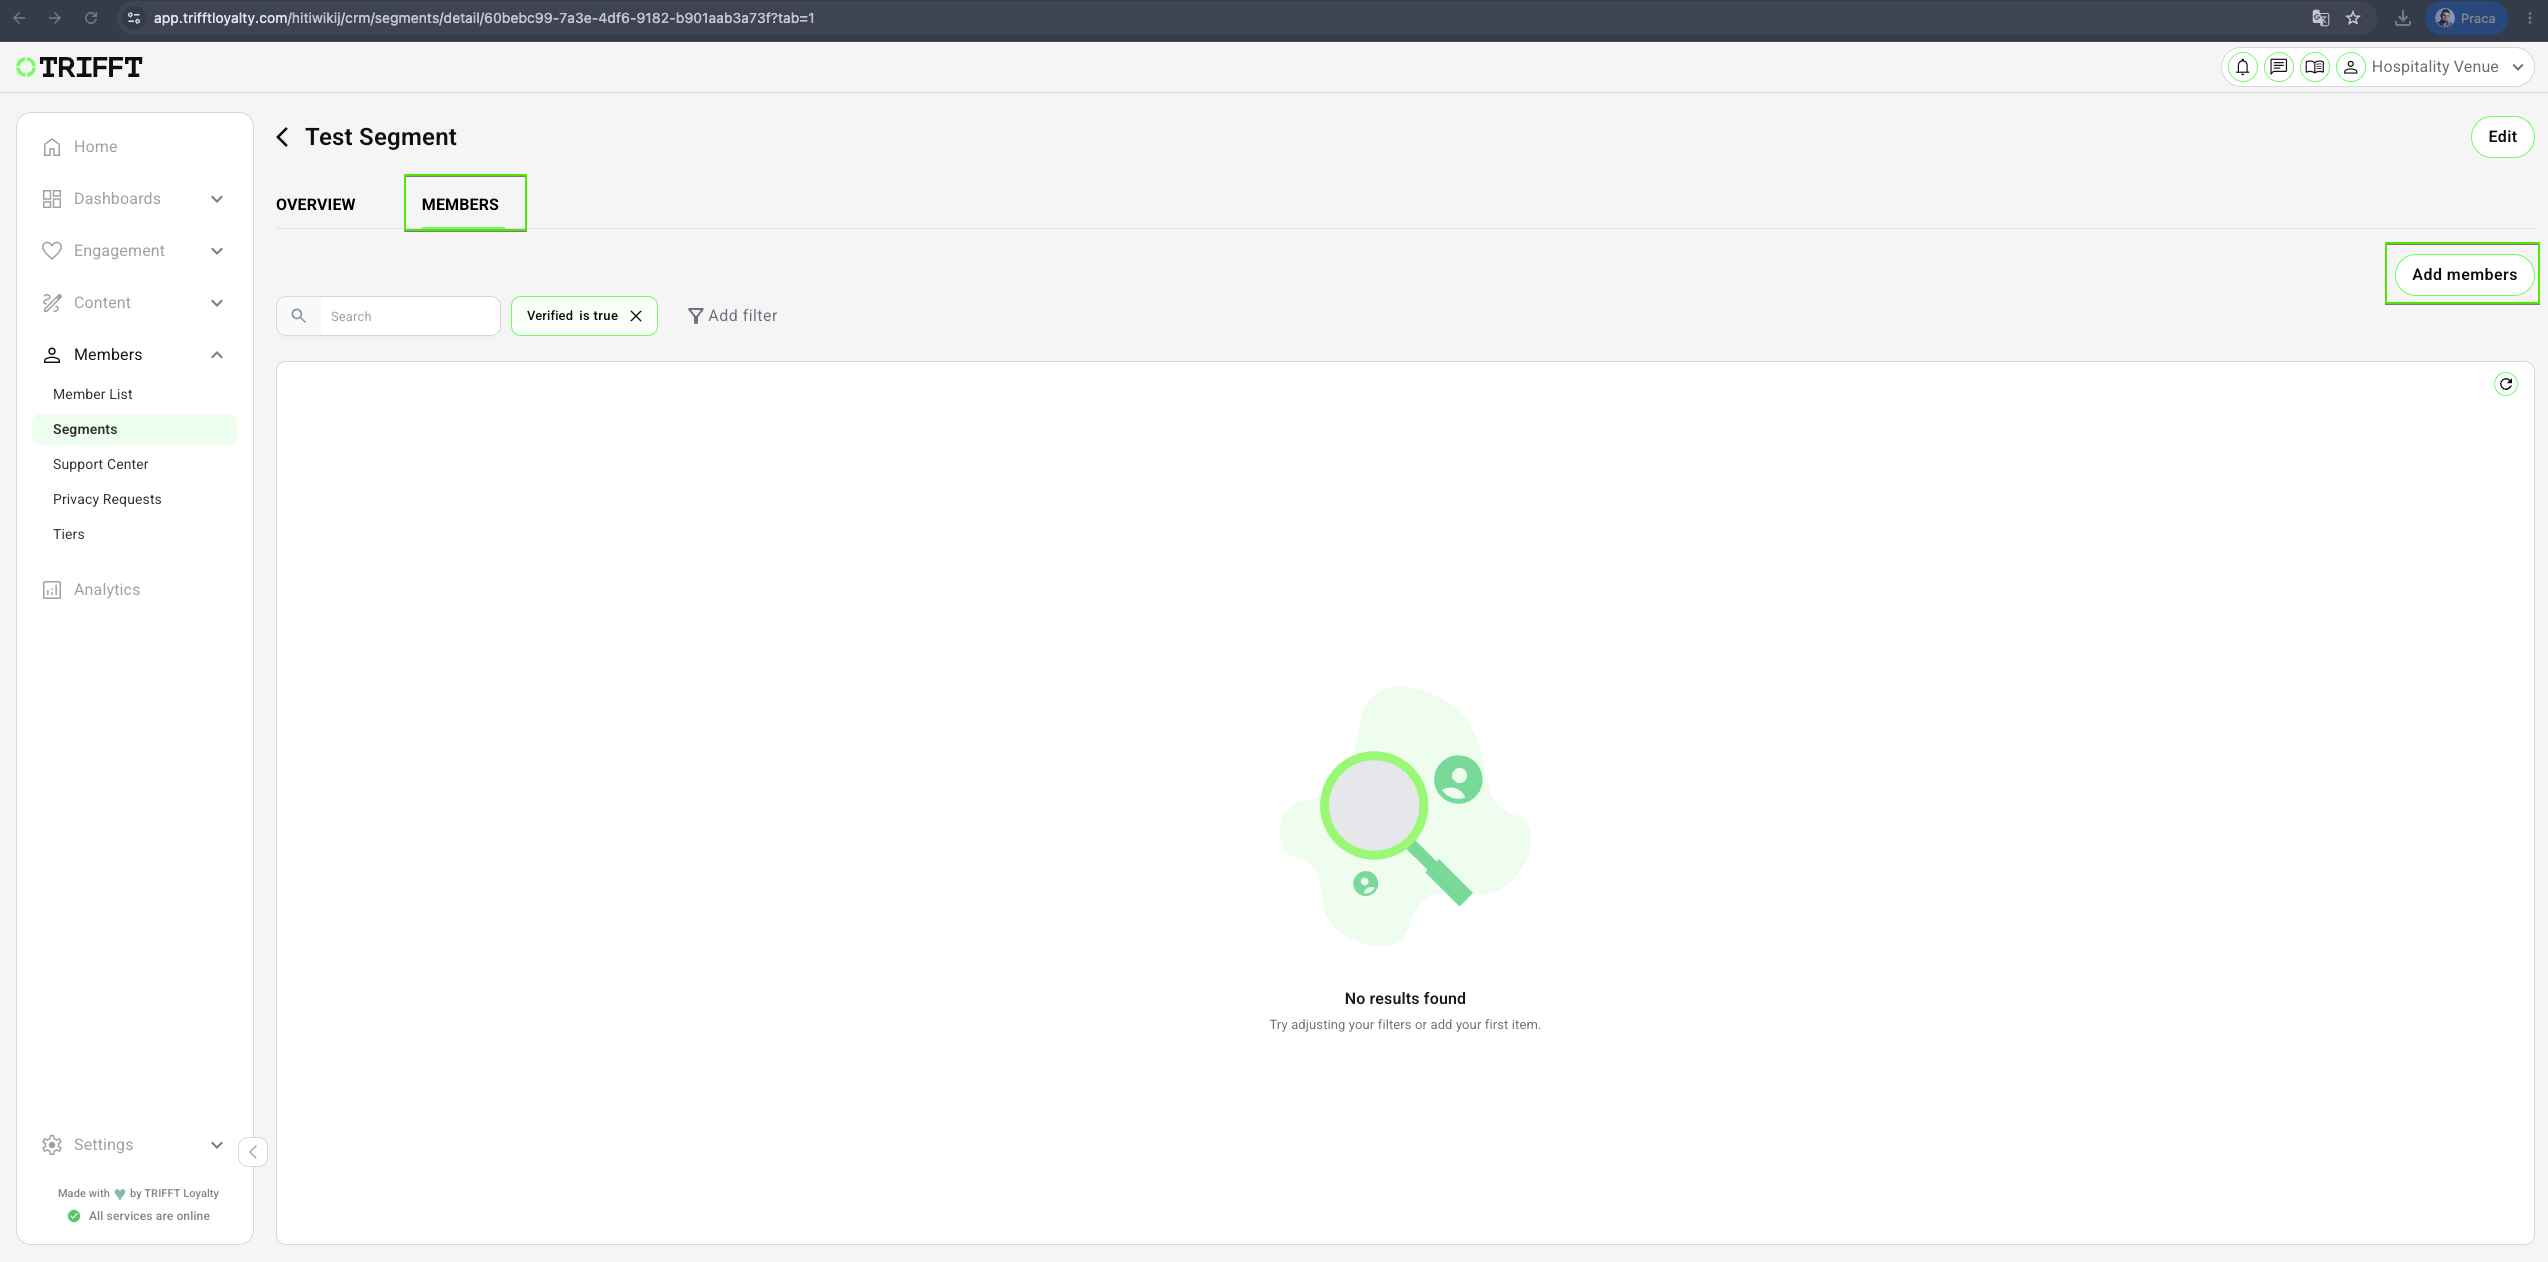
- Once the new segment is created it will automatically open on the Settings Overview tab.
- Open the Members tab and then click on the Add members button in the top right corner to access the list of all members.
-
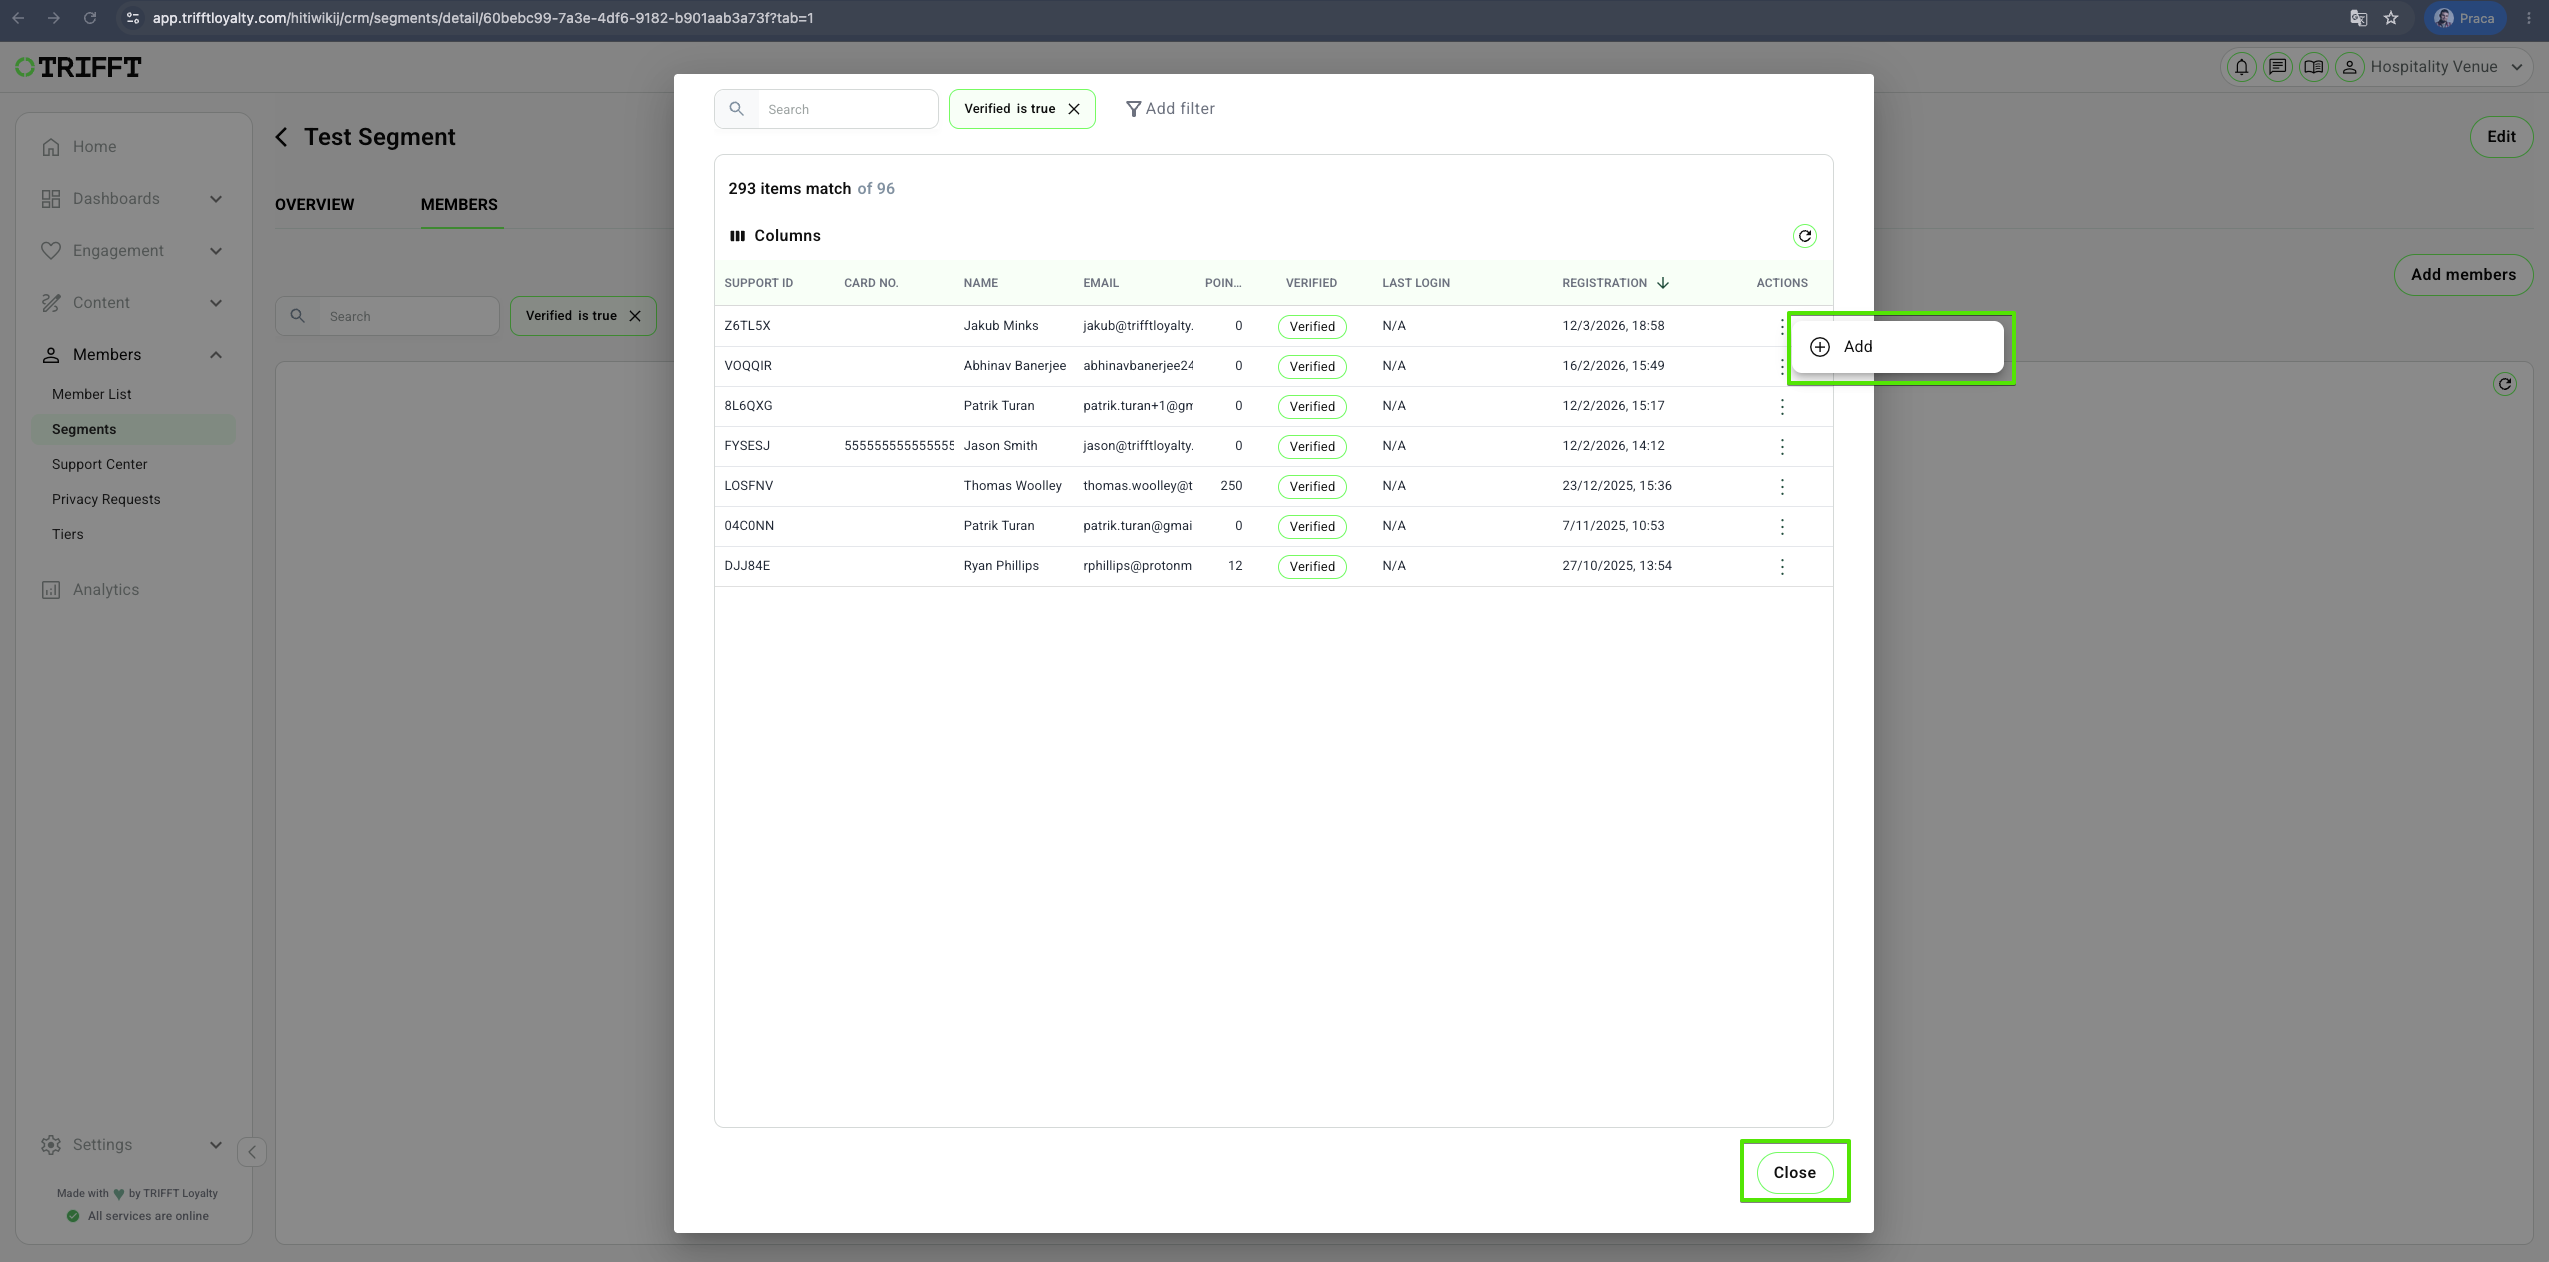
Find the Member you want to add to the segment, click the three dots in Action column and select the + Add option.
-
Once all members are added just close the window with the Close button.
Remove a member from Segment
- On the Members tab you can see a list of all members added to your segment and a total number of members in segment.
- You can use the Search bar and filter function for searching the members.
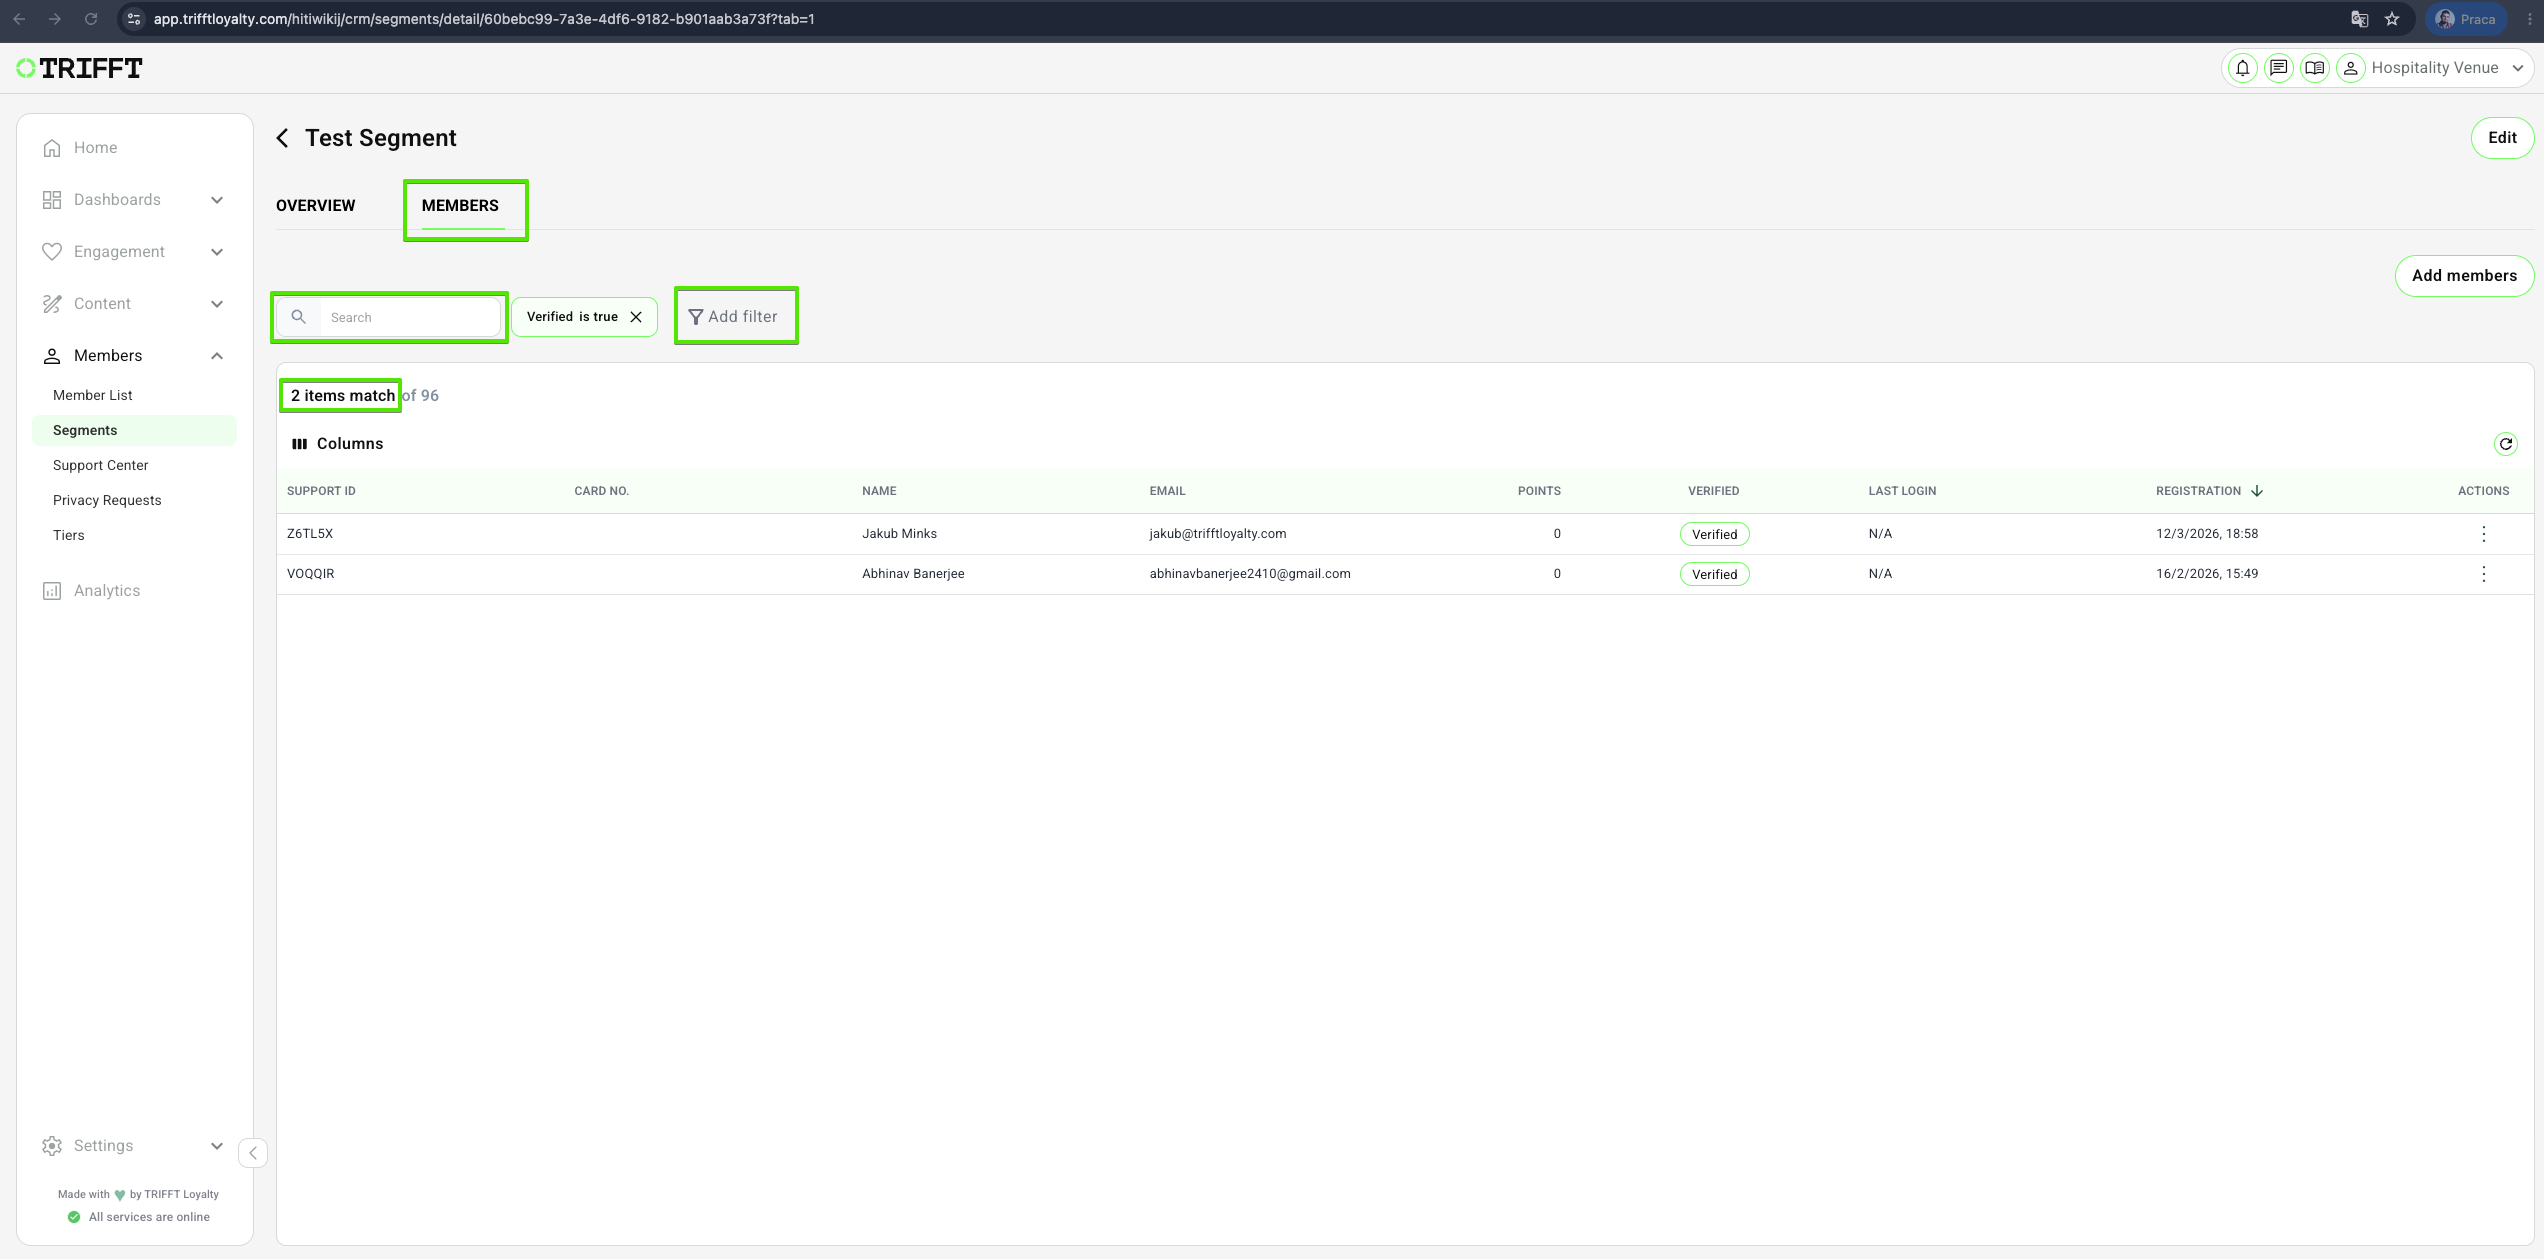
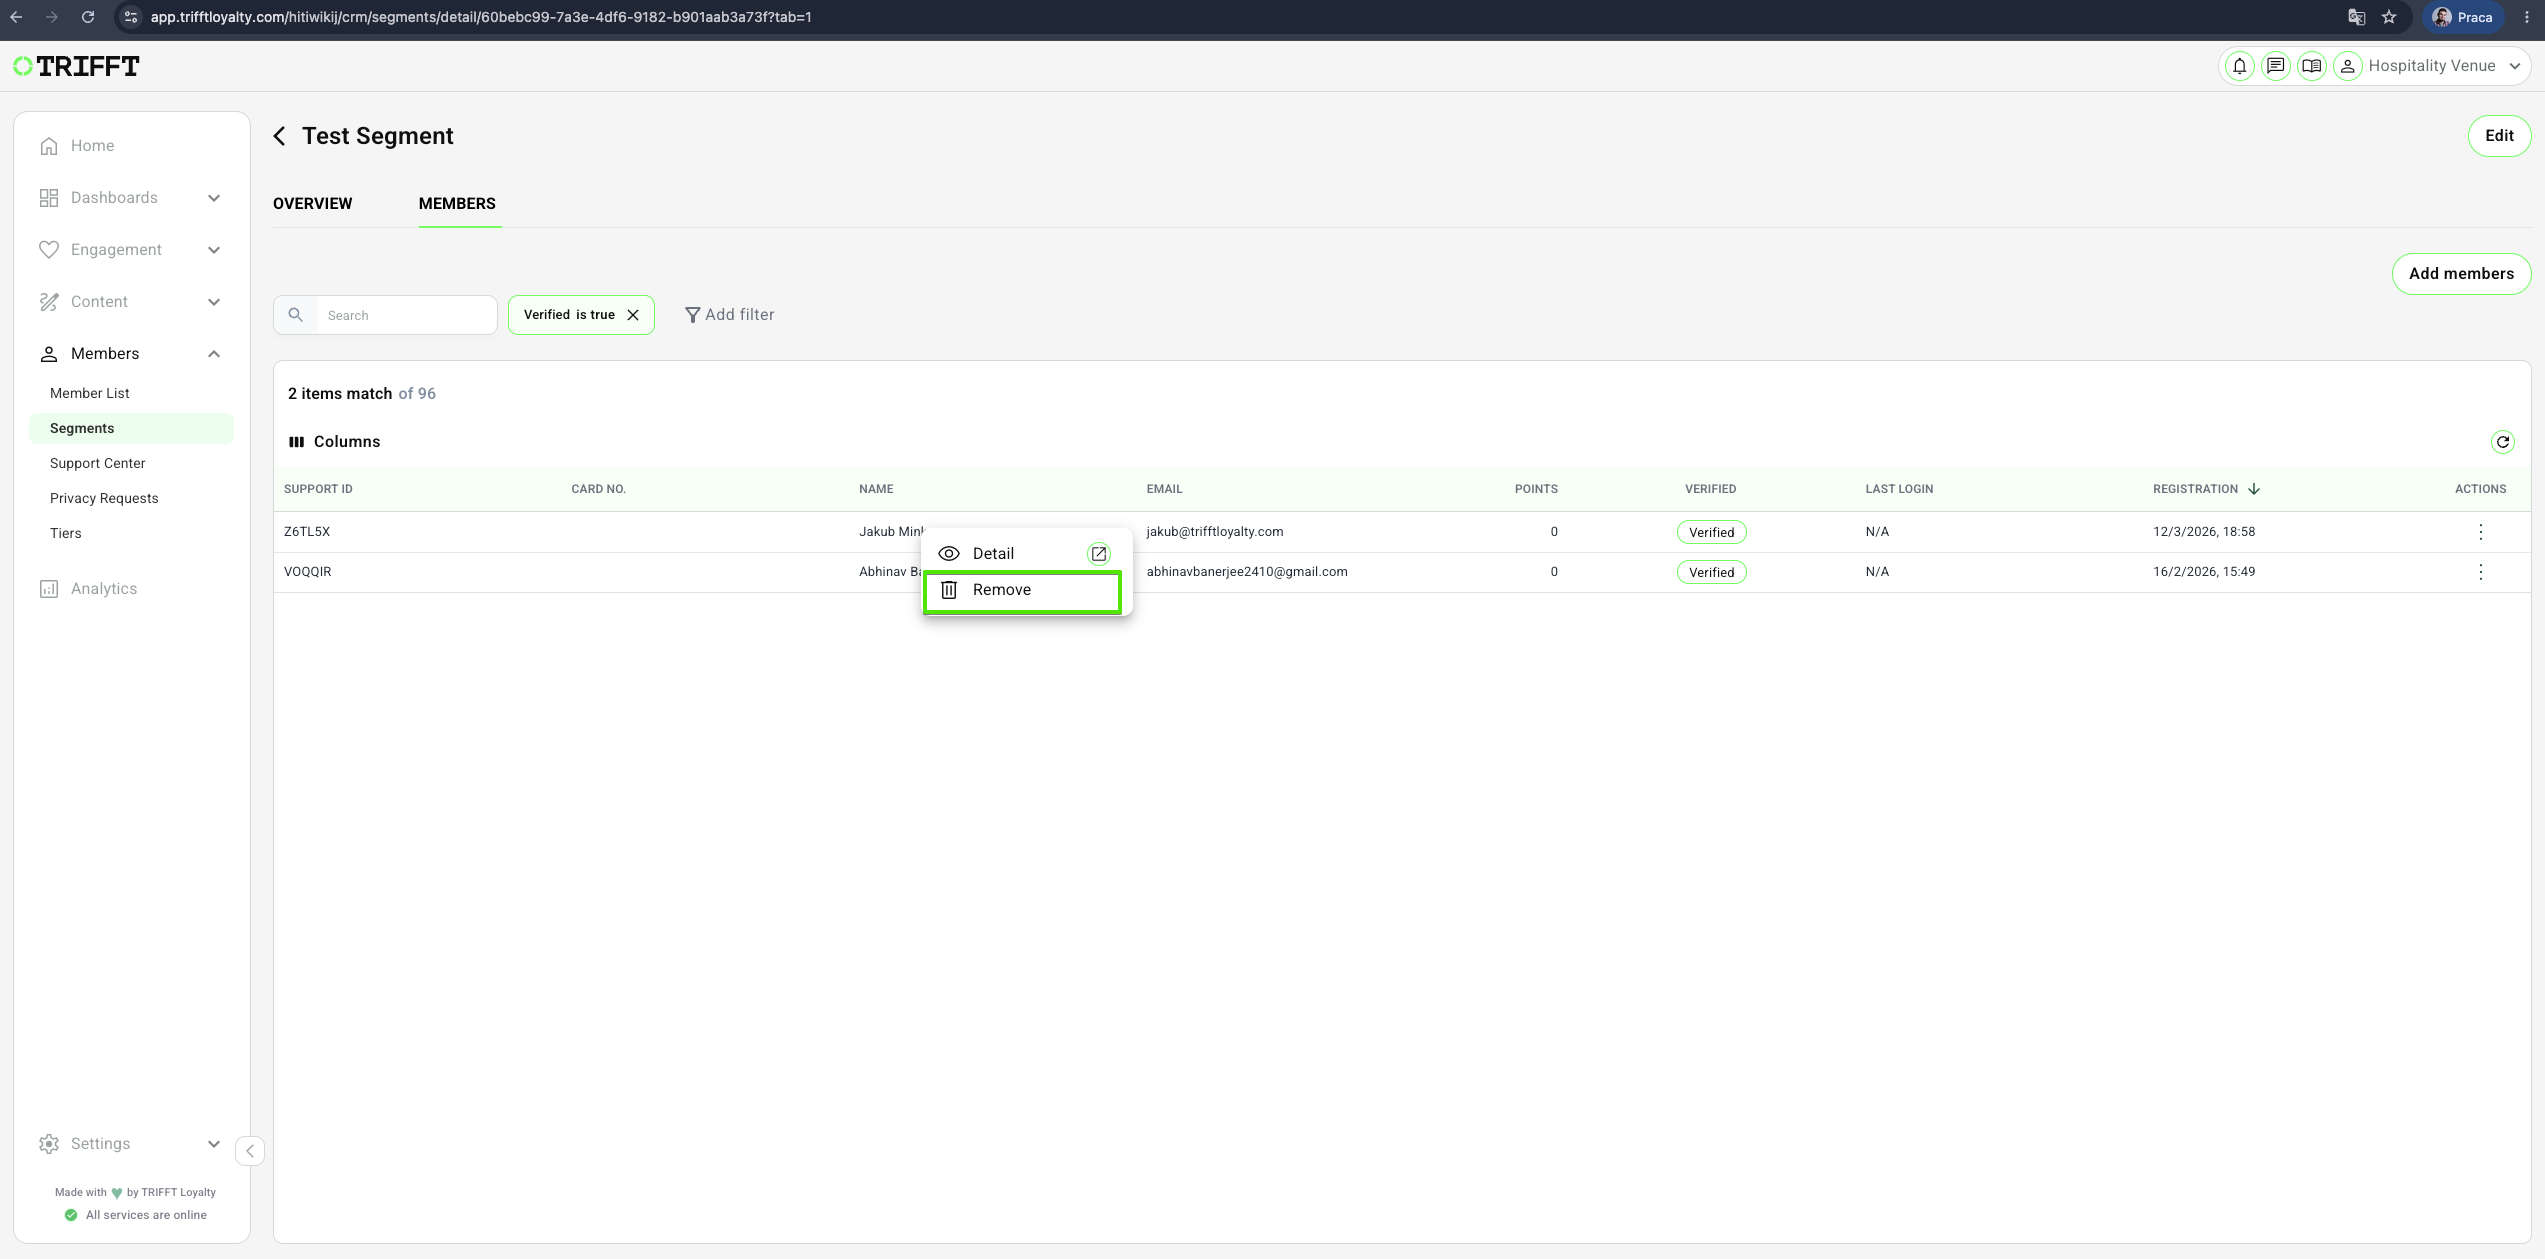
- To remove a member from the Segment just find the member, right-click on the member and choose Remove.
| Topic / function | Segments |
|---|---|
| Audience | CRM / Marketing Ops / Implementation |
| Goal | Provide step-by-step setup for dynamic and static member grouping |
| Prereq systems | TRIFFT Cockpit, Member Data (PII/Attributes) |
Prerequisites
- Access: Ensure you have the Admin or Editor role to access the Audience module in the Cockpit.
- Data points: Confirm that the attributes you wish to filter by (e.g., "Favorite Category," "Total Points," or "Last Purchase Date") are active and populated in member profiles.
- Integrations: If syncing segments to Klaviyo or Bloomreach, ensure the API connection is "Active" in the Integrations tab.
Configuration checklist
- Filter Accuracy: The logic correctly includes the intended audience without being too broad or restrictive.
- Dynamic Refresh: Ensure the "Dynamic" toggle is on if you want the group to update automatically as member data changes.
- Public Localization: If the segment is "Public," ensure the Display Name is translated for all active program languages.
- Integration Mapping: The segment name matches the naming convention used in your external automation flows (e.g., Klaviyo/Bloomreach).
- Data Safety: Filters correctly handle "Null" values to avoid excluding members who simply haven't provided a specific attribute yet.
Updated 3 months ago
Did this page help you?