This Ongoing Management Guide provides the steps required to maintain and optimize Custom Parameters.
Updating Custom Parameters
Navigate to Custom Params: Log in to the TRIFFT Content Cockpit and go to Settings > Custom Parameters.
Edit Parameter: Select an existing custom parameter to modify its settings.
Final check and Save: Make the final check of your adjustments and click Save button in the top right corner.
Managing Custom Parameters on the entity
Open the entity where your custom parameter sits.
Make your adjustments accordingly. You can find 2 examples of custom parameters on entities Venue and Coupons below.
Use case #1 - Setting up a Parking option of your Venue Custom Parameter:
Let’s say you want the app to show which venues offer parking and which do not. First, you need to create a Parking custom parameter and then set the required value for this parameter for each specific venue.
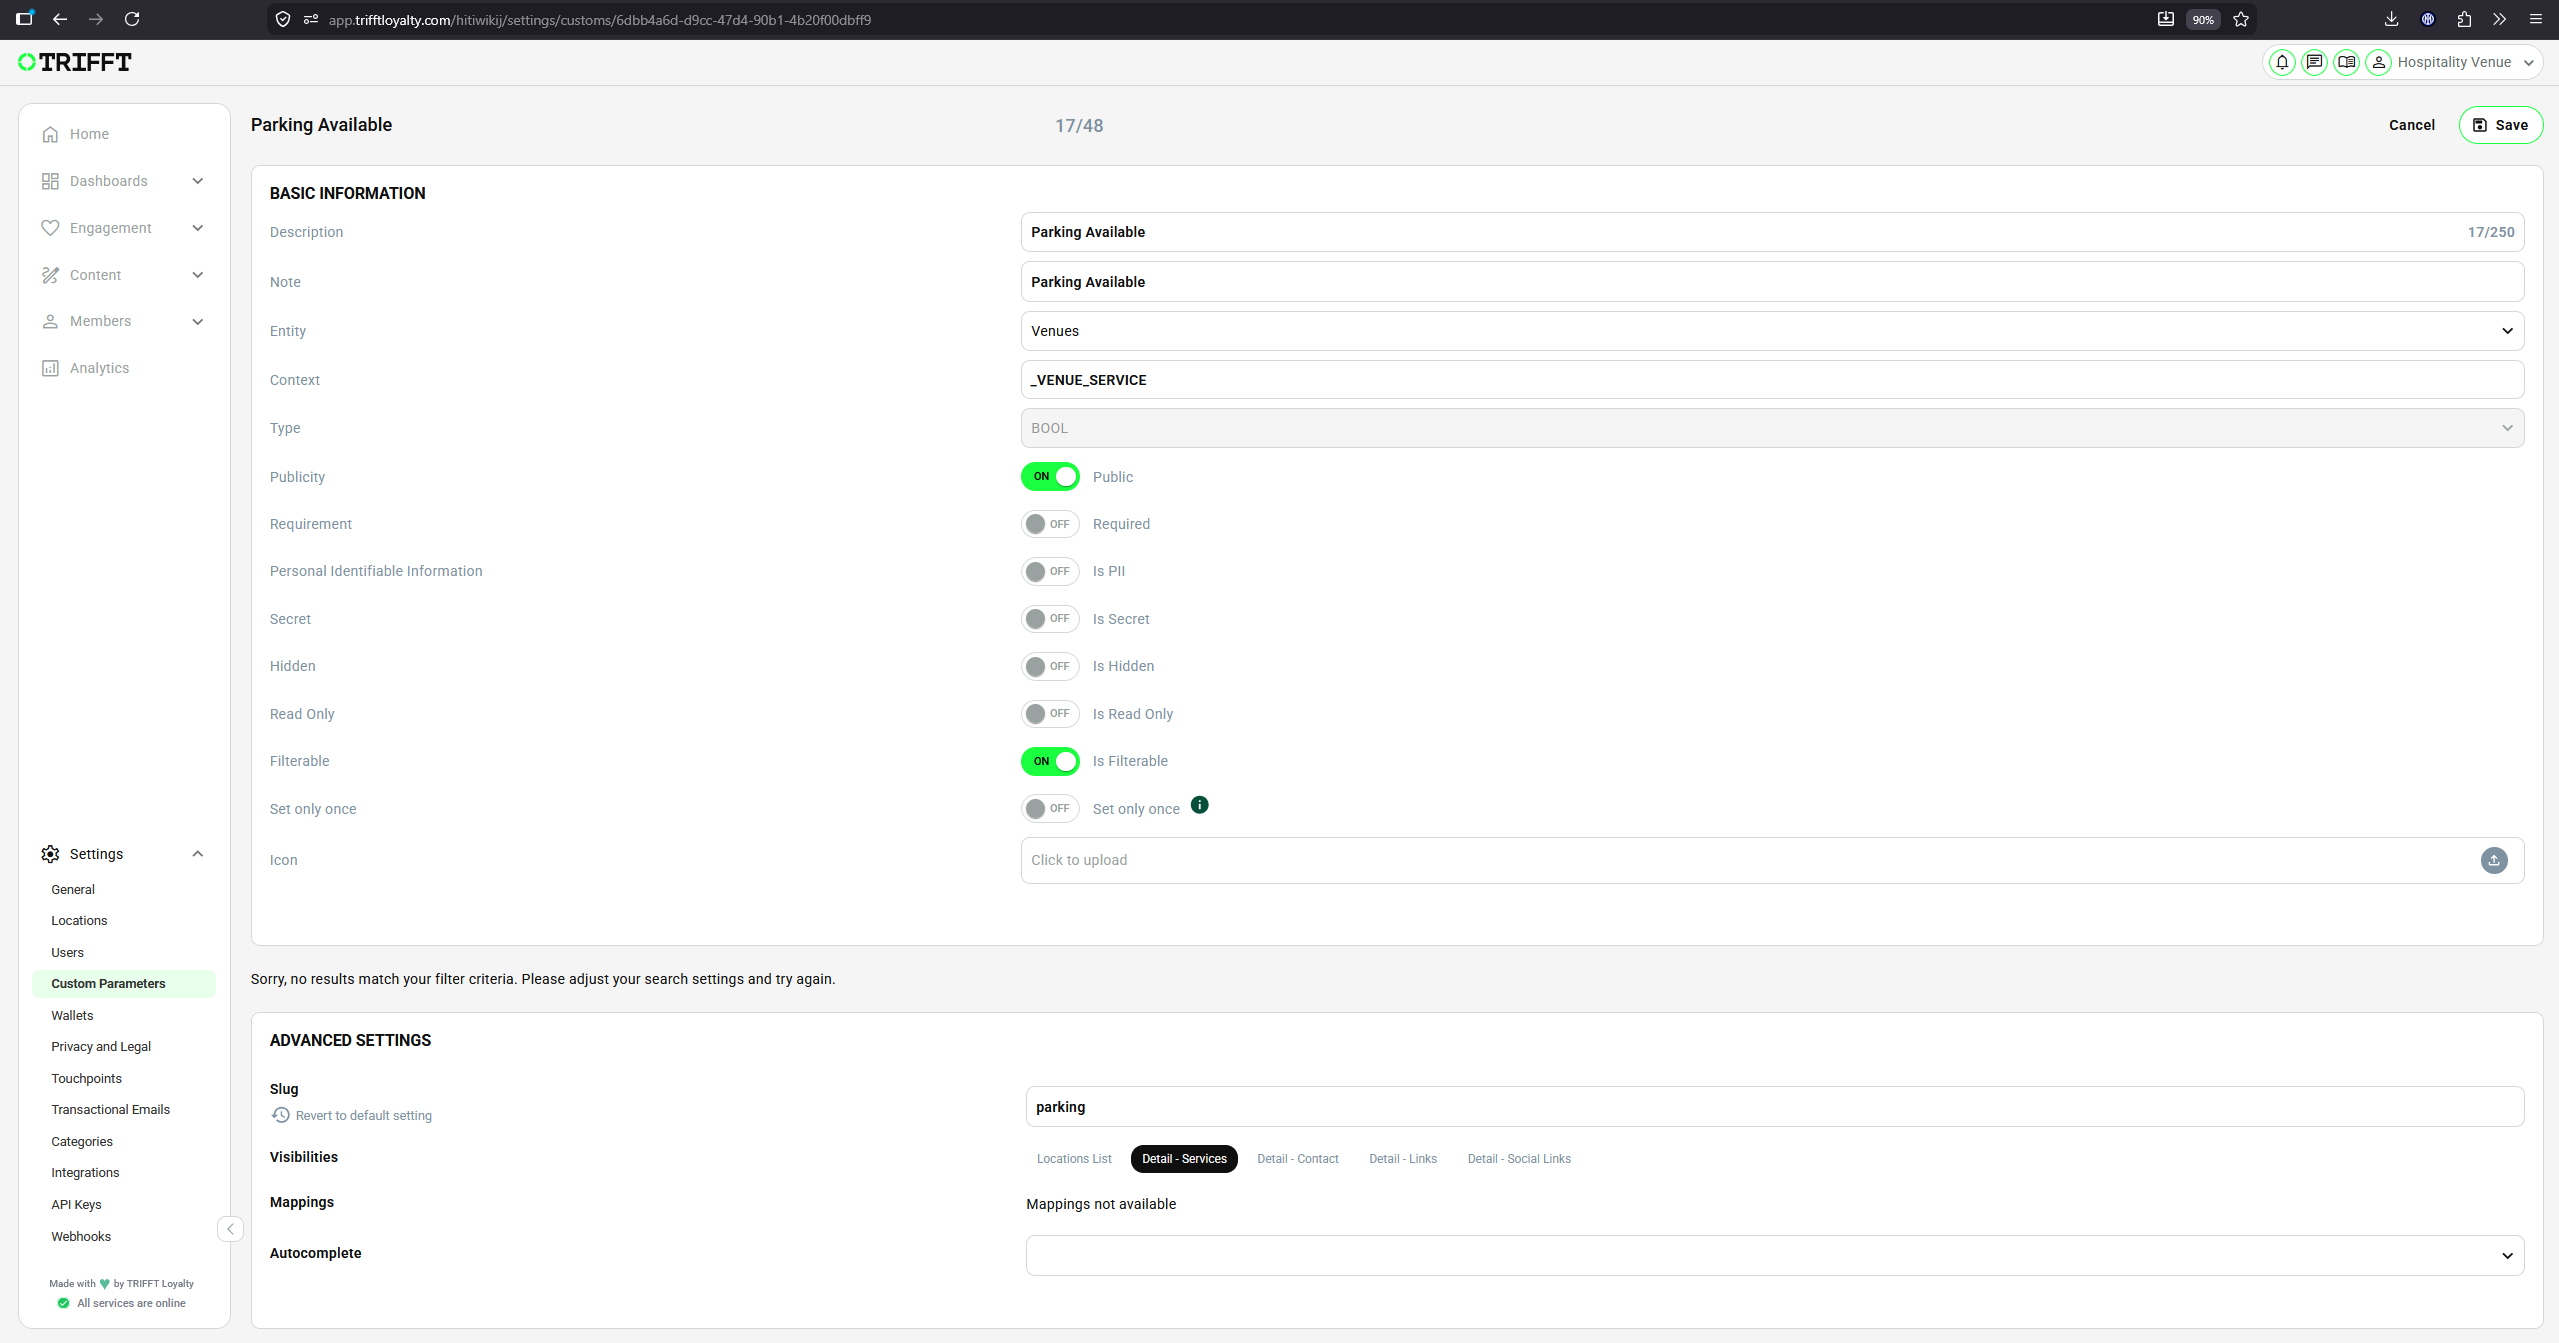
Example of Venue custom parameter Parking in the settings of Custom Parameter:
Example of Venue Custom Parameter - Parking
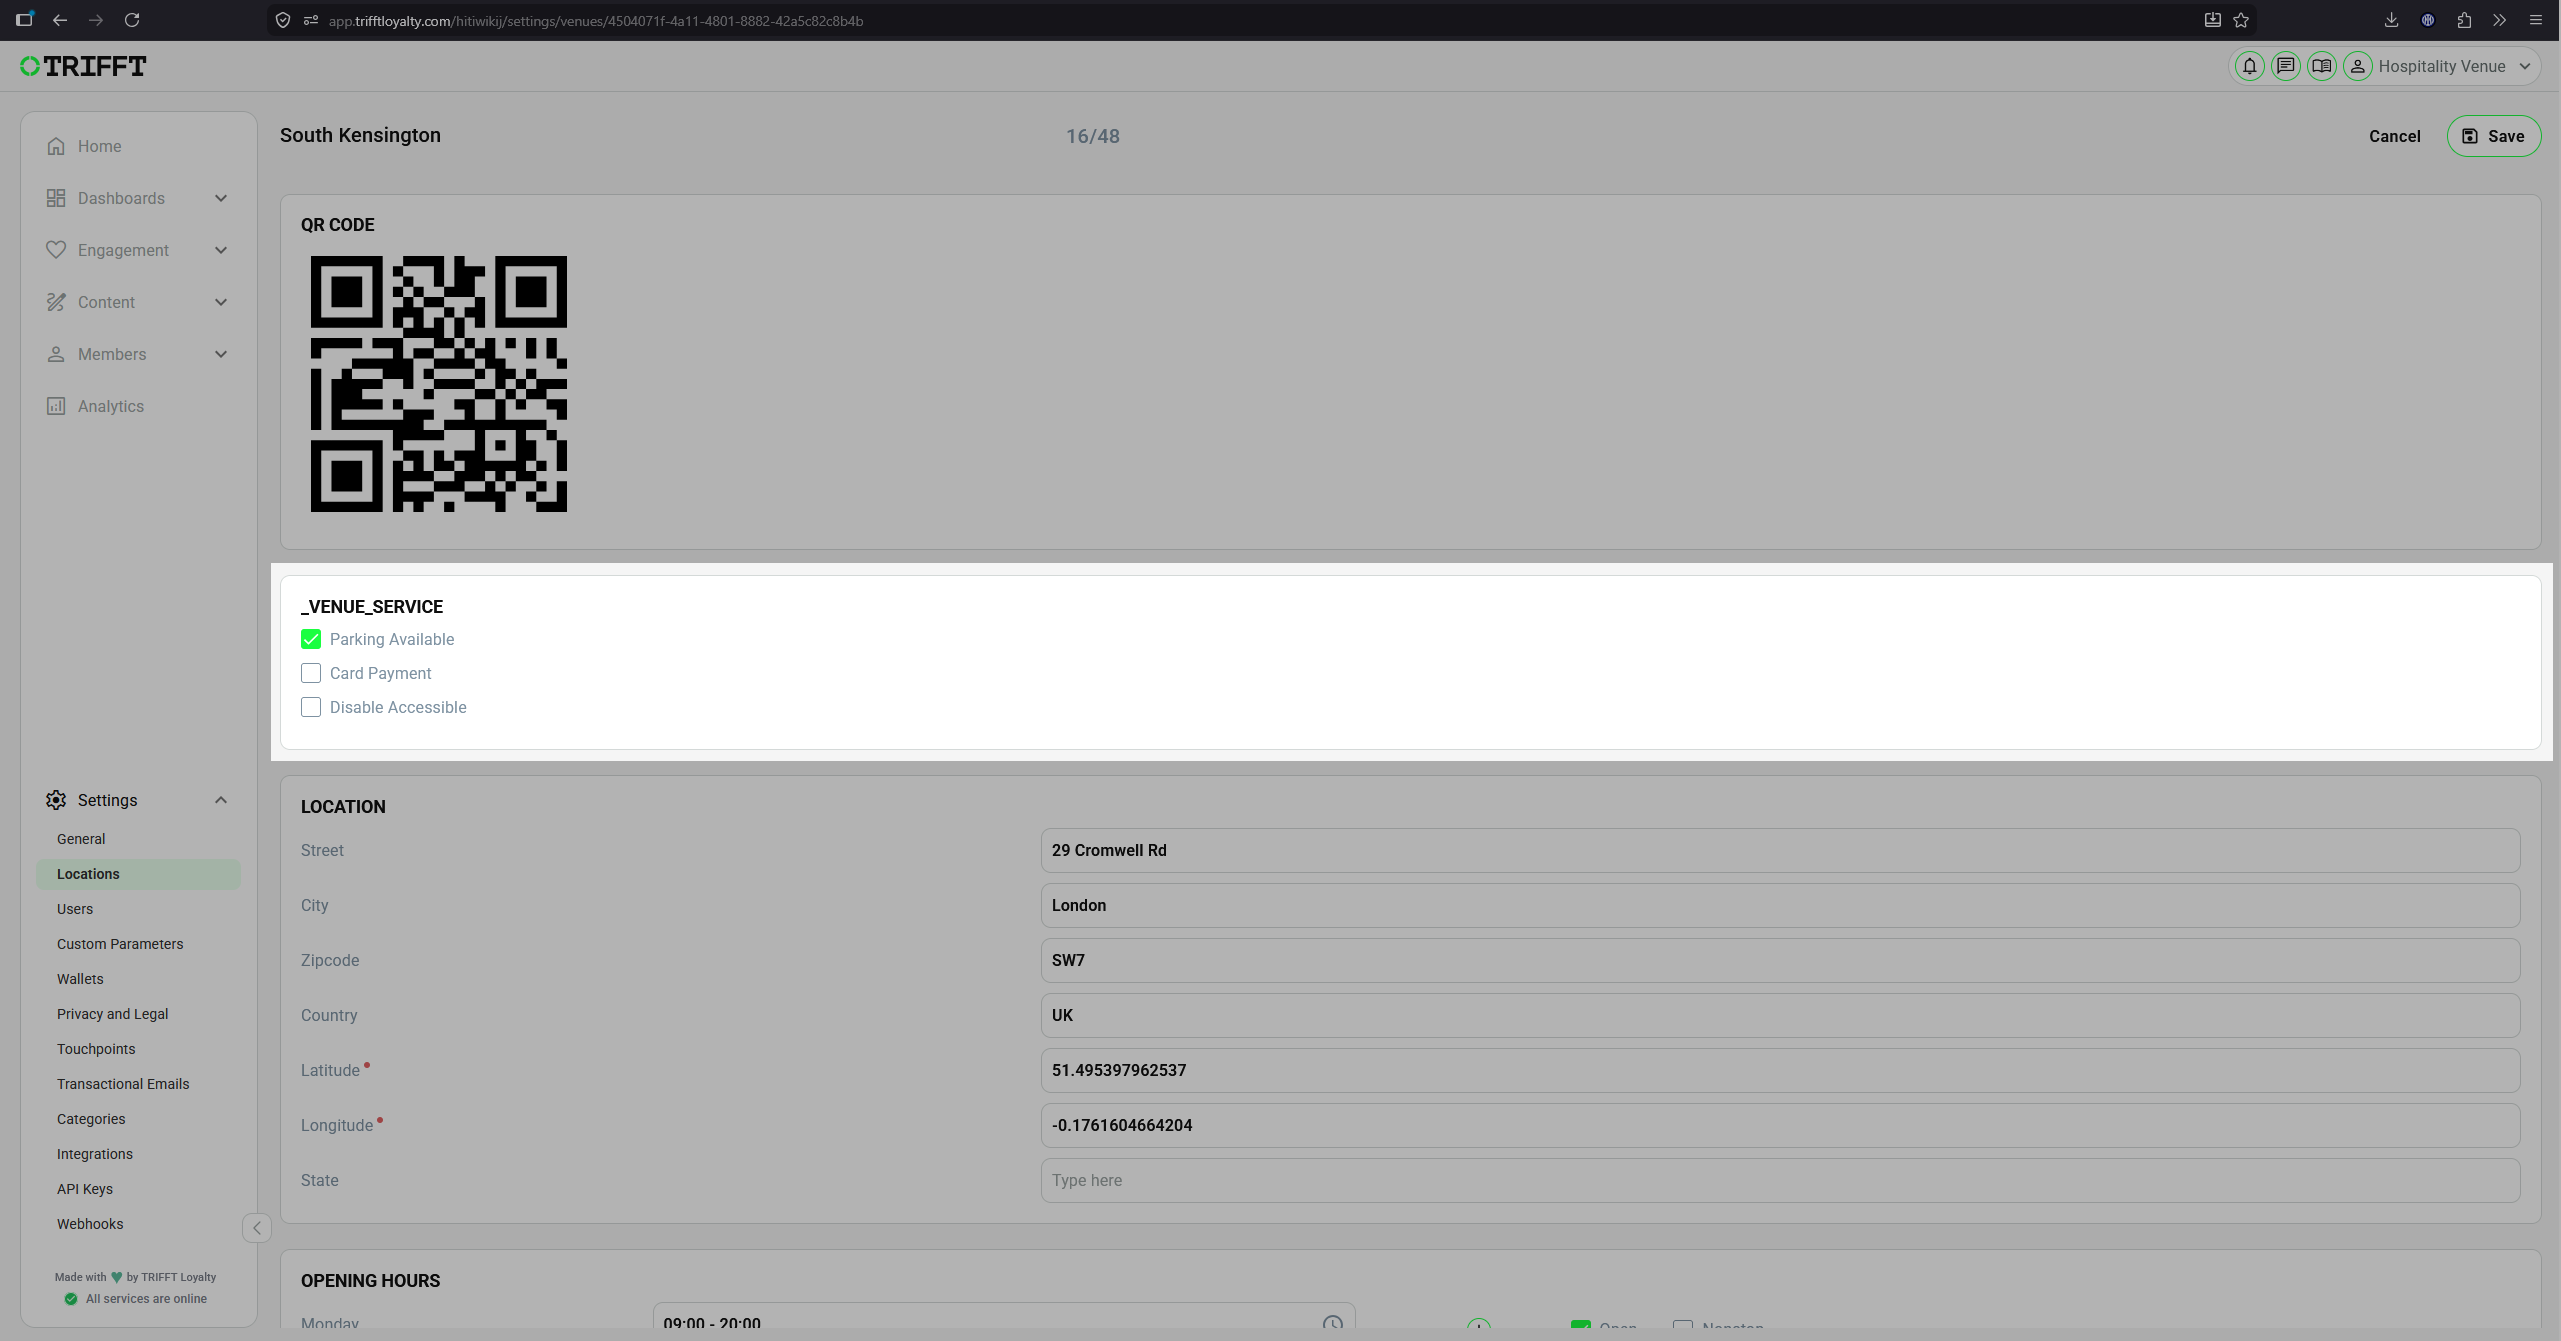
Venue settings - navigate to Settings → Location and open one of your locations:
Example of Venue Settings
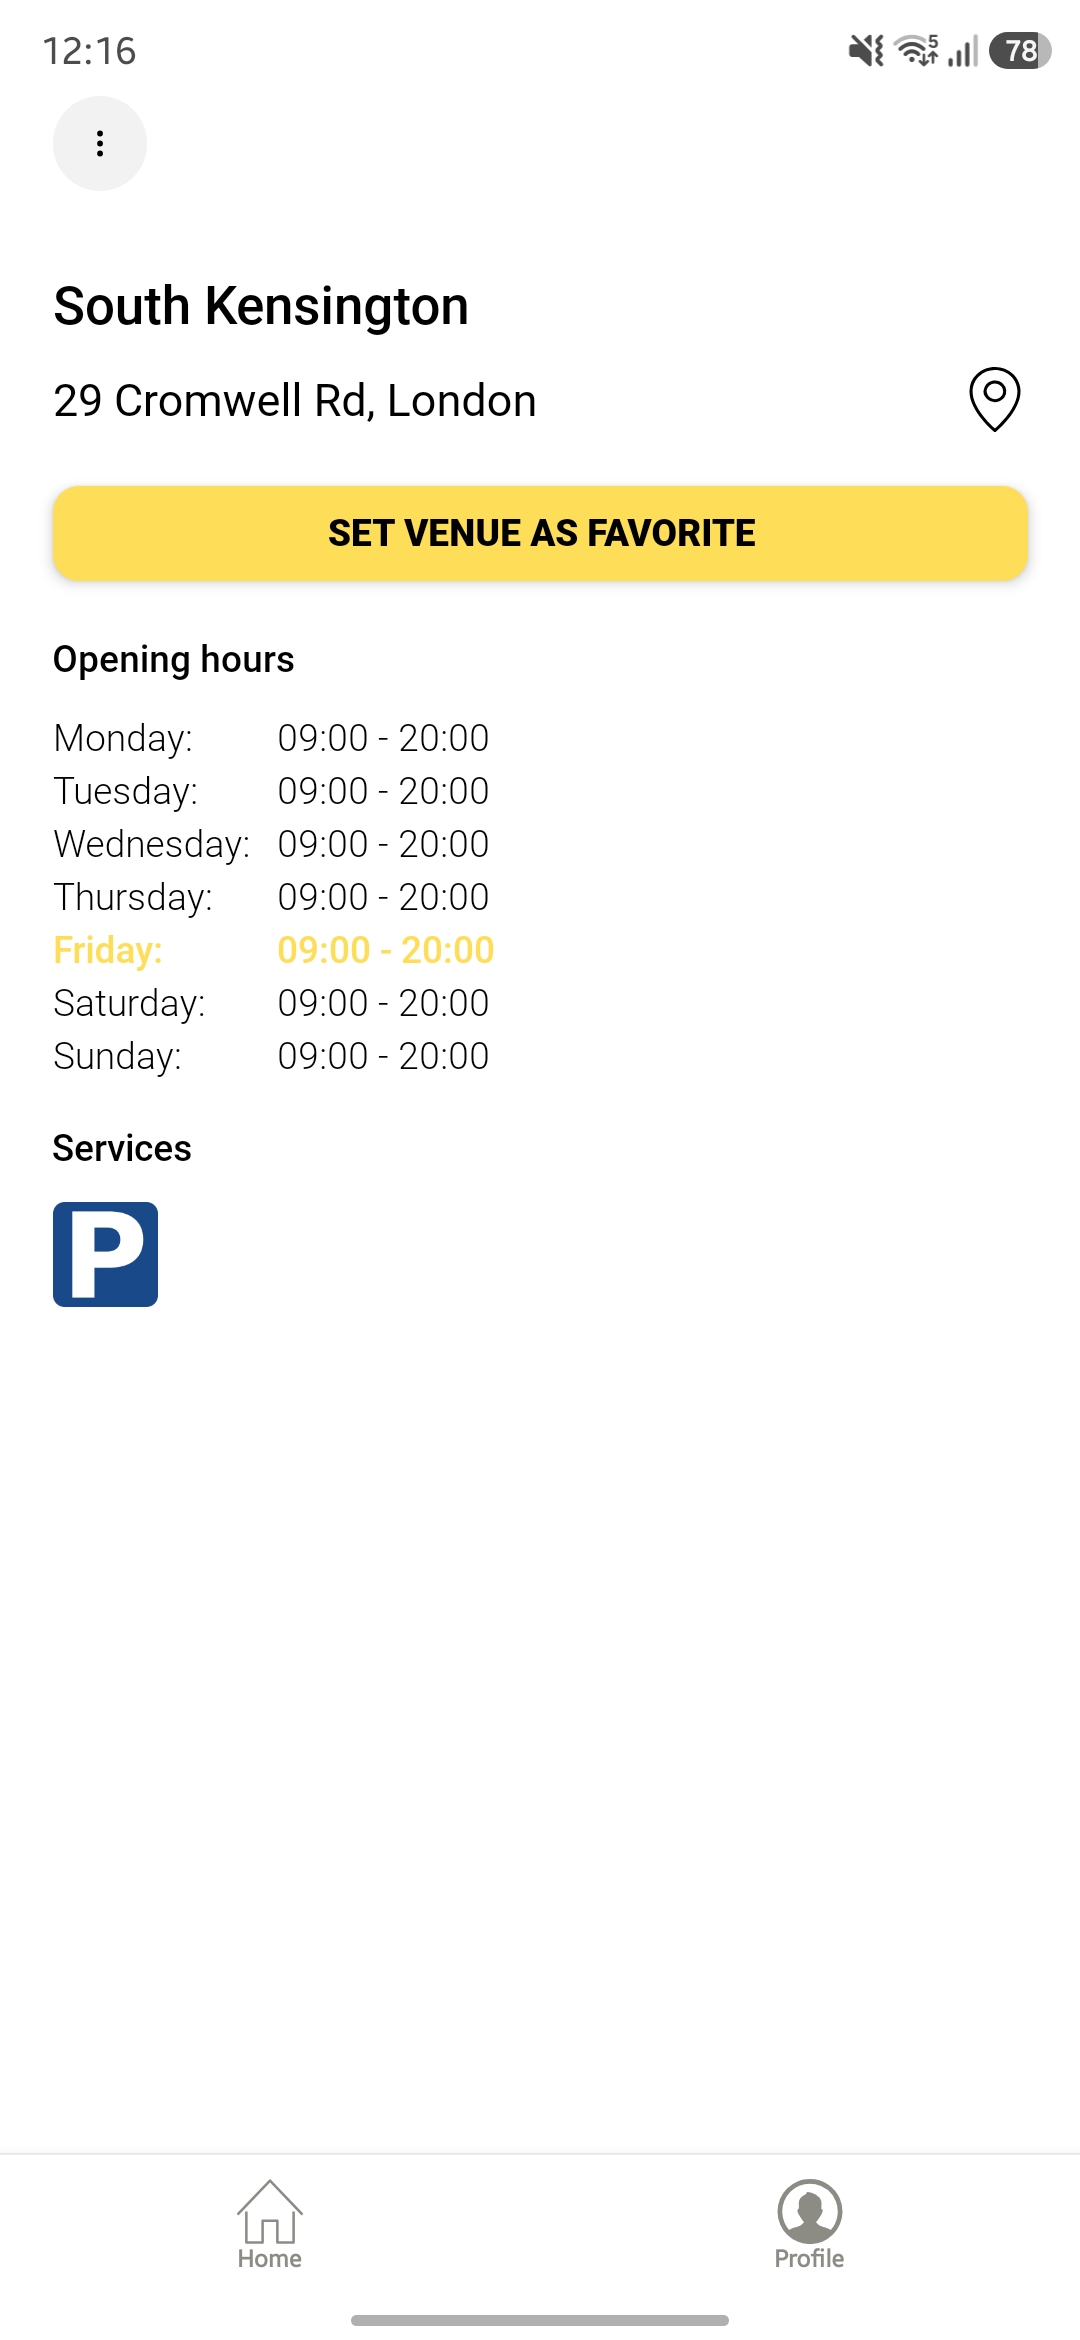
Final Result in the App - custom parameter visible in the detail of chosen Venue in the Services tab:
Example of Parking visibility in the App
Use case #2 - Setting up a Coupon's discount code from your POS:
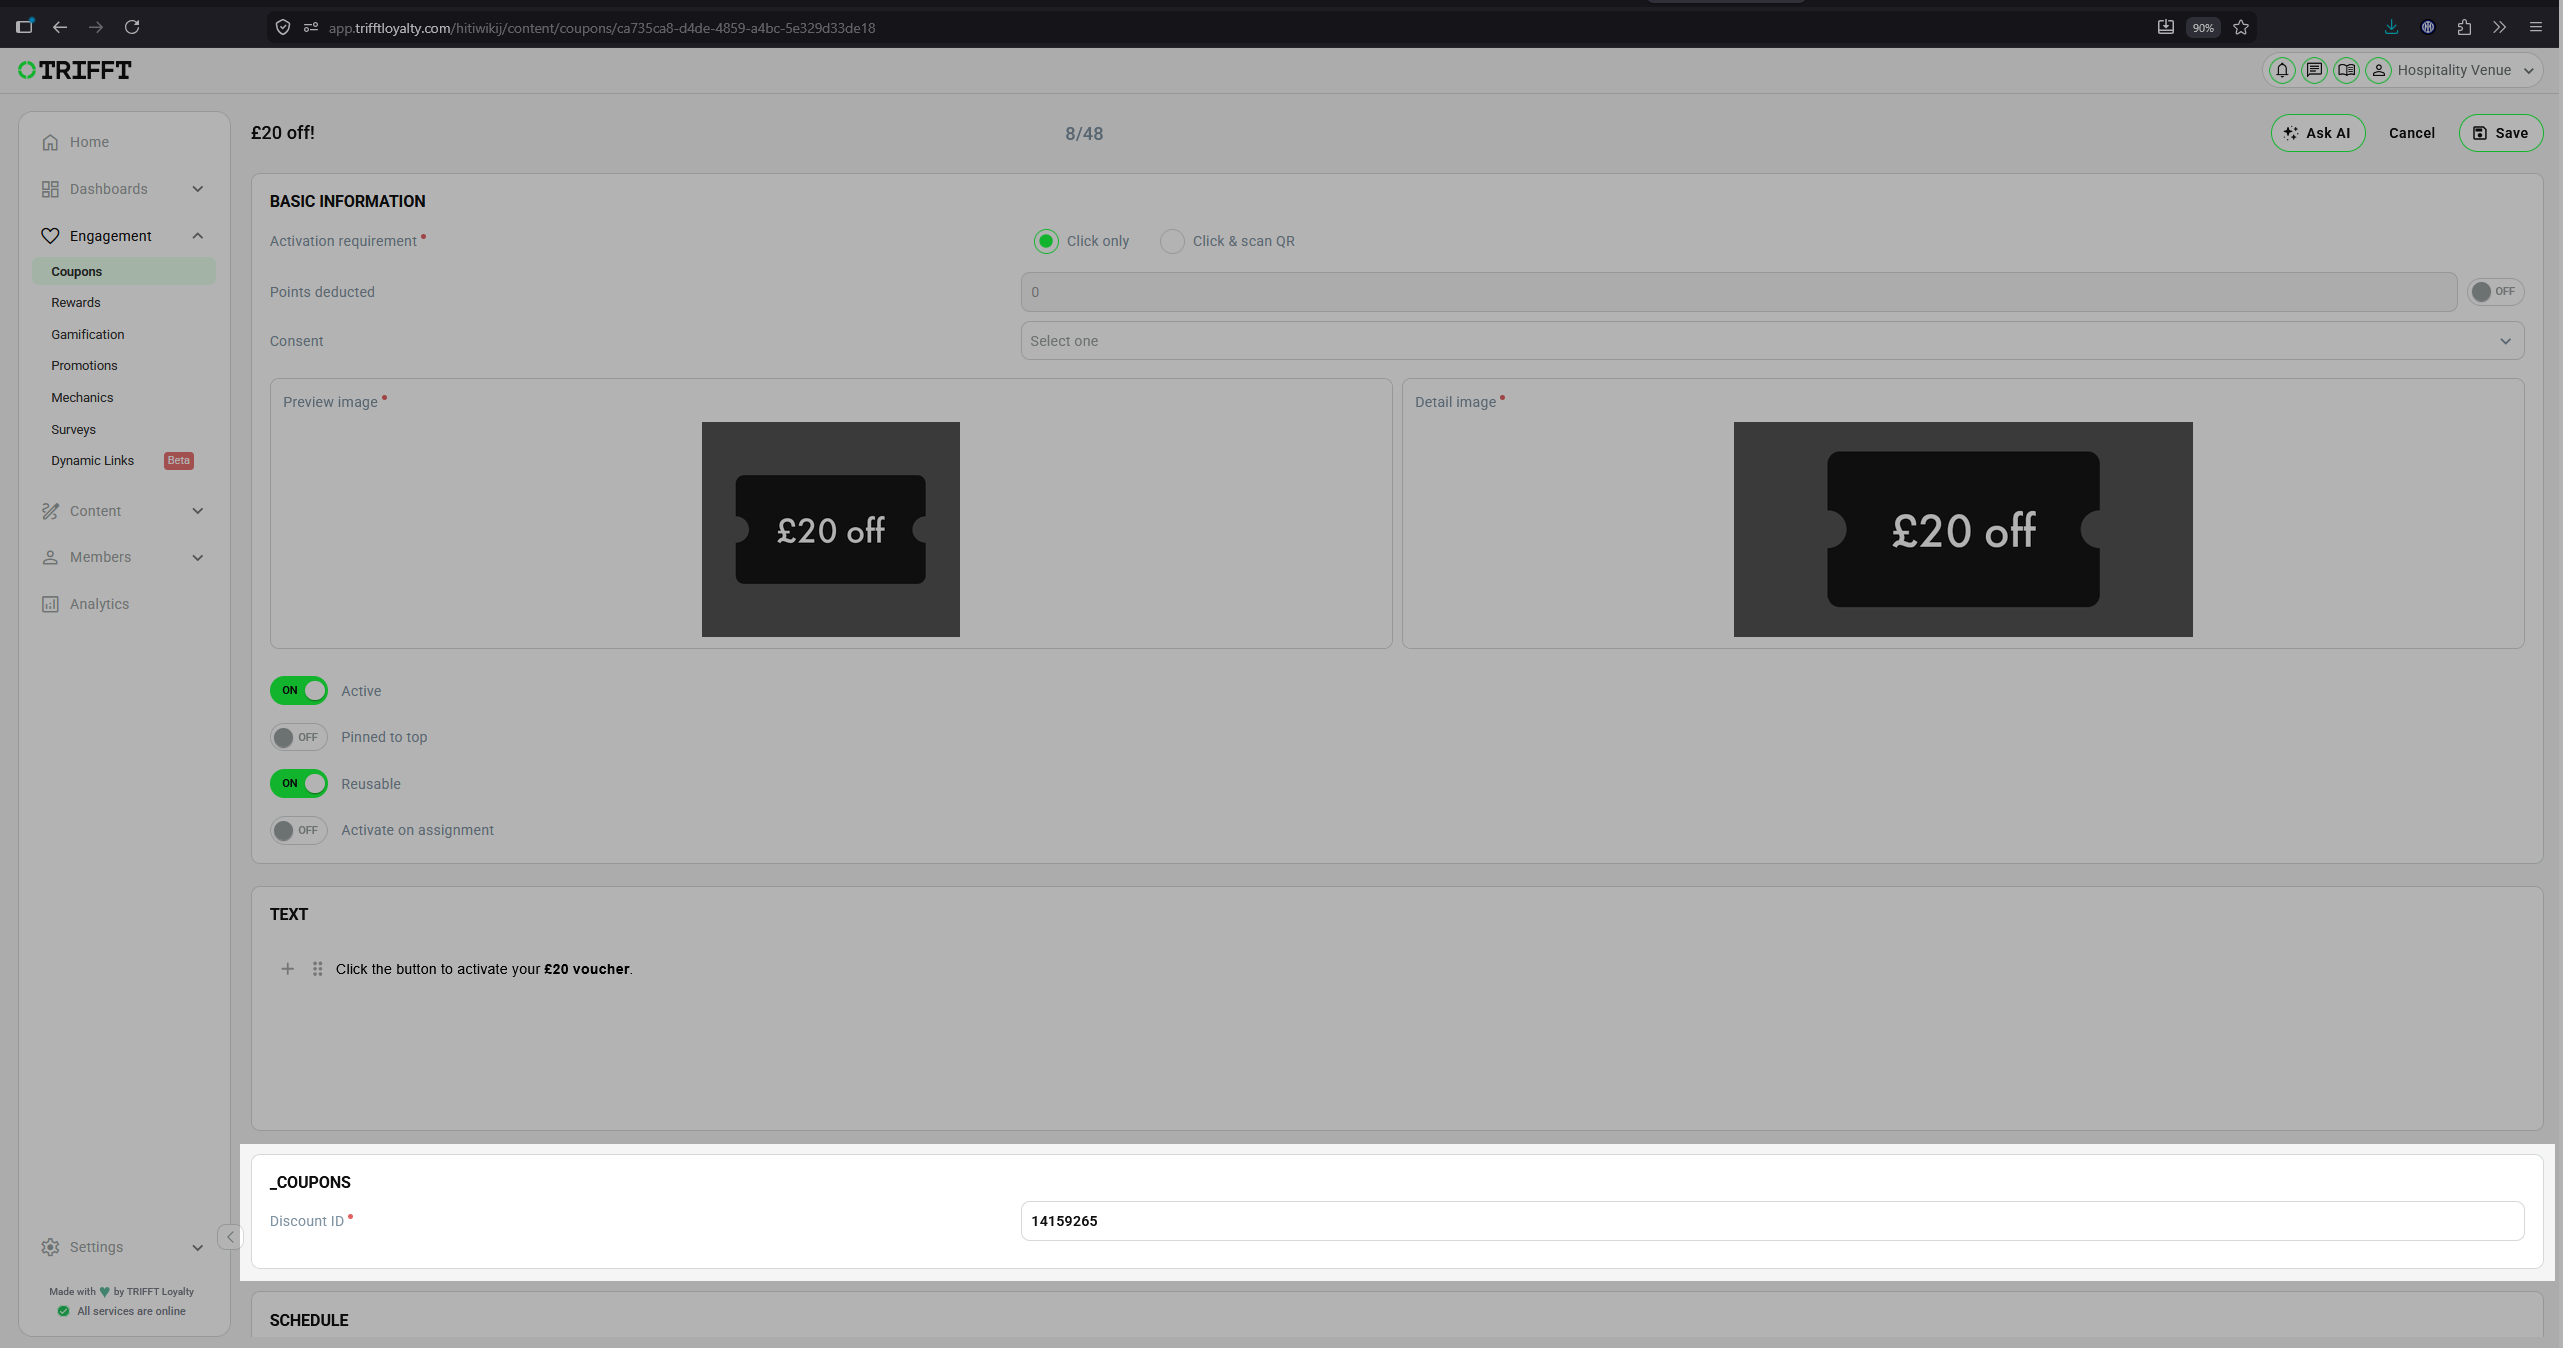
Let’s say you have an integration with your POS system and the POS can identify a specific discount only by its ID. In this case, you need to create a custom parameter with a slug used for communication between TRIFFT and your POS system. Then, in the settings of the specific coupon, enter the same ID that the POS uses to apply the discount.
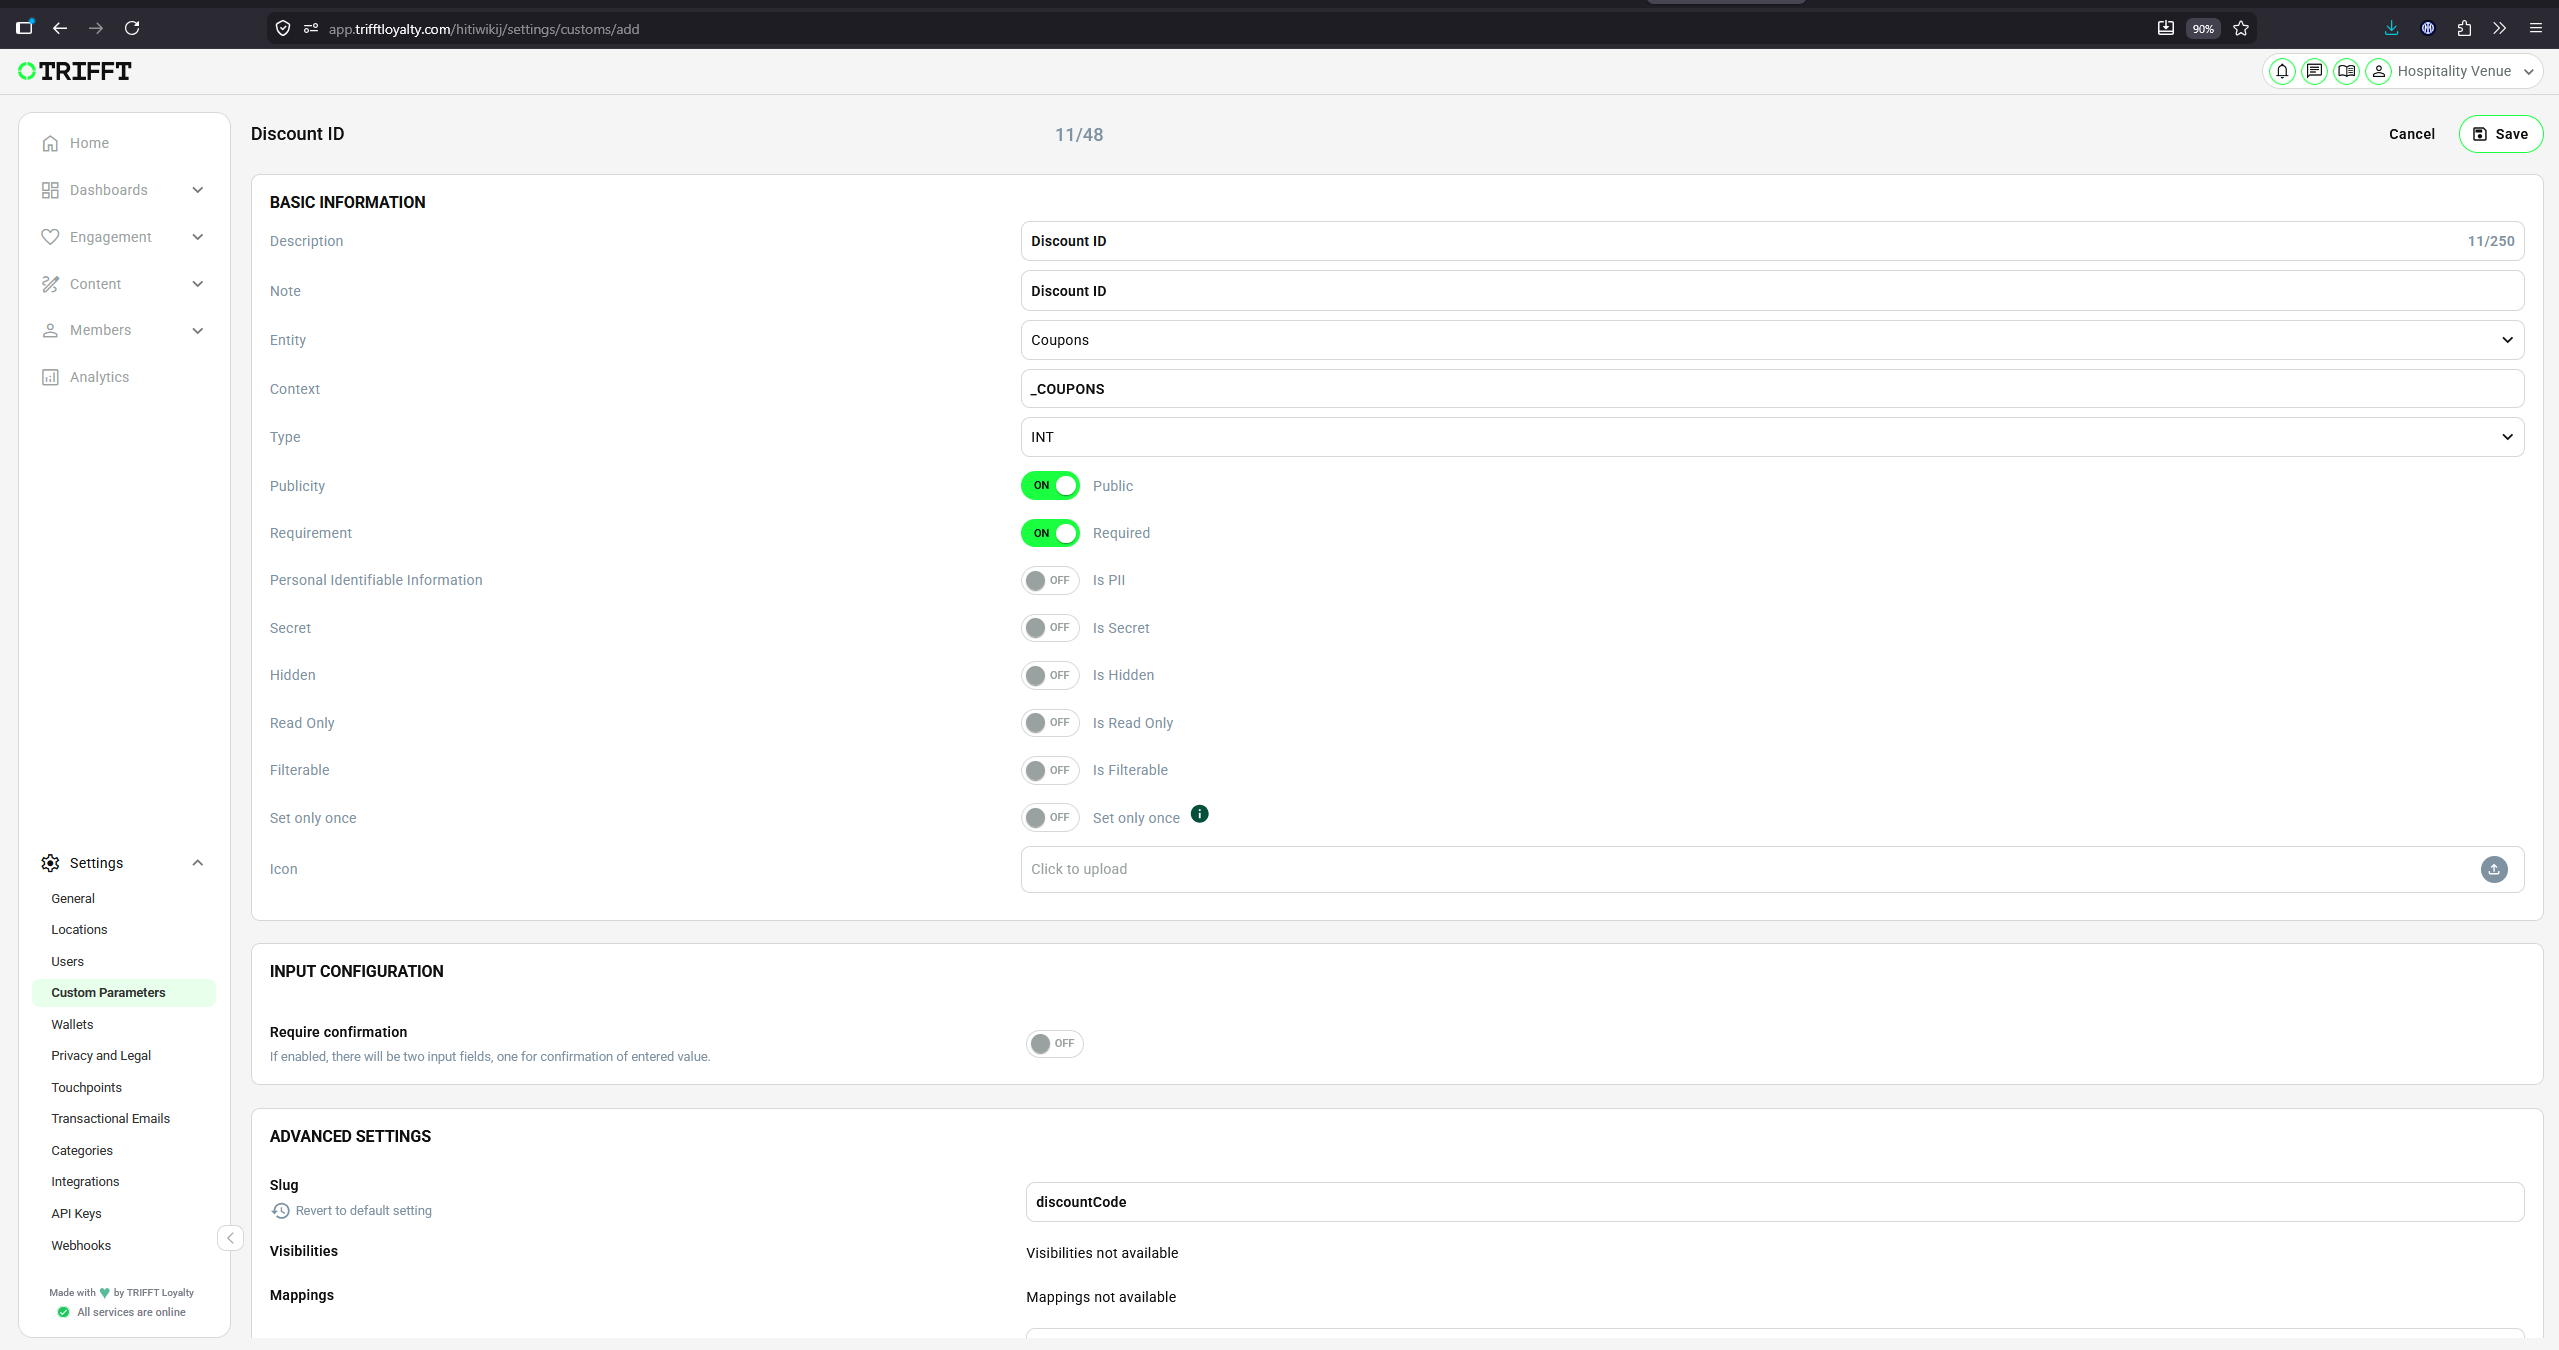
Example of Coupon custom parameter Discount ID in the settings of Custom Parameter
Example of Coupon Custom Parameter - Discount ID
Coupon settings - navigate to Engagement → Coupons and open one of your coupons:
Example of Coupon Settings
Use case #3 – Assigning a Coupon via a Registration URL (processing the custom params during the registration)
Custom parameters can be processed automatically during registration. This makes it possible to create a registration URL that assigns a coupon to a new member without requiring them to enter a promotion code manually.
ℹ️
In this example, a coupon is assigned through a promotion using the promotion code GIFT.
1. Create the Promotion
Create a promotion that assigns the required coupon when the following promotion code is used: GIFT
Under normal circumstances, the customer would need to enter this promotion code manually in the application or Client Zone to receive the coupon but we want to skip this step and process the promotion code GIFT without letting customer know.
2. Create the Custom Parameter
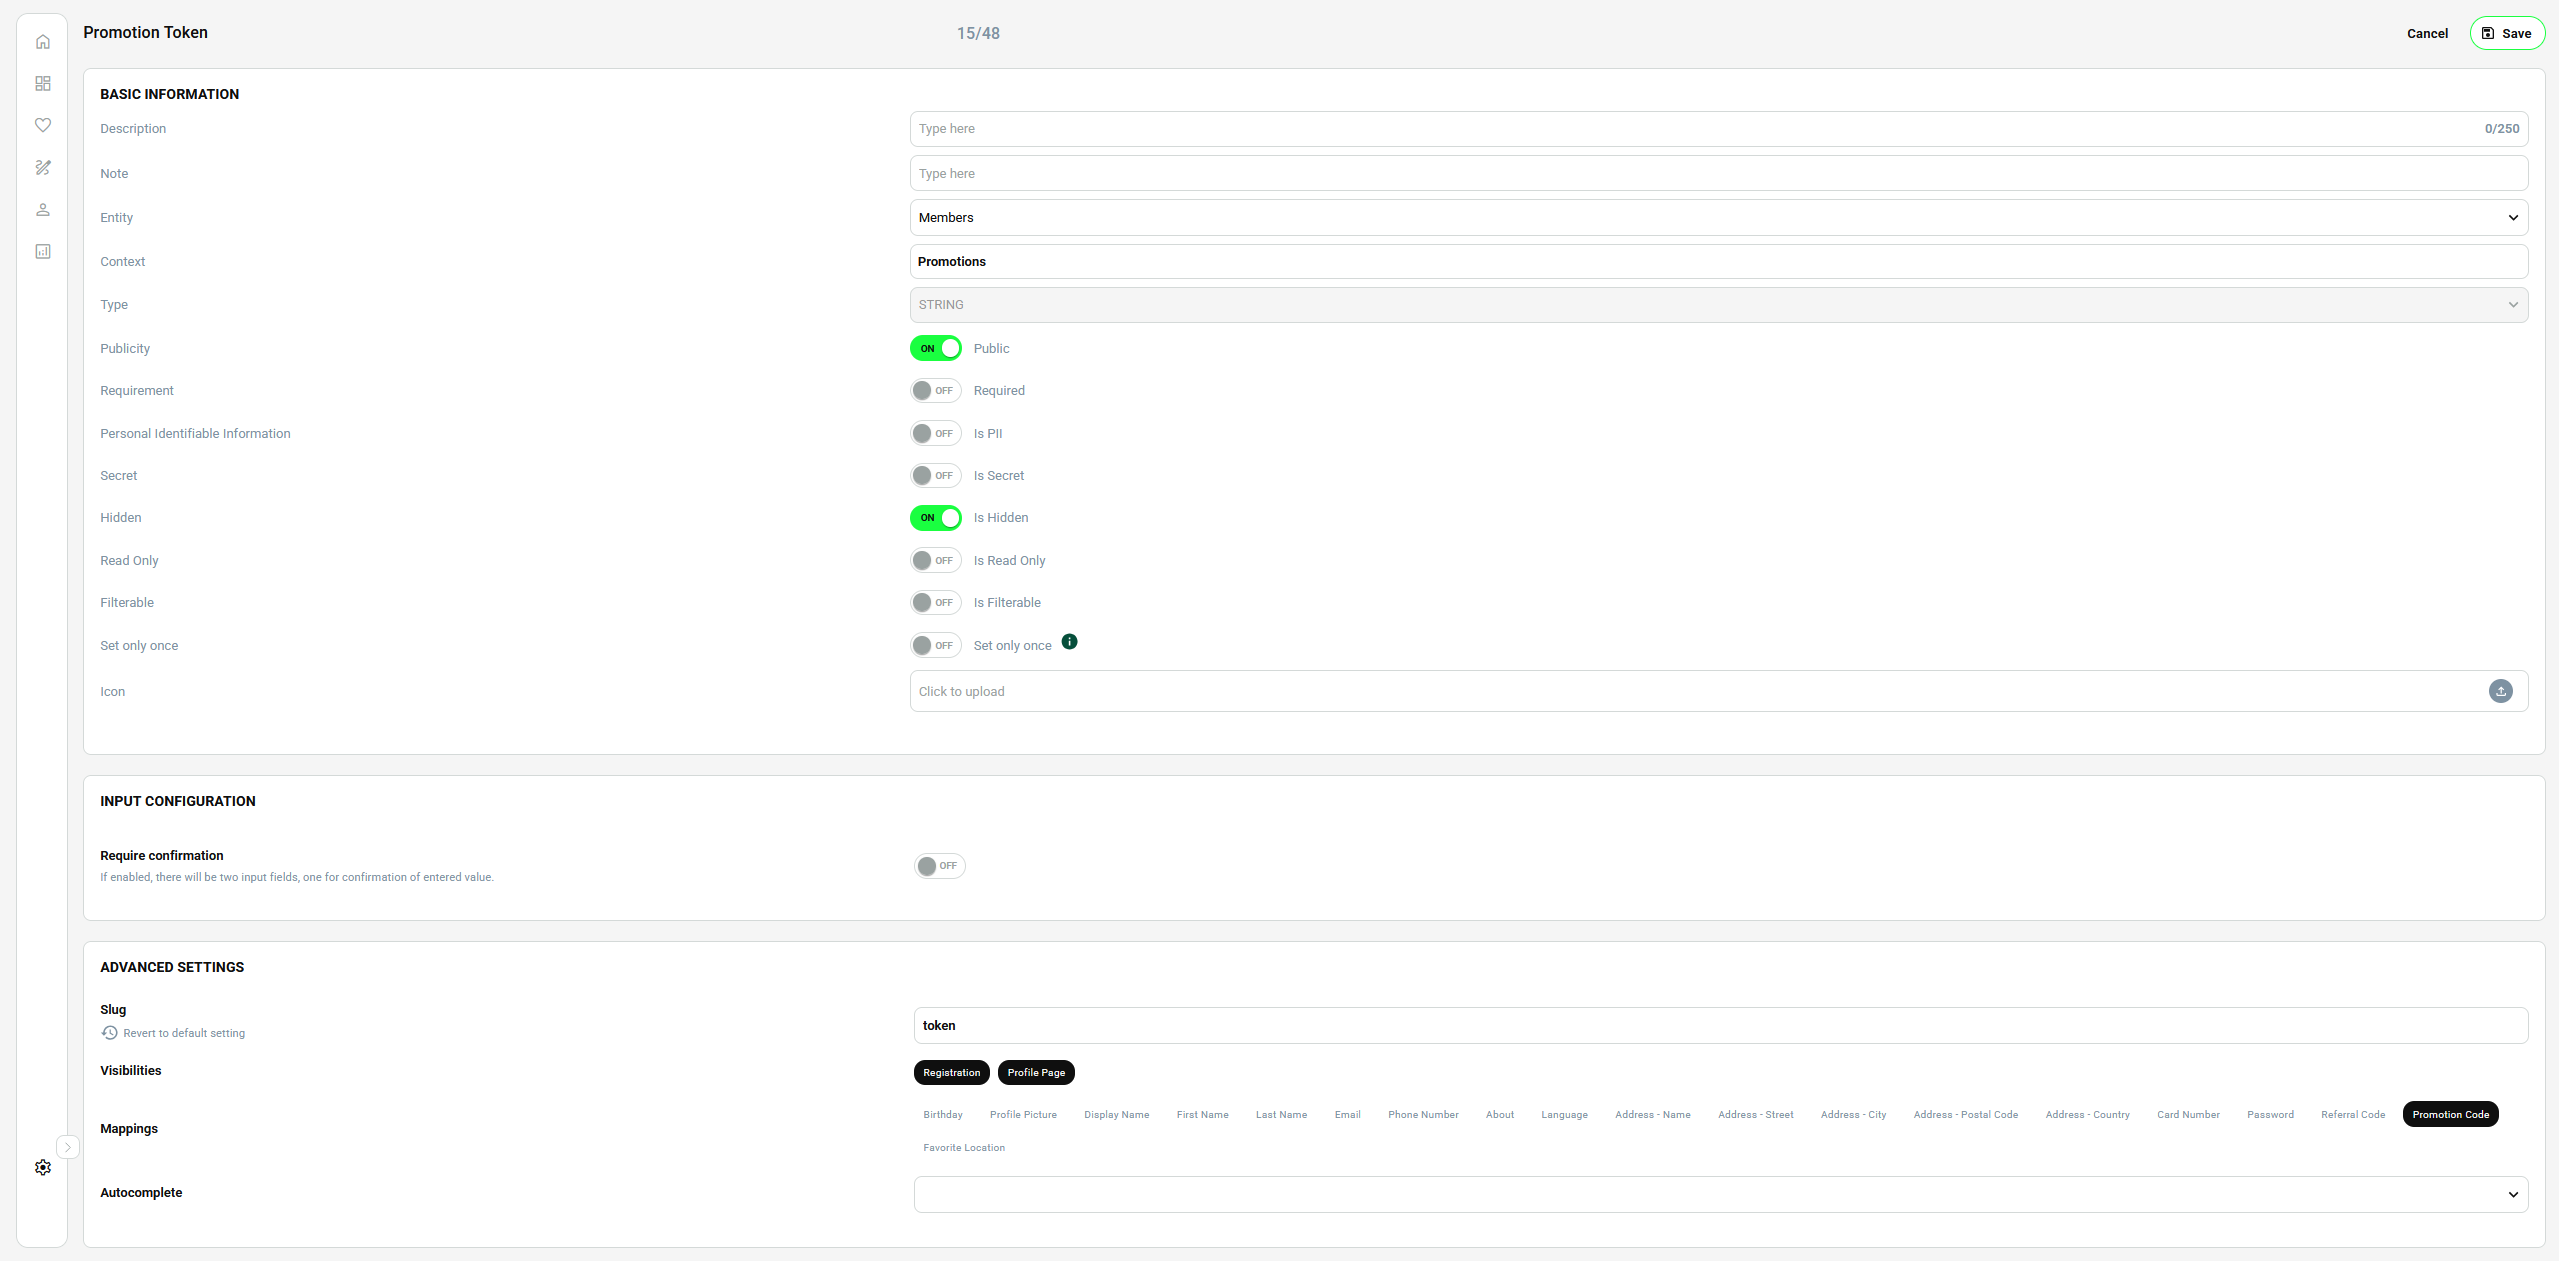
Create a new Custom Parameter using the following configuration:
Setting
Value
Name
Promotion Token
Slug
token
Mapping
Promotion Code
Visibilities
Registration
The Promotion Code mapping ensures that the value received through this Custom Parameter is processed as a promotion code during registration:
3. Configure the Client Zone
Open the general Client Zone Settings and configure the registration parameter processing:
Setting
Value
Process Params on Registration
ON
Registration Process Params List
Promotion Token
⚠️
The Custom Parameter must be selected in Registration Process Params List. Otherwise, its value will not be processed during registration:
Client Zone settings where Promotion Token is being process during the both - registration and login process
4. Create the Registration URL
Use the following URL structure:
<Client Zone URL> / ?<custom-parameter-slug>=<promotion-code>
When a customer opens this URL and completes the registration:
The value GIFT is passed through the token Custom Parameter.
The Custom Parameter is processed automatically in the background during registration.
Its value is recognized as a promotion code.
The promotion assigns the corresponding coupon to the newly registered member.
✅
The customer receives the coupon automatically after registration and does not need to enter the promotion code manually in the application or Client Zone.
Use case #4: Displaying a Dynamic Custom Parameter Value in a Widget
The Static widget can display the current value of any member custom parameter using the following Jinja syntax:
{{member.param.slug}}
Replace slug with the slug of the custom parameter you want to display. For example, if you create a Date of Birth custom parameter with the slug birthday, use:
{{member.param.birthday}}
The widget will automatically display the value set for the current member.
Other Use cases:
Custom parameter processing can also be used in many other different use cases. It just need to be mapped to the correct section. For example, if you want to process custom param Referral Code you can easily follow the same instructions as in the previous use case but with the Mapping = Referral Code. You can also use many more Mappings like Favourite Venue, Birthday, Language, etc.
Ongoing management checklist
Data Quality Audit: Periodically verify that data flowing from Shopify or POS matches the assigned attribute types to prevent sync failures.
Redundancy Check: Archive or delete parameters that are no longer used in active segments or automated flows to maintain system performance.
Security Audit: Confirm that sensitive internal parameters are not accidentally toggled as "Visible" to members in their profile settings.
External Tool Sync: Verify that any changes to parameter names in TRIFFT are updated in mapped fields within Klaviyo or Bloomreach.