
Tiers Set Up
This guide covers how to set up Tiers in TRIFFT from scratch, including validation steps.
Step-by-step setup
1. Open the Tiers panel
- Open the Content Cockpit and navigate to Members > Tiers.
2. Initiate new tier
- Click Add new.
3. Name your tier and put a description
- Provide a name that fits your brand (e.g.,
Explorer,Voyager,Legend).
4. Define Progression Threshold in Settings
- Set the requirements for entry (e.g.,
1,000 Total Lifetime Pointsor500.00 Total Spend).
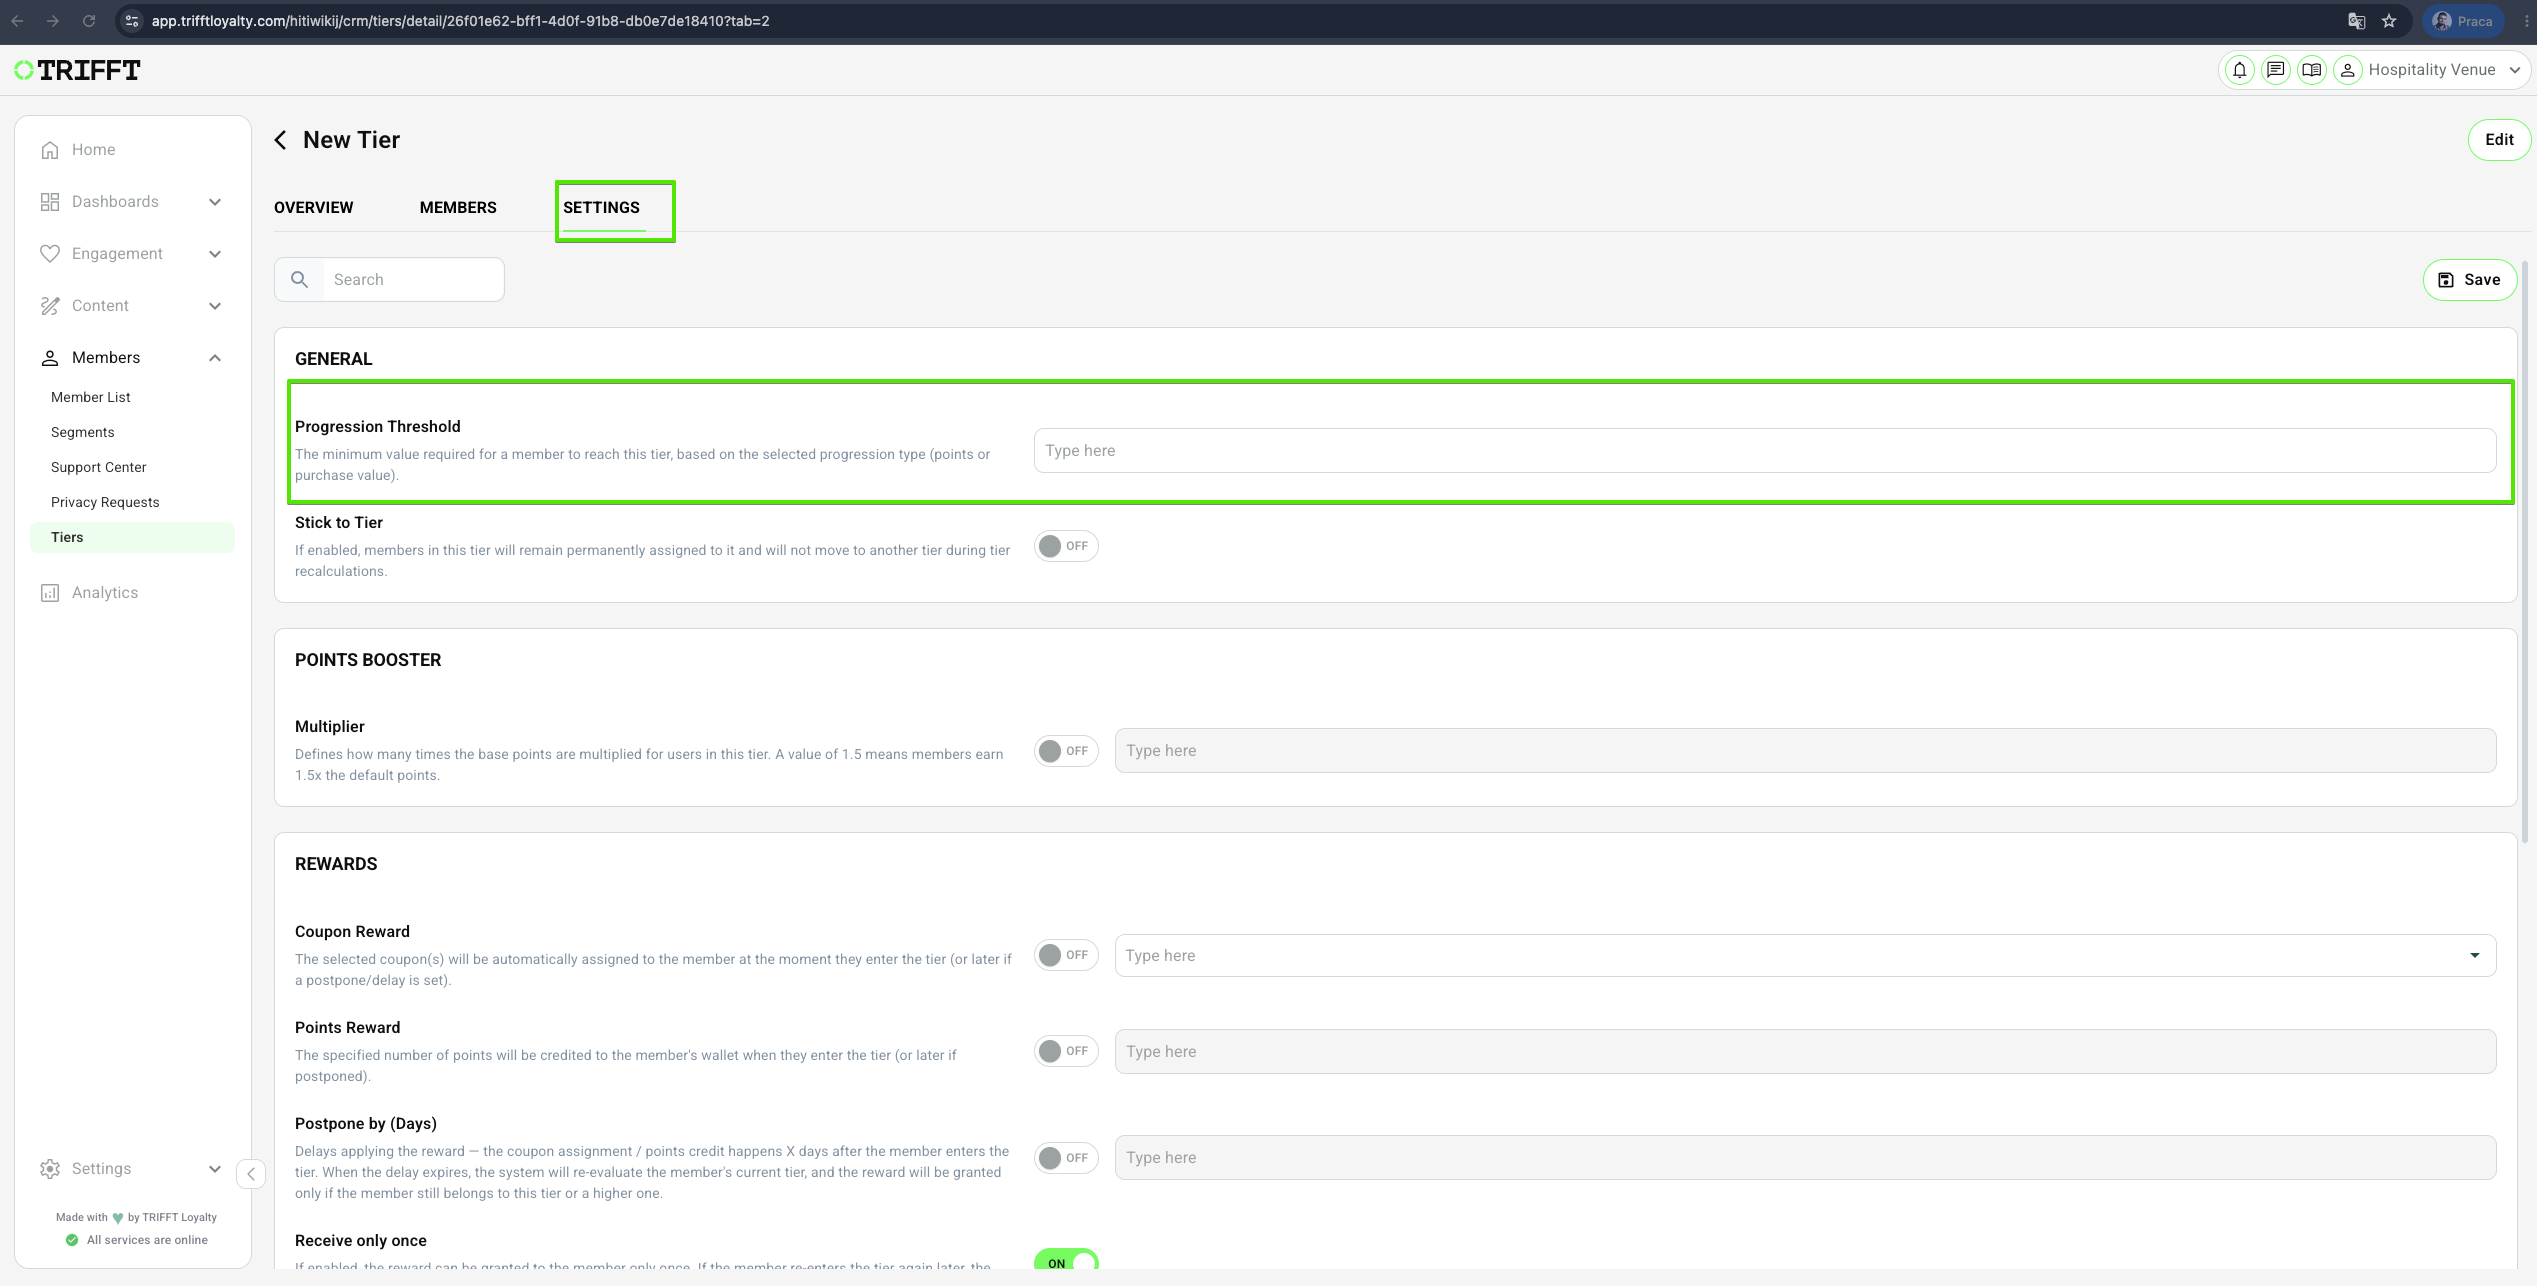
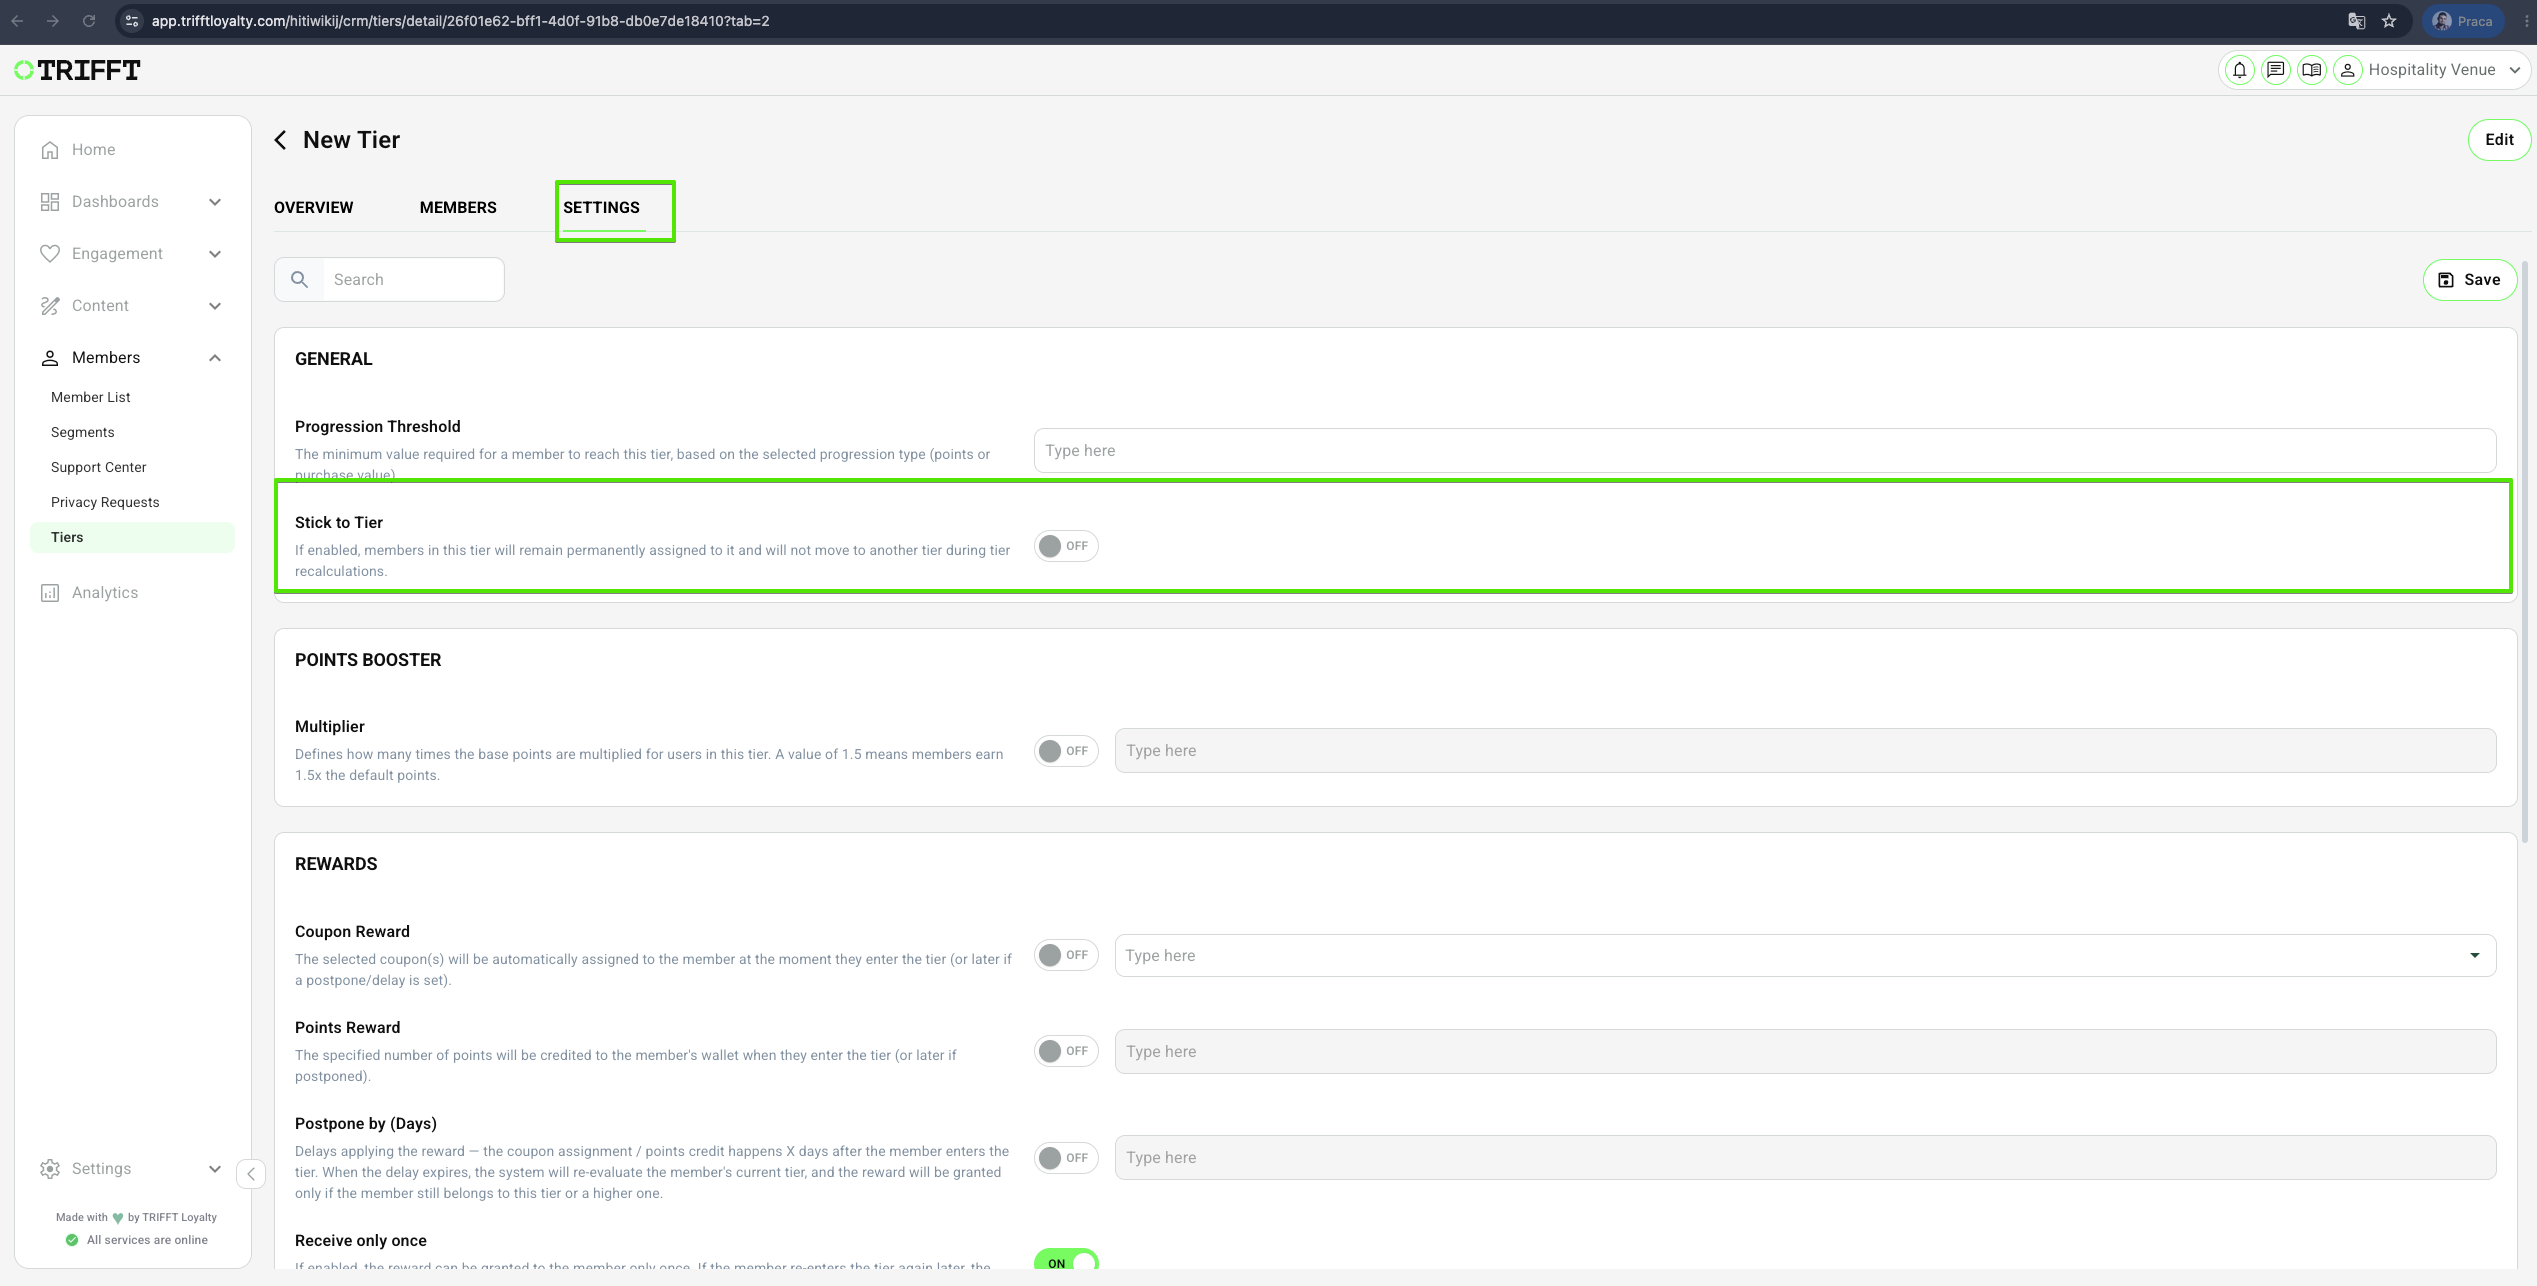
- Stick to Tier - If enabled, members in this tier will remain permanently assigned to it and will not move to another tier during tier recalculations.
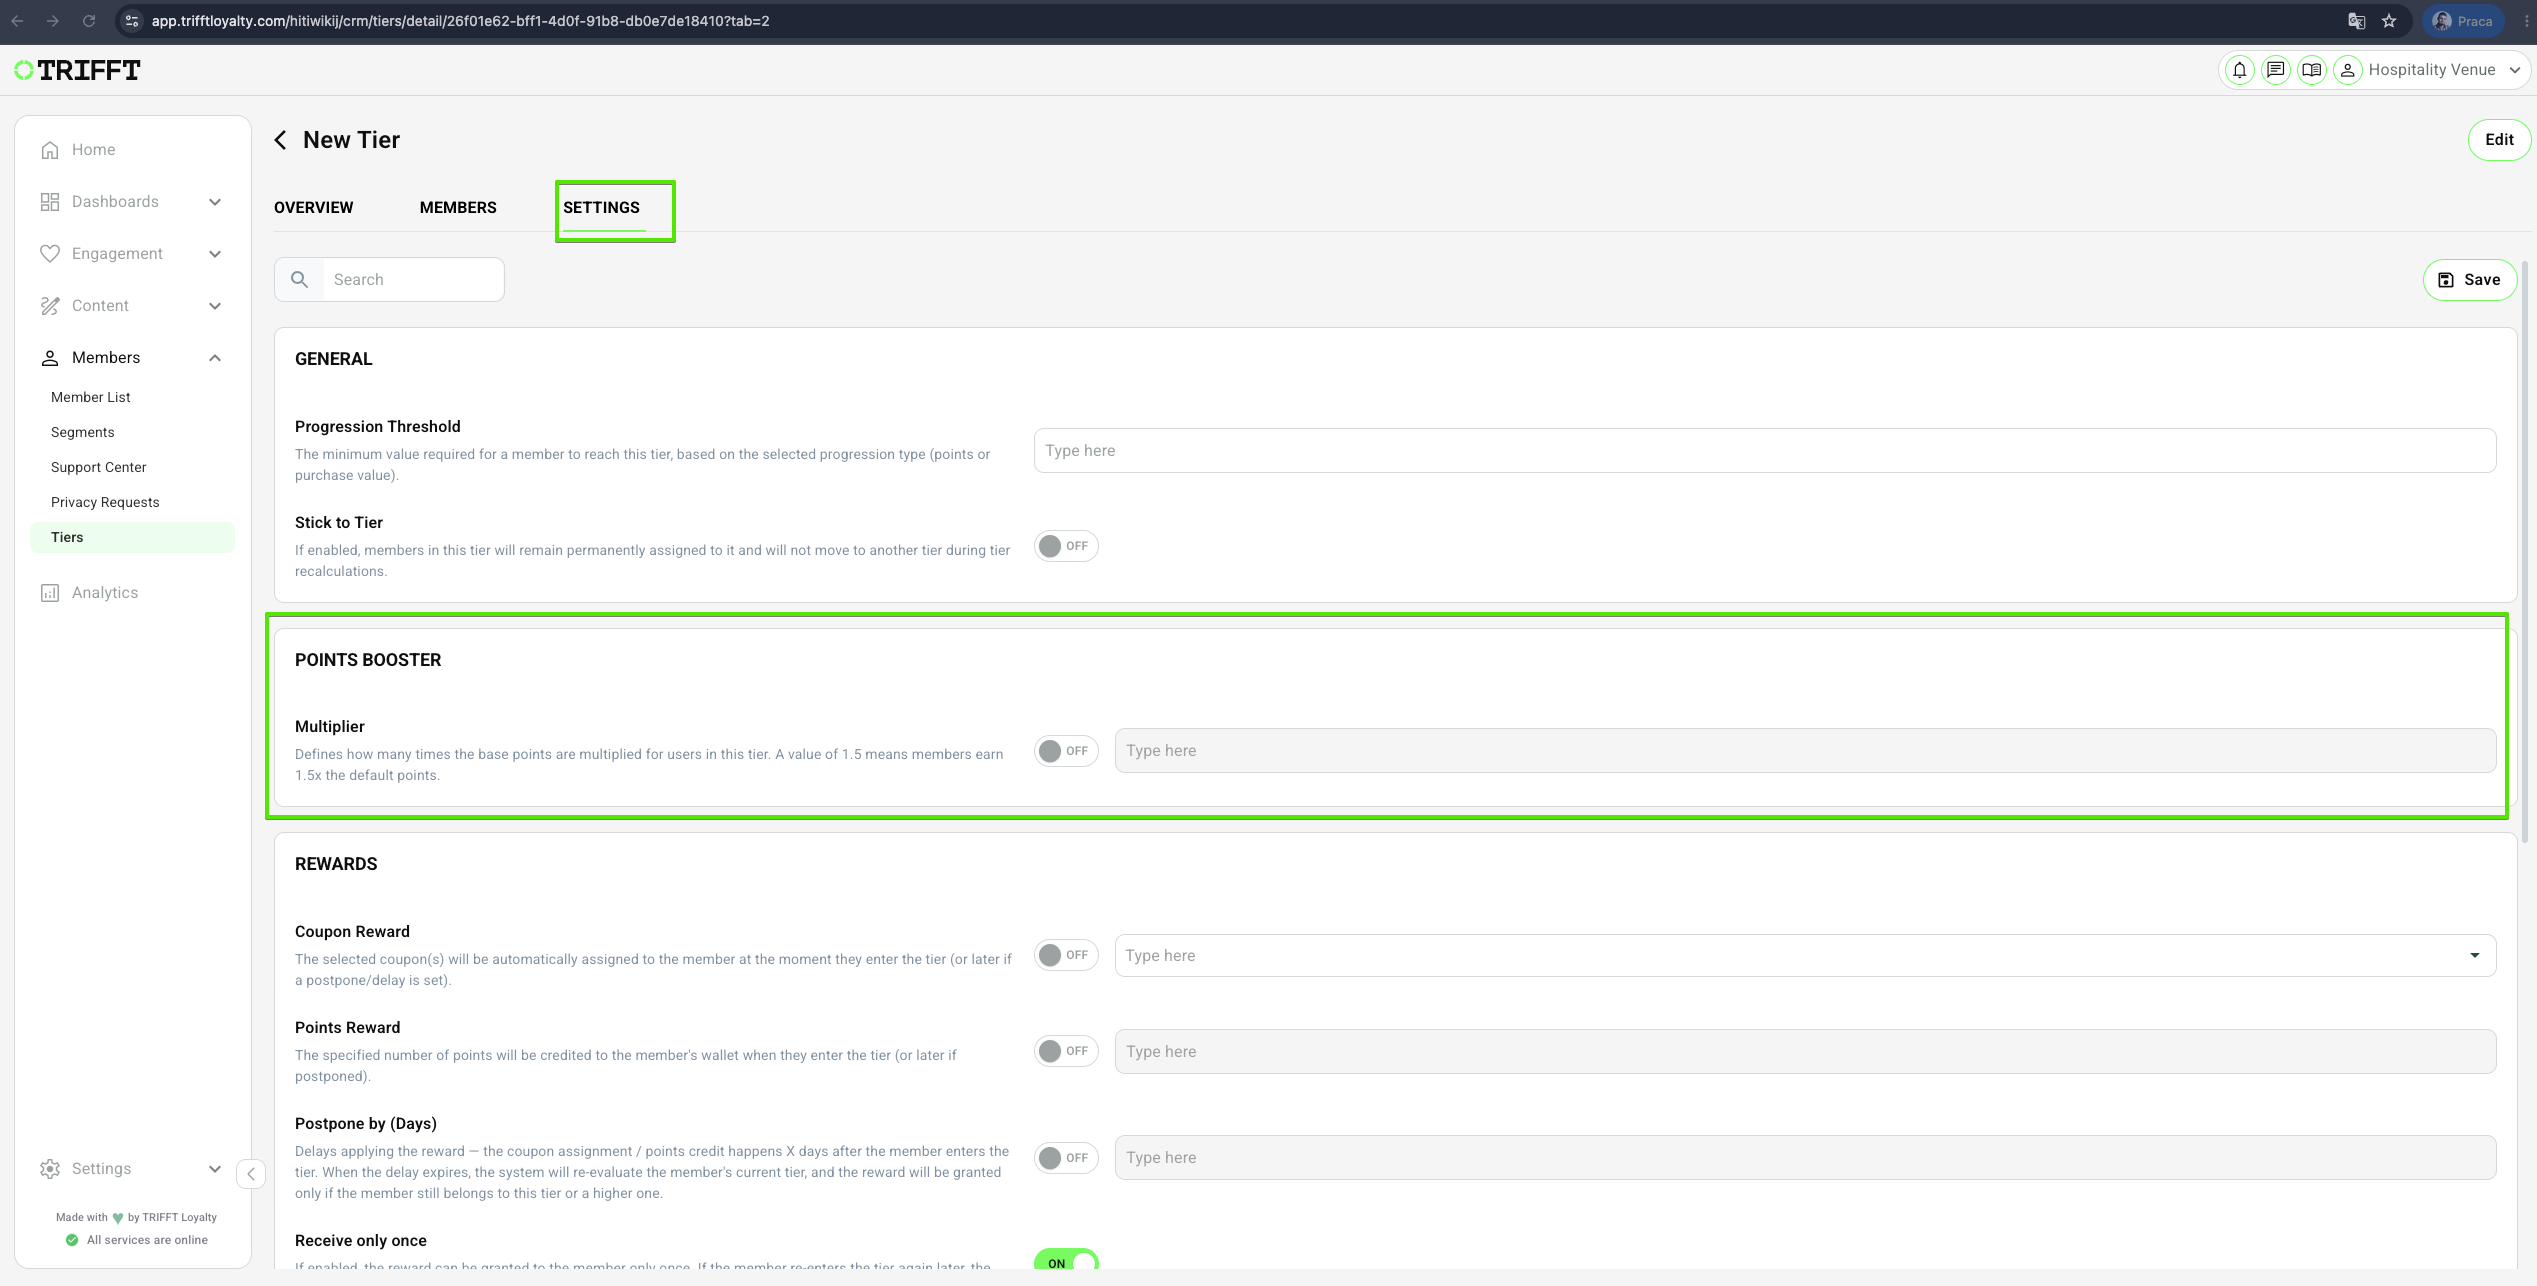
5. Configure Points Booster
- Multiplier - Defines how many times the base points are multiplied for users in this tier. A value of 1.5 means members earn 1.5x the default points.
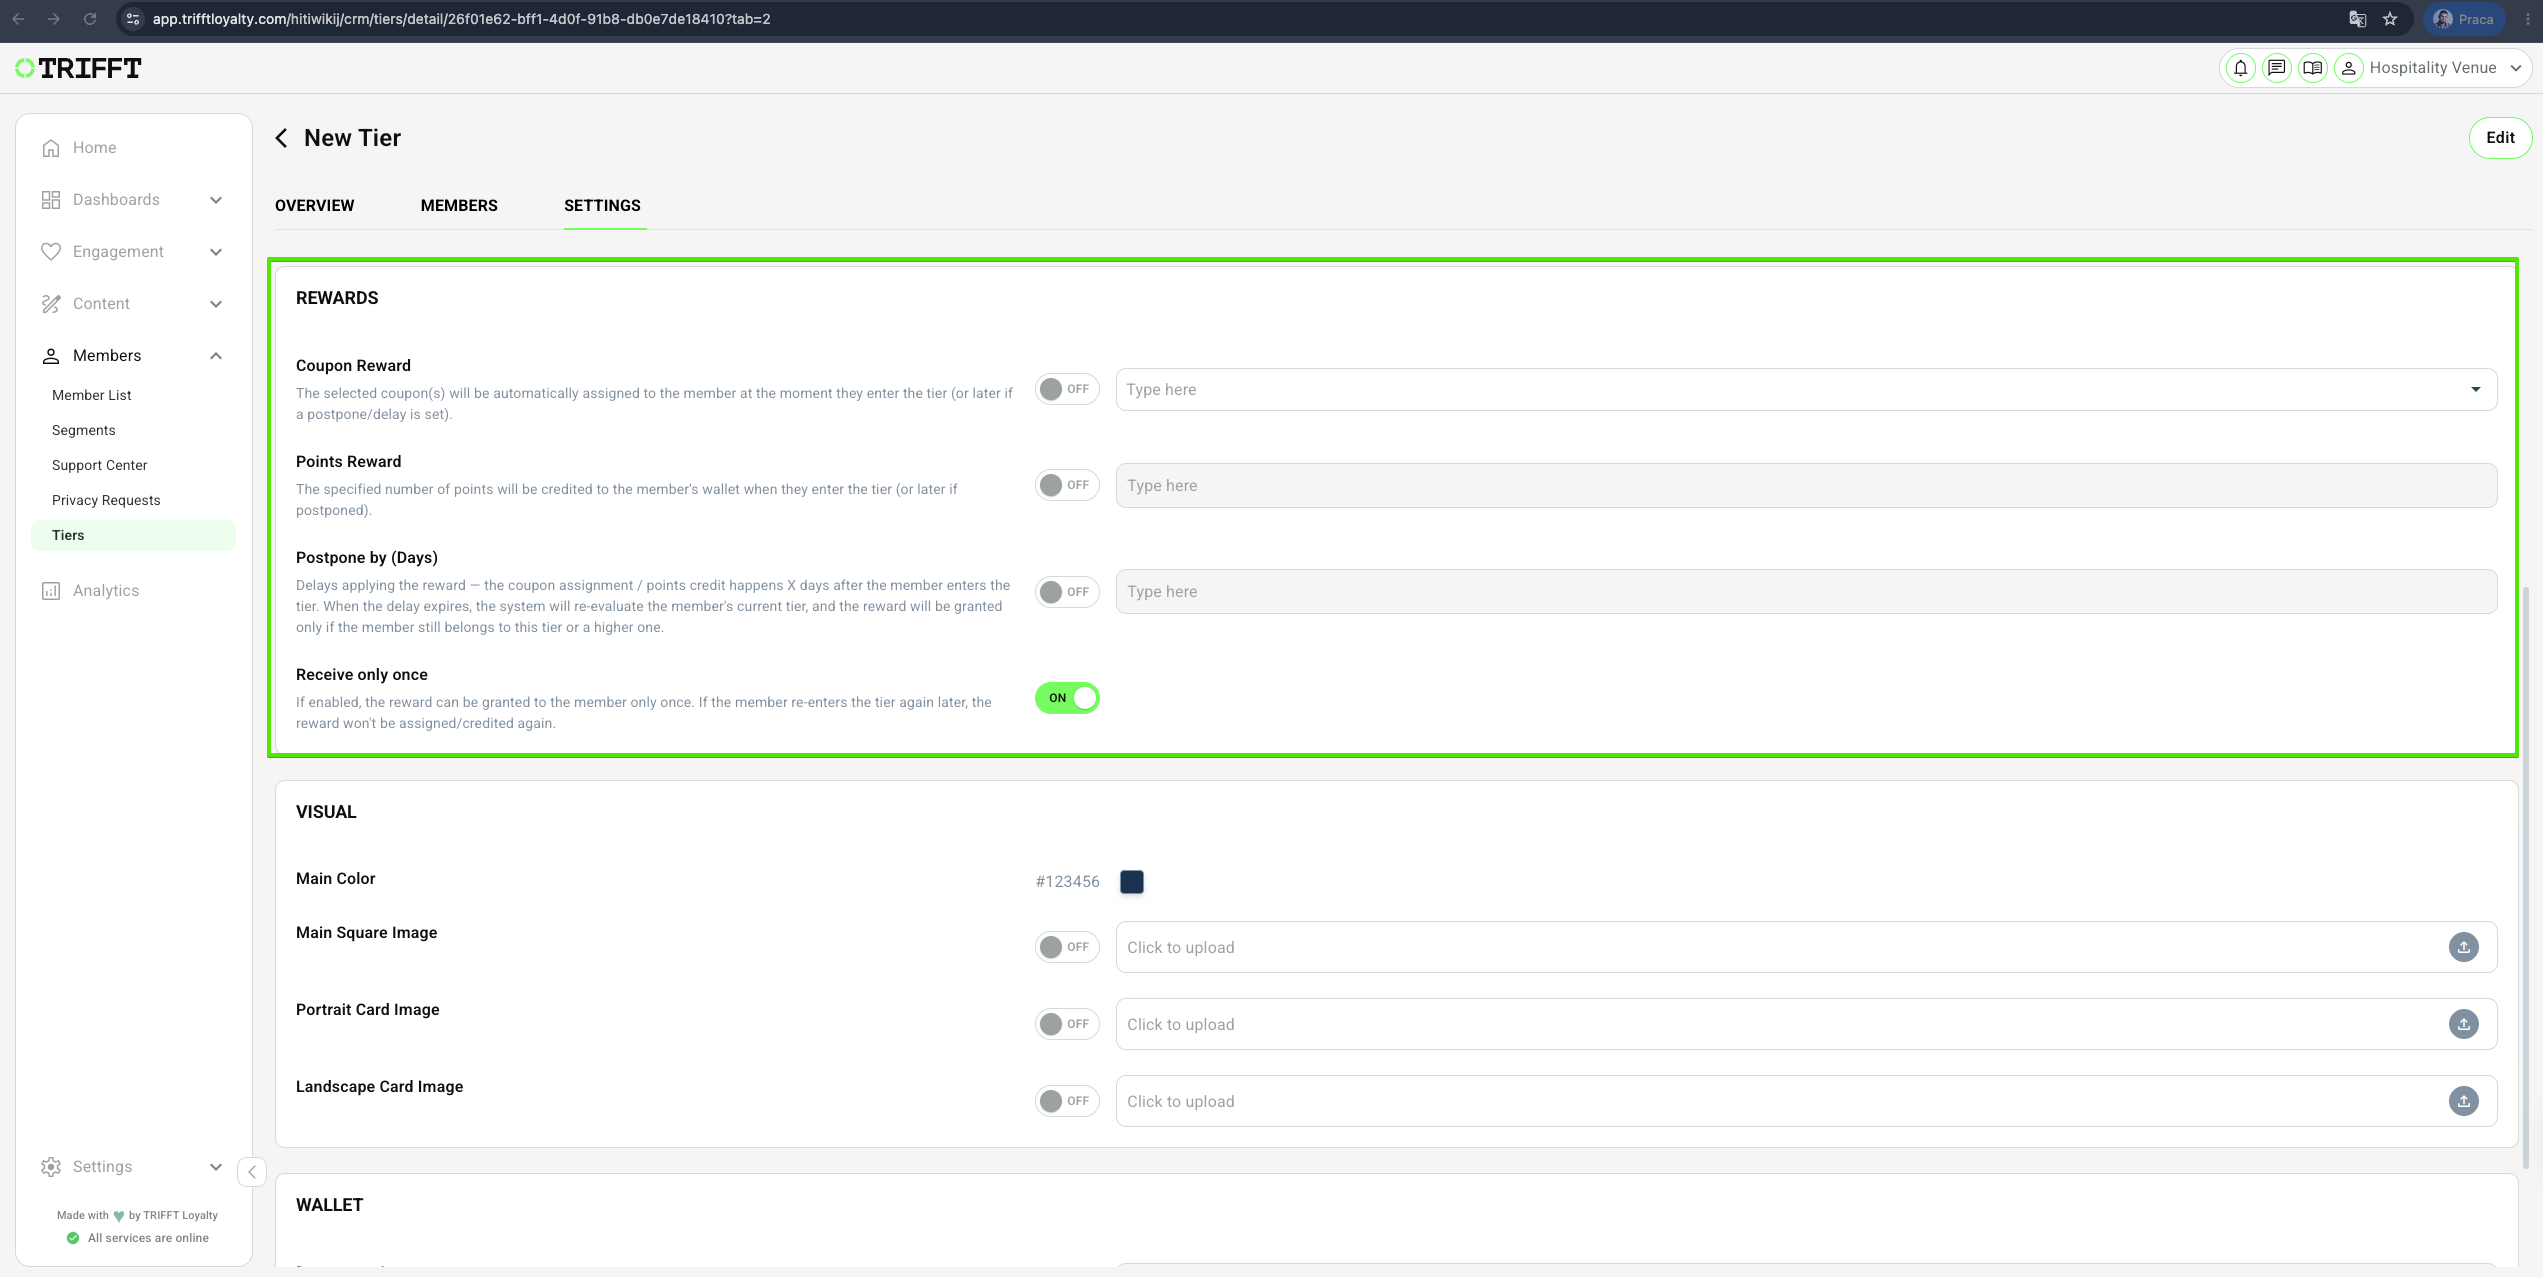
6. Configure Rewards
- Coupon Reward- The selected coupon(s) will be automatically assigned to the member at the moment they enter the tier (or later if a postpone/delay is set).
- Points Reward - The specified number of points will be credited to the member's wallet when they enter the tier (or later if postponed).
- Postpone by (Days) - Delays applying the reward — the coupon assignment/points credit happens X days after the member enters the tier. When the delay expires, the system will re-evaluate the member's current tier, and the reward will be granted only if the member still belongs to this tier or a higher one.
- Receive only once - If enabled, the reward can be granted to the member only once. If the member re-enters the tier again later, the reward won't be assigned/credited again.
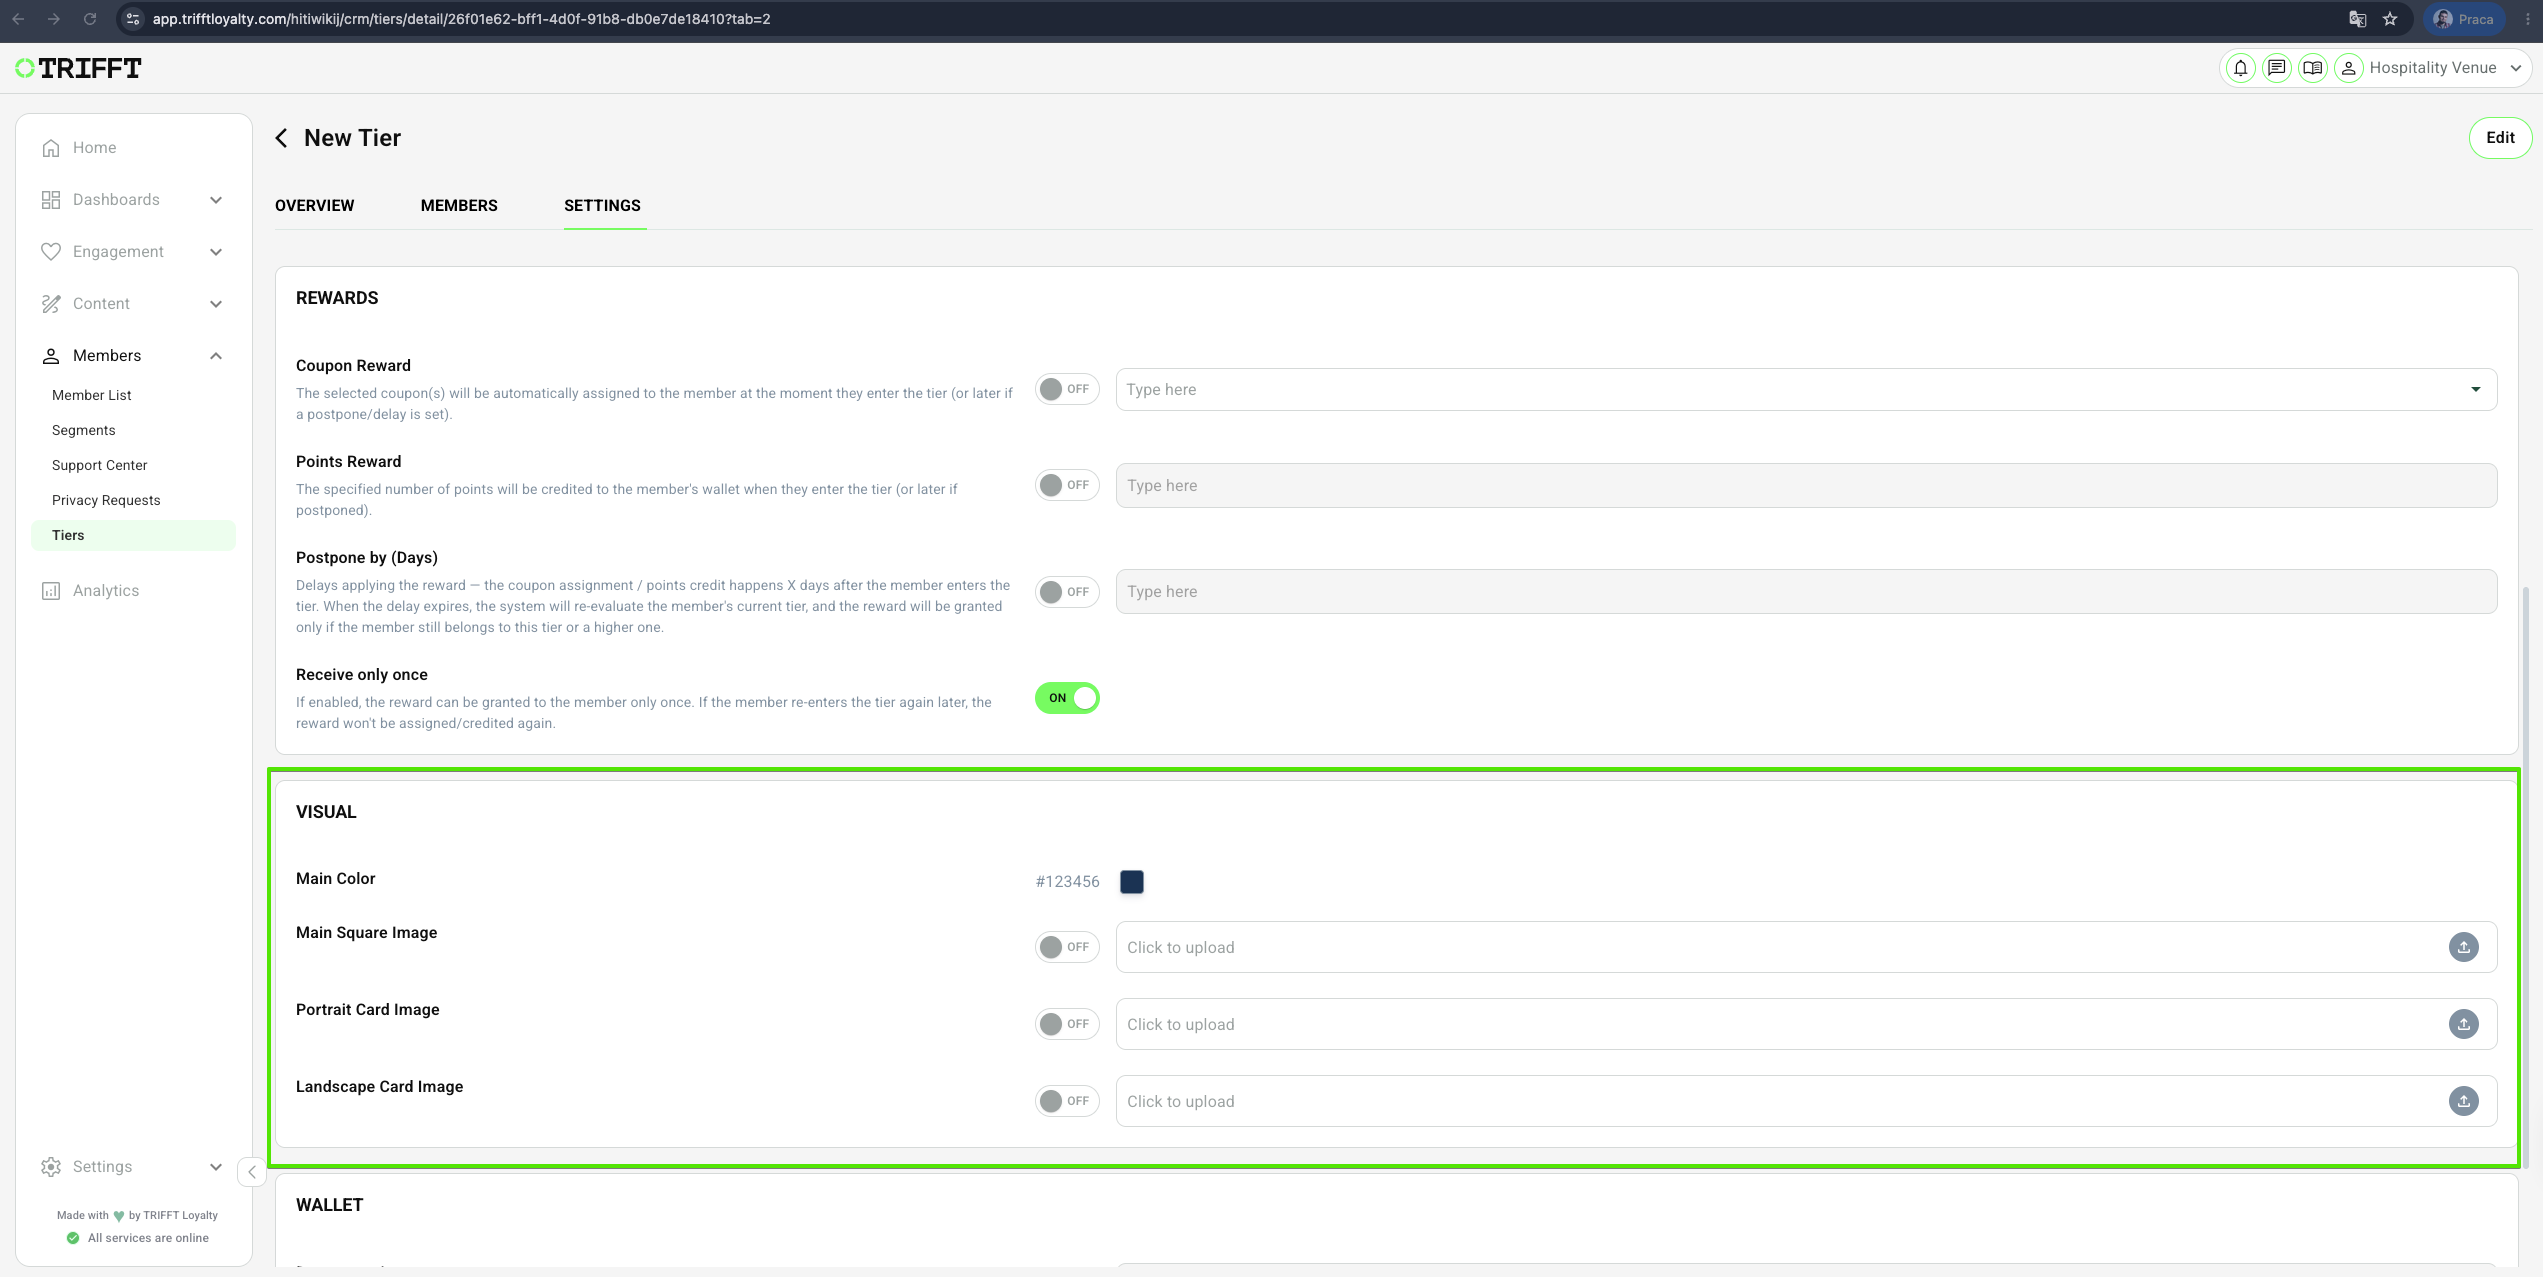
7. Configure Visual
- Main Color
- Main Square Image
- Portrait Card Image
- Landscape Card Image
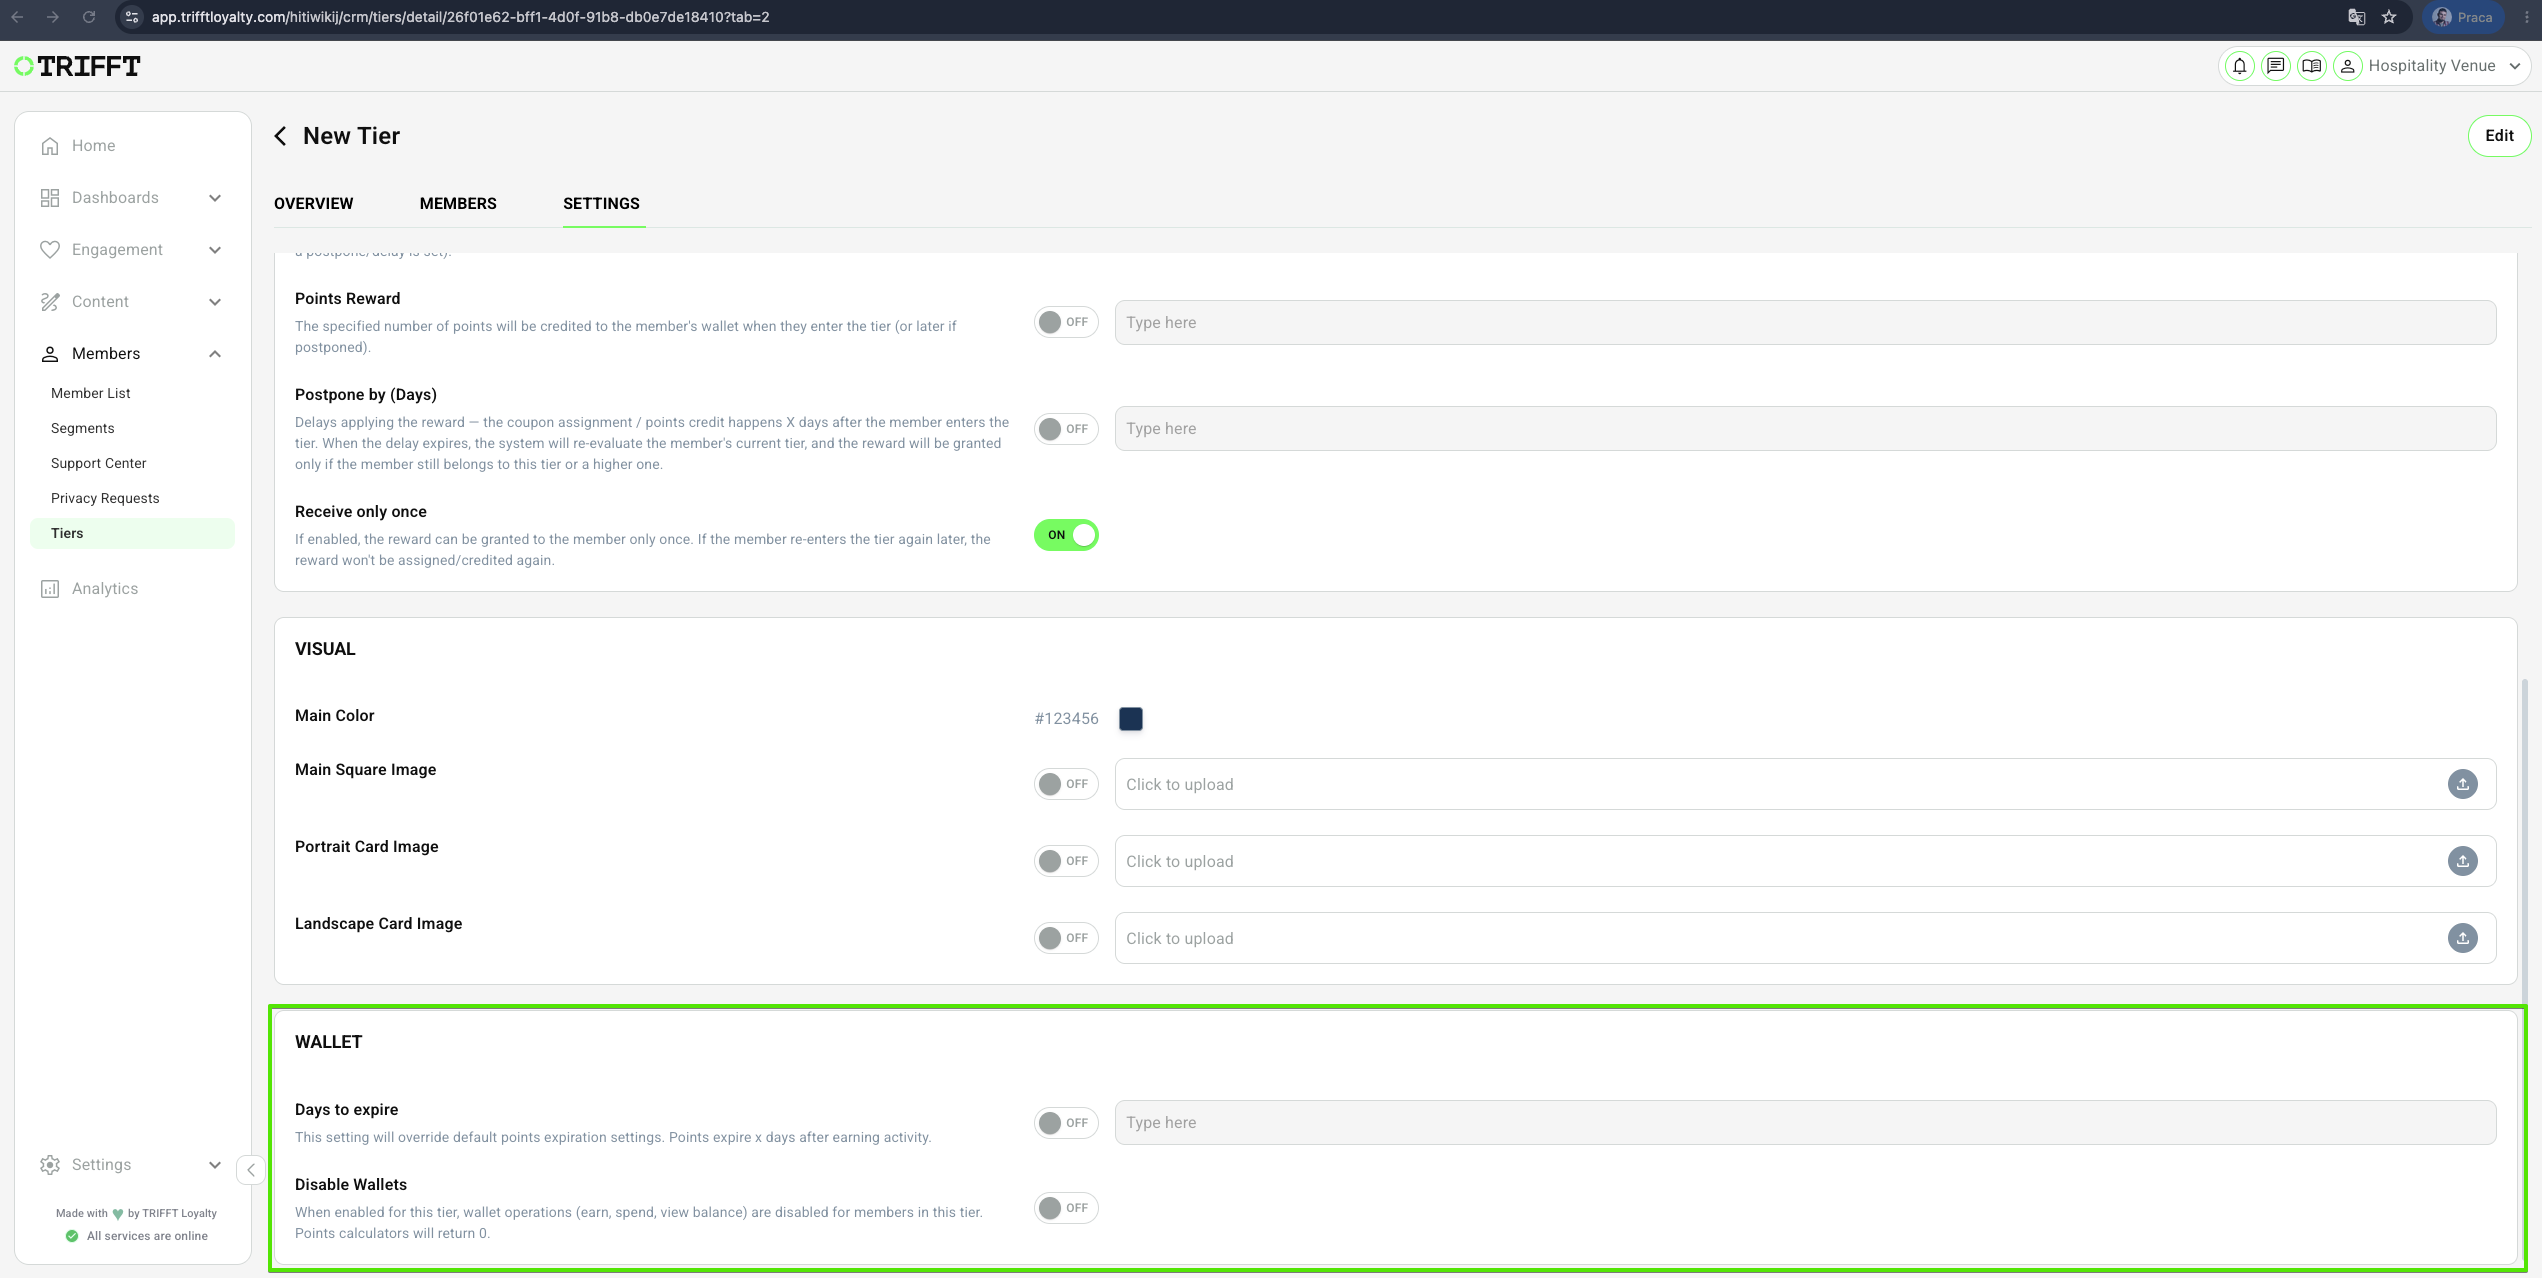
8. Configure Wallet
- Days to expire - This setting will override the default points expiration settings. Points expire x days after earning activity.
- Disable Wallets - When enabled for this tier, wallet operations (earn, spend, view balance) are disabled for members in this tier. Points calculators will return 0.
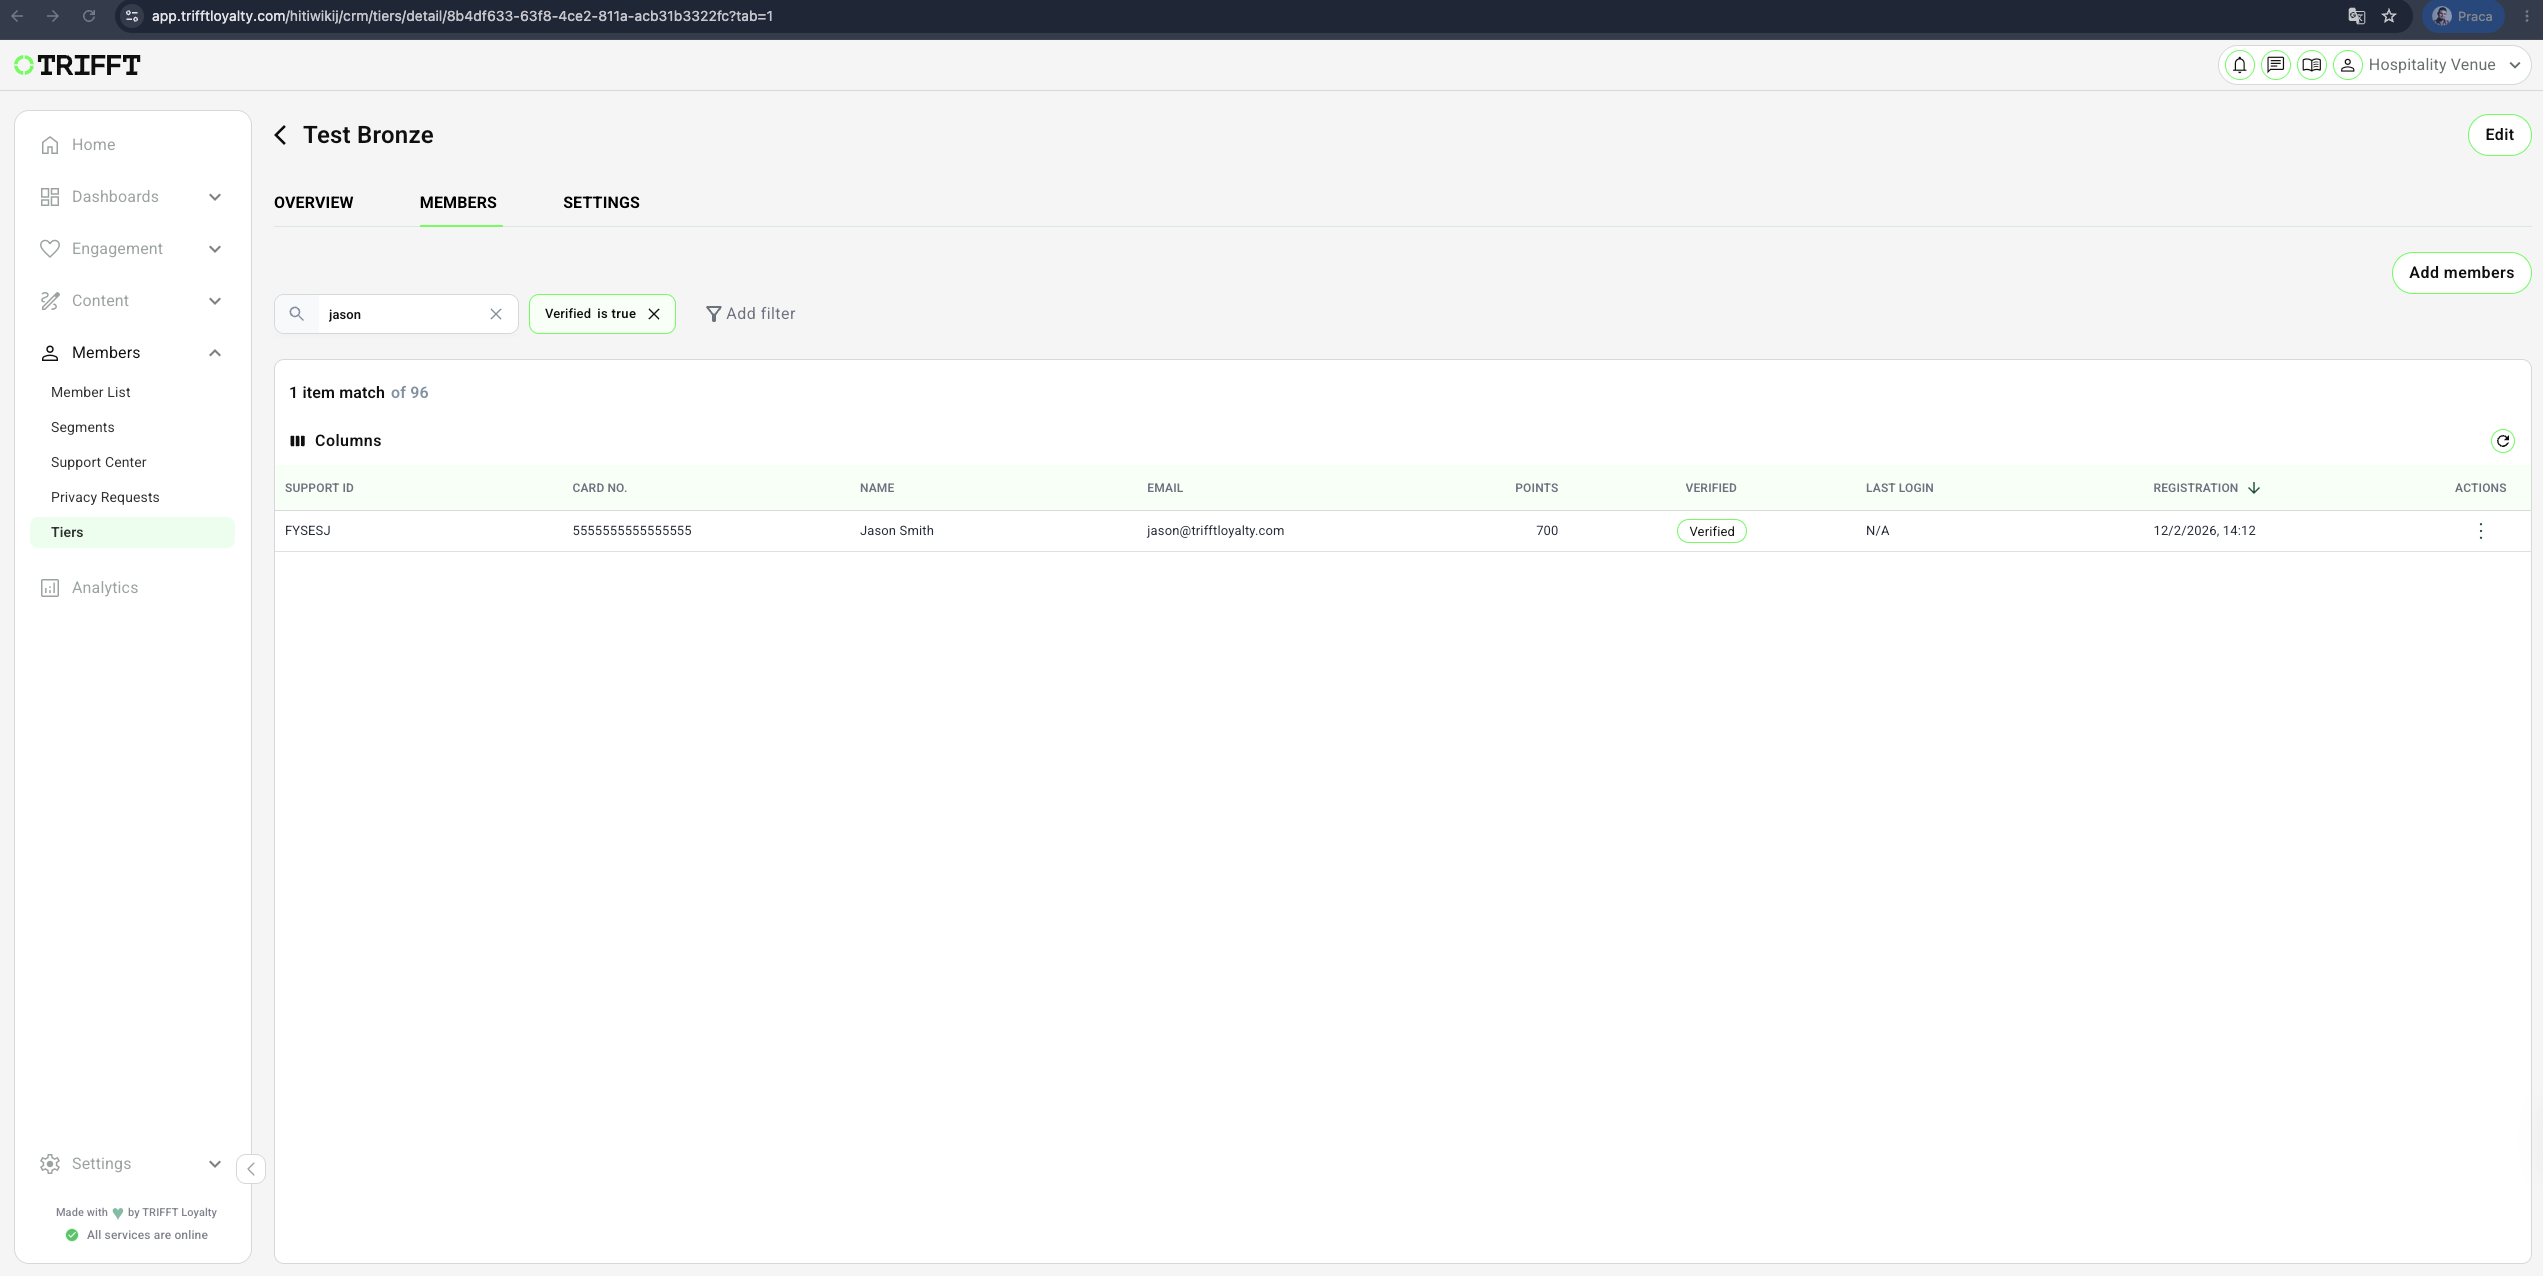
9. Member Overview & Management
Inside the detail of any tier, go to the Members tab, which will allow you to manage the members:
- Helps you track who belongs to each tier and manage memberships directly if needed.
- You can see which members currently belong to this tier and manually add or remove members if needed.
10. Finalize and enable
- To start using the Tiers, you will need to Enable this feature in your project. Navigate to: Content Cockpit > Settings > General > Tier and click on Enable Tiers:
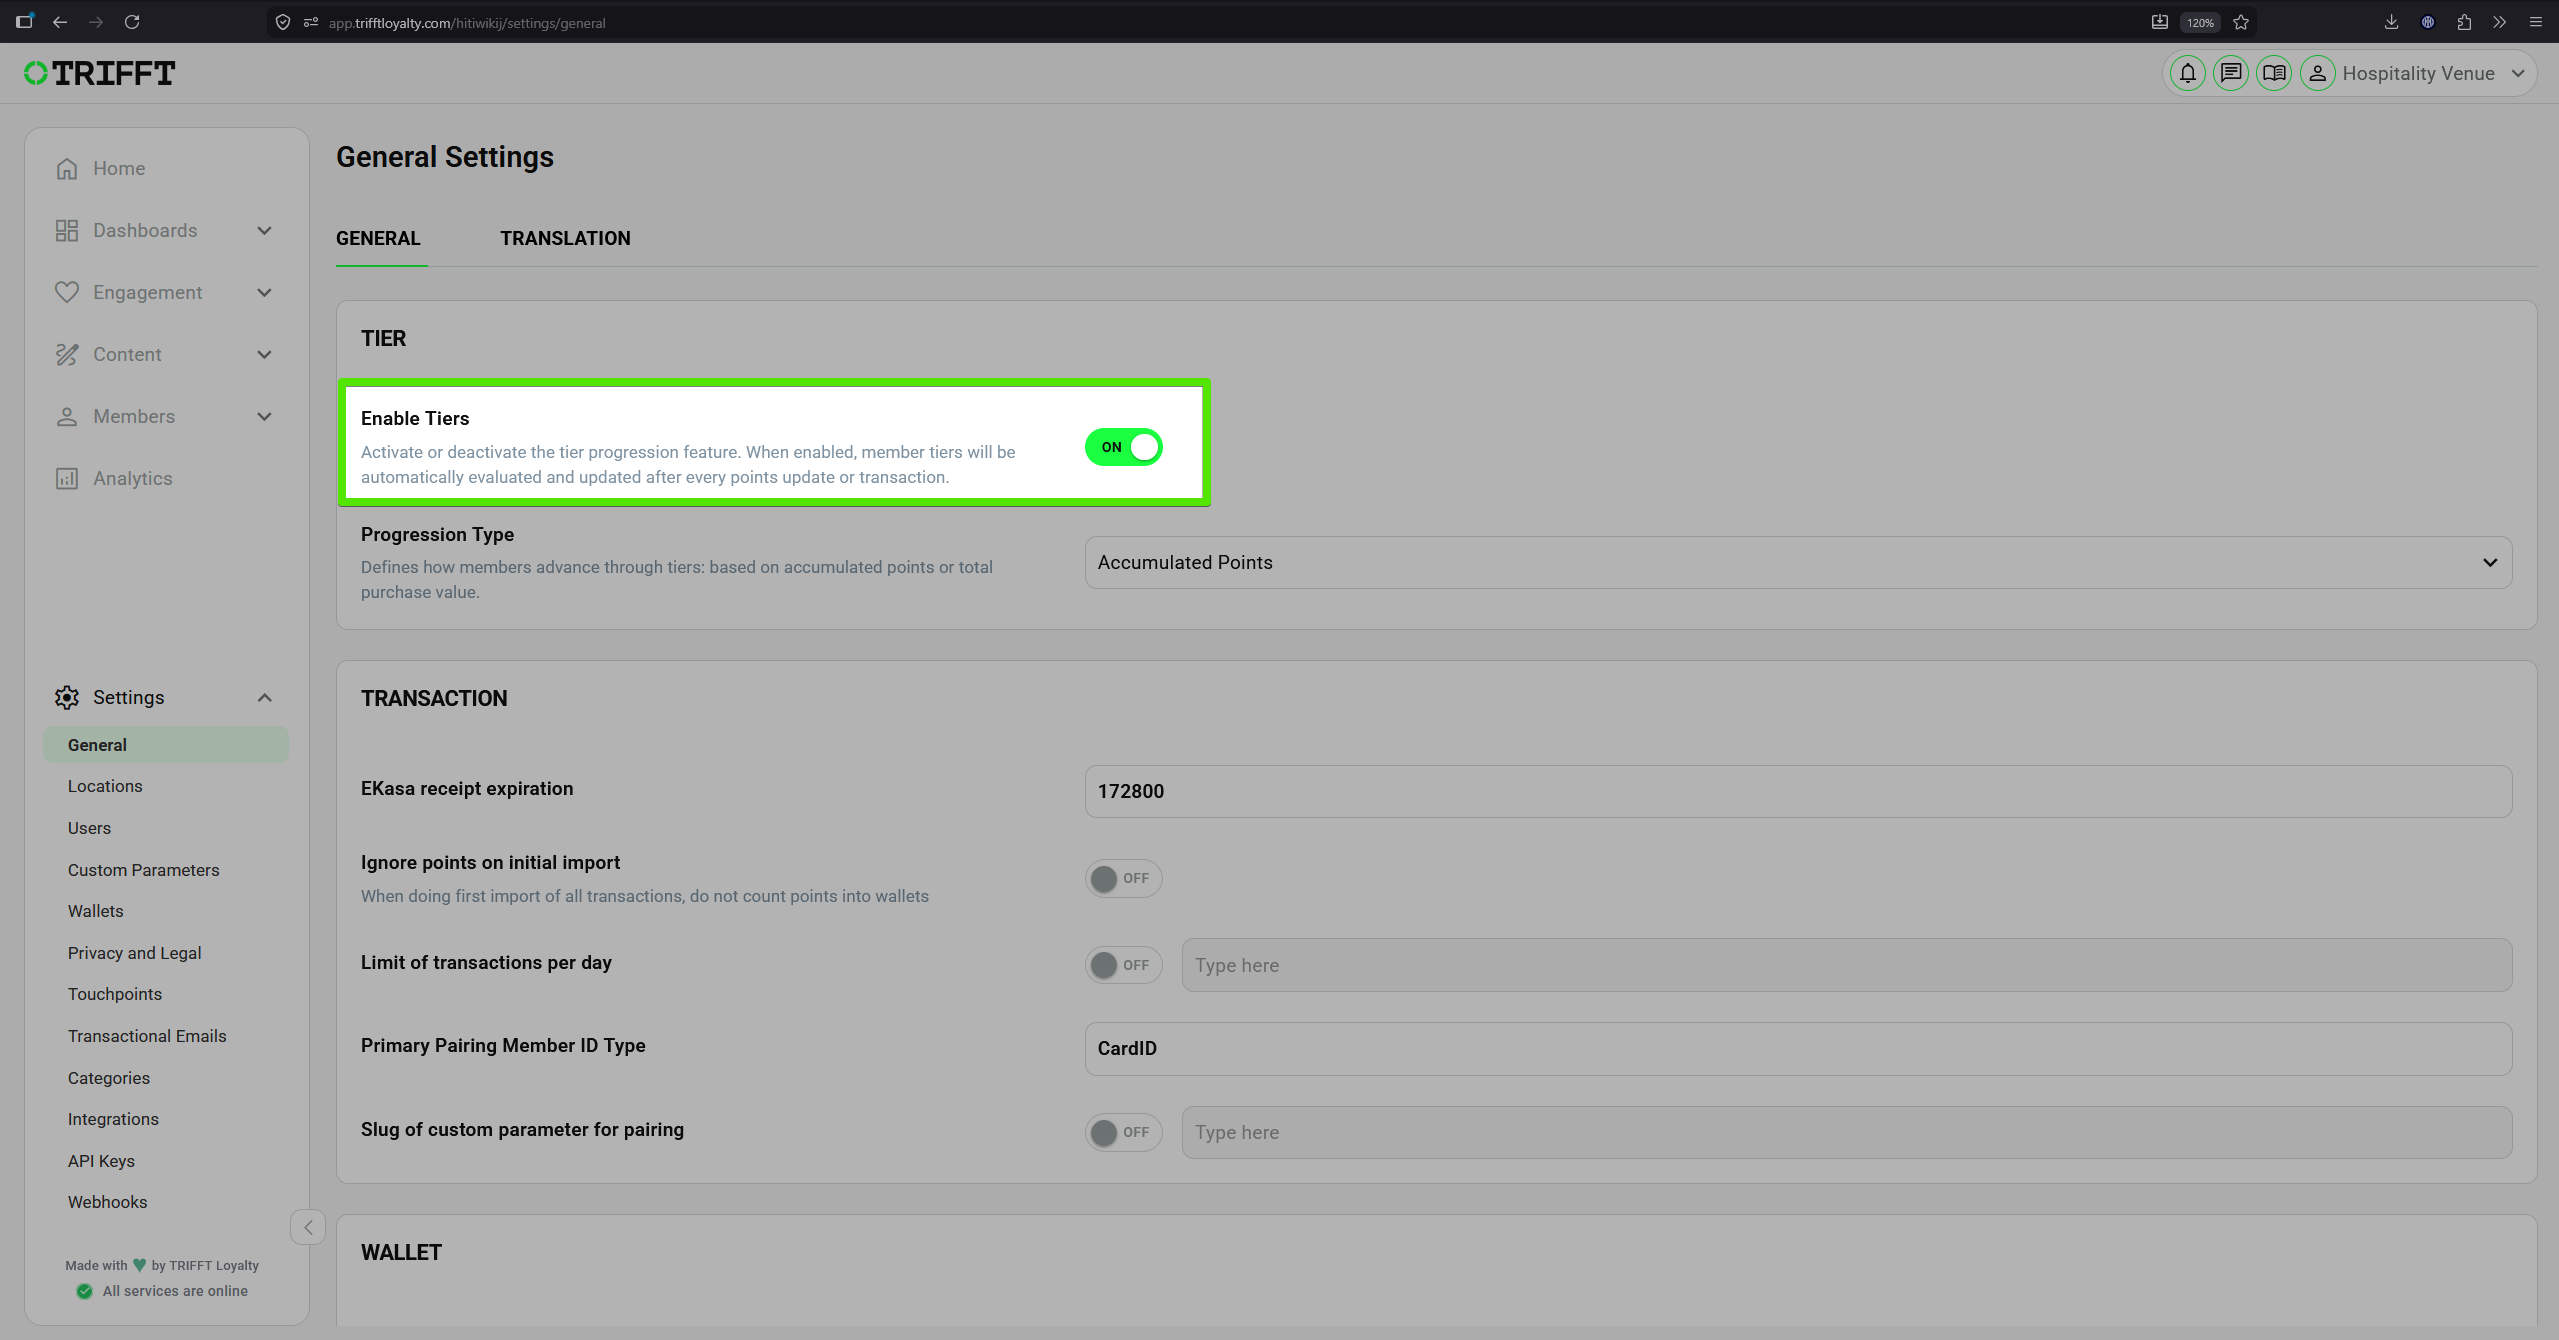
Enabling Tiers Feature
Note: You are not allowed to move the members accross the regular Tiers. Tiers are calculated by the system as they need to follow strict rules, so you are not allowed to move members accross them. Otherwise it could break the calculation.
Configuration checklist
Run through this checklist before going live:
Structure & Fairness
- The 'Base' tier is set for all new sign-ups with 0 points
- Tier benefits are clearly distinct (e.g., Silver is significantly better than Bronze)
- The tier-down logic is fair and clearly explained in your FAQs
Design & App Presence
- Badges are high-contrast for visibility in the mobile app
- Tier background images do not obscure text on the digital card
Updated 3 months ago
Did this page help you?