
Categories Set Up
This guide covers how to create and manage Categories to organize the user interface.
Prerequisites
Ensure you have the role **Admin/Manager/Content Editor **role in the Content Cockpit or access to **Settings→Categories **in the **Custom **role type.
Before you begin, gather the following:
| Requirement | Details |
|---|---|
| Data | Defined naming convention for categories (e.g., Rewards vs. News). |
| Integrations | None required, this is an internal TRIFFT feature. |
Step-by-step setup
1. Open the Categories panel
- Navigate to Settings → Categories in the sidebar.
2. Create a new category
- Click Add New.
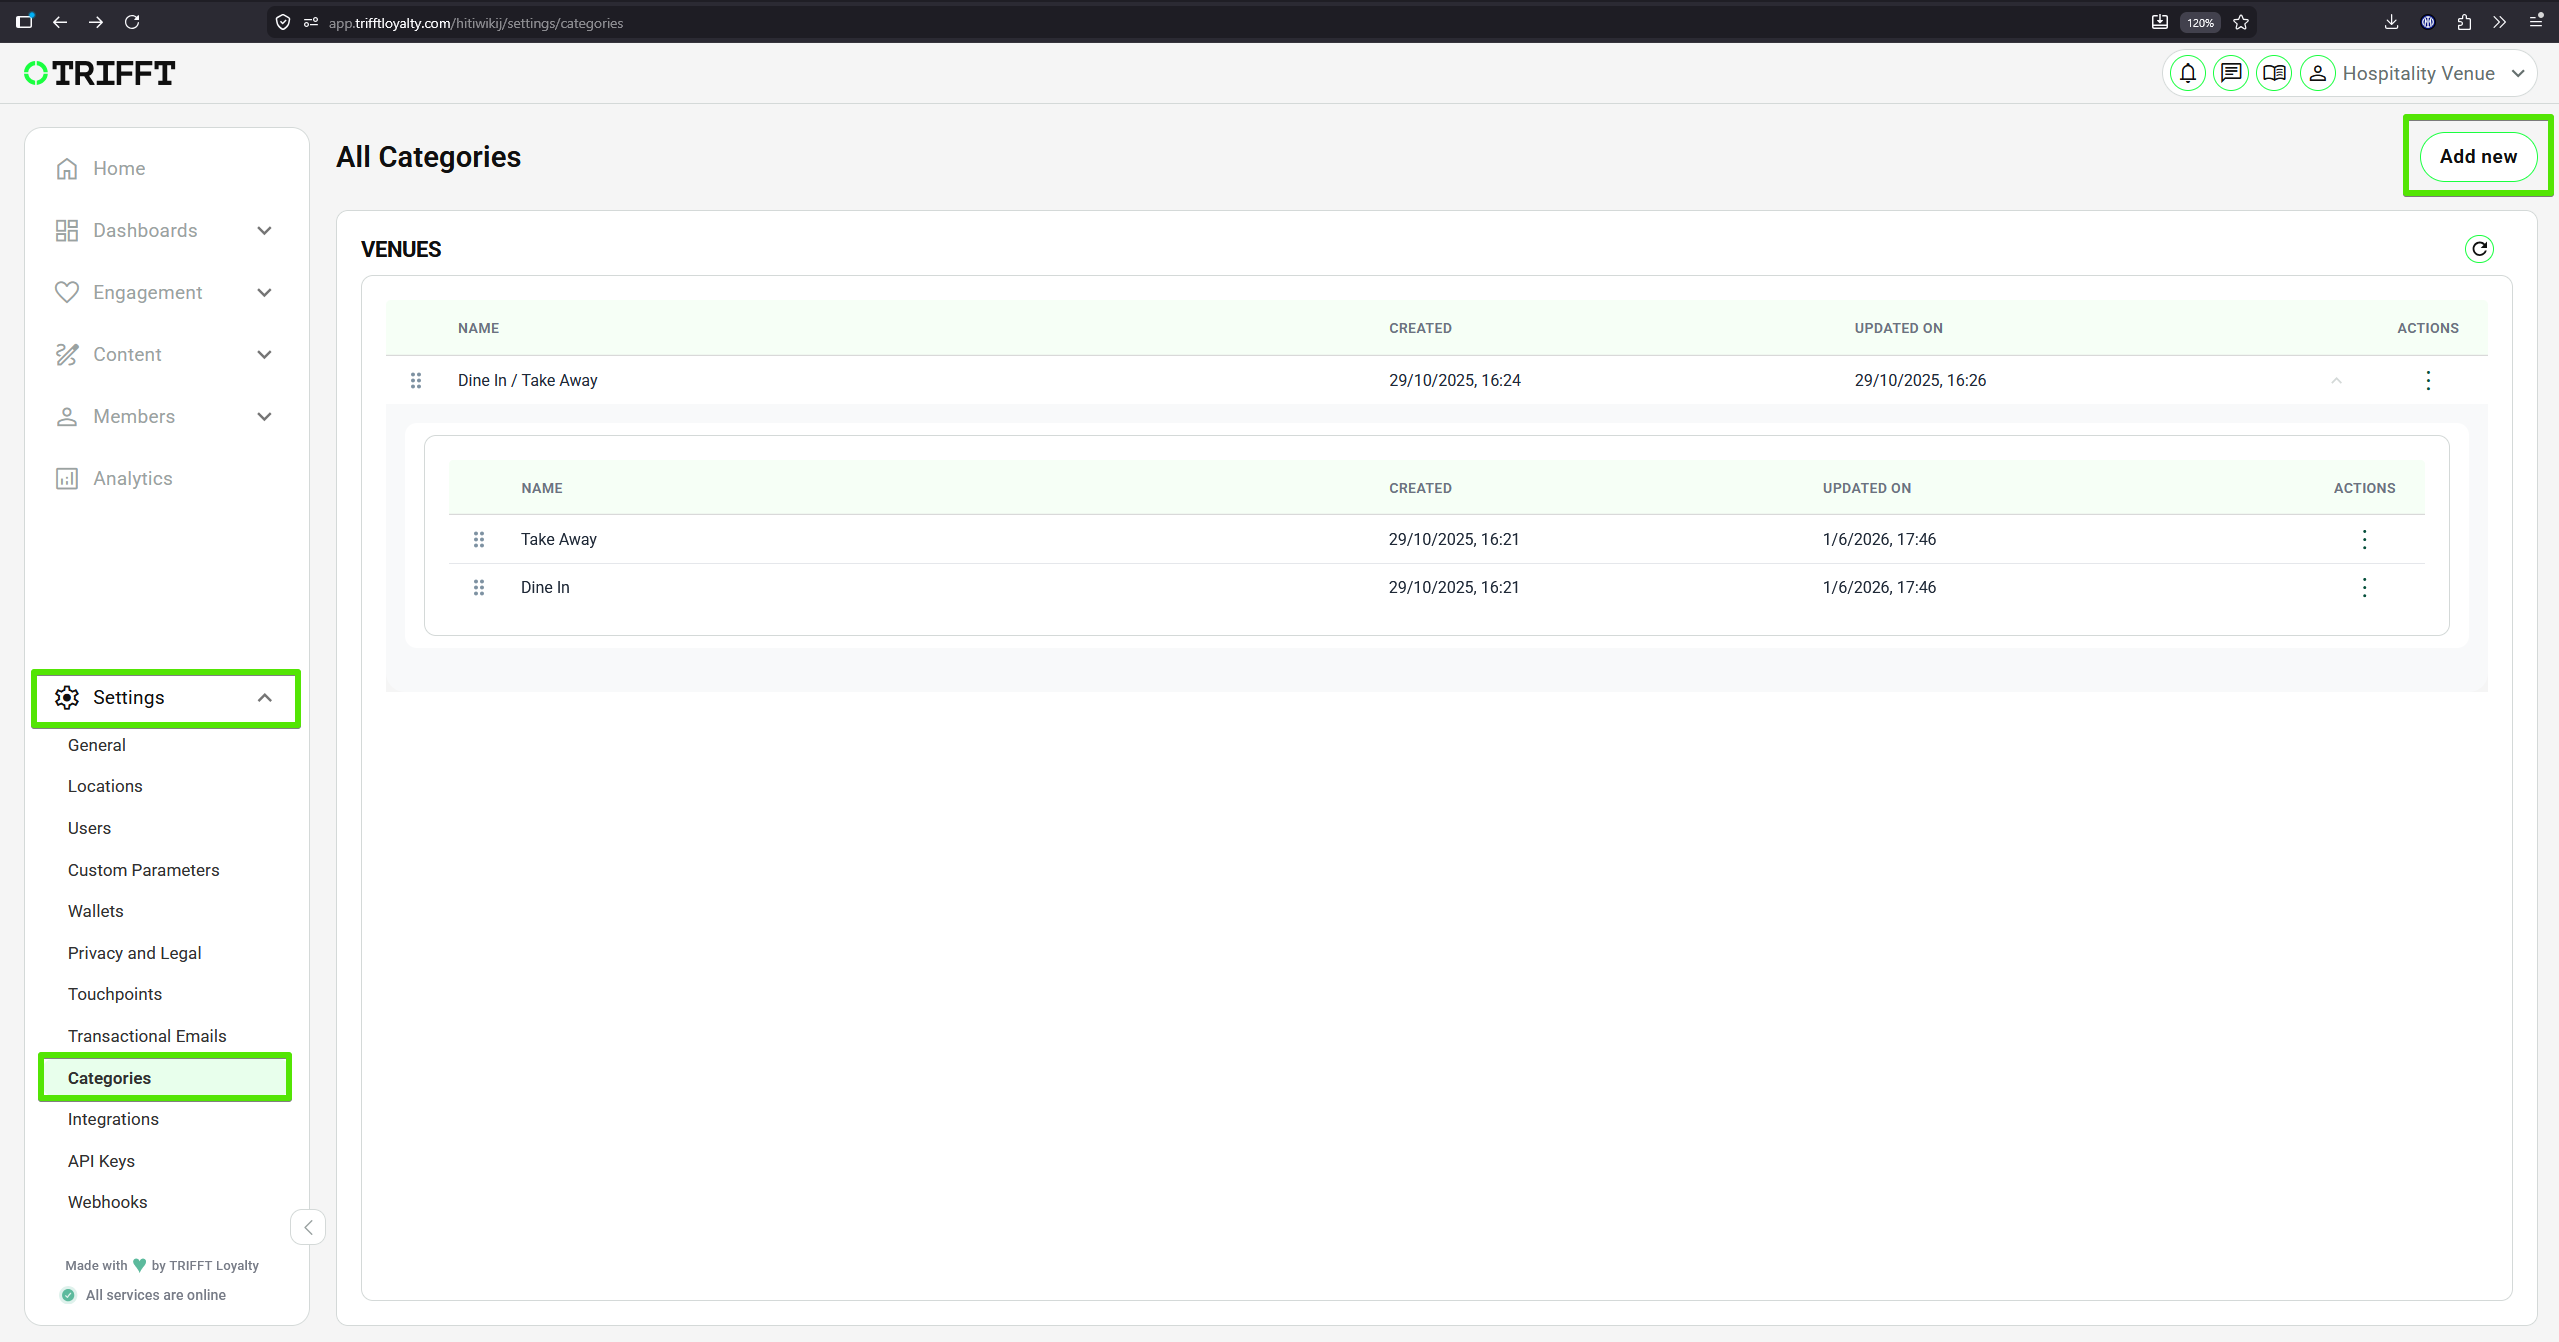
Creating New Category
3. Define basic settings
- Provide a Category Title (name) and internal Description.
- Select the Type to define which section the categories should be applied to.
4. Establish hierarchy
- Select the Parent Category if creating a sub-menu structure.
5. Assign visual assets
- Assign an icon or image that will represent the category in the App.
6. Set audience targeting
- Set the Segments if this category should only show for specific segments.
7. Link content
- Link existing Rewards or Articles to the new category via their respective settings.
8. Confirm in-app layout
- Confirm the category appears in the In-App Navigation settings.
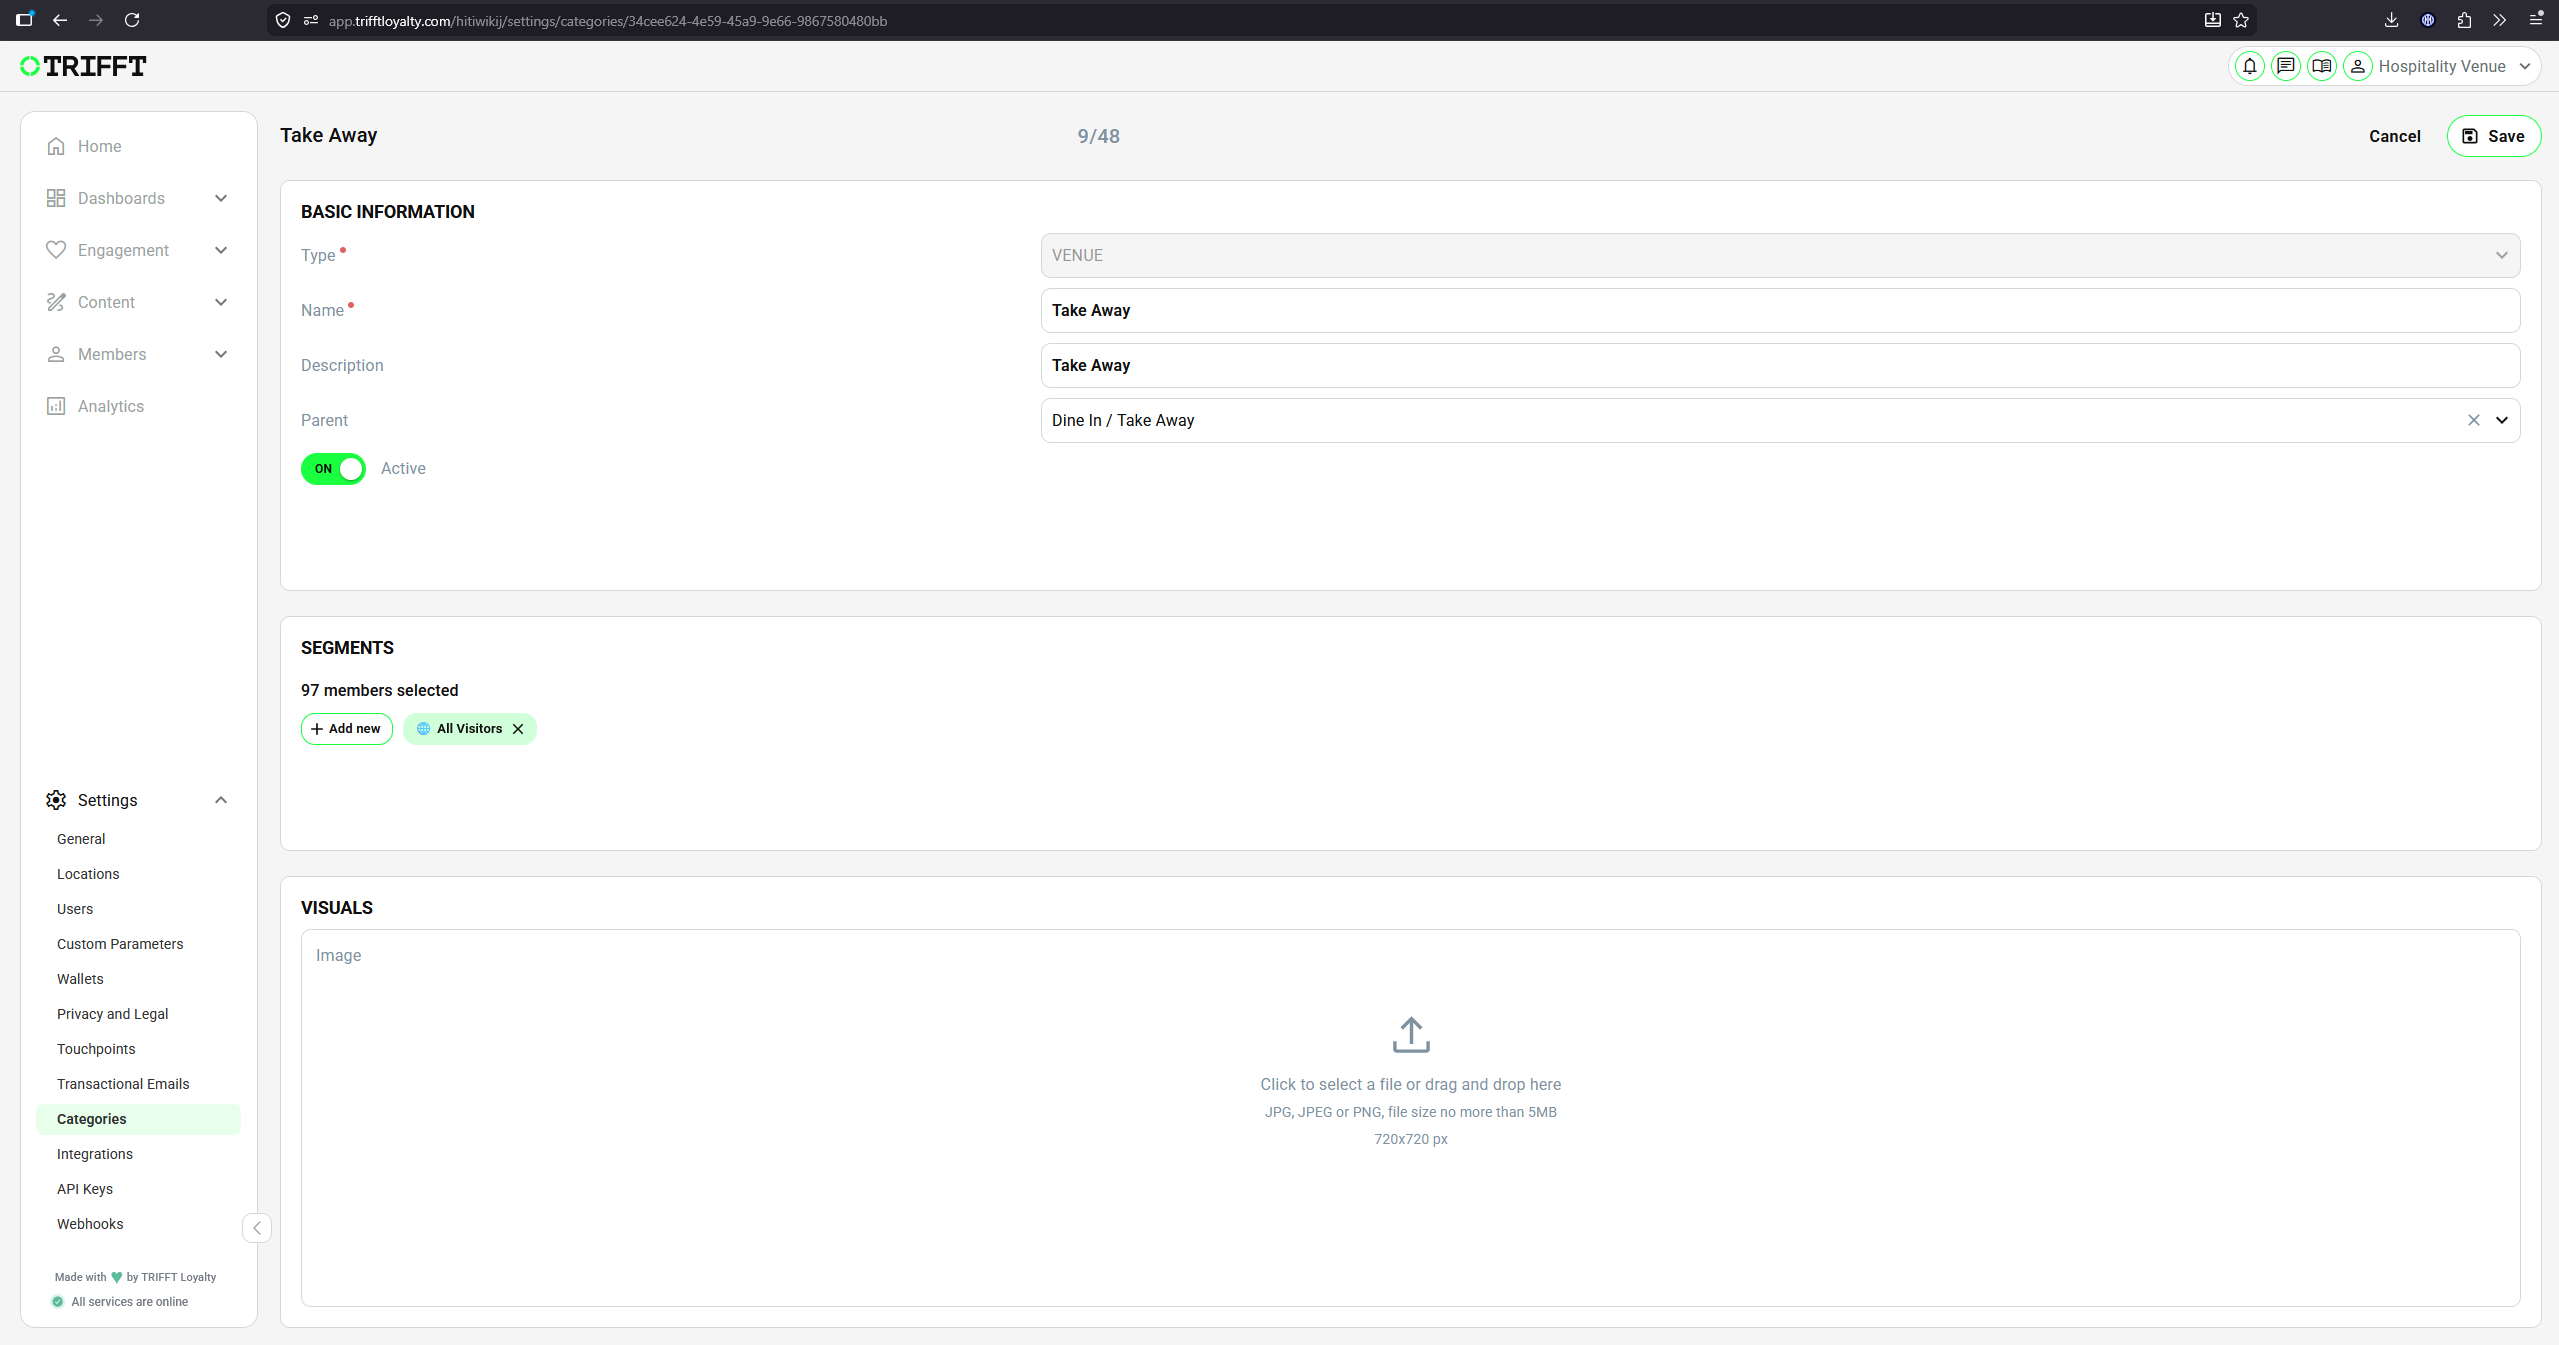
Example of Take Away Venue/Location sub-category under the parent Dine In / Take Away Category with visibility for All visitors.
Configuration checklist
Run through this checklist before going live:
Readability & Structure
- Category names are concise for mobile screen readability
- Display order is set correctly (you can adjust it with drag&drop on the list of all categories)
- Empty categories are hidden or contain a 'Coming Soon' placeholder
Assets & Logic
- Icons are high-resolution but optimized for fast loading
- Category tags match the filtering logic in the mobile app
Updated 3 months ago
Did this page help you?